Categories
Walls & flooring

The carpet cleaning secrets the professionals don’t want you to know

Despite the preponderance of other attractive flooring solutions that make our living spaces look and feel good, we are still in love with the good old rug. Carpets bring warmth and softness to our living spaces, and depending on the choice; they can even add a touch of luxury.

However, it is not all smooth-sailing when it comes to carpet installations. The downside with carpets is that they will trap dirt and dust pretty fast. Carpets can also be precursors for foul odour in your interior spaces. Suppose you fail to take timely carpet maintenance. In that case, they can form breeding grounds for bacteria, mould and various other microscopic allergens that can transform an otherwise well-maintained home into an unhealthy environment for the occupants. 

Regular carpet cleaning helps you prevent all of this while keeping your carpet in tip-top shape. Central to this is proper carpet cleaning. Buying cleaning products or hiring a professional cleaner might be easy. Still, the hard part is doing the cleaning right and using a carpet cleaning method that will work for you and help keep your carpet clean, fresh and in the best shape over its lifetime. Carpet Cleaner Cairns explains the top carpet cleaning secrets that the professionals don’t want you to know.

Brown carpet being vacuumed by person in blue jeans and white sneakers.
A dirty carpet being vacuumed / Source: Clean House Melbourne

Frequent vacuuming is your carpet’s best friend

Vacuuming is probably the most underrated carpet cleaning and maintenance technique. Doing it frequently keeps your carpet clean for a longer duration of time which saves you the cost of having to call on a professional carpet cleaner regularly. Some dirt serves as ‘magnets’ for more dirt so the less on your carpets, the better for your overall carpet cleaning regimen. A good culprit is an oily dirt which will attract more dirt on your carpets and spread rather quickly. 

Vacuuming should not just be focused on the carpet. It is also advisable to vacuum areas adjacent to the mat, including the entrances and high-traffic areas. Your feet will pick the dirt from these areas and transfer it to the soft fabrics of the carpet that readily hold onto the dirt. Ensure you clean the edges of the room as well as beneath your furniture as these areas can hide lots of dirt and dust that eventually find their way onto your carpets. 

It is also advisable to master the right vacuuming technique that will maximize every cleaning action. Vacuuming your rooms and carpets is a cumbersome chore, so you better do it right whenever you master the energy and will to do it. You will have tremendous success when you vacuum with slow passes than doing it fast. Slow passes are especially crucial in the high-traffic areas that accumulate lots of dust and dirt.

You can manage most of the small stains yourself

Your professional carpet cleaner won’t tell you this, but you can handle most of the small or spot carpet stains yourself. You have to ensure that you do it promptly and with the right cleaning materials and techniques. Some of the ‘must-have’ cleaning materials that are essential to the optimal cleaning and maintenance of your carpets include the following: 

  • Club soda: Best for handling wine and beer spillages
  • White vinegar: You can mix vinegar with water for juice and soda stains
  • Dishwashing liquid: Ordinary dishwashing liquid can work on several stains when mixed with warm water to form a friendly cleaning solution.
  • Wet wipes: Wet wipes are hyper-efficient in quickly blotting out spot stains on the carpets. 

Always blot and never rub your stains 

Rubbing and scrubbing stains immediately is a sure-fire way of ensuring that it not only spreads over a large surface area but also embeds itself more in-depth into the carpet fibres. Rubbing adds permanence to the stain. The best spot stain treatment merely is blotting it out. 

When a stain spills on your carpet, start by blotting out gradually using an absorbent paper towel, sponge or napkin. Do this many times, gently applying pressure in each blotting action. It takes as much stain as possible out of the carpet rather than pushing it deep into the carpet fibres. When blotting out the stain, start from its outer edges and gradually make your way to the centre.

A dirty grey carpet gets vacuumed.
The results of a freshly cleaned carpet / Source: PestX

Treat all stains immediately

Your professional carpet cleaner probably won’t tell you this. Still, you have a perfect shot at eliminating carpet stains when you treat them immediately. Granted, you can’t always be there when the spillage or staining happens. Still, when it happens on your watch, it is recommended to treat the stain immediately. This allows you to get the stain out before it percolates deep into the carpet’s fibres. Unless you are familiar with professional carpet cleaning techniques and materials, avoid using powerful detergents or chemicals. If the stain is stubborn, you can promptly contact a professional carpet cleaning service. You can try using vinegar, club soda wet wipes, hydrogen peroxide or the simple dishwashing liquid depending on the type of stain to clean out the stain immediately. 

Contact local carpet cleaning experts

Hydrogen peroxide can remove your blood stains

Bloodstains on carpets aren’t as common as wine, beer, juice, dirt or food stains. If you cut yourself and blood spread or spatters on your carpets, you can remove these unsightly stains with hydrogen peroxide. If the bloodstain is still fresh, you can try removing it by blotting it out with an absorbent paper towel or napkins. If the blood has dried out, try loosening it using water and a mild detergent. Using a butter knife, you can gently scrape off the dried blood stains off the carpet fibres. After scraping them off, you can use hydrogen peroxide to clear off the rest of the blood residues. Hydrogen peroxide will fizz and then foam when it comes into contact with the bloodstains, eliminating the stain in the process.

Use area rugs in high traffic areas

The high traffic areas on your carpets will suffer a higher degree of wear and dirt than the low traffic areas. Because they take in a lot of dirt, they are also generally harder to clean. They will accumulate a lot of dirt from the high foot traffic that will necessitate a higher cleaning frequency. One way of preserving your carpet is by using area rugs in the place where your carpet is particularly taking a good beating. These can include the following:

  • The spot where your kitchen meets your living room
  • The hallways
  • The spot where your bathroom meets the joint area or the hallway
  • Backyard doors

The best way to relieve pressure off the high-traffic areas is by using area rugs. Beyond the functional aspect of protecting your carpets, these rugs can also be a decorative item. You can choose different styles, shapes and patterns to add some style and charm to your house interiors.These are some of the best carpet cleaning secrets that your professional carpet cleaner won’t tell you about. However, it would be best if you mainly used these for small localized stains. An experienced and well-trained carpet cleaner better use powerful carpet cleaning detergents, chemicals and equipment.

Categories
Finance

Car allowance tax guide

Saving money at tax time is something that everyone wants to do. If you have work-related car expenses, then you might be able to deduct work-related car expenses under certain circumstances. Let’s explore when and how you can deduct your vehicle expenses at tax time.

Here are a few examples of times when you might be able to deduct your car expense when using it for business.

  • Hauling tools and equipment used for your job.
  • Pick-up and delivery of items for your employer.
  • Travelling between two different places of employment.
  • Your work begins at home and involves various sites.
  • Travel for meetings, conferences, and other work-related events.
  • Travel to your workplace, but only under certain circumstances.

How do I track & claim my car-related expenses?

The Australian government allows two different methods for claiming the car allowance tax deduction. When claiming car expenses, you can use either method. Here is a break down of how they work.

Cents per kilometre method

Using this method, you can deduct a set rate for each kilometre that you travel for business-related activities. If you use this method, you must demonstrate that you used the kilometres claimed for work. A simple logbook that includes the miles travelled is sufficient. Let’s take a look at an example.

Jim is a manager for the construction industry. He uses his personal car to deliver and drop off supplies to a remote worksite that is 7km away. The round trip is 14 km to and from the home office. He does this once a week, every week of the year except for two weeks of vacation. The current allowable rate is $0.68/kilometre.

  • 14km per week X 50 weeks = 700 kilometres that can be claimed
  • 700 allowable kilometres X $0.68 = $47.60 that can be deducted

Pros

  • Easy to calculate using a simple formula.
  • Computed using a standard rate set by the government.
  • Suitable for people who use their car less than the maximum allowable kilometres.
  • Record keeping is simple for this method.

Cons

  • Limited to 5,000 kilometres per vehicle per year.
  • Cannot claim separate vehicle expenses.

Logbook method

This method requires more record keeping of motor vehicle expenses. Still, if you use your personal vehicle for work frequently, it can add up to a more significant deduction. Let’s see an example.

Now, let’s say Jim uses his own vehicle for 1,000 km during the 12 week period when he tracked vehicle mileage in his logbook. Let’s also say that Jim kept records of fuel, repairs, service, insurance, and took depreciation on his new vehicle. The current deduction rate using the logbook method is 85%.

  • 1,000 km X 0.85 = $85
  • $8,430 of vehicle expenses X 0.85 = $7,165.50
  • $7,165.50 + $85 = $7,250.50 deductible expenses

Pros

  • Only have to keep a motor vehicle logbook for 12 consecutive weeks.
  • You only need to complete the logbook once every five years.
  • More detailed record keeping.
  • Can deduct expenses such as registration, fuel, service, insurance, etc.
  • Based on a percentage of all costs.
  • An excellent choice for those who exceed the 5,000 km limit for the cents per km method.

Cons

  • You must own the car.
  • Must record all business and all personal trips.
  • Must keep all receipt for related expenses.
  • More restrictions apply to this deduction method.

What car-related costs can’t I claim on my taxes?

Both vehicle expense deduction methods have different rules that apply to when you can and cannot take the deduction. Here are a few examples that might apply to your circumstances.

  • Travelling from home to your regular place of employment.
  • Car expenses that are reimbursed or are included as part of a salary package.
  • Picking up something for your employer on your way to your regular work location.
  • Fuel when using the cents per km method.
  • An employee is driving your personal car for work.
  • You are working overtime, and public transportation is not available.
  • You have to drive back to work for after-hours calls.

What about owned or leased cars?

You can deduct expenses from a car that you own, lease, or is under a lease-to-own agreement. This can be claimed using either the logbook or cents per km method. In some cases, you might be able to claim the car tax deduction for vehicles, such as motorcycles, passenger vans, or trucks fitted to haul equipment.

How to hire a tax accountant

Sometimes, deciding how the rules for the car tax deduction apply to you can be tricky. Hiring a tax accountant can help you take the maximum allowable deduction for your circumstances and help you to avoid any penalties for claiming something that is not allowed. Here are a few tips for hiring a tax accountant.

How to create an accurate estimate

To claim your tax deduction and get the proper credit for your circumstances, you need to do a few things to help your tax professional:

  • Keep all vehicle-related receipts.
  • Print out all electronic receipts.
  • Place all of your receipts in a file.
  • Keep your logbook with you at all times.
  • Place your logbook in a place where you will see it.

Licencing & qualifications

Hiring a tax professional is an important decision. You must choose carefully because utilising the wrong one can land you in trouble. Here are some of the requirements needed to become a tax accountant.

  • Must have a Bachelor’s degree in accounting.
  • Must participate in the Certified Practising Accountants (CPA) program or be a member of the Institute of Public Accountants or Chartered Accountants Australia.
  • Be sure to ask how long they have been a tax accountant and their experience with similar tax circumstances.

Contact local tax accountants

How to save money hiring a tax accountant

Tax accountants use different methods of charging for services. Some charge a flat fee, while others work on a percentage basis. Here are a few tips for saving money when hiring a tax professional.

  • Ask what they charge and how they charge upfront.
  • Save your receipts, or you cannot deduct all of your eligible expenses.
  • Keep your records in the proper order to save your preparer time.

FAQs

Can you claim fuel on tax?

Claiming fuel on tax is only allowed if you choose the logbook tax method. A matching receipt must accompany a fuel claim, and you must keep a travel logbook for tax purposes. You can only claim a portion of your fuel expense that was used for work purposes. You cannot claim this deduction if you use the cents per km tax deduction method.

Categories
Design & technology

How to plan your web design

There is seemingly no end to web design businesses in the market. They price themselves from as low as $199, and all the way up to $25,000. Sometimes there is little difference between what you get as an end result.

After 10+ years running my web design business I have learnt that there is a way of doing things which will ensure the highest chance of success for your website build.

The biggest mistake people make when buying a website is looking for web design right off the bat. Then a web designer will ask them to pull together their content, some images and make them a website without really knowing their business or their clients.

Planning your website build will help save time and money in the long run / Source: MG Datacomm

There are 5 clear steps to building a quality website, if followed step by step you should end up with an awesome website and great results.  These are website planning, content creation, web design, web development and hosting.  In this article we will focus on planning your website and follow up with a little more about the other areas.

Web design planning

When you open a new business you would rarely do so without a business plan. Any real investor will not release funding until they have seen a strong business plan. This should be the case for your website as well. Why would you invest time, energy and money into building a website without planning its future and how it will benefit your business?

When you plan your website in advance you get to choose who it will appeal to and therefore the calibre of your future sales leads.  You also get the chance to plan your search engine ranking, content direction, the user experience and the way they think about your industry – their worldview.

Search engine ranking

I have rarely met a business owner who doesn’t want to ensure their website is benefiting from regular search engine traffic. Some people even pay Google thousands per month for this honour. By researching your keywords and planning each page to be compatible with those search terms you will give yourself the best chance of that happening. Planning the next 12 months of your blogging efforts is also wise, ensure you base each blog article on a search term which you want to be seen on as well.

Content direction

Your written content is of huge importance, people actually will read your website. If it’s boring or not what they were looking for, you will lose them in the first 10 seconds.

When writing your content you need guidelines planned. The guidelines should give an idea of the goal of your article, how it will help your reader and what you want the reader to do after reading it. If you have someone write your content for you professionally, that person should be able to ensure they shape the content in a way that compels your reader to want to spend money with your business. That’s called ‘converting content’.

User experience

When planning your website it’s important to think about what the visitor will experience on your site, how the site will encourage them to move between pages and the overall subconscious emotional response you want to trigger. Ensure that you plan the site so there is not too many clicks between landing on the site and converting as a customer. The more clicking a visitor has to do the more likely they are to get annoyed and look elsewhere for their information. Likewise on forms, the more fields a user must fill in – the more chance there is of abandonment.

Website images

In the planning of your website you need to ensure you select the images which will be used in the web design phase. Ensure they are high quality and represent your business well. Ensure you choose images with people who are similar demographic to your potential clients. Don’t forget to use images with people smiling! You can also get some wonderful images from Stock Photo sites. These can really make a difference and save you a fortune on photography.

Check out sites like Pexels, iStock, Shutterstock and Adobe Stock. They are often a real help to Web Design.

Website framework

The most common web design framework in the industry today is WordPress. Once you get used to it you will find it is not too hard to use and has a lot of added bonus features which can be installed as plugins from within the CMS.

When selecting a WordPress theme, make sure you don’t just buy the first theme you find.  Many of the cheap themes are sourced from hobby web developers who want to make extra money while they study. They may look great but they often let you down in the code department. This leaves you open to future malfunction not to mention security holes allowing some hackers to penetrate your website. I like to stick with premium theme clubs for my web design. I use Yootheme for many of my projects due to their clean code and great layouts. Yootheme does have the ability to build your site with a site builder, however I avoid complications by just using Widgetkit and raw wordpress.

Contact local web designers

Planned web design

There have been many sites I have planned or re-planned in the past. Here are a few of those which were planned for success and succeeded as a result.

I have a client who owns a web hosting company which specialises in looking after businesses who have large server needs. His business Website is Amaze.com.au.  I was commissioned to re-plan their website. It was built by a large agency who had done nothing about planning the SEO or implementing onsite SEO. 

I planned the site over the course of 1 month. I created a development version of the website to work on so as not to cause any issues with the live site. The plan was then implemented onto the website page by page until I was finished. Once the site was put live, it saw great results within just a few days of launching!

One of my longest held clients is Occupational Safety Solutions, who sells SWMS Templates through their online store. We planned the search engine success for this site as well as the visual user experience. This client had huge benefits from our web design planning and went on to grow their business. 

Wrap up

I sincerely hope this article helps you realise the benefits in web design planning and what it will do for your future web design project. If you have any questions feel free to contact myself or one of my team for some great answers!

Categories
Legal

Conveyancer vs solicitor: What’s the difference?

The Australian government deliberately developed PEXA so that electronic settlements do not take place until the solicitors representing property buyers have filed their details with the (OSR) Office of State Revenue online system.

Electronic conveyancing defined

Electronic conveyancing is a national system that permits for an automatic completion of a property sale or purchase by uploading the entire documentation, and electronic funds transfer into the PEXA system.

Clients cannot automatically log in to the E-conveyancing system to obtain details of their particular conveyancing transaction progress. The Property Exchange of Australia (PEXA) developed the system to streamline and monitor all conveyancing transactions.

eConveyancing minimises the manual paperwork and processes associated with property transactions by allowing the legal parties to carry out the settlement online. The system enables clients to file documents and financial agreements electronically. eConveyancing reduces the risk of delays and errors giving customers greater successful, prompt settlements.

Source: Conveyancing.com.au VIC

The regulatory structure in conveyancing

Electronic conveyancing legislation was amended in the 2015 Property Amendment Bill of the (SA) Real Property Act 1886. The revised act and the launch of E-Conveyancing in South Australia commenced on 4 July 2016.

ARNECC, the Australian Registrars’ National Electronic Conveyancing Council, is an organisation involved with the Registrars from all Australian States, developed the national regulatory law for electronic conveyancing.

Two sets of rules made include:

  • The (MPR) Model Participation Rules govern the connection linking the (ELNO) electronic lodgment network operator and participants, such as solicitors.
  • The (MOR) Model Operating Requirements manage the connection between ELNO and the land title registry.

The activities and tasks of lawyers opting to use e-conveyancing work under the ECNL and the MPR, governance.  In South Australia, version 4 of the MPR and MOR already began operations in the SA Registrar-General office and commenced on 27 May 2017.

Once adopted by a particular authority, the MPR and the MOR essentially become the Operating Requirements and the Participation Rules, respectively.

What are the advantages of eConveyancing over hiring a lawyer?

If all the parties involved in a property transaction have subscribed to PEXA then e-conveyancing process involving stamp duty payment, lodgement of settlement records, transfer documents and funds takes place electronically.

This happens if all participating parties in the transaction agree. This e-process could potentially save you about $200 in transaction fees alone. The major setback faced by clients today is the few PEXA subscribers.

However, more companies have slowly begun migrating to the automated system. The advantages experienced by e-conveyancing include:

  • Decreased transaction costs – Solicitors and conveyancers will no longer have to pay extra fees passed on to their clients. This will bring a significant reduction in overall transaction costs.
  • Easier use – Excessive paperwork no longer applies for lodgment at different Forms will no longer need physical lodging at venues. All documents require digital signatures.
  • Regular updates – Clients receive conveyance-processing updates in real time through text messages or email.
  • Electronic transfers – This is from the solicitors provide printed e-receipts for all the transfers drawn in the settlement process.
  • Quick transactions – You can buy or sell your home faster than in a paper agreement.

Costs involved

With the new conveyancing system, one of the main concerns faced by the stakeholders was the time involved in the preparation of documents. This process alone cost clients huge transaction fees and expenses involved in real estate contracts.

It is crucial that you know all these costs and budget for them accordingly. It is disastrous if you do not plan for all possible property transaction expenditure.

Costs and operating expenses arise in different areas of the business deal. Some may not seem obvious or expected. Typically, you should set aside some cash when buying property for the following costs:

  • Any loan charges payable for obtaining a mortgage
  • Registration fees (Payable at the Lands Titles Office)
  • Stamp duty
  • Search costs
  • Property rates and taxes
  • Minor extra costs and conveyancing fees
  • Costs of moving

You may incur additional costs involved in your particular transactions. Ask your conveyance official for details of the entire purchase before proceeding into the contractual detail.

Individual conveyancing, is it possible?

Unless you have a thorough understanding of conveyancing and precisely know what to do; you can enter into a property transaction without representation. However, here is the downside of self-representation; you cannot expect any technical support from the other party.

If you make any errors, the settlement may delay until you fix it, or worse still, have the other party terminate the entire contract. If you considering representing yourself in the conveyancing deal, carefully examine the list of tasks and tick those that you can handle individually.

Interestingly, not all property agents carry out conveyancing on their own when performing personal transactions. Conveyancing is a professional skill. To be safe, it is best to engage an expert for a smooth, faster transfer of property.

Contact local conveyancing experts

Do you require a solicitor?

Registered conveyancers provide expert skills involving conveyancing work. You may not need to hire an attorney for your property deals. Some conveyancers have complete certified solicitors education. The majority of practicing lawyers have the primary, tertiary education in conveyancing.

In fact, local law firms employ registered professional conveyancers to carry out their conveyancing jobs. A conveyance expert must provide proof of Membership of the AIC as an assurance of professionalism.

Conveyancers or solicitors, who’s cheaper?

When these two professional services collide, both conveyancers and solicitors provide consultant, expert advice and charge for their services accordingly. Frequently, the fees charged reflect the bulk of the contract.

This is common whether you either procure the services of a registered solicitor or hire a conveyancer. The real distinction is that conveyancers provide expertise in this particular field whereas lawyers handle several areas of the law.

As with nearly all business costs, you will end up paying for the services required. Therefore, a professional conveyancer charges slightly higher fees for their swift expert assistance. A registered and certified conveyancer provides peace of mind, knowing all your transactions will go through smoothly.

Categories
Ceremony

Wedding readings for every bride and groom

The written word has a way of evoking intense feelings and setting the right mood. Many people consider a ceremony incomplete without a wedding reading. Unfortunately, it’s not easy to choose the right text to read. Many couples spend hours scouring different websites and reading different books to find the perfect passage.

This list contains a few recommendations for wedding readings. You can browse the options listed here and decide if any of them fit your requirements. You can then read the entire chapter or poem the passage originates from to get a sense of the context and pick the part of the passage that suits you best.

Your choice of wedding reading can help set the tone and mood of the ceremony / Source: Francine O’Brien Marriage Celebrant

Modern wedding readings

Modern wedding readings usually don’t have any religious connotations and the quotes are taken from contemporary novels and other such sources. These quotes can be just as meaningful and important as those taken from religious texts. Here are some options for you to consider:

1. The Notebook

The Notebook is one of the most romantic novels in contemporary literature. There are several lines and scenes in this book that would work well for a wedding reading. The book was written by Nicolas Sparks and was turned into a movie recently.

The movie has become Valentine’s Day ritual for many couples. The most popular quote is, “I’m nothing special; just a common man…”. This quote is simple yet meaningful and highlights the importance of loving your partner with all your heart and soul.

2. The Bridge Across Forever

What could be more uplifting and suitable for a modern wedding reading than a novel based on a true love story? The Bridge Across Forever by Richard Bach was published in 1984 and was on the New York Times Best Seller List for a long time. It’s considered a timeless classic and is a great read even if you don’t want to quote it at your wedding ceremony.

The most popular quote from this book is, “A soulmate is someone who has locks that fit our keys, and keys to fit our locks.” The paragraph that follows this line is very popular in modern readings and will set a wonderful mood.

3. The Alchemist

The Alchemist by Paolo Coelho isn’t a romance novel but don’t let classifications stop you from finding passages to read at your wedding. This book was published in 1988 and is a story of a young boy’s quest to find treasure. It’s the author’s most well-known book and has been translated from the original Portuguese into 69 languages.

One of the most romantic and relevant passages in this book follows this quote, “When he looked into her eyes, he learned the most important part of the language that all the world spoke — the language that everyone on earth was capable of understanding in their heart. It was love.” Quotes from this book would be an excellent addition to your wedding.

4. The Princess Bride

This fantasy romance novel is fun to read, and quotes from this book are an excellent addition to any wedding. The Princess Bride was first published in 1973 by William Goldman and combines comedy with romance, fantasy, and adventure. Quotes from this novel can add a lighthearted feel to your wedding.

One of the best quotes to read from this book is, “Do I love you? My God, if your love were a grain of sand, mine would be a universe of beaches…” This passage is bound to make everyone smile or laugh but it also showcases the depth of love and what people are willing to do for their loved ones.

5. Captain Corelli’s Mandolin

This is another novel that was adapted and turned into a movie. It’s a historical romance novel set during a time of war, which lends some seriousness and gravity to the story.

The relationship between Antonio Corelli and Pelagia is interesting and intense with lines such as, “Love is a temporary madness. It erupts like an earthquake and then subsides. And when it subsides, you have to make a decision.” The entire passage explores the deeper and more practical aspect of love.  Love is not always about romance, flowers, and adventure. It’s also about growth and learning to become a single unit.

6. Wild Awake

Wild Awake is a story about a teenager’s journey during a summer without her parents. It’s a contemporary young adult novel that teaches several lessons and contains many quotes you can read at your wedding.

One of the most popular passages to read from this novel is, “People are like cities: we all have alleys and gardens and secret rooftops and places where daisies sprout between the sidewalk cracks, but most of the time, all we let each other see is a postcard glimpse of a skyline or a polished square…” This and the lines that follow are perfect for wedding readings as they contain wisdom and explain how people relate to one another.

Wedding readings from classical literature

Classical literature is full of quotes and passages that will work well with all types of modern weddings.  In fact, you’ll find some of the most romantic and meaningful quotes on weddings, relationships, and romance in classic literature. Here are some of the most popular novels to read and source quotes from:

Classical literature can be a great source of wedding readings inspiration / Source: Tie the Knot Celebrant

1. Les Misérables

Victor Hugo’s eloquent work is a popular source of quotes and inspiration for brides and grooms. Les Misérables is a potent book with powerful stories. The book takes a deeper look at the nature of love and relationships and should be on everyone’s reading list.

This quote is just one of the many you could pick from, “The future belongs to hearts even more than it does to minds. Love is the only thing that can occupy and fill eternity. In the infinite, the inexhaustible is requisite.” You can find something unique that suits your relationship in this book.

2. Adam Bede

This was the first novel published under the pseudonym George Eliot in 1859. The story is set in the late 1790s and is told from George’s perspective.

While the story itself is a grim reading, there are some memorable quotes you can include in your wedding such as, “What greater thing is there for two human souls, than to feel that they are joined for life…” This line and the passage that follows is a perfect match for a wedding filled with joy.

3. Jane Eyre

Jane Eyre is a classic romance novel that almost everyone has read at some point in their life. The Bronte sisters were known for their gritty and realistic tales, which were a marked contrast to the relatively light-hearted works of Jane Austen.

Jane Eyre has several inspiring quotes such as this example, “I have for the first time found what I can truly love — I have found you. You are my sympathy — my better self — my good angel — I am bound to you with a strong attachment.”

4. Letters to a Young Poet 

This book contains a series of ten letters written by the Bohemian-Austrian poet Rainer Maria Rilke to a 19-year old officer cadet Franz Xaver Kappus. The poems are wonderful reads, offering much wisdom.

Quotes like, “For one human being to love another human being: that is perhaps the most difficult task that has been entrusted to us, the ultimate task, the final test and proof, the work for which all other work is merely preparation,” are perfectly suited for weddings.

5. A Farewell to Arms 

This novel was written by Ernest Hemingway in 1929 and is set during the First World War. It tells the story of Frederic Henry, a Lieutenant in the Italian army’s ambulance corps and his love affair with Catherine Barkley. There are several themes to explore in this novel and many quotes that can give you a unique look at wartime romance.

But one quote captures the magic of the wedding day and marriage perfectly, “That night, there was a feeling that we had come home, feeling no longer alone, waking in the night to find the other one there, and not gone away; all other things were unreal.”

6. Mark Twain’s Letters 

Mark Twain is one of the most well-known and recognised authors in classical literature. His books are filled to the brim with quotes and comments that can apply to any social situation and circumstance. However, what he wrote in his letters is equally interesting.

This quote from a compilation of his letters is perfect for any wedding reading, “This will be the mightiest day in the history of our lives, the holiest, & the most generous toward us both — for it makes of two fractional lives a whole.”

Funny readings for weddings

Some people don’t want a serious and solemn atmosphere at their wedding. They want the event to be full of joy, laughter, and humour. What better way to achieve this result than to add some funny quotes and readings to the event?

Some couples prefer a joyful, lighter mood during the marriage ceremony / Source: Dianne Sherrington Townsville Celebrant

1. Albert Einstein

Einstein was a genius but he didn’t have much to say about love. What he did say can add a very light-hearted touch to a wedding.

“Gravitation cannot be held responsible for people falling in love. How on earth can you explain in terms of chemistry and physics so important a biological phenomenon as first love? Put your hand on a stove for a minute and it seems like an hour. Sit with that special girl for an hour and it seems like a minute. That’s relativity.” Who hasn’t experienced this in their life? This reading will make everyone at your wedding smile.

2. Dr. Seuss

The Dr. Seuss series is well-known for imparting pearls of wisdom in a playful manner. When you read these tales as an adult, you notice subtleties and lessons that weren’t clear to you as a child.

Readings from these stories are always a charming addition to any wedding. For example, you can read, “Congratulations! Today is your day. You’re off to Great Places! You’re off and away!” and the entire page that follows injects playful meaning to the ceremony. This quote describes a new journey with new challenges, which is exactly what a marriage is.

Contact local celebrants

Wedding poems

If you want a traditional wedding and wish to incorporate a softer and more romantic element to it, you can read a poem. Unlike quotes, poems are inherently romantic and have a beautiful rhythm. There are many romantic poems you can choose; but the ones mentioned below are the most popular.

1. Sonnet 116

William Shakespeare was a masterful playwright and his words still have the ability to move people. Shakespeare’s sonnets are in a league of their own and convey deep meaning about love and relationships.

Sonnet 116 is popular because it’s true. It’s the best possible description of what love and marriage should be, “Let me not to the marriage of true minds, admit impediments. Love is not love which alters when it alteration finds or bends with the remover to remove: o no; it is an ever-fixed mark…” Whether you have a traditional wedding or a modern one, Sonnet 116 will never be out of place.

2. Hope is a thing with feathers

Emily Dickenson captures the hope and happiness that a marriage can bring with this poem.

“Hope is the thing with feathers that perches in the soul, and sings the tune without the words, and never stops at all…” This poem captures brides and grooms feel on their wedding day.

Wrap up

The right reading will set the mood for your wedding. Readings can move people to tears of happiness or bring some light-hearted relief. Let these examples inspire you to find a reading that suits your wedding.

Categories
Lighting & electrical

How to use your switchboard

What is a switchboard?

A switchboard is an electric power board that holds individual switches to control different power needed to certain areas of your home. 

What does a switchboard do?

Often referred to as a power box or a meter box, this board takes the entire load of the incoming electrical feed and separates it into switches rated for a specific amount of voltage. For example, a refrigerator needs more power than a table lamp plugged into an outlet. Voltages are measured by what the switch is for, then set up accordingly.

You can also find the main switch inside a meter box in addition to the switches on the switchboard. This single switch is to shut down all power from the entire board. 

What should I do if my lights or power points aren’t working?

If there is an overload on one of your switches, that particular switch will automatically flip off. For instance, a living room with nothing but outlets and overhead lighting may not be prepared to accept an electric area heater. When used, it may tell the switch that it is not wired for that much power. Go to your switch box and check if all the switches are on. Chances are, there will be one that has flipped off. Instead, use another breaker that has a higher voltage setting or check with a licensed electrician for advice on increasing power.

Labelling a switch board can make using it a lot easier / Source: Got U Wired

What should I do if all the electricity has gone off in my house?

In the case of all lights in the house turning off, several things could be the cause. Check your neighbour’s homes for any sign of lights. If their lights are out as well, there is probably a broader issue that is out of your control. If your neighbours have lights, check your main switchboard for signs that the main power switch has switched off. Switch it back on and make a note to check with your switchboard electrician to find the cause. 

Safety tips for your switchboard

High voltage is nothing to play around with. Unless you are a licensed electrician, keep your DIY skills to turning the switches on and off. These switches are made for the average homeowner to use in case of a power surge or overload. Learning how to use a switchboard is easy as long as you don’t try and remove the switches. Only trained professionals are able to determine what is tied to a switch and how to approach a problem.

There are times when a switchboard will wear out or need repair. A few of these signs include:

  • Lights begin to flicker
  • Circuit breakers are always tripping
  • Circuit box contains old ceramic fuses
  • Switchboard feels warm when circuit is tripped

Never attempt to remove a switch to uncover a problem

Only a licensed switchboard electrician has the tools and knowledge to understand the problem. Voltage can be deadly to the inexperienced homeowner.

Avoid sparks or fire

Sparks or fire signal an emergency, and you should contact a licensed electrician immediately. Follow his instructions and wait for his arrival.

Label all switches

Labelling is a simple idea, but many homeowners do not follow. You can save a lot of time and frustration in knowing which switches control different parts of your home.

Check your circuit breakers

Circuit breakers play a crucial role in safeguarding electrical systems and preventing potential hazards. In Australia, RCBOs (Residual Current Circuit Breakers with Overcurrent Protection) are commonly used for enhanced safety. These devices combine the functions of both a residual current device (RCD) and a circuit breaker, providing protection against electrical shocks and overcurrent situations. When installing RCBOs, it’s important to follow the appropriate wiring diagram, such as the one provided by Clipsal, to ensure correct and safe installation in accordance with Australian electrical standards.

Contact local electricians

What to look for when hiring an electrician

Licensing

A qualified electrician will have completed trade school and spent four years as an apprentice. However, there is an exception to completing an apprenticeship. It can be challenging to find a master electrician to study under. It is possible to take the required courses that range from 6 to 18 months and pass a final exam. While being able to obtain a license, it can be challenging to find employment with a company without the on-hand experience of an apprenticeship. 

Insurance

Your electrician should be able to provide a copy of their insurance for mishaps that could occur. 

Experience 

Experience is the key to understanding different areas of electricity. If your candidate has not completed an apprenticeship program, ask for references of past clients or seasoned electricians that can vouch for their work.

Quotes

Get three quotes from licensed electricians and compare the costs. Electricians in Australia average around $45 per hour for their services. The cost can vary according to region, experience and specialty.

Categories
Walls & flooring

How to paint tiles

Tiles play a pivotal role in defining the aesthetic of a space, but trends change, and sometimes, so should your tiles. If you’re wondering how to paint bathroom tiles or refresh your kitchen, having your tiles painted is an easy, affordable solution instead of a tile replacement. Here are some tips on how to paint tiles, ensuring a smooth DIY experience. 

What is tile paint?

Tile paint is a type of paint designed specifically for painting tiled surfaces, including walls and floors. When you use ordinary house paint, it will not stick to the tiles. Even if the paint sticks, it will begin peeling away. Choosing the right type of paint is the first step in this DIY job.

What to know before painting tiles

Painting old tiles white using a paint roller | Source: iStock

Before diving into the paint cans, here are three important things you should keep in mind for a flawless tile-painting experience. 

  • Choose the right tiles. Not all tiles are created equal, and you need to select the right type for their use and functionality. For instance, it’s ideal to get non-slip tiles for the bathroom. Meanwhile, ceramic or porcelain tiles provide a solid surface for the paint to adhere to.
  • Surface preparation is key. Give your tiles some TLC before diving into painting. Clean and sand the existing tiles to remove the glaze and ensure proper paint adhesion. 
  • Select the right paint. Investing in good quality tile primer and paint for tiles from a reputable store is essential for a finish that stands the test of time.

Benefits of painting your tiles 

Renew the look

Painting over tiles is an easy way to renew the look of any room. Many people choose trendy colours when they install tiles and later find that the tiles look dated and out of place. Choose from a myriad of colours to give your space a fresh, contemporary feel.

Changing your tile’s colour can have a dramatic effect / Source: Brightr Solutions

Cheaper than replacing them

Replacing your tiles and hiring a pro to do it costs a lot. You need to pay someone to remove the old tiles and check for water damage, and you also need to pay for new tiles and grout/other materials. Painting tiles is a wallet-friendly alternative to a complete tile replacement. You can also conceal dated or imperfect tiles, turning flaws into features.

Easy DIY

Knowing how to paint tiles can turn a weekend into a home improvement project with minimal time and readily available supplies. Depending on the size of the space, you might need as little free time as a few hours. Most jobs take a weekend or less and require supplies that you can get from any home improvement store.

Create custom and personal designs

Unleash your creativity by crafting personalised designs, making your space uniquely yours. While you can draw inspiration from what other DIY enthusiasts did, you don’t need to rely solely on their ideas. You can combine new colours and come up with your own designs.

What you’ll need

Gather the essential tools and equipment to ensure a seamless and successful project. Having these tools and materials on hand should prepare you well for your tile painting project with confidence.

  • Tile cleaner: To thoroughly clean and prep the tiles before painting.
  • Sandpaper and sanding block: Use fine-grit sandpaper to remove the tile glaze and use the sanding block to smoothen the surface.
  • Masking tape or painter’s tape: Essential for protecting surfaces you don’t want to paint, such as appliances and outlets.
  • Paintbrushes and rollers: A combination of brushes and rollers helps cover different areas efficiently.
  • Paint trays: To hold and distribute the paint while using a roller.
  • Drop cloths or plastic sheets: Protect your flooring and surrounding areas from paint splatter.
  • Paint stirrer: Ensure your paint is thoroughly mixed before application.
  • Tack cloth: Use to wipe away dust and debris after sanding.
  • Tile primer: Choose a high-quality primer for better adhesion.
  • Tile paint: Make sure it’s a durable paint suitable for tiles.
  • Sealer: For added protection, especially in high-traffic areas or if painting floor tiles.

Safety gear:

  • Protective gloves: Shield your hands from chemicals in cleaners and paints.
  • Safety glasses: Keep your eyes protected from dust and debris.
  • Respirator mask: If working in a confined space, ensure proper ventilation and protect yourself from fumes.

A step-by-step guide on painting tiles

Step 1: Repair any damaged tiles

Showing a cracked tile | Source: iStock

Begin the prep work by treating any chips or cracks with TLC to ensure a smooth surface. Caulk can repair any thin cracks or minor chips by applying a small amount while wearing gloves and levelling it with your finger.

For major flaws, use an exterior-grade waterproof spackle. Apply a little amount and wipe away the excess with a putty knife, bringing the filler down to the tile surface.

Step 2: Clean and sand the tiles

Fill a bucket with warm water and TSP cleanser (Trisodium phosphate). Wipe the tile down with gloves to remove dirt. Begin at the top and work your way down, changing the water as needed. Let it dry after rinsing with clean water. 

Use sandpaper to scuff up the glazing without sanding down to the tile body while wearing safety gear. To prevent beeswax from embedding, clean the tile with water and dry it with a tack cloth.

Step 3: Protect non-paintable areas

Shield your furniture, appliances and other items from accidental paint splatters by using masking tape and sheet plastic. Protect outlets and appliances to ensure that your paint lands only where it is supposed to.

Step 4: Prime the surface

Grab your tile primer and fill a lined tray with bonding primer. Apply thin applications with a roller, and be careful not to press too firmly. Using a roller ensures that you don’t miss any parts of the tile and that the primer goes on smoothly. The primer can take a few hours or longer to dry or cure. 

Step 5: Paint the tiles

Painting bathroom tiles to renew the look | Source: iStock

Choose high-quality tile paint and apply it evenly with a roller. You can also spray paint your tiles if it’s easier and you have the right equipment on hand. 

Avoid overloading your roller or paintbrush to prevent drips. Fill in the gaps and smooth down the edges with a paintbrush.

If you want to create unique patterns, use a cut sponge, prefabricated stencil, or handmade painter’s tape stencil. Before attempting patterns, check the manufacturer’s instructions regarding drying times.

Enhance the overall aesthetic by delicately painting the grout lines. Use a fine brush or a specially designed grout paint to accentuate these details, creating a cohesive and professionally finished appearance.

Contact local painters

Step 6: Let the paint dry and cure

It is best to let the tile paint dry completely overnight, although it may only take a few hours. If humidity slows the drying process, operating fans and leaving windows open will draw moisture from the air and help the paint dry faster.

Step 7: Apply a second coat

When buying tile paint, make sure you have enough for multiple coats, as the exact quantity needed depends on the job. Darker tiles generally require more tile paint than lighter ones. Additionally, surfaces with accent tiles, patterns, or unique designs may need extra coverage. Using a primer to conceal old tiles reduces the overall tile paint required. If old tiles are visible through the paint, you may need multiple coats.

Step 8: Apply a sealer

Finally, apply two coats of polyurethane sealer after the paint has fully set. Allow the paint to cure for 24 to 48 hours before applying the sealer to ensure it is no longer tacky to the touch, promoting excellent bonding.

Preserve the beauty of your painted tiles with regular maintenance. Clean them gently with a mild detergent, and avoid abrasive cleaners to extend the life and vibrancy of your newly painted tiles. With proper care, your painted tiles will continue to enhance your space’s aesthetics for years.

Transform your space with fresh coats of paint

Tile painting emerges as a versatile and cost-effective home remodelling option. The possibilities are endless, and knowing how to paint tiles allows you to personalise your surroundings.

If you decide to let a pro handle the job, choose someone with the right qualifications. Painters in Australia need a Certificate III in Painting and Decorating, which goes to those who did apprentice programs and took the right classes.

Hiring a skilled painter can ensure that your house painting endeavour goes off without a hitch. They can assist you in selecting the right kind of paint and colour to complement your style and emphasize your tiles. With a single brush stroke, you may transform, refresh, and customise the style of your kitchen or bathroom!


FAQs on painting tiles

What kind of paint do you use on bathroom wall tiles?

  • Epoxy paint: Ideal for bathroom wall tiles, known for durability and moisture resistance.
  • Latex or acrylic paint: This option is user-friendly and especially effective with a bonding primer.
  • Oil-based paints: Suitable but requires proper ventilation due to fumes.
  • Tile paint or refinishing kits: Offers specialized formulations for tile surfaces.

Ensure thorough surface preparation, including cleaning and priming, for optimal paint adhesion and lasting results.

Does painting over kitchen and bathroom tiles last?

If you use high-quality paint and properly prepare the surface before painting, your painted tiles will last many years without needing to be repainted.

Can you paint over the kitchen splashback tiles?

Yes. Paint is one of the simplest and most cost-effective ways to remodel your home. A few cans of paint can transform your kitchen’s walls, cabinets, kitchen island, table, chairs, and even your splashback.

Categories
Resources

4 Australian winter wedding destinations

Having your wedding during the cooler months may seem odd at first, but if you’re looking to host a unique and unforgettable wedding, then winter is your winning month. It can also be a lot cheaper to host your wedding in the winter-time, as it avoids peak season, and that means you’ll probably have more flexibility and freedom when it comes to hiring the best professionals in the business.

A winter wedding can be a magical event / Source: Peter J de Vries Celebrant

While Australia is known for its heat and a glistening endless coastline, there are four beautiful alpine resorts that are picture perfect to host your winter wedding:

1. Thredbo, NSW

Thredbo is set 500km west of Sydney, and depicts a European-style ski village. The Denman is a hotel that boasts 4 stars, 33 rooms and a 55 seat restaurant, along with a day spa and cocktail bar, and acts as the perfect venue to get hitched in winter. It’s perfect if you’d prefer a more intimate affair, and the hotel provides wedding packages too.

2. Charlotte Pass, NSW

Charlotte Pass is Australia’s highest village, and is found within the Mt Kosciuszko National Park. During winter months, the village is completely covered in snow and is amongst one of the quieter ski resorts in Australia. The Kosciuszko Chalet Hotel boasts the aesthetics of a medieval castle and provides sweeping views of the Charlotte Pass village. The chalet can accommodate for up to 120 guests, and provides a restaurant that can host 35 people and an inner lounge space for 85 people.

3. Falls Creek, VIC

Source: Jason Robins Photography

Falls Creek is located 350km east of Melbourne and is at the base of Mount Beauty in Alpine National Park. Falls Creek is a fully serviced resort that offers a selection of restaurants, hotels and nightlife. The Quay West Resort & Spa is an apartment-style property, providing an uninterrupted, breathtaking view of the mountains from 63 luxury suites, a five-room day spa and four different venues available for private hire that can accommodate 20 to 100 seated guests.

4. Mount Buller, VIC

Only a three hour drive from Melbourne, Mount Buller has Victoria’s largest ski resort. There’s a range of accommodation to choose, from simple dorms and lodges to luxurious and opulent retreats such as the Mount Buller Chalet; containing 61 rooms and penthouse suites, a day spa and a restaurant area that can seat up to 150 people.

Winter wedding ideas

There’s a certain charm in having a winter wedding. It can be a magical experience with cosy and decorative touches that are unique to the colder seasons.

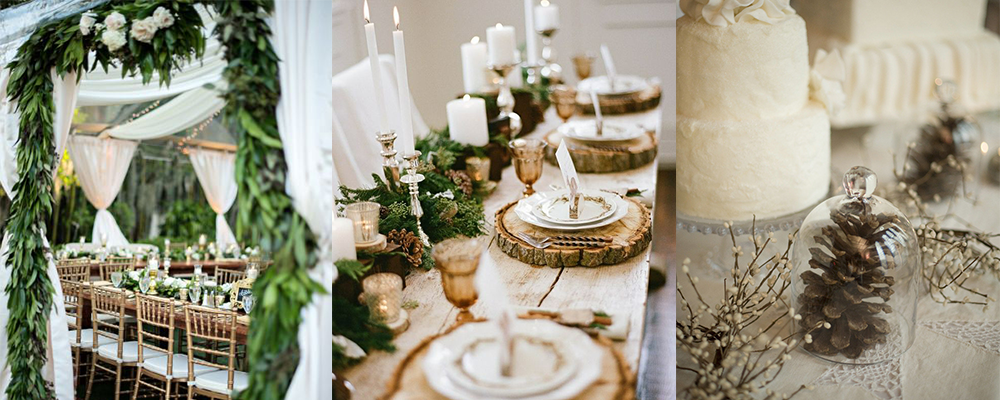
Traditionally, wedding flowers boast bright florals and decorations but for a winter wedding, there’s charm in holding a bouquet of earthy florals with unique colours such as rich reds, leafy greens, muted greys and warm oranges.

Opt for warm, wintry tones in your decor and florals for a winter wedding / Source: Shutterstock

A simple string of fern can add an elegant touch to a wedding invitation and pinecones tied to a gold ribbon can hang off the back of guests’ chairs or complement the candles on your wedding table. You can also bring some light to the decor with fairy lights.

wedding-2.2

Wrap up

Planning for your wedding to take place in winter doesn’t have to be dreary or dull, quite like the weather. Venturing to these alpine resorts will assure a unique wedding that will make the day even more special and memorable.

Categories
Kitchen

Achieve a Hamptons style kitchen

What is a Hamptons style kitchen?

With a Hamptons style kitchen, you get the perfect combination of a room that is perfect for both family meals and entertaining. Inspired by the region of the same name, the style uses natural colours such as tan and blue that work with the coastal theme along with a tonne of natural light. This style gives you all the space that you need and creates a functional space for cooking and eating.

Benefits of a Hamptons kitchen

Functionality

As you look at Hampton kitchen designs, you’ll find that these rooms are highly functional. Not only do you have separate spaces for cooking and prep work, but you get space for entertaining and organising your foods and ingredients too.

Aesthetically pleasing

The most significant benefit of choosing this type of kitchen is that it is aesthetically pleasing to both your family and guests. While the natural light makes the room look larger, the bright colours turn the kitchen into the focal point or central hub of your home.

Hamptons style kitchens are mostly white / Source: Bob Jet Building Services

Timeless style

If you’re tired of redoing your home every few years as trends change, you’ll love that the Hamptons style is timeless. The colours and features that it adds never go out of style.

What makes up the Hamptons style?

Colour pallet

One thing to keep an eye on while looking at Hampton’s kitchen ideas is the colour combos used. White is very popular because it has a clean and refreshing look. If you worry that you can’t keep white clean, go with a deep navy blue and add some white accents. You might opt for lighter shades of blue and tan that work with the theme too. These colours are reminiscent of relaxing at the beach.

Materials

Wood is the most popular material that designers use for a Hamptons kitchen, both in natural brown colours and white. Marble and natural stone are also commonly used. Wicker also looks excellent in this type of kitchen. You can use wicker baskets for storage or opt for wicker furniture. Wire and metal accent pieces work well too.

Nautical and coastal themes

Nautical and coastal themes transform the kitchen into something special. You don’t need to go overboard with tons of decorations though as just a few pieces work to emphasise the style.

Specific features

Architecture

Now is the time to make the most of the architectural features in your home. If you have tall ceilings, consider adding wood beams. When you choose the right stain, those beams will work in the space without overwhelming your senses. Large and open spaces are common in this type of kitchen, but you don’t need to tear down a wall. You can try removing the doors on your cabinets or installing open shelving. New shelves and cabinets open up the room and make it feel larger and more inviting.

Benchtops

Benchtops usually come in marble or wood in a Hamptons style kitchen. Use a darker colour to make the benchtops the focal point of the room, or use a lighter shade to blend in with the surrounding space. 

Flooring

In a modern Hamptons style kitchen, the flooring can make a big impression. Wood flooring is easily the most popular choice. A darker shade of wood hides stains but can make a small kitchen feel even smaller. When you select a lighter shade of wood, you get the beach feel every time you walk in the room. Not everyone likes using wood floors in kitchens though because the wood can develop scratches and scuffs. Consider going with tile in a soft and natural colour. 

Contact local interior designers

Lighting

Hanging lights are a standard option for a kitchen in the Hamptons style. Also called pendant lights, they usually have a cord or bar that hangs from the ceiling and supports the lighting fixture. Many of the top Hamptons lights use shades of white and black, but some prefer the look of entirely white pendant lights. You can use lights that incorporate gold or silver too as these colours work with the theme. 

Centre island

Adding a centre island is the easiest way to create a gathering space for your family. They’ll love pulling up a stool and taking a seat to share a quick breakfast and relaxing as you cook. The island also creates a place where you can read the newspaper or flip through a cookbook while your kids do their homework. It also comes in handy for entertaining and gives you extra storage space. Look for centre islands that have open shelving or cabinets for storing extra cookware and things that you need every day. 

Kitchen stools

Don’t forget to look for Hampton’s style kitchen stools to go along with your centre island. Look for comfortable seats that people will want to sit on when they eat a meal, help you cook or stop by during your next party. Chrome stools have a shiny finish and usually feature a leather seat. If you think that those stools are too modern, go with wood stools. You can choose stools with a fabric covering that matches the Hamptons theme and is easy to clean. Just make sure that the seats are tall enough that people can pull them up to the counter or island.

Hamptons style kitchens use a lot of wood and marble / Source: Aspect Cabinetmakers

Splashback

A splashback prevents damage to the wall and catches the splatters and splashes that come off pots and pans as you cook. A Hampton’s style kitchen splashback can be simple or elaborate. A simple idea involves tile in shades of white and grey that blends with the rest of the room. Using tiles in unusual shapes can make the splashback more interesting. You can incorporate other colours too, such as pale blue and light brown.

When bringing home the Hamptons look for your kitchen, choose contractors you can trust who get the job done quickly. They can install Hampton cabinets, put down new flooring, install a centre island and hang new lights. Those accents help you create the perfect kitchen.

Categories
Design & decor

How to make your own pallet bed

Buying a new bed frame can cost hundreds of dollars, even if you choose a cheaper material. As long as you can find wood pallets and have some free time, you can use the right tools to build a new frame out of that recycled wood.

What is a pallet bed?

Whether you want to do your part and help the environment through recycling or save some money, consider making a bed from old pallets. This type of bed uses the pallets to create both the base and headboard. While basic designs are suitable for most DIY enthusiasts, you’ll find some complex and intricate designs that you can try too.

Sourcing out a pallet

Where can you find pallets?

Home improvement stores now sell pallets that you can take apart and put back together again. However, finding free pallets can help you save money on your project. The best place to find free pallets is through small business parks in your area. Distribution companies often give away pallets too. Don’t forget to use the internet to find companies giving away pallets.

How many pallets do you need?

The number of pallets that you need to make a wood pallet bed depends on the size that you need. For a queen size pallet bed, you need at least four. Complex and intricate designs, as well as those with a headboard, will need more pallets. You only need two wood pallets to make a twin bed.

A bedroom with a desk and a pallet bed
You need multiple pallets to create a double bed / Source: Shutterstock

How to choose safe pallets

Companies often use pallets treated with chemical solvents that protect the wood from water damage. To choose safe pallets, look for any letters stamped on the surface. The initials MB stand for methyl bromide and indicate that the pallets aren’t safe for home use. You can also buy pallets from home improvement stores that are brand new.

Turning a pallet into a bed frame

Learning how to make a pallet bed is easy when you know what steps to follow. Check out the steps below and make sure you understand what to do before you start

Sand and wipe down

To make a DIY pallet bed, you need to sand the pallets first. Even if you choose new pallets, sanding the wood is important because it gives the wood a smooth surface and reduces your risk of getting splinters. An electric sander is the best tool for the job because it fits in one hand and works quickly. Make sure that you wear protective gear when sanding, including a mask and goggles. After you finish sanding, wipe off the pallets to remove any excess wood dust.

Paint

You do not need to paint a pallet bed base, especially if you have longer blankets or plan to use a bed skirt. Painting lets you add a personal touch though and make the bed yours. If you decide to paint, choose between spray paint or a brush application. Brushes allow you to add just enough colour that you can still see the natural wood grain through the topcoat. Using spray paint ensures that you get the even coverage that you want and will completely hide the wood grain.

Contact local interior design experts

Secure the pallets together

For a basic DIY wood base, you only need four pallets. Place the pallets on the ground in a two by two layout. Though you do not need to secure the pallets for this type of bed, you may want to use screws to keep the pallets from shifting as you get in and out of bed. If you use wood screws, make sure that the screws are long enough to go through the wood in two pallets.

Securing the pallets is necessary if you want a bed with some height. As pallets are relatively short, you can stack two or more and get as high off the ground as you wish. Use a power tool to sink the screws through the top of one pallet into the pallet below. 

When you get to the top level, put down some material that keeps your mattress from snagging on the wood. A thick piece of cardboard or some felt will work. Those who like sleeping on a firmer mattress can use a piece of plywood cut to the same size as the bed.

Create a pallet headboard

Though you don’t need a headboard for your bed, making one to go along with your wood pallet bed frame is as simple as securing a pallet to the wall. You’ll want to sand and paint the pallet to make it match the bed. Have someone hold the pallet flush against the wall as you sink wood screws through the surface and into the wall, which keeps the pallet bed headboard from falling. You can easily use the slats in the headboard as extra storage for everything from books and lights to clothing and decorations.

If you want to create a different look, try adding some fabric. Simply wrapping the wood in fabric before you hang it creates a fun and functional headboard. You can also secure slats of wood from a second pallet to the front of the headboard to create extra shelves. With another pallet, you can even make a matching footboard to go with your pallet bed base.

Optional decorations

Once you have a pallet bed frame, consider adding some optional decorations to make the bed look different from those that others created. You can go with something basic such as lights. Fairy lights add a nice touch of atmosphere and are small enough that you can weave them through the slats in the bed. If you don’t have a nearby outlet and don’t want to use an extension cord, look for fairy lights that run on a battery. Larger lights create a fantastic look too when suspended on the wall and above the bed. Twinkle lights placed inside the pallet below your bed adds a small amount of light also.

A bed with a pallet bedhead and lights
Lights can add a personal touch to the bedhead / Source: Shutterstock

Decorations can include extra wood that you source from other pallets. Consider cutting down some of the slats and turning them into tiny bedside tables that attach to the side of the headboard. You’ll have more than enough space for a glass of water and your cell phone. Some create beds that include a built-in section on the base for storing their shoes or slippers. You may add cutouts to the wood that lets you run cables through the bed too. Those cutouts are perfect for charging your phone or powering a laptop.

How to make a pallet bed with storage

Making a pallet bed with storage gives you more room for your belongings. It’s easy to make a bed that fits in a small room and has more storage space.

Leave extra room

Leaving extra room around the edges of the bed is the best way to make a frame with storage. Those spaces give you room for a potted plant or a few books. You also have enough space for a light and anything else you would display on a bedside table.

There are endless ideas for projects that you can do with a few wood pallets. Once you find pallets, you can make a DIY bed base and dozens of other items for your home.