A minimalist decorated room exudes a contemporary and calm feel. It rides off the notion of ‘less is more’, and its style is all about restraint and simplicity. It’s an extremely popular and relevant style, yet it can be challenging to execute perfectly. Here’s how to nail a minimalist home design.
What is minimalist home design?
It is the art of making your interiors functional, comfortable and beautiful, while using as much empty space as possible. In this form of interior design, you play with outdoor views and light around the room, and create an eye-catching focal point. The concept of de-cluttering your home is meant to bring peace and harmony, and gives everything a supremely free-flowing look. It’s all about removing all of the headaches that come with the messes in a cluttered house, leading to stress-free, supremely relaxing living. Minimalism can bring about a very healthy, all-is-calm feel for everyday life.
A completely minimalist lifestyle will include very few extra things around the house. You won’t see frilly, decorative window covers, heavy throw rugs, or lots of extraneous pillows, cushions or tablecloths around. Most of the walls and most of the floors will be clean and clear. There won’t be any rugs on top of carpets, there won’t be many wall treatments or floor coverings, and there will only be a few art pieces hanging around – and they will be very strategically placed.
Selecting minimalist furniture
Cost is not an important factor in choosing furniture for a minimalist home. You will be buying only a few pieces, so assign a generous budget and focus on style instead. A single couch, perhaps supplemented by a couple of side chairs, should do in the living room. Avoid beds with headboards, as these are hardly functional but take up space. Give preference to beds with built-in storage drawers, so that you don’t have to buy a separate chest of drawers to hold your belongings. While picking minimalist furniture, ensure that their size is proportionate to your rooms.
Contact local interior designers
Minimalist flooring & walls
Flooring has a big contribution to the ambiance of a room. Generally in minimal design timber, bamboo and more recently, vinyl is used. For your walls, opt for neutral colours like white, black and grey, or subtle earth tones for some warmth and dimension. Minimalist furniture means that both the walls and flooring will be very noticeable, so choose colours that complement each other. For example, beige walls would look great with hardwood flooring. You can take away the drab, sterile look of a home painted white or grey by adding stone veneer wall tiles for a natural look. Alternatively, paint a short wall in a contrasting colour and texture to convert it into a feature wall.
Maintaining a minimalist home
The advantage of limited furniture is the ease of cleaning. You won’t have piles of magazines gathering dust on the coffee table, or a number of greasy appliances on the kitchen countertop. Cleaning is still required regularly, though, because even the smallest stain is clearly visible in the bright, open space.
Minimalist design tips
Keep accents to a minimum
While keeping furnishings to only the most functional elements is a plus, don’t think that you have to keep accent pieces to the bare minimum. Instead of filling your space with meaningless small pieces, choose just one or two statement pieces. One large piece of art on the wall is better than a dozen smaller pieces scattered around the room.
When deciding if you want to decorate your abode in a minimalist way, it can be a difficult task in executing the right balance between having it too cluttered or even too empty. A cluttered space can make you feel stressed and confused, whereas an empty space may cause feelings of emptiness and sadness. To avoid your home not really feeling like a home, scatter some well-placed family photos or favourite books in different areas to make the space familiar.
Simple symmetry
Simplicity through symmetry in design and layout is another element of minimalist design. We naturally feel more calm with symmetrical visuals, and this principle gives your furniture pieces room to breathe.
Large windows are common in minimalist homes as it allows natural light to fill the room and the use of light colours for walls has the ability to make the room appear larger.
A common misconception is that in minimalist design, the only colours that can be used are neutral hue colours – this is wrong. It’s true that a light, simple and neutral hue colour scheme should be adopted, but accent colours are also essential. Whether it may be a bright teal blue or a splash of green, an accent colour can give life to a room.
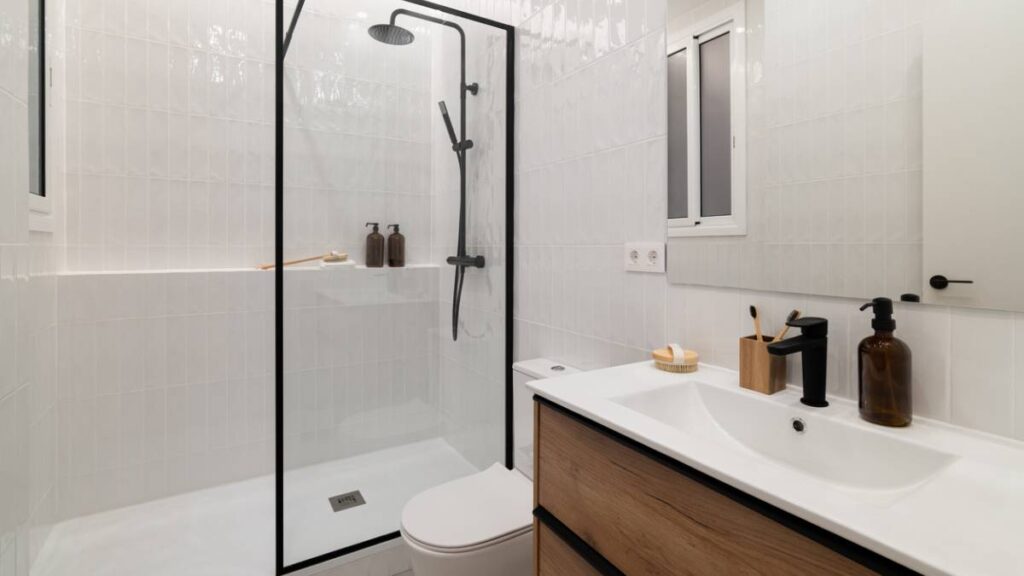
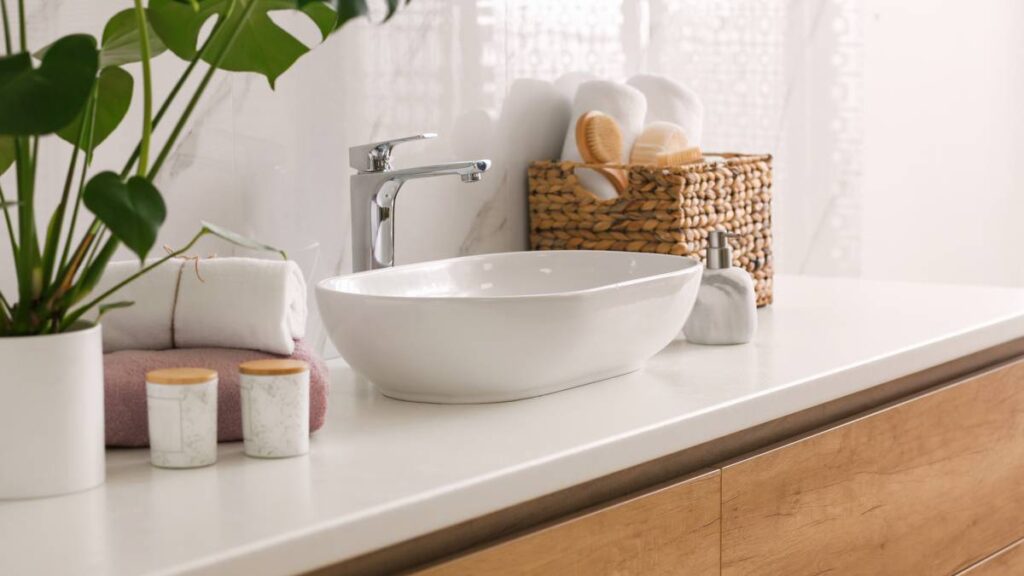
The use of some greenery in this bathroom is a clever way to liven up the space / Source: Visualising Interiors
A minimalist home has the appearance of simplicity, but when it comes to decorating your home to be simplistic, it may prove to be more complex than you think. Connect with an expert interior designer to help you nail the minimalist style you desire.
When was the last time you really thought about restumping a house? Unbeknownst to you, these unsung heroes holding up your property may be silently deteriorating. Over time, these foundation supports can fall victim to wear and tear, compromising the stability of your entire structure. If left unchecked, the consequences can be dire.
But there’s a solution that can breathe new life into your home’s foundation: house restumping.
What is house restumping?
Get your house checked if it needs new stumps | Source: iStock
House restumping is the process of replacing a house’s existing stumps, located beneath the structure, when they become damaged. Depending on their condition, it may require either a full restumping or a partial restumping, where only some of the stumps are replaced.
Stumps provide a stable and level foundation for a raised house, transferring the weight of the house to the ground below. When stumps can no longer adequately support the house, this can lead to problems such as uneven flooring and cracked walls.
Common causes of stump damage include dry rot or damage caused by termites. At other times, stump damage is unavoidable even with proper maintenance, such as by soil movement.
Some alternatives to restumping in Australia exist, such as piering and underpinning. This involves adding support structures beneath the existing foundations to strengthen them instead of replacing the stumps.
How do I know if my house needs restumping?
Problems with worn-down house stumps manifest in various ways, some of them not obvious. Here are a few:
Uneven floors: Sagging or uneven floors are a common sign of damaged stumps. Some floors may even slope in one direction, generally toward the weaker stumps. Left unattended, this can cause the house to sink or settle unevenly.
Sticking doors and windows: When stumps become misaligned, it can cause doors and windows to stick or bind, making them difficult to operate. They may sometimes not even open or close completely.
Cracked walls and ceiling: Weakened stumps stress the home’s structural integrity, leading to these visible cracks. These cracks are usually found in walls, ceilings, or around windows and doors.
In severe cases, damaged stumps can lead to structural instability, putting the entire house at risk.
Benefits of house stumping
Restumping directly addresses the underlying foundation problems that can lead to uneven floors, cracked walls, and sticking doors and windows. Installing new, sturdy supports can restore structural stability and help with house levelling.
In addition, house raising and restumping can also protect it from the effects of flooding. While Australia is known as the driest inhabited place on earth, floods still accounted for about 20% of casualties from natural disasters in the last 100 years. Making your home flood-proof is also increasingly important, given the effects of climate change.
Finally, a properly restumped home is a practical investment because it demonstrates the owner’s commitment to maintaining the property. This can significantly contribute to the home’s resale value, especially if the restumping is done to accommodate additional floor space, like adding a room or two.
Choosing the right stump material
Does this mean you need to choose the most expensive material for your restumping project? Not necessarily.
Most homeowners can choose from the three most common stump materials: treated timber, concrete, and galvanised steel.
Treated timber: Of these three, treated timber is the most cost-effective. However, it’s more susceptible to eventual rot and termite damage, especially if poorly maintained.
Concrete: Concrete is more durable than wood but a bit more expensive. This is the ‘middle of the road’ option for many homes since they combine both durability and sturdiness without being too pricey. Concrete stumps are tough and can provide additional protection against flooding and soil movement.
Galvanised steel: Galvanised steel stumps offer superior durability and longevity. The downside is they’re more expensive, some even five times as much as concrete stumps. Some steel stumps may also come with adjustable mechanisms, which allow the homeowner to easily level the house if the ground shifts or settles.
Steel stumps vs. concrete stumps
While both options are sturdy and durable, they offer different benefits. Steel stumps are easier to install and adjust, making them a top choice for homes on sloping sites. Additionally, they are resistant to pests and moisture, reducing the risk of damage and costly repairs.
On the other hand, concrete stumps offer excellent load-bearing capacity and can support heavier structures. Ultimately, the choice between steel and concrete stumps will depend on your specific needs, budget, and building site.
House restumping process
The house restumping process typically involves the following key steps:
Renewing your stumps stabilises its foundation | Source: iStock
1. Site preparation
The first step is to clear the areas around the home. Professional restumpers clear the area around the home’s foundation, then excavate it to expose the existing stumps. This allows the crew to assess the condition of the stumps and the underlying soil. Boards around the house will also need to be removed.
Certain house additions, such as building a deck, also need this step beforehand.
2. Inspection
Next, a private surveyor or local council will then inspect the home. The home must pass inspection before the new stumps can be installed.
3. Stump removal
Once the stumps are examined and determined to be damaged, restumping builders position hydraulic jacks, cranes, and other machinery to lift and support the house from the stumps. This enables workers to examine the old stumps and determine the extent of the damage. They then carefully remove the old, damaged stumps.
3. New stump installation
It’s time to install new stumps. These may be made of treated timber, galvanised steel, or concrete, depending on the specific needs of the home and the recommended approach.
Installing new stumps begins with using a level to ensure the home is level and even. Then, workers measure the holes to fit the proper size stumps. Adjustable house stumps can save time on installation, and they can be easily adjusted.
4. Repositioning
Once the stumps have been replaced, the home is then carefully lowered and adjusted using hydraulic jacks to ensure the foundation is perfectly level and the new stumps are properly aligned.
5. Finishing touches
With the new stumps and the house secured in place, the restumping crew turns their attention to restoring the property to its original state.
They do this by re-establishing the surrounding landscaping, backfilling the holes with appropriate materials like topsoil and gravel, and ensuring a stable base. The workers also replant disrupted gardens, relaying pavers or concrete to return the exterior to its original condition and as close to its original appearance as possible.
Budgeting and hiring the right contractor
Restumping your home is a significant investment, so do your due diligence when hiring a contractor.
First, check for relevant licences and insurance. A licence means the contractor is experienced, which can minimise problems after restumping. Them having insurance also means you won’t be liable for damages.
Next, scour online reviews and ask for referrals from friends or neighbours who’ve had similar work done. A reputable stumper can provide a portfolio of previous jobs.
Finally, obtain quotes from at least three different companies. Note that house restumping costs can vary wildly; the more stumps need to be replaced, the more expensive it is. Also, consider accessibility, soil conditions, and the extent of repairs needed.
Contact local building experts
Licencing requirements
In terms of licencing, the qualifications and regulations may vary depending on the territory or state. Some states require the worker to have a permit if the work carried out exceeds a specific monetary amount.
Australian Capital Territory: Restumping houses in the ACT requires a registered builder licence from the ACT Planning and Land Authority, and compliance with relevant regulations and inspections.
New South Wales: Builders in NSW need a building licence before they can undertake any residential building work valued at more than $5,000 in labour and materials, including applicable taxes. The requirement is based on the value of the work.
Northern Territory: Restumping falls under the category of plumbing and draining work. Therefore, stumpers in the Northern Territory need to meet the licensing and registration requirements set by the Plumbers and Drainers Licensing Board, such as being a holder of an advanced tradesman licence.
South Australia: The definition of “builder” in South Australia encompasses contractors, demolishers, and renovation workers. Restumpers need a builder’s licence, which must be renewed annually.
Tasmania: In most cases, workers need at least two years of work experience to qualify for a licence in Tasmania. Builder licences fall into three categories: builder, fire protection, and demolisher.
Restoring your foundations, one stump at a time
At the end of the day, a home’s foundation is literally its bedrock, the very thing that keeps it sturdy for the years to come.
But this extensive and complex project isn’t for the DIY enthusiast. Restumping is a delicate process that requires the expertise of licenced professionals who know the ins and outs of this procedure.
So, if you’ve noticed your floors are starting to resemble a fun house mirror, or your doors and windows are playing a game of “will they, won’t they” open and close, it’s time to find the restumping expert who will take care of your foundations, one stump at a time.
FAQs on house restumping
Is it worth it to restump a house?
Yes, restumping is a worthwhile investment for a homeowner. Addressing foundation issues through new, sturdy stumps restores the structural integrity of the home, fixing problems like uneven floors, sticking doors, and cracked walls.
Proper restumping can also increase a home’s resale value and protect it from flood damage. While the upfront cost may be significant, it’s necessary to maintain the property’s long-term safety and stability.
How often does a house need to be restumped?
There’s no definitive timeline, as it depends on aspects like the quality of the original stumps, soil conditions, and the property’s age. However, most houses require restumping every 40 to 60 years. If you’re in the market for old homes, consider whether you’re buying a house that needs restumping after all.
Some signs it’s time for restumping include sagging floors, sticking doors/windows, and visible cracks. Regular inspections can help identify issues before they worsen, allowing homeowners to address problems proactively.
Can you restump a house yourself?
Attempting to restump your house as a DIY project is not recommended due to its inherent risks and complexities. Professional contractors should always be employed when restumping, as slight mistakes while installing adjustable or typical house stumps could have catastrophic effects not only on the structural integrity of the house but the safety of the people living in it.
How do you restump a low house?
The first step to restumping a low house is to lift the house. Raising the house creates space so that foundation support beams and other equipment can be inserted beneath the house. However, if a home is shallow, excavation may be required to insert the beams underneath it.
What is the difference between restumping and underpinning?
Underpinning is a process typically used on houses with brick veneer and a concrete slab foundation. Over time, the slab cracks and the brick loses alignment, and underpinning involves using jacks to prop the damaged slabs. On the other hand, restumping involves stabilising a house using new beams or stumps to prop it up.
All of us are likely to move to a new house at least once during our lifetime. When we do, we’ll quickly realise how stressful this can be. We’ve compiled this simple moving house checklist to help make the entire process a little bit easier for you.
First of all, you’re going to need to think about whether to use a removal company or simply move yourself. If you are doing things on your own, you’re still going to need some assistance, so enlisting the help of family and friends is a good idea.
If you are moving long distance, it requires more planning and checking in with interstate removalists about the move. When you know where your new home will be, consider the entryways. Will it be easy or hard to move your furniture in? Is the home a ground floor property or higher up in an apartment?
Also, think about the costs involved, as well as how much time you have. If you don’t have much time, a removal company will be your best bet and decrease the stress of moving. If you’ve got a stricter budget, however, make sure you shop for a cheaper company or do it yourself. If you do go it alone, remember that you’ll still need a trailer or truck, unless you ask friends to help you.
People often forget to change their address, which can cause issues down the line. A month or more before moving, start this process. Use the Australia Post redirection service if it does get too late to change it on your own.
Who will need your address? See below for a quick view:
Always aim to start early and move systematically through the house. Start in rooms you don’t use as much and list what is inside each carton or box you fill. Number them as well.
Place cushioning in each box for protection, and wrap delicate items individually. Heavy items should go inside smaller boxes or in the bottom of larger ones. Load essential items into the van last, so they can be accessed immediately upon arrival.
Renovations are great for a change of scenery, update old facilities and most importantly, provide an increase in the value of your home. That value, however, can be severely diminished if you end up spending more than your finances can handle.
With that in mind we’ve put together a guide on how to spend wisely on your next home renovation without blowing the budget.
1. Estimating value
As a rule, you should not spend any more on a single room than the value of the room as a percentage of your overall house value. To do this, you will of course, first need to get an estimate of your home’s value.
For instance, if your home’s overall value is $800,000, (the median Australian house price) and you want to renovate your kitchen, which accounts for between 10-15% of your property’s value, then you should aim to spend under $120,000 – or 15% – on your renovation.
Plan and allocate your budget according to which room will ad the most value to your overall property / Source: Ryan Linnegar Photography
It’s also worth keeping in mind that some rooms scale to add more value than others. For instance, while the kitchen is often cited as the make or break room, it offers amongst the lowest return on investment, whereas a moderate bathroom makeover can almost double the money spent.
2. Look at loan options
If you’re borrowing money for your project, make sure you look at what deals are available and what types of loan will work for you. It might seem like common sense, but taking the time now to research your options and choosing one works for you will certainly save you money down the line.
If you’re unsure, speak to a professional who can provide you with the financial advice you need to make an informed decision.
3. Research quotes from contractors
Talking to a professional builder/contractor is the fastest and often the most accurate way to assess the total cost of a project. Start a conversation with a few trusted providers, and use their experience and understanding of the finer aspects of a renovation to accurately assess the cost of a project.
4. Follow the plan
While you’re in the middle of a renovation, it can be easy to get caught up in the excitement of a project and start thinking about other ways you can add value to your home. Always remember to take a step back and see how these changes would affect your budget and timeline. Reviewing the plan is the best way to avoid blowing your budget as even small additions to a project can carry unexpected costs.
5. Create a buffer
There are always unexpected costs lurking around the corner of any construction project, so provide yourself with a buffer of extra cash to take care of these items. It only needs to be 10% of the total cost of the renovation, however, that 10% can make all the difference in the event of accidents or other setbacks outside of your control. Rather than having to dip into your savings or borrow extra money if the builders need more time or if a window or fixture gets broken and needs replacing, using your emergency fund can save you money in the long run.
An emergency “buffer” fund is essential for any renovation budget / Source: Geoff Comfort Photography
6. Consider all the costs
Keep in mind, when you get an estimate from your builder, it will typically cover only the base price of construction and materials without factoring in the price of interior finishing. In order to finish your home, you’ll have to factor in additional costs for interior fixtures such as these:
Flooring
Window treatments
Lighting and fixtures
Landscaping services
Driveways and pathways
Utility connections for your electricity and for appliances such as phones, computers and television
Water, sewerage and garbage disposal costs
Ground excavation for the build
Cabinetry and appliances for kitchen and bathroom
Energy-efficient additions such as added insulation, solar panels, solar-heated water systems and tanks to collect rainwater
To help control your budget, talk to your builder and find out how many of these interior fixtures are included in the estimate. If they aren’t, ask if your builder can recommend professionals who can do these jobs for you at a reasonable price.
Contact local home renovation experts
7. Keep your expectations realistic
It’s crucial to be realistic about the things you can and can’t have in your new home. For example, if you’re on a strict budget, you probably won’t be able to splurge on granite benchtops in your kitchen or bathroom. With all the luxury accessories, fixtures and materials available, it’s easy to get carried away and fall in love with everything you see, but you can quickly end up ruining your entire construction project if you don’t keep the spending in check. From the very start, you need to look at how much you’re paying for the site, and add on the base construction price. Whatever is left in your budget can be used for interior finishing, but be sure and set a budget by parceling out an appropriate amount for each area. Don’t start shopping for these goodies until you’ve set strict monetary limits on each section of your list.
The good news is that, with auctions, online auction sites and clearance sales, you can still get luxury items well within your budget. Just use your bargaining skills to locate great deals, and keep your eye open for discontinued stock.
Highlights: • Focus your budget on professional waterproofing, plumbing, and electrical work. You can save money on DIY tasks like painting, decorative fixtures, and vanity updates. • Strategic wall and floor updates using budget-friendly materials and using LED lighting, water-efficient fixtures, and consistent finishes can dramatically transform the space without major structural changes.
Dreaming of a spa-like bathroom retreat but worried about the cost? You’re not alone. A bathroom renovation consistently ranks as one of the highest return-on-investment home improvements, potentially increasing property value by up to 10%. The challenge lies in achieving that magazine-worthy look without draining your savings account.
The good news is that transforming your bathroom doesn’t require a six-figure budget. With smart planning and strategic choices, you can create a stunning space that feels both luxurious and functional. This guide reveals practical bathroom renovation ideas on a budget that deliver maximum impact for your dollar, helping you prioritise where to save and invest wisely.
What are the benefits of renovating your bathroom?
It’s the small things that can have a big impact on your bathroom renovation / Source: ESTEEM Constructions
When you’re looking for ideas for bathroom renovation on a budget, you want upgrades that extend beyond mere visuals. These improvements can transform your daily routine while boosting your home’s value and appeal:
Increased property value:Bathroom renovations typically recoup 60-80% of their cost when selling, making them one of the smartest home improvement investments.
Enhanced daily comfort: Modern fixtures, better lighting, and improved storage make your morning and evening routines more pleasant and efficient.
Improved functionality: Strategic layout changes and smart storage solutions can maximise space, particularly in smaller bathrooms.
Better energy efficiency: Upgrading to LED lighting, low-flow fixtures, and energy-efficient ventilation reduces utility bills while supporting environmental goals.
Health and safety improvements: New waterproofing, slip-resistant flooring, and proper ventilation create a safer, healthier environment that prevents mould and water damage.
Where to save vs where to spend when doing a budget bathroom renovation
A newly renovated bathroom can add serious value to your home / Source: Origin Bathrooms
Smart budget bathroom renovation ideas focus on understanding which elements deserve investment and which offer opportunities for savings. This strategic approach ensures your renovation delivers lasting value while staying within budget.
Top 3 areas where you can cut costs
Painting and wall treatments
DIY painting can save you plenty compared to professional services. Quality moisture-resistant paint costs around $60 to $100 for an average bathroom, while special tile paint can refresh existing surfaces for under $80.
Decorative fixtures and accessories
For a cost-effective update, consider swapping out accessories like towel rails, toilet roll holders, and shower caddies yourself. Online retailers offer a wide variety of affordable options, with many pieces costing between $20 and $50.
Vanity updates
Refreshing an existing vanity with new paint, handles, and hardware could be as affordable as $150 or up to thousands. This approach can achieve a completely transformed look for a fraction of the cost.
Top 3 areas you shouldn’t skimp on
Waterproofing and structural work
Poor waterproofing could lead to costly damage that can run over $10,000 to repair. Professional waterproofing doesn’t come cheap; some may even cost $500 to $2,000, depending on the extent of the work. However, this investment can be worthwhile in the long run.
Plumbing and electrical
Plumbers and electricians ensure safety and compliance. Cutting corners here risks expensive repairs, safety hazards, and insurance issues.
Quality tiling in wet areas
Proper tile installation in showers and around baths prevents water damage. Professional tiling could range around $50 to $80 per square metre to ensures durability and waterproof integrity.
Renovation ideas for every part of the bathroom you can do on a budget
Fixtures can add real impact to your budget bathroom renovation / Source: ESTEEM Constructions
Transform each area of your bathroom systematically with targeted improvements that maximise visual impact while controlling costs. These small bathroom renovation ideas on a budget work particularly well in compact spaces.
Bathroom walls
Fresh walls instantly modernise any bathroom and provide the foundation for your entire bathroom design scheme.
Replace the wall tiles
Partial bathroom tile replacement focuses the budget where it matters most. Remove and replace tiles around the vanity or in the shower. Consider subway tiles or mosaic feature walls for contemporary appeal, or larger format tiles to reduce grout lines and create a cleaner, more spacious feel. Light-coloured tiles reflect natural light, making small bathrooms appear larger and brighter.
Repaint the walls
Moisture-resistant paint transforms bathroom walls for $60 to $100 in materials. Semi-gloss or satin finishes resist humidity while providing easy cleaning. Light colours like soft whites, pale greys, or warm beiges create an airy atmosphere that makes spaces feel larger.
For accent walls, thinkdeeper colours like navy or forest green behind the vanity to add depth without overwhelming the space.
Install splashback panels or peel-and-stick tiles
Acrylic splashback panels provide waterproof protection with minimal disruption. These panels come in various finishes, including marble-looking, timber-style, or solid colours.
Peel-and-stick tiles offer DIY-friendly installation for $20 to $40 per square metre. While not suitable for shower areas, they work well as backsplashes behind vanities or as accent features.
Bathroom floors
A modern bathroom. / Source: iStock
Budget bathroom renovation ideas for flooring focus on materials that combine affordability with moisture resistance.
Install slip-resistant flooring
Vinyl plank flooring designed for bathrooms costs $25–65 per square metre and easily installs over existing surfaces. Modern luxury vinyl replicates timber or stone appearances while providing superior water resistance and comfort underfoot.
Meanwhile, textured surfaces and bevelled edges add visual interest while improving safety. Choose planks with built-in underlay for added comfort and sound reduction.
Play with tiles
Mix tile sizes and patterns to create visual interest without premium costs. Make things interesting by combining large-format tiles with smaller mosaic borders for custom looks.
Another tip: matching wall and floor tiles creates a seamless flow that makes small bathrooms feel larger. Alternatively, contrast light walls with darker floors to ground the space and hide dirt.
Consider polished concrete or pebble tiles
For a modern, low-maintenance look, a polished concrete finish is a great option. However, costs vary significantly depending on the method. The most budget-friendly option, a ‘grind and seal’ finish, can start at around $50 per square metre. A more robust, mechanically polished concrete finish typically starts at $100 per square metre.
Pebble tiles add natural texture and create a spa-like ambience. Install them in shower floors or as accent strips for tactile interest that enhances the sensory experience.
Contact local bathroom renovation experts
Shower and bath area
The shower and bath area typically receives the most use and attention in bathroom renovations.
Replace the showerheads
High-pressure showerheads cost $100-500 and install easily without plumbing modifications. If you want a transformative daily shower experience, explore rain showerheads, handheld options, or water-saving models.
Want more luxurious showers? Multi-function showerheads combine rainfall and targeted spray patterns for that luxe feel at a moderate cost. Look for models with flow restrictors to reduce water consumption.
Switch glass shower screens with acrylic
Choose shower screens that resist yellowing and scratching while offering easier installation and replacement. Acrylic shower screens cost 40% to60% less than glass while providing similar functionality.
Frameless acrylic screens create open, spacious feelings in small bathrooms. For professional installation guidance, learn about shower screen installation techniques to ensure proper fitting and sealing.
Opt for a walk-in shower and bath area
Remove shower doors entirely for an open, accessible design that costs nothing but creates significant visual impact. This approach works best with proper waterproofing and floor drainage.
Conversely, you can consider installing a floor-to-ceiling tile feature wall or mosaic accent to define the shower area without physical barriers. This creates the illusion of a bigger space while improving accessibility.
Vanities and storage
A bathroom vanity. / Source: iStock
Smart storage solutions and vanity updates provide both functional and aesthetic improvements. Ready-made vanities are cheaper than custom options, while still delivering style and functionality.
Install smart storage
Floating shelves cost between $30 to $80 and provide essential storage without consuming floor space. Install them beside mirrors, above toilets, or in shower niches for toiletries and decorative items. Mirrored medicine cabinets combine storage with essential functionality.
New cabinet handles can instantly modernise any vanity. For a cohesive design, choose consistent finishes throughout the bathroom, such as brushed brass, matte black, or chrome. This is useful if you’re renovating your bathroom piecemeal or designing a modular bathroom.
Also think about replacing your tapware to complement your handle choice. Modern mixer taps with waterfall or swan-neck designs add luxury appeal without premium costs.
Paint the mirror frame
Transform existing mirrors with specialty paint designed for glass and metal surfaces. Metallic spray paints in gold, bronze, or black cost under $20 and create custom designer looks.
Mask the mirror surface carefully and apply multiple thin coats for professional results. This technique works particularly well with ornate or dated frames.
Lighting and finishing touches
Proper lighting and coordinated finishes create cohesion and enhance the functionality of your renovated space without breaking the bank.
Upgrade to LED lighting
LED downlights cost $15 to $40 each and reduce energy consumption by 75% compared to halogen alternatives. For comprehensive illumination, install them over vanities, in showers, and as general ceiling lighting. Backlit mirrors combine task lighting with storage.
Match finishes
Consistent finishes throughout the bathroom create a sophisticated, designer appearance. Choose one primary finish (chrome, brushed brass, or matte black) for all tapware, handles, and accessories.
This coordination principle extends to lighting fixtures, towel rails, and even tile trim. Mixing more than two finishes can create visual chaos in small spaces.
Add/replace towel rails and shower caddies
Heated towel rails add luxury while providing practical towel drying. Choose models that complement your finish scheme and provide adequate hanging space. Keep in mind that for a hardwired, polished look, you will need to budget for professional electrical installation, which can add several hundred dollars to the total cost.
Corner shower caddies maximise storage in compact shower areas. Stainless steel or powder-coated options resist rust and maintain appearance over time.
Place an indoor plant
Low-light plants like snake plants, ZZ plants, or pothos add natural elements that soften hard bathroom surfaces. Synthetic alternatives provide similar visual benefits without maintenance concerns.
Choose decorative pots that complement your colour and finish choices. Position plants away from direct water exposure while ensuring adequate light for living varieties.
Eco-friendly and sustainable budget bathroom renovation tips
A clean bathroom countertop. / Source: iStock
Sustainable choices in bathroom makeover ideas on a budget deliver environmental benefits while reducing long-term operating costs. These improvements often pay for themselves through reduced utility bills.
Low-flow showerheads and dual-flush toilet mechanisms reduce water consumption by a significant amount without sacrificing performance.
LED bulbs last 15–25 times longer than incandescent alternatives while using 75% less energy. The higher initial cost is offset by reduced replacement and electricity costs.
Bamboo vanities, recycled glass tiles, and reclaimed timber accents provide unique character while supporting environmental goals.
Energy-efficient exhaust fans prevent moisture problems while consuming less power. Proper ventilation extends the life of all bathroom materials.
Low-VOC paint products and finishes improve indoor air quality while often costing similar amounts to conventional alternatives. They’re particularly important in small, enclosed bathroom spaces.
Time for a bathroom makeover
Creating your dream bathroom on a budget requires strategic thinking rather than unlimited funds. The key lies in understanding where to invest for maximum impact and where smart savings won’t compromise quality or safety.
The most successful bathroom renovations on a budget balance DIY enthusiasm with professional expertise. While you can do some tasks yourself, professionals should handle the majority of the heavy lifting. Start planning your project with trusted bathroom renovation experts today.
FAQs on bathroom renovations
How much does a budget bathroom renovation cost in Australia?
Budget bathroom renovations typically cost $8,000 to $15,000 for basic updates, including painting, new fixtures, and cosmetic improvements. Mid-range renovations with some structural changes cost $15,000 to $25,000, while high-end renovations can exceed $30,000.
Can I renovate a bathroom myself in Australia?
You can handle cosmetic work like painting, installing accessories, and replacing non-plumbing fixtures yourself. However, licensed professionals must complete waterproofing, plumbing, and electrical work to meet Australian building standards and maintain insurance coverage.
Is it worth renovating a bathroom before selling?
Yes, bathroom renovations typically return a significant amount of their cost when the property is sold. Focus on neutral colours, modern fixtures, and quality finishes rather than highly personalised design choices.
Do I need building permits for bathroom renovations?
Minor cosmetic updates don’t require permits, but structural changes, plumbing alterations, or electrical work typically do. Check with your local council, as requirements vary by location and scope of work.
What mistakes should be avoided when renovating a bathroom?
Common mistakes include inadequate waterproofing, poor ventilation, choosing style over function, and attempting complex plumbing or electrical work without proper licensing. Always prioritise quality structural elements, even when working with tight budgets.
Which bathroom fixtures give the best value for money?
LED lighting, water-efficient showerheads, and quality tapware provide excellent value through energy savings and durability. Bathroom resurfacing of existing tiles and vanities often delivers better value than complete replacement.
It seems like no one really worries about their gutters, or thinks that guards are worth it – until it’s too late. Clogged or damaged gutters can have major financial implications if you don’t take the necessary precautions to protect them. Check out our guide below for a look at how you can protect your home’s gutters.
What are gutter guards?
Essentially, gutter protection just refers to installing physical barriers to prevent debris, leaves, insects, and animals from getting into your gutters. The concept is rather simple, since these guards are made up of mesh that can be purchased in rolls.
As you might guess, you can simply place the mesh over your gutters, which will ensure that most debris cannot get through. Leaves, rocks, and litter can all clog up your gutters over time, causing them to be ineffective or even break when it rains and the water is forced to build up. The finer the mesh is in your gutter guards, the less debris can get through.
Gutter guards protect your roof from building up debris and excess water / Source: Powerclean Exteriors
The benefits of gutter guards
There are many benefits of installing gutter guards on your roof.
Maintainwater flow: the most important reason is ensuring any water in your gutters can run along the surface seamlessly until it reaches the area where it can safely fall into a drain. When debris builds up, it blocks the water’s path. Blockages can lead to your gutters overflowing when there is a lot of rain. Having too much water sit in one area of your gutter can put extra weight on your house, breaking the gutters, causing stains down the side of the house, damaging your home and its foundations.
Avoid gutter cleaning: With gutter protection, you don’t have to worry about getting onto the roof every six months or less to clean the gutters of debris that is blocking them up. Bonus, you can also save money by not having to hire a professional for this job. You may still need to clean the gutters, but you’ll only have to do it once every few years instead of every six months.
Keep pests and rust at bay: When blockages occur, stagnant water accumulates, attracting mice, cockroaches, spiders, and mosquitoes. With gutter guards, this isn’t such an issue. More than this, gutter guards physically prevent birds, rodents, possums, and the like from getting into your roof space. standing water and wet debris can also attract premature rust.
Water tank win: Water will flow freely through your gutters and downpipes when gutter protection is in place. If you’ve got a rainwater tank, this will ensure that it fills faster. In addition, the water that is collected by the tank will be cleaner as well, since fewer contaminants, leaves, and debris will filter down through the pipes.
Bushfire protection: If you live in any area where bushfires are common, dry materials that build up in your gutters can cause a fire hazard, as travelling embers from nearby fires can light them up. Metal gutter protection, therefore, is important in minimising this build up and eliminating this potential hazard.
Contact local guttering experts
Gutter guard options
In general, a gutter guard will be a mesh made out of aluminium, polypropylene, or stainless steel. The size of the holes in the mesh is just one option to think about as you choose your gutter guards. Consider the types of debris your home seems to be prone to. If you are most worried about larger debris or large pests, such as rats, the mesh you choose does not have to be particularly fine. If it’s small debris you are worried about, you need to select gutter guards with the smallest openings possible.
Most gutter protection is in the form of a thin metal mesh / Source: JK Handyman
You also have a choice when it comes to colours. If you want your gutter guards to be hard to see, you can buy them in the same colours as your gutters. You also have a choice when it comes to the material. The mesh is usually made of metal, such as aluminium or steel, but you can also opt for gutter guards made of nylon or foam. For bushfire protection, be sure to choose the metal mesh rather than the plastic-like material.
If your bathroom sink is blocked, it can cause significant disruptions in your household, especially when many people need to use it. Not only that, but it can also cause water damage, and that can lead to costly repairs. Here are a few suggestions that you can try if you have a blocked bathroom sink.
Signs your sink drain is blocked.
Your sink drain will give you a few signs that it is developing a clog long before you have a complete blockage. It is always best to address the issue before more severe problems or leaks occur. If you experience any of these signs, you should take action to correct the situation immediately.
A sink draining slowly is usually the first sign
An unusual smell from the sink, such as sewage or a rotten smell
Unique sounds from pipes, such as bangs, rattles, gurgling, or knocks
What causes a blocked sink drain?
Several things can cause your bathroom or kitchen sink to become clogged. Here are a few of the most common causes of a slow draining kitchen sink or a blocked bathroom sink drain.
Hair. When we comb our hair, some falls out and goes down the bathroom sink drain. Even if you are not experiencing significant hair loss, this can build up over time and get caught in the trap. The more people in the household who use the sink, the faster this occurs.
Dirt. Dirt from our bodies can clog the drain. Also, if you let even small food particles go down the sink when you are washing dishes, it can cause a backup over time.
Grease. It would help if you never pour grease down your kitchen sink. As it moves through the pipe, it will solidify and build upon the pipe walls. This will eventually cause a blocked kitchen sink.
Poor water flow. If your system does not have adequate water flow, then it will not be able to flush particles from the system properly. This will allow more hair, dirt, and food particles to accumulate faster.
Foreign objects. Accidentally letting foreign objects, such as sand when cleaning out a fishbowl, or cat litter can cause a clog as it builds up. It is always best to rinse out these items outside, rather than letting them go down the drain.
How to unblock a drain?
The most common method for clearing a blocked kitchen sink drain is with a plunger. This method uses force and pressure to try to break the clog-free and allow it to move through the pipes. Here are the steps to using a sink plunger.
1. Add or remove water. You will need a small amount of water in the sink to make plunging work. You should probably start with about 10 centimetres or so. If the sink is too full, you will need to remove some to prevent water from overflowing onto your floor.
2. Plug and holes or drains. If you have a double sink, use the sink stopper to close one side of the sink.
3. Submerge plunger in water. Place the rubber end of a plain cup plunger into the water right above the drain hole.
4. Clear plunger of air. Tilt the plunger slightly to one side to allow any air to escape.
5. Position and plunge. Make a tight seal around the drain opening. Grab the handle of the plunger and move it up and down forcefully. This will get more difficult as pressure builds up.
6. Release and clear. Hopefully, you will feel something let loose and start flowing. When this happens, you can remove the plunger and run plenty of hot water down the sink to clear it.
An unclogged drain is important to the effectiveness of your home plumbing system / Source: Pn Plumbing And Gas
Clearing a drain without a plunger
If you do not have a plunger, there are still some things that you can try to unclog your blocked sink drain.
Baking soda. Pouring a simple box of baking soda down the sink can sometimes clear a clog. You might need to allow this to sit in the sink a few hours or overnight to work.
Sodium hydroxide. This is known as caustic soda or lye. Be extremely careful when using caustic soda on your pipes. It can cause some nasty burns. Also, it can damage some types of lines, so be sure to read and follow the directions on the package.
Bent wire/hanger. If the problem is hair stuck in the trap just below the drain, then using a bent wire of coat hanger with a hook, in the end, can help to fish out the hair and clear the drain. You can also use a coat hanger if the problem is a foreign object.
Boiling water. If the problem is grease or another buildup on the sides of the pipe, then pouring boiling water down the drain can clear it in some cases.
Vinegar. Vinegar can help to clear grease or other food particles. One popular method is to pour baking soda down the drain first and then follow with vinegar. The fizzing action can remove the clog. You might have to do this several times for it to work.
Dish detergent. Pouring straight dish detergent down the sink and allowing it to sit in the sink for a few minutes can clear some clogs, especially if the problem is grease.
Bathroom sink vs kitchen sink:
The location of the sink might be a factor in determining which method to try first to unclog a blocked drain. Determining what is causing the clog is the first step in the process.
Bathroom sink. Hair and foreign objects are the most common cause of clogs in bathroom sinks. Hair goes down the drain and can cause a clog over time. Also, items are sometimes dropped down the drain when putting on makeup or doing other personal care. In this case, the best-clogged bathroom sink drain solutions are to try to remove the offending object using a bent wire. However, sometimes, a backed-up sink can mean a clogged sewer drain. If both the sink and shower or tub are slow draining, it can be signs of a sewer drain problem.
Be sure to keep all aspects of your bathroom clean, including the sink / Source: chrome projects
Kitchen sink. The most common type of kitchen drain clog involves grease or food particles that have slipped down the drain. For this type of clog, trying to dissolve the offending substance is the best choice. You might try boiling water, baking soda, vinegar, or plain dish soap to clear these types of clogs. It might be noted that some commercial products are available for unclogging sinks. Still, they can damage pipes, so be sure to read the label to make sure that it is safe before using it.
Don’t let a clogged drain affect your kitchen duties / Source: W Plumbing Partners
Benefits of a hiring a professional plumber
If you have tried the above solutions and nothing has worked, then it might be time to call in a professional plumber. Here are some of the advantages.
Contact local plumbing experts
Professional. A plumber often knows exactly what the problem is right away. They have the tools and proven methods for taking care of the problem quickly and efficiently.
Knowledgeable. A plumber knows the best way to unclog a sink without damaging your pipes or causing water damage to your floors and cabinets.
Eliminates smell. Unclogging a sink by yourself can be smelly and messy. A professional can often do it without the odour and mess.
Reduces the chance of clogging reoccurring. A professional can often take measures that will prevent the clog from reoccurring. They can also give you valuable advice to help you take better care of your sink in the future.
Saves money over time. Unclogging a pipe yourself takes time. Also, a professional can often help you to avoid costly repairs in the future.
A dilapidation report is a summary of damage done to nearby buildings while demolition is being performed. Before and after dilapidation reports are standard in comparing existing or new damage.
What does a dilapidation report include?
Dilapidation reports commonly contain the following information:
Notes
Notes on the structural condition, noticeable water condition and external damage from wear and tear are essential in highlighting the beginning condition of a structure.
Measurements
The measurements of a nearby building can offer a summary of any movement that occurs once the demolition has begun.
Photographs
Pictures of crumbling concrete, water pipes in need of repair and other damages can prove that there were existing problems before the demolition occurred.
Diagrams
Making diagrams of specific areas can be used as a comparison to before and after areas of foundations, previous building inspection details and places where pictures are not possible.
Benefits of dilapidation reports
The benefit of dilapidation reports includes preventing damages to surrounding buildings. However, more importantly, other parties accusing you of damaging their property from your equipment. The reports are offered before and after a job. The facts are clear if damages have happened due to unintentional moves by your company.
Any time a contractor is bringing in large equipment or moving soil, the potential for damage is a threat. Just the vibration of motors running can cause harm to unsecured items. It is recommended that before you, or your neighbours, begin a construction project, a report of dilapidation should be ordered.
Another form of inspection is called a building works inspection report. This report is used when a project changes hands in the middle of the work. Making notes and taking photographs at the changeover and the end will provide an accurate picture of where a new contractor’s work began.
Residential vs commercial dilapidation reports
Dilapidation reports for residential or commercial properties can vary in structures and ground type. Laws are often not the same for the two different sites. Residential sites may have more personal items to deal with. In contrast, commercial areas are more concerned with structural and drainage issues. However, both are important in the claims that could be made when a job is completed.
What is the difference between dilapidation reports and dilapidation surveys?
A dilapidation survey report deals with the current condition and areas that may be prone to damage. While the damage is not visible at the time, a weakened foundation could become damaged by heavy equipment.
Only a professional commercial dilapidations assessment can provide the tell-tale signs of potential problems. Restoration of damage is also much more manageable when a dilapidation survey is available. Dilapidation reports rely mainly on the physical evidence of the before and after scenes.
Contact local dilapidation report experts
How to hire a dilapidations report expert
A dilapidations report expert will be a professional within the building trade. They must not be associated with the owners or construction company. By using a third party, a neutral, unbiased report is presented.
A dilapidation inspection is much like a home inspection where training and experience are necessary. Only a qualified commercial or residential contractor will understand the essentials of how structures and large equipment can be impacted. Your local building authority can provide you with a list of qualified individuals to perform a before and after inspection.
Once you have a list of qualified dilapidation inspection individuals, use further research to determine which one is best for your particular situation. Ask questions such as:
Are you licensed?
How long have you practised in the area?
Has your work ever been questioned?
Can you provide a list of references?
Also, get estimates on the dilapidation reports. Depending on the area and the amount of work involved, the prices will be different. For example, in Sydney, a residential dwelling by one company is $700, and a commercial property begins at $850. Be sure to compare apples to apples when getting more than one quote to get an accurate comparison of the competitors.
Dilapidation reports are not cheap. However, they are worth the time and money when considering significant repairs that could be necessary.
Trees, as with every living thing, require care and maintenance. However, there can be a lot of confusion around what trees need, especially in terms of their care. This is when an arborist steps in.
When to remove trees?
There are some circumstances that make it necessary to remove trees. Some situations in which it is the best course of action to remove a tree from your garden or yard include:
If the tree is dead, dying, or infested with wood-boring insects
If it has been planted in the wrong location or you need to remove it to construct a building
If the tree or its roots pose a threat to your property or a neighbour’s
Who should I hire to remove trees?
Removing a tree yourself can be dangerous for you and the surrounding properties. Since this is certainly not a project you would want to tackle on your own, consulting a professional is vital. Two professions –tree loppers and arborists– handle this type of removal. While the two professions share some skills, arborists have more detailed tree knowledge. Keep this in mind when considering whom to contact.
When consulting with professionals, make sure they have the necessary insurance–personal insurance and public liability at least. Get a quote from anyone you are considering as well as a clear idea of what the quote covers. Choosing someone with experience and references will save you trouble in the long run.
An arborist’s skill lies in not only the physical acts of tree climbing, pruning and branch removal but also understanding what each tree needs. Before you hire an arborist, take these four points into consideration.
1. Not all trees need pruning regularly
Pruning is necessary to ensure the healthy growth of a tree. Fruit trees, in particular, require constant pruning to deliver a high quality and quantity crop. Trees that produce large flowers, such as Magnolias and Flowering Crabapples, should also be cut back regularly to ensure that they bloom regularly. Understanding the type of tree that you have and whether or not they require an arborist is the first place to start in the hiring process.
2. If it has dead branches, get it pruned
Dead branches are a hazard to your home and its inhabitants, especially if you live in an urban area. To identify dead wood, look for branches that are completely leafless while the others around them have green leaves. Also, if your tree is deciduous, and every other branch is bare in autumn, but one branch is still clinging to its dead leaves, then it’s time to get it pruned. Dead branches can also be a sign of disease within a tree. If you’re concerned your tree has any signs of dead branches, especially ones that are large or overhanging, hire an arborist asap.
Contact local tree loppers
3. If it has fungal growth, you might have a bigger problem
Large shelf fungus, wood conchs or another mushroom like growth on a branch or the trunk of the tree can be a major problem. The fungus grows in areas of decomposition. Meaning that if you have any signs of it on your tree, the tree itself may be rotting and therefore unstable, if you see this happening it may be too late to save the tree. Call an arborist to get a professional assessment and removal before it falls!
4. Look for seasonal pricing
Summer and spring are high growth months for plant life. This means that landscapers are in high demand. Now that we’re moving into autumn, it might be a good time to look at getting some tree removal done. If you have any serious issues, either dead wood or fungus, hire an arborist sooner rather than later. If however, your garden simply needs a prune, ask about winter pricing.
Arboreal care is often confused with ‘tree-lopping.’ It is, however, a much more involved process that helps ensure your trees receive the best care they can have. Helping you maintain healthy plants or saving you and your home from disaster.
You may wonder what happens to the tree once it is out of the ground. The tree lopper or arbourist you hire will cut it down into small pieces and should be able to remove everything–even the tree stump–for you. You may choose to keep the wood for winter firewood. Or you can see whether the hired professional can turn the wood into mulch for you. You may find that mulching the tree can reduce the tree-removal cost since they won’t have to pay to dispose of the tree for you.
Even if you own your property, you will probably have to get a permit to remove a tree. Check with your local council, as it can inform you on the current rules and regulations. If your tree is classified as protected, you may find that you have to gather additional permissions before it can be removed.
While it’s true how often you change your bedsheets comes down to your own personal preference, experts suggest changing your sheets every week is the best way to keep your bed as hygienic as possible.
According to a recent poll, Australians change their sheets once every four weeks, increasing the risk of bacterial infections, allergies and skin irritations.
When it comes to our bed sheets, our sleeping spaces harbour dead skin cells, dust mites, sweat and often bacteria, so regular cleans are essential for good health and great sleep. Not to mention, the reinvigorating feeling of falling asleep between fresh and crisp bed sheets should be enough incentive to replace our sheets.
Pillows especially pick up loads of oil and dirt from your face and hair and should be changed and washed frequently. This will help avoid pimples, rashes and other unsightly skin issues on your face and neck. A weekly clean of pillowcases and a fortnightly replacement of bed sheets is recommended to ensure your sleeping area remains clean. Air out your pillowcases, pillows and quilts regularly in the sun where possible to keep bedding sheets fresh and crisp for bedtime.
Doona’s and sheets should be washed on a hot cycle fortnightly at most. The hot wash will kill any bacteria or mites that are present.
The best way to wash bed sheets
Washing your bed sheets is relatively simple by putting them through 60degree+ hot wash with detergent to kill bacteria. Ball up your bed sheets to prevent them from losing shape.
When washing your sheets, bleaching agents can weaken the fibres of your sheets so opt for a natural remedy by adding 1/4 cup of lemon juice to the wash cycle to whiten your sheets.
Clean your curtains or drapes every month by simply running the vacuum over them. Any tough spots or stains can be treated independently based on the material. Curtains and drapes can be very heavy and delicate so avoid putting them in the washing machine if at all possible. For delicate fabrics that need a thorough clean, consider taking them to a dry cleaner to ensure they are not damaged in the cleaning process.
Why do I need to clean the curtains, drapes and bed sheets?
Curtains act as dividers between outside and inside environments, absorbing and blocking the moisture and dirt that can get in through open windows and air vents. Dirt and debris from the air can also accumulate on curtains while we vacuum and dust other areas of our home. Cleaning our curtains can refresh the smell and airspace of our homes as well as increasing the lifespan of your drapes. Dust is also a health hazard and regularly cleaning your curtains can prevent the build-up of dust and protect your family’s health.
Contact local cleaners
How should I clean my curtain drapes?
How you choose to clean your curtain drapes can depend on the material. With nylon, polyester or cotton curtains, a warm and gentle wash cycle is sufficient.
Wash lightweight curtains on a delicate cycle, while heavy drapery will retain water, making it difficult to dry and air out. Bear in mind that lighter drapes made of delicate fabrics can shrink so ensure the label of your curtain is checked before washing.
Most of the dust on your curtains settles between the hems and the folds of the curtain and vacuuming from the top down can help prevent dust build up and maintain your curtains between washes. Ensure that you always vacuum on both sides of the curtain to remove dirt and dust.
Clean your curtains regularly to refresh the space and increase lifespan / Source: In Design International
Don’t wait for stains to build up on your curtains and drapes but add a little dishwashing liquid to your damp sponge and dab away at your stains.
Preventative sprays that can repel dust. A reliable home solution:
1 cup of water
1/4 cup vinegar
1/4 cup of crushed lemon or lime juice for a citrus scent
Add in a spray bottle and apply to drapes for a fresh barrier against dust and dirt.