Categories
Heating & cooling

A guide to air conditioners

As the summer arrives, a lot of people flock to stores to buy new air conditioners. If you are in need of one, all you need to know about purchasing an air conditioner is mentioned in this guide. There are air conditioners on the market to suit every budget and need. Read ahead to select the one that is perfect for you.

Air conditioning options

Air conditioners are available in a range of styles. Mentioned below are the main types:

  • Portable air conditioners: Portable air conditioners can be moved from one room to the next as per your requirement after installation. Though ideal for people who move a lot, portable air conditioners are not the most efficient and can be quite noisy.
  • Window air conditioners: These are installed in a window opening in the wall and are suitable for cooling small areas in your home.
  • Split systems: Split systems have two main components. One is the wall unit that is installed indoors and the other is the condensing unit that is located outside the home. Split systems are efficient and are available as reverse-cycle units. This means they can be used as a heater during the winter and as an air conditioner during the summer.
  • Ducted air conditioners: These are also available as reverse-cycle systems and have an option of being zoned. This allows you to cool certain areas of your home and is presently the most expensive option.

Where to place it

If you do not have a current system in your home, the first step will be to consider the placement of the unit. The first component is the exterior portion. Place it outside of the home, in a place where it does not take away from the overall aesthetics of the home and is not too loud. You are likely going to want to speak to your neighbours about placement as well. Most systems can run fairly loudly, which means you will need to consider proper placement the first time you instal it or you could be dealing with complaints about the noise.

Source: Valuez

Conditioning Efficiency

Select an air conditioner that is very efficient and that gives you maximum cooling per unit of power consumed. A good way to confirm this is to check the label of the air conditioner to see how much power it consumes. A unit that has variable speed settings adjusts the output of the air conditioner according to the temperature of the room. This is efficient because the room stays more consistent in temperature and the cost in maintaining the temperature is also reduced.

How to save money using an air conditioner

Make sure you have the right air conditioner

The first – and most essential – way to save money on air conditioning is also the simplest. You just have to make sure that you have the right type of air conditioner for your home. That means you need to find one that is the ideal size for the rooms you need to be cooled. Take into consideration all of the essential factors of the rooms – how hot they get, which direction they face, what people will be residing in them, and so on. If you put a small air conditioner in a large room (and vice versa), you’re not going to be getting all the coolness you need. Also, check the energy star rating on the air conditioner, and only look for one with a big number of stars. 

Contact local air conditioner experts

Clean your air conditioner and install insulation

Once you pick out your air conditioner, you need to perform regular maintenance on it. Change and clean the filters, and make sure the whole unit is sparkling clean. Doing this will ensure that the air conditioner will perform at peak efficiency. Additionally, you need to take a look at the insulation you have in your house. The more insulation you have, the less you’ll have to have the air conditioner on. Make sure that all of your insulation has a high ”R” rating before you put it in – you’ll be able to cut down the temperature by several degrees if you get the right type installed in the house. 

Use natural methods to cool your house

There are also several simple things you can do to cool down that don’t even involve the air conditioner. Shut the doors and turn all the lights off – you’ll be surprised at how far that goes. You can also do things like instal a verandah to help deflect sunlight, put double-glazed windows in, plant trees and shrubbery to create shade, instal ceiling fans or paint your home in lighter colours. Do all of these little things, and you’ll see big savings on your bill. 

An outdoor unit / Source: Seeto & Sons Air Conditioning

Selecting a professional installer

You could instal components of the air conditioning system yourself. However, because this is a complex system and requires expertise, it is best to turn to a professional installer instead. The right professional makes a big difference. If you choose one that isn’t as skilled, you could end up with a system that is hard to use, does not work properly, or may not be as efficient as it should be.

Look for a professional who has proper licensing and certification. He or she should have experience as well. You will also want to ensure that this provider has insurance to protect you from mistakes. Once you do this, do not just hire the first person you see. Rather, request a quote for service instead. It is a good idea to select a professional who offers a fair price for the service, but who also has outstanding references (people you can actually speak with) as well. This can help you feel comfortable allowing this person to do the work for you

Categories
Walls & flooring

How to tile a wall

Kitchen and bathroom wall tiles are a durable, long-lasting, aesthetically appealing option for DIY projects. Once you learn how to tile and get to know some basic tiling tips and tricks, laying tile can be a fun, inexpensive DIY project that enhances your home’s appearance. Once you learn how to tile a bathroom or kitchen, there are many kitchen and bathroom wall tile ideas you can try that improve the feel, function and value of your home. Tiles come in so many styles and colours, meaning your design options are endless.

How long does it take to tile a room?

Several factors determine how long it takes to tile a room. The room size, type and style of tiles used, and the complexity of the design you want to create all play a role in determining how long tiling a room takes. Additionally, whether you have experience tiling or not will affect the time it will take to complete a project. It will take most people a couple of days to complete a tiling job due to the preparation and drying time required.

Tiles make a great splash back for kitchens / Source: Aahil Tiling and Stones

Materials and tools

There are several tools you will need when retiling a bathroom or kitchen wall, floor or counter. They include:

  • Bucket
  • Sponge
  • Spirit level
  • Tape measure
  • Pencil
  • Tile levelling support 
  • Tile cutter – almost every tiling job will require cutting some tiles to size and shape you need.
  • Adhesive mixer
  • Tile nippers – this is a hand tool used to cut off small pieces of tile so they fit in tight spaces.
  • Cross spacers – cross-shaped tile spacers are used to ensure the tiles are placed an equal distance apart. Tile spacers help keep grout line straight and give tile work a professional-looking finish. 
  • Notched trowel for wall and floor tiles – this lets you control small amounts and thickness of the adhesive attaching the tile to
  •  the wall or floor will be.
  • Small gauging trowel – Use for mixing small amounts of quick-setting drywall compound or mortar.
  • Grout float – This is used for spreading and pressing grout between the tiles.
  • Angle grinder and a diamond cutting blade – This is used to grind or cut angles into the tile to fit into odd-shaped spaces.
  • Drill and diamond-tipped drill bit
  • Tile wet saw

How many tiles do I need?

To calculate the number of tiles you for the job, measure the length and width of the area you will be tiling. Multiplying those numbers by each other give you the area’s square meterage. Add 15% to cover cuts, waste and broken tiles. Divide the area’s total square metres by the square metres covered by the tiles in a box of the tiles you choose. This will tell you how many tiles you need. 

How to tile a wall

  1. Prepare the surface: clean the surface thoroughly. Remove any adhesives or coatings and ensure the wall, floor, or countertop is smooth. 
  2. Make measurements and markings: measure the wall to be tiled. Place a tile at the top of the wall and put a mark directly underneath it. Then place another tile below the mark and draw a line on the wall where it ends. Repeat this process until you get to the bottom of the wall. If the space between the last row of tiles and the floor is too small for a full tile, measure the distance. That’s the size to which you will have to cut the last row of tiles.
  3. Prepare the tile glue: whether you are using a pre-mixed paste adhesive or a cement-based tile adhesive, follow the instructions for preparing it outlined on the package. This ensures the tile will remain firmly affixed to the wall. 
  4. Lay the first row: thoroughly cover the back of a tile with adhesive and push it into the wall’s top left-hand corner. Make sure it is straight and lines up with the mark and the grid pattern you made on the wall.
  5. Check it is level: using a spirit level is a fast, simple and easy way to ensure each of the tiles you install is straight and level. Simply hold the spirit level up against the bottom of the tile.
  6. Continue laying rows: once you are sure your first row of tiles is straight and level, put in tile spacers and match each new tile to the one above it. The tile spacers will keep an even space between each row of tiles. 
  7. Cut and lay the corner tiles: Draw the cut lines on top of the tile and then cut off the excess with the tile cutter. Do a dry fit with the tile. Using a notched trowel, thoroughly butter the tile’s bottom with a thin set of the adhesive and press it into place.

Contact local tiling experts

How to grout a tile wall

Put a little water and some grout powder in a clean bucket and mix it until it has toothpaste consistency. Use a grout float to the spread the grout on the tiles in a diagonal motion. Make sure all the joints are filled with grout. When the grout starts to set, use a damp sponge to clean the tiles’ excess grout. 

How to tile over electrical outlets

When installing tiles over electrical outlets, turn off the outlet’s power. Outline the electrical outlet’s exact size and shape on the tile with a pencil using a tape measure. Use a clamp to fasten the tile on to a piece of plywood. Using a drill with a diamond-coated bit, drill a hole on each of the 4 corners of the lines drawn on the tile. Using a saw, plunge cut from one hole to the next. Remove the cut section of tile. Use tile nippers to clean off and smoothen all rough areas. Add adhesive to the cut tile, put it in place over the electrical outlet and let it dry.

A tiled feature wall in a shower / Source: Mrg Tiling

Can you tile over tile?

You can put new tiles over old ones to save time, money and hassles when retiling. However, don’t do so if the existing tiles are loose, lifting, damaged, or uneven. Even if you have the best tiles for bathroom walls, the new tiles will have all of the same problems. Plus, they may not adhere properly to the old tiles, and the added height can prevent cupboards and doors from opening and closing correctly. 

How to hire a tiler

Tiling a wall or an entire room can take some time and requires a lot of attention to ensure it is straight and neat. It might be worth your time to hire a professional tiler to get the job done to make sure the finished product is of high quality.

Licencing and qualifications

When hiring a tiler, make sure to research that they are properly licenced and qualified. It’s also a good idea to ask friends and relatives for some local tilers’ names with whose work they are familiar and impressed.

Categories
Bathroom & laundry

Installing a new shower base

There are many reasons why you may need to install a new shower base in your home. Perhaps your old one has become cracked, stained, or you are doing a bathroom remodel. Shower pan installation is one of the more straightforward plumbing jobs you can do. A new shower base can be the lift that your bathroom needs to make it feel like new again. This article explores how to do it yourself. 

Benefits of updating your shower base

If your shower base is leaking, the benefits of installing a new one are apparent. If your old concrete shower base has become cracked or damaged by water, you may need to install a new one to protect your floors and your home’s structural components. Even if that is not the case, there are many other reasons why you may want to install a new concrete shower base and replace your old shower pan. Some older shower bases were made to be shallow. You can replace your older model with a deep shower base that will help do a better job of keeping your floor from getting wet. A fibreglass shower base is a durable choice, especially when properly installed on top of concrete.

Source: Architest

Is it easy to DIY a shower base installation?

A DIY installation is easy, but it does involve some concrete work and some minor plumbing work. A shower base replacement is an easy task most of the time, but if your old plumbing is in the wrong place, the job can quickly become complicated. If you do not follow the instructions properly or are inexperienced, it can result in an improper installation. This can cause major leaks and potentially cause structural damage to your home. It is best to make sure that you understand the entire process before attempting to do it yourself.

Materials and tools

If you are going to install a shower base yourself, there are quite a few materials and tools that you will need. This list assumes that all of the old plumbing fits the new shower base, and no extra plumbing work is required. A licenced plumber must handle anything beyond the minor plumbing work needed to be done in these instructions because of proper venting and local building requirements. Here are some of the things you need to have on hand before you start the job.

  • Drill with a mixing attachment 
  • Bucket
  • Trowel
  • Measuring jug
  • Spirit level
  • Sponge or cloth for wiping excess cement and adhesive
  • Bag of premixed sand and cement or subfloor levelling compound
  • Adhesive recommended by the manufacturer
  • Access to clean water
  • Shower drain flange 
  • Gasket and drain screen 
  • The new shower pan 
  • Hole saw
  • Caulk and Sealant

Contact local plumbers

How to install a shower base

  1. Make measurements: You need to make measurements to purchase a shower base that will fit into our space. Before you set out to the hardware store, you will need the area’s overall dimensions, and it is a good idea to know where the drain is located. You should select a shower base with a drain that matches the old one. Otherwise, you can be in for some extra plumbing work.
  2. Cut holes in the floor: The first thing you will need to do is cut a hole in the floor for the plumbing to come through. If you are fortunate, the old hole will line up and, and you can skip this step. If you need to do this, place the new shower base into position and check to see if the holes line up. In case they do not line up, use a pencil to mark the shower drain location. Cut a hole in the subfloor. Do not make the hole too big. 
  3. Cut recesses: You might need to cut recesses into the studs to make the new shower base fit. If you are not an experienced carpenter, you need to be extra careful so that you do not destroy the integrity of the wall. 
  4. Mix cement: Now, it is time to create a solid base for your new shower pan. If you are installing a shower base on concrete floor foundation material, you will not need to place additional concrete on top. You can use a subfloor levelling compound and adhesive to glue the shower pan in place. If you are installing on a wood floor, you need to mix cement according to the directions.
  5. Lay the concrete: Lay the concrete base according to the directions. Make sure it is as smooth as possible, and be sure to make it the recommended thickness. The cement base should be smooth and level. Allow the concrete to dry and cure for the time recommended in the directions. Ensure the concrete base is completely dry before installing the new shower base on top of it.
  6. Install the shower base: Installing the shower base requires an adhesive recommended by the shower base manufacturer. Apply the adhesive and install the shower base on top of it according to the directions. Make sure to line up the drain holes and use a spirit level to ensure that it is not installed at a slant.
  7. Insert nogs: Place the rubber gasket so that it is seated properly around the drain pipe. Reinsert the drain, fittings, and screen. It is a good idea to test the shower drain to make sure that it does not leak. Allow the adhesives to dry for the recommended time, and the job is now complete.
  8. Waterproofing a shower base: Once the adhesive has cured, and you are sure that there are no leaks, you can seal around the new shower base with caulking to provide a waterproof seal. 
Source: Dell’arte

How to hire a shower installer 

This article outlined the simple version of the installation process. Along the way, you can run into issues like plumbing that needs to be rerouted or structural work that needs to be repaired. If you do not get the foundation level and smooth, the new base will not function properly. As you can see, it is possible to do this job for yourself, but this is one instance where it might be wise to hire a professional from the beginning.

Licencing and qualifications

At the bare minimum, a plumber must meet state and local licencing requirements. You will want to find someone who is experienced and has a solid reputation for this type of job. You might also need the services of a tiler, electrician for shower lighting, or a carpenter. Shower base installation is usually performed as part of a bathroom renovation. Some contractors have all of the licencing to do the entire job, while others will need to hire a subcontractor. Make sure that everyone who will be working on your new shower and shower base has the proper qualifications to do the job right.

Categories
Construction

How to build stairs

If you are planning a DIY deck project, one of the most important parts is building the stairs. Maybe you need to add a short set of steps to reach your back door or a shed. These are projects that you can accomplish yourself, but most of the time, stairs on the inside of the home must be constructed by a licenced contractor. If you are thinking about building a small set of steps for your landscape or outdoor project, this article will help you understand the process.

How easy is it to build steps for a deck?

The answer to how easy is it to build steps for a deck is that it is a manageable process, but some parts of the process require time to get right. Outdoor timber steps are a relatively easy project as far as materials and carpentry skills are concerned. You can always purchase ready-made outdoor steps and attach them to your deck with minimal skills. The most challenging part of how to build steps for a deck is getting the steps level and the proper height. You want to make sure that they are easy to get up and down and do not slant and cause a tripping hazard.

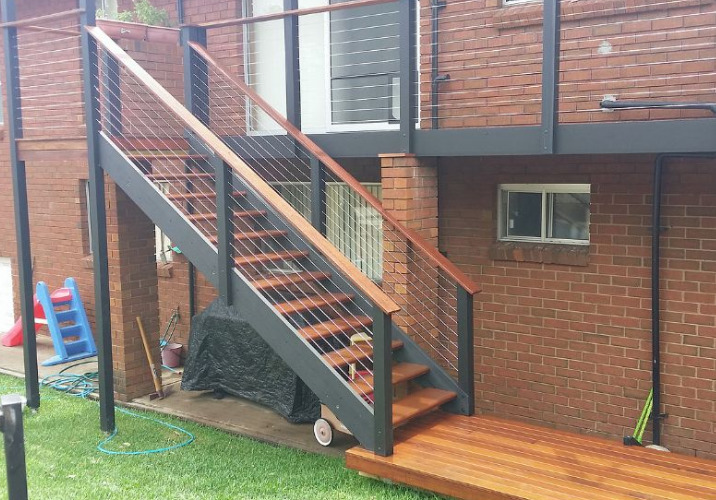
Stairs leading a second level / Source: Mitroteam Projects

What is the standard rise and run of stairs

Before beginning the process, make sure to check your local building codes, because even for a short set of outdoor deck stairs, some areas have strict regulations. The first thing that you need to know about how to build external timber stairs is the standard stair step height that is required. 

The first thing you must do is calculate the proper rise and run for the stairs. This is the most crucial part because it will affect the staircase’s stability and overall usability. The rise is the total height of the stairs from the ground. The run is how far out the stairs will need to go to create stairs that are not too steep and difficult to navigate. The height of each stair is a function of this calculation.

Materials and tools

Here are some of the basic materials and tools you will need to complete your staircase construction. Keep in mind that DIY stairs will require some basic carpentry tools, and purchasing the proper safety equipment is always a must. Make sure that you have all of the required tools and materials on hand before you begin your project.

  • Tape measure and carpenter’s pencil
  • Carpenter’s square
  • Spirit Level
  • Cordless drill and decking screws
  • Circular saw or hand saw
  • Clamps 
  • Lumber for the stringer, treads, and risers
  • Bracket designed to attach the stairs to the deck, house, and flooring 
  • Paint and approved outdoor sealant 

How to build deck stairs

Now that you have your materials, it is time to begin constructing the stairs. 

  1. Calculate the stair rise and run: The first thing you need to do is calculate the stair rise and run. You need to determine how many steps you will need to make the stringers carry the treads and risers. First, measure the total height that the stairs will need to cover. This will be measured from the ground or flooring to the deck’s top board. The standard step height is between 16.5 and 20.3 cm. The best step size for stairs is 17.7 cm on average. Divide the height of the rise by this number. This will tell you how many steps you need. The tread’s width needs to be no less than 22.8 cm so that your entire foot can fit on them. Multiply the number of stairs by the tread width, and this will give you the run of the stairs. This is the length the stairs will extend from the deck or home. 
  2. Measure and cut stringers: Once you have these measurements, it will allow you to cut the stringers accordingly. You will need to accommodate for at least 22.8 cm horizontally, and the stairs’ height. This template will look like a sawtooth pattern. It will have a place for you to attach the treads and risers securely. It is important to make sure that your cuts and measurements are accurate. Otherwise, your stairs could have a slant, which could cause a tripping hazard. This is the most critical part of the building process.
  3. Install stringers: The first thing that you need to do is to securely attach the stringers to the house or deck and the flooring or ground. If you are attaching to the ground, you will need to get brackets that hold H3 CCA posts. Special brackets will also be needed for attaching to wood or concrete surfaces. 
  4. Install risers: Next, use decking screws to attach the risers to the stringers securely. When installing the risers, make sure that everything is flush and secure. Countersink all of your screws to make sure that none of the heads stick out and can snag on clothing or shoes.
  5. Install treads: Installing the tread is a step that requires special attention. They should be securely attached with decking screws and countersunk, just as with the risers. Even if you accurately cut the stringers, it is still a good idea to double-check each tread as you install it with a spirit level to make sure that it is flat. Make sure you know how to level stairs before beginning this step. 
  6. Attach trim boards: Now, you can attach the trim boards and give your project a finished, professional look. 
  7. Varnish and seal: The final step is to varnish and seal the decking. Make sure to use a product designed for exterior decking. You should also choose one that will not cause slipping or become slippery when wet. Installing grips to the treads can help prevent a tripping hazard. Now, your deck stairs are ready to use. 

Contact local decking experts

How to build interior stairs

Building interior stairs uses a similar process as building outdoor stairs for decks. In some houses, the rooms’ size and way out may make the calculations trickier than for outdoor deck stairs where you have plenty of space. The process is similar, but building codes and stair dimensions are different for the house’s interior than for the outside. Most inside stairs require a licenced contractor for the job. 

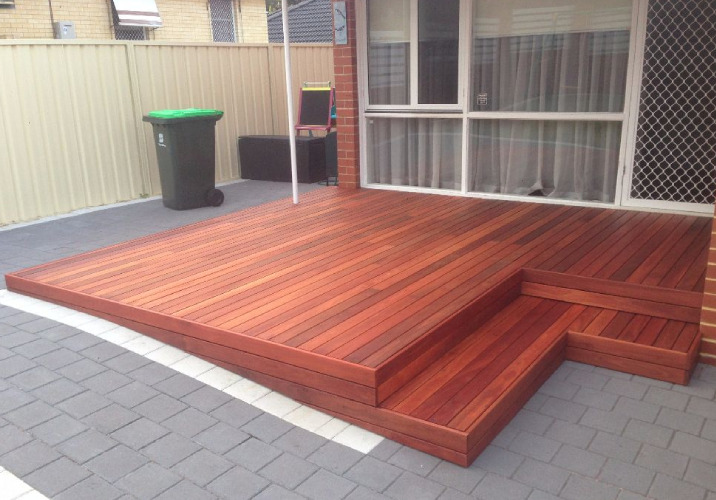
A simpler project / Source: Quality Timber Decking

How to hire a builder

As you can see, building a set of stairs looks like an easy process, but it is quite complicated. Suppose you get the calculations wrong or miscut one of the stringers. In that case, you can end up with a set of stairs that is a hazard, look unattractive, and that could land you fine if the inspector happens to see them. Safety is the most important consideration when building a set of stairs, so if you do not have the experience or knowledge to do it right, this is one job that is better left to the professionals. 

Licencing and qualifications

Your contractor must have a carpenter’s license and a general contractor’s licence to complete the job. Some locations have special requirements that must be met. It is up to you to make sure that you hire a contractor who is licenced and qualified to complete the job properly so that your stairs will be safe for you and your family.

Categories
Bathroom & laundry

How to install a shower screen

Installing a shower screen is an easy way to give your bathroom a luxury upgrade. Several types of shower screens are available, including frameless, framed, semi-frameless, sliding doors, and pivot doors. Installing them is an easy job that can give your bathroom the uplifting change it needs.

How easy is it to DIY a shower screen installation?

Shower screen replacement is a relatively easy installation process. The most important consideration is that if your shower is recessed inside a wall, you must get one that perfectly fits the opening. Otherwise, you could be in for some construction. If your shower is tucked into a corner of your bathroom, or you already have a free-standing shower screen, the process is relatively easy. The process involves removing the old shower screen, putting the framework and screen panels in place, and waterproofing them. 

Shower screen options

With a quick search online, you can find many shower screen ideas and options. Fully-framed shower screens are a popular choice for bathrooms of all sizes. This type consists of glass panels that are supported by an aluminium frame. They are a budget-friendly choice and have a clean, modern look. 

Frameless shower screens are sleek and minimalist in their design. This choice features glass panels supported by minimal hardware. They are excellent for small spaces and give the bathroom a high-end, luxury look. You can also choose semi-frameless shower screens, which are between the framed and frameless types in terms of the frame’s visibility. 

Sliding door shower screens are an excellent space-saver and a practical solution for small spaces. The doors slide along tracks that are easy to install. Pivot door shower screens open just like a standard door. They are an excellent choice if you have the room. Bi-fold doors and quadrant shower screens are also available. As you can see, you have many choices when it comes to designing your bathroom the way you like it and options for all sizes and shapes of spaces. 

A new shower screen will help to modernise the space / Source: River City Constructions

Materials and tools

Before you get started on your DIY shower screen installation, you will need a few items first. 

  • Shower screen of your choice
  • Nylon wall plugs
  • Shower screen gap filler or bathroom silicone
  • Marker
  • Caulking gun
  • Drill
  • Hammer
  • Impact driver
  • Large spirit level
  • Measuring tape
  • Pop rivet gun
  • Screwdriver 
  • Trimming knife
  • Clear setting blocks
  • aluminium water stop
  • Sealant (Bostik or other known brands)
  • Gloves
  • Safety Glasses

If you purchased a pivot door type screen, you would also need shower screen door pivot hinges if they are not included in the kit. Before you head out to the hardware store, make sure that you know how to fit a shower screen to your existing shower base. The shower screen should fit just inside the lip of the shower base.

How to install a shower screen

Here are the basic steps for installing a shower screen that applies to any shower screen that you purchase. The main difference between installing a frameless or shower screen with a door is that you may need to install hinges or a sliding track according to the manufacturer’s directions. 

  1. Clear the area: The first step to installing a shower screen is to remove the old one and clear the area. You will want to start with clean, dry surfaces. Assemble all of your tools, and layout the hardware according to size and shape. Ensure that you have the correct numbers of hardware for each step according to the screen installation directions.
  2. Attach channels/brackets to the wall: The next thing you need to do is mark the brackets’ position and channels on the wall and floor. Use your spirit level to make sure everything is straight and square. Also, make sure that the bottom channel fits inside the shower screen base’s bottom lip. Next, you can use the mounting hardware to install the channels and brackets. Make sure to do this in the order recommended by the directions, and make sure they are straight and level. Otherwise, the grass may not fit inside correctly. 
  3. Position and attach the hinge: Next, you should attach the hinge to the frame or glass panel according to the directions. The type of attachment will depend on whether you chose a frameless, framed,semi-frameless, or shower door as your screen. 
  4. Install each panel one at a time. Once the hardware and hinges have been installed, it is now time to install each glass panel. It is recommended that you start with the ones next to the wall first and work your way out. Glide each panel slowly and carefully into the channel and secure it in place with the appropriate hardware. The next step is to install the glazing seals and secure them in place.
  5. Install the support bar. The final step of the construction process is to install the frameless shower screen support bar. 
  6. Seal with silicone. Once all of the framework and glass panels are installed, it is time to waterproof it by sealing it with silicone. When waterproofing a frameless shower screen, you should only run a bead of sealant along the outside of the shower door. Make sure that it is smooth and pressed smooth inside the seams. You can clean up any excess with a damp cloth before it dries.

Contact local bathroom experts

How to apply silicone on shower screen

1) Make sure you buy the correct type of silicone. Some silicones are designed specifically for bathrooms so make sure you check the packaging before you buy. You should also make sure that there is enough sealant available as most jobs will require more than what comes in one tube of silicone.

2) Prepare the area first by removing any soap scum, grime, or previously applied silicone from around where you’ll be applying the sealant. 

3) Before making any cuts with your knife or scissors it’s important to test fit each piece of trim around your shower screen frame several times because once cut, there’s no going back! Take into account any drains at this stage too as it’s easier to move them slightly if necessary than having them in a fixed position during installation later on down the line which might cause unwanted problems.

How to remove a shower screen 

Before installing your new screen, you need to remove the old shower screen. To do this, loosen the hinges on the door and remove the glass door panel. Next, you can slide the glass panels carefully from their channels. Once this is complete, you can loosen the screws and fasteners from the top, sides, and bottom of the old shower screen. Ensure the area is clean, and you are now ready to install your new one.

Source: Newman Homes and Renovations

How to hire a shower installer 

Frameless shower screen installation can be an easy process, but handling the big glass panels and getting the framework straight can be challenging for someone inexperienced. The process itself is not complicated, but getting everything flush and secure is the most difficult part. Also, handling the large glass panels can be challenging for those who are not familiar with the task, and there is always a chance that you could break them. Installing a shower screen yourself will probably take more time than if you have a professional handle the job. 

Licencing and qualifications

Before hiring a shower screen installer, it is important to check their licencing, qualifications. It would be best to ask for references or pictures of jobs they have done. In Australia, shower screen installation must be done according to building codes and regulations because it is a wet area of the house. 

The installer must follow waterproofing regulations, floor waste regulations, ventilation regulations, electrical regulations, and other local and state regulations that may apply. In most cases, any bathroom renovations must be carried out by someone who has the proper state licence to do it. These requirements differ by state, and you need to make sure that your professional is licenced to work in the state where you live.

Categories
Outdoor living

How to build a backyard chicken coop

Chickens are an excellent addition to a small farm or backyard in areas where they are allowed. Before your poultry journey begins, you need to construct a chicken coop and chicken enclosure, or chicken hutch, to keep them safe and happy. This is a project that you can do yourself, or you can hire a professional. This article will address the basics of building a chicken coop using the DIY route.

Benefits of having chickens

The benefits of owning backyard chickens go beyond the eggs. If you are a gardener, chickens and a produce patch are the perfect combination for many reasons. Chickens provide a natural fertilizer that helps promote foliage and fruit set. They also forage in the garden picking insects off the leaves without harming larger plants. Chickens are also the perfect way to dispose of surplus vegetables or that slightly overripe apple or banana. Chickens are also fun to watch and make wonderful pets. 

DIY chicken coop ideas

If you have decided to add chickens to your backyard, the first thing that you will need is a chicken pen. You can find plenty of chicken coop ideas online that are both practical and creative. Backyard chicken coops come in many shapes and sizes. 

One of the primary considerations is where you plan to place your chickens. They should have access to some sunshine and some shade throughout the day, but they should also have a secure place for nesting and sleeping at night. The minimum requirements are two to three square metres per chicken inside the coop and four to five square feet per chicken outside. These are the minimums, but your chickens will be happier the more room you can provide. When building a chicken coop, keep in mind that chickens will fight in a crowded area, just like us. 

Chickens are very beneficial animals to have as pets / Source: KC’s Pets At Home

Materials and tools

There are many different ways to build a chicken coop, including easy to build chicken coops that come in a kit. If you are doing it from scratch, you can decide on a wooden chicken coop, aluminium chicken coop, or use some other material. The plans and this article are for a simple chicken coop made of wood that anyone with basic carpentry skills can complete. 

  • Tape measure and carpenter’s pencil
  • Carpenter’s square 
  • Hammer and nails 
  • Cordless drill and screws 
  • Spirit level 
  • C-clamps or bar clamps
  • A retractable knife or utility knife
  • A circular saw or hand saw
  • Outdoor timber framing
  • Marine-grade plywood 
  • Treated fence panelling or other material for the outside of the coop
  • Treated H3 CCA fence rail
  • Fence mesh
  • Wire mesh panel
  • Hinges and door latches 
  • Chicken coop plans

How to build a chicken coop DIY

If this is your first time building a coop and you do not have a lot of experience with these projects, it might be best to purchase pre-made plans.

  1. Cut all the required timber: The first thing you need to do is cut all of the required lumber to the proper size. Make sure to do this carefully and follow all safety precautions. To ensure precision, measure twice and cut once.
  2. Assemble the side and back supports: You may choose to use posts set in concrete to do this. If you do not, make sure that the posts are secure and that the soil around them is compacted. You can also purchase special brackets specially designed for this purpose.
  3. Assemble the roosting box: Hens typically do not sleep in the same place as they lay. Also, roosters need their own space within the coop. The roosting box typically consists of four wood pieces that are nailed or screwed together, forming a square.
  4. Assemble the nesting box: Hens need a special nesting box to lay eggs and brood chicks. Constructing the nesting box is similar to constructing the roosting box. 
  5. Attach the outdoor area: Now it is time to attach the wire mesh to the outside of the coop and create the outdoor daytime area. When doing this, pay extra attention to ensuring that it is secure and will keep predators and rodents out. 
  6. Assemble and attach the walls: Now, you can connect the side walls recording to the plans. Make sure to close any gaps so that the coop will be protected from the weather and keep pests out.
  7. Cut and attach the flooring. Cut and attach the flooring to the floor joist assembly. One tip is to attach hardware cloth to the flooring’s underside before laying it down. This helps to prevent rodents and small predators from getting into the coop. They cannot chew through the hardwire cloth, but they will try to chew through a hardwood floor. 
  8. Create and assemble the door: Now it is time to assemble the door and attach it to the coop with hinges. 
  9. Cut and attach cladding: The main coop area’s last step is to connect the outside cladding. Once again, using a hardwire cloth on the inside will help secure the main coop area from rodents and pests.
  10. Install ramp and chicken wire: Although most chickens can manage short flights, many require a ramp to get into the coop. You should make sure that it is non-slip, not something that they will not try to peck and swallow, and it must have steps made from boards attached to the plank to prevent slipping.
  11. Create and attach the roof: The last part of the major construction is to attach the roof. Make sure to use roofing felt and either shingles or aluminium roofing materials. 
  12. Create and attach a nesting box roof: The final touches include attaching a roof to the nesting box. Hens like to feel like they are in a cozy, secured area. They should have enough room to stand up and move around, but most of the time, they will only be in this area for a short time while they are laying eggs unless they are brooding. 
The more space chickens have the better / Source: Shutterstock

How to hire a builder

As you can see, even though building a backyard chicken coop looks like a simple process, there are many steps. You must have some basic carpentry skills and knowledge to be successful. Sometimes, it is less hassle and can be cheaper to hire a professional who knows how to do it right.

Licencing and qualifications

Unless you are running electricity or plumbing to the chicken coop, most chicken coop builders only need a general construction licence or carpentry credentials to do the job. Call around and get several quotes before hiring a contractor. It would help if you also read reviews or ask for photographs of their finished projects. 

Categories
Gardening & landscaping

Grow your own frangipanis

Frangipani trees are not only beautiful, but they also smell absolutely delicious as they start to flower into spectacular shades of red, maroon, pink, orange, yellow and white. Best of all, they’re perfect for a wide variety of hot, dry climates because they’re not vulnerable to fire or drought. They can also grow in difficult soils, such as those with high salt content. If you’d like to grow your own frangipani trees, here are the basics you’ll need to know.

How to get cuttings

Frangipani trees are typically grown from cuttings that can be culled from woody or herbaceous stems, as well as from softwood, hardwood and semi-hardwood sections of the tree. In order to take a cutting, you’ll need to use a tree that is in very good health. Frangipani sap can irritate and burn skin, so use gloves while cutting. 

Cuttings taken in winter or the plant’s dormant period will do much better than clippings taken at other times of the year. It should be a healthy adult tree that has plenty of trimmings to spare. Cut a branch that is about 20cm long. Once you have it, leave the cutting in a cool, dry place for at least a week to make sure the end is completely dry. The cutting can’t be in contact with soil, water or anything else or it won’t dry properly.

How to plant the cutting

Once the frangipani cutting is completely dry, it’s time to plant in into a pot. Make sure the pot is filled with free-draining potting mix, or even sand because this type of tree does not like to have its roots in standing water. The pot should be elevated from the ground a little bit so that the airflow extends all the way around the plant. You can plant right into the soil if you like but if you do so make sure the plant gets full sun throughout the day as it will require a minimum of six hours of direct sun daily. Keep the soil warm by using mulch but don’t allow the mulch to cover the cutting itself.

Frangipani trees thrive in well-drained soil with a slight acid content, so try to maintain a pH measuring 6.1 to 6.5. While they grow well in most soils and climates, frangipani trees greatly prefer hot temperatures and don’t thrive in areas where there’s severe frost. If you live in a cold climate, plant your tree in a pot and keep it indoors during the winter.

Source: Shutterstock

Use water sparingly

Frangipanis can’t take much water. While you might want to give the cutting more and more water to make sure it will take root, this will actually hurt the cutting. Water the cutting only once every few weeks — it shouldn’t need more than this. Over the next few weeks, you should begin to see roots developing, and the tree will begin to grow.

Moving the frangipani

Once your frangipani tree has grown roots into the potting mix, it’s a good idea to transplant it into a bigger pot of into a garden if you did not initially plant into a garden. Be careful while transplanting the cuttings, however, as the fragile roots can be easily snapped.

Contact local experts

Maintenance

During cooler months, frangipani trees need to stay dry, but they can be watered regularly during warmer seasons. While your frangipani is growing, enrich the soil with organic fertilisers that have high levels of potassium, phosphorus and nitrogen, and add compost, fire ash and animal manure for maximum benefit. If your frangipani is potted, enrich the soil with a potting mix containing one-third sand, as well as a slow-releasing fertiliser.

Frangipani leaves are susceptible to moulds, rust and fungi. If these occur, apply fungicide sprays containing a solution of white oil and copper. Detergent or white oil mixed with milk powder also helps prevent powder-like mildew and rust. By nourishing the tree, you’ll help prevent disease and infection.

Frangipani trees thrive when they’re pruned, so prune and shape them regularly. If the branches are dense and crowded, prune them to a half or a third of their length. These branches will then sprout extra shoots from the pruned ends. To avoid these extra shoots, prune all the way back to the main trunk. This way, the tree won’t develop any more branches in that area.

If you aren’t an experienced gardener or you need a bit of advice concerning your frangipani trees, call a gardening business or landscape gardener for assistance. By giving your frangipani trees the care and maintenance they need, you and your family will be able to enjoy them for generations.

Categories
Roofing

Keep your solar panels clean

Benefits of solar panel cleaning

There are several benefits of cleaning your solar panels. The most important benefit is ensuring they can generate the maximum amount of power possible. Plus, regular solar panel cleaning and solar panel maintenance can expand the functional lifespan of the solar panels. Clean solar panels absorb more sunshine than dirty ones and function more efficiently. Therefore, you’re able to save more on energy bills, helps maintain the manufacturer’s warranty and enables you to get more out of your investment. That’s true even if you do the solar panel cleaning services yourself.

How often to clean solar panels?

Research shows solar panels provide optimal performance when cleaned twice a year. Many experts recommend solar panels be cleaned in spring and Autumn. How dirty solar panels get due to environmental factors determines how often you should clean them. If you live near the sea, near lots of construction dust, automobile exhaust, leaves, bats or birds, you should regularly check the solar panels to see if they need cleaning. However, be aware excessive cleaning can scratch solar panels and reduce their efficiency.

Solar panels before & after cleaning / Source: Kleen Genie

Materials and tools

Very little solar panel cleaning equipment, supplies and tools are required to clean dirty solar panels. They are:

  • A good quality soft brush: This will be used to safely and carefully remove dust, debris or anything else a water hose cannot wash off the panels. 
  • Squeegee:  One side of the squeegee should have a plastic blade, and the other side should have a cloth-covered sponge.
  • Hose: The combination of water, a soft brush, a mild detergent and the squeegee should be enough to get the panels clean. 
  • Very mild detergent: This is an optional item some people use to help remove dirt and grime that cannot be removed with water and a soft brush alone. 
  • Distilled or de-mineralised water: Some people use distilled or de-mineralised water to clean their solar panels to help prevent streaking. De-mineralised or distilled water can produce a spot-free finish which is more resistant to dirt and grime, provides a better result and has a longer-lasting impact. 

Contact local roof cleaners

The best way to clean solar panels

Finding the best method for cleaning solar panels on the roof is very important. Solar panels are exposed to lots of environmental pollutants and must be kept clean in order for them to provide optimal performance. The following steps outline the best method for cleaning solar panels on the roof safely and properly.

  1. When to clean solar panels: If your solar panels are dirty, it’s best to clean them early in the morning on a day when it is overcast. In cooler months, clean the solar panels in the evening. The key reason for this is cleaning solar panels when they are hot can damage them. Plus, the hot sun can make cleaning products dry on the solar panels too quickly and leave grease and residue on them. 
  2. Shut off the system: When you are going to clean solar panels, you first have to shut off the system. This stops electricity from flowing and makes it safe to make contact with them to do the cleaning. You can also have an accredited professional Clean Energy Council certified technician check the panels for discolouration, cracks, chips or other obvious defects. They can also safely make sure all cables and fittings are securely attached before starting to use your solar panel cleaning equipment.
  3. Brush off any debris: Once the system is safely turned off, use a soft brush on a long pole to brush off as much dirt and debris as you can. In many cases that’s all it takes to get the solar panels clean. A soft brush is the best brush for cleaning solar panels because it will not scratch the glass surface.
  4. Scrub with water and a brush: If after you have gone over the solar panels with a soft brush there is dirt or grime, it’s time to add a little water. Aim the hose at the front surface of each solar panel and scrub it using the water and the soft brush. If some dirt and grime remain, you can add a little of the very mild detergent and scrub with the soft brush and the side of the squeegee with the sponge to clean all the grime off each solar panel. 
  5. Rinse: Once the dirt and grime have been carefully removed, rinse the panels using the water hose and dry them with the squeegee. Make sure you only put the water on the solar panels’ top surface. Don’t spray water on the back of the solar panels or in gaps between the roof and panels. This can damage the system. Ensuring the panels are dry prevents hard water mineral build-up on the glass. Regular solar panel cleaning services is an important part of proper solar panel maintenance. 

How to clean solar panels from the ground

People often ask does cleaning solar panels make a difference, and the answer is yes! However, when you are cleaning your solar panels yourself, the safest way is to stand on the ground and use a hose and a squeegee with a very long handle. Cleaning the solar panels while you are standing on the ground is safe and comfortable. Spray the panels with a water hose. Use a soft long-handled brush to remove loose dust and debris and the sponge to scrub off stubborn grime and residue. Then rinse off the panels and dry them with the squeegee. 

Clean solar panels / Source: JFK Electrical

How to hire a solar panel expert

Hiring a solar panel expert is a simple and straightforward process. You can ask your relatives, friends, neighbours and acquaintances who have solar panels for recommendations. However, you have to make sure they have the proper licencing and qualifications.

Required licensing and qualifications

To be able to install photovoltaic systems in Australia legally, a person needs two crucial documents. They are an electrical licence as well as Clean Energy Council Of Australia accreditation. They can also work as a solar panel installer if someone with an electrical licence supervises them. Property owners only qualify to get rebates from the government if the solar panel installer is CEC accredited.

Categories
Plumbing

DIY: How to fix a leaking tap

Whether it is your kitchen sink, bathroom sink, or shower, a dripping tap is more than just an annoyance. It can cost you money. Sometimes, a drip is obvious, but it might be dripping so slowly that you never notice it. 

 If your sink or shower is never dry, even after long periods of non-use, you probably have a dripping tap. A sudden increase in your water bill could also signal a leaky tap. One faucet dripping three times a minute wastes 1 litre of water per day, and that can add up quickly on your bill. This should be an incentive to get it fixed quickly. 

Different causes of a leaking tap

Several things can cause a leaky tap, including: 

  • Improper installation
  • Water pressure problems
  • Corroded valve seat
  • O ring problems
  • Faulty tap washer

If your problem is one of the first three issues, you probably need to call a plumber. If the problem is the o ring, you can fix it yourself. The o ring is a small rubber disc that is attached to the tap’s stem screw. It can become worn or loose over time, leading to a leaking mixer tap. This is the most common problem regardless of brand, be it a Novelli mixer tap or other brands, and replacing the worn-out part usually fixes it.

Leaking taps will end up wasting lots of water / Source: Ubacon Building Group

Tools & materials needed to fix it

To fix your leaking tap, you need several tools and materials before you begin the job. Most of them can be found at your local home improvement store or online. 

  • 12mm washers
  • O ring
  • Jumper valve
  • Reseating kit
  • Spanner wrench or tap spanner set. 
  • Multi-grips
  • Screwdriver 
  • Tap lubricant
  • Rag or old cloth

If you need a new o ring, it is a good idea to replace tap washer sets, too. A reseating kit might not be necessary with some types of faucets, but if your home is older, it is best to get one in case. Also, you might be able to get away with a regular wrench in some cases. 

Contact local plumbers

How to replace a tap washer

Changing a tap washer and o ring is an easy process, but it can be tricky if this is your first time. Also, there are slight differences depending on the type of faucet you have. For instance, a single faucet with a mixer will be different from sinks where the hot and cold are separate. Here are the steps to get you started.

  1. Turn off the water supply. Before you get started, it is essential to shut off your water. Some homes have a shutoff valve beneath the sink, but in some cases, you might have to turn off the main water supply to your home. Once the water is off, it is a good idea to put a drain plug in the sink so that small parts and screws do not fall down the drain. 
  2. Unscrew the tap. Using a spanner wrench, loosen the screw and take off the cover of the tap. You can now remove the handle. Some older style faucets have a tap bonnet above the ring and washers. You should remove this, too. 
  3. Remove the old washer. Wind the threaded spindle out of the pipe as if you were turning off the water. This action will expose the O-ring. It might come off quickly, or you might have to remove it with a utility knife. Once you have completed this, clean the surface thoroughly before you replace tap spindle parts. 
  4. Replace the o-ring and washer. Before replacing the tap O ring, apply tap lubricant to the spindle and valve. This will help it get a better seal and will help it operate more smoothly. 
  5. Re-install tap into place. Now it is time to replace the tap spindle band and replace the bonnet. It is important to be sure not to over tighten the nuts when doing this. You can now re-install the handles and tighten them down using the spanner wrench. 
  6. Test water. The job is now finished, and you can turn the water back on. Test the work and make sure that it is still not leaking. If it is still leaking, you might have to get a reseating kit and do it again or hire a professional. 
Changing a shower tap washer can be more complicated depending on the type of shower / Source: Visualising Interiors

How to change a shower tap washer

The steps for changing a shower tap washer are identical to changing one on the sink or faucet only you will be working vertically instead of horizontally. The only difference is that once you unscrew the top of the handles, there will usually be a skirt or cover plate underneath. Sometimes these will need to be screwed off, and other times they pull straight off. There could also be an adhesive holding it on, but you can easily break this with a pair of pliers. 

For showers, you might need to use your spanner wrench to take the jumper valve out. When replacing the shower faucet, make sure that the skirt is replaced in a manner that will prevent water from leaking behind your wall and causing damage. If it was glued on, you need to make sure to use an adhesive approved for showers to replace it.

How to hire a plumber

Tap washer repair is an easy process, but there are a few nuances that you need to know. Otherwise, you could end up with a mess and possibly experience structural damage. If you need to fix a leak and are not confident in your ability to do it yourself, it might be more cost-effective to hire a professional. Not only will it save you the hassle, but a licensed professional will also make sure that the job is done right.

Licencing and qualifications

Regional government authorities licence plumbers and requirements can differ according to location. These licences dictate the type of work the plumber is allowed to do, and not all plumbers can do every job. For instance, they might need a different licence to do gas installations or to install drains. Most licenced plumbers can replace a tap or make other repairs that might be necessary to your sinks and shower.

Australian regulations specify a minimum distance between water and power points, which must be adhered to for safety reasons. Be sure to consult with a licensed plumber to ensure that your plumbing work meets the necessary safety standards and complies with regulations regarding the distance between water and power points in Australia.

Categories
Outdoor living

How to get rid of possums

Possums are a typical backyard visitor in many places around Australia. Possums are a relatively harmless animal. However, they can be quite a pain if they find a way into your roof or home due to the noises they will make during the night. Additionally, they can provoke pets such as dogs, causing them to bark. Keep reading this article for tips you can follow to deter possums from your yard and roof, as well as what to do if a possum finds its way into your home.

Are possums dangerous?

Possums are not aggressive animals. If you get too close to them, they tend to hiss at you to scare you away. If the hissing doesn’t work or if the animal sees you as a threat, it will lay on its side and play dead. You do not need to be afraid of possums hurting you, but it is always a good idea to still keep your distance. 

What does a possum sound like?

If you have a possum in or on your roof, you will usually hear the pattering of their feet as wells as some scratching. How loud this sound is can depend on the material of your roof. As possums are nocturnal, the level of noise they make is increased at night, which is why you will want to try and get rid of one if they end up in or on your roof.

How do possums get into roofs?

Possums like to live in the hollows of trees. The holes and nooks in a roof make an excellent substitute for trees, which is why possums will commonly make themselves at home there. Possums can climb very easily, which makes it easy for them to gain access to your roof.

Possums like to burrow themselves in small, dark spots / Source: Oz Pest Control Canberra

How to deter possums

Cover openings

A straightforward way to keep possums out of your home is to cover any holes in or around your home. If you have uncovered compost heaps outside your house, then those will attract possums, too. It’s most important to cover up any holes in your roof, as possums like to burrow themselves insides small, dark nooks. 

Motion sensors

Motion sensor lights will often deter possums and other animals. You can purchase these at a hardware store. Motion sensors are triggered by a possum’s movement, which will cause the light to turn on. This will hopefully scare the possum away. Possum deterrent spray is also effective, but only if you follow the appropriate safety guidelines on the label. 

Remove food sources

One of the simplest steps to possum control is to eliminate food sources. Any food scraps left outside will attract possums, encouraging them to come into your yard. Do not leave pet food out on your porch or in your open garage. If you have outside garbage cans, cover them tightly. 

Secure your veggie patch

Possums especially like foods that don’t require hunting. To keep possums away, construct a secure fence around your garden, or you can use pesticides as a possum repellant. 

Use smells as a deterrent

You can use lots of smells that possums don’t like to attempt to deter them from your garden and home. Scents are onions, garlic and ammonia can be effective in doing so. You can regularly spray the side of your garbage cans with a mixture that contains half ammonia and half water to stop possums from getting into your bins. 

Contact local pest control experts

Trim trees

Possums and other animals may climb trees in your yard. If trees are close to your house, then you are likely to find possums around your house. Keep trees trimmed to reduce the number of places where the animals can nest. Additionally, reducing the size of your trees can help stop possums from reaching your roof so easily.

Install a possum box

A possum box is a small wooden box placed in a tree where a possum can nest. By allowing a possum to make its home in the box, you can prevent it from trying to enter small holes in your roof or walls.

How to get rid of possums in your roof or home

Hire a professional

If a possum finds its way into your home, you should always call a professional to remove it, rather than trying to do it yourself. It is against the law in Australia to kill a possum. It is also illegal to catch it and release it somewhere else, which is why you should only leave this method to professional pest control experts.

Pest control experts specialise in animal control and possum removal. A licenced company has satisfied all the necessary prerequisites for licensure in your state or territory. Licenced workers are also well-versed in the appropriate use of fumigants and pesticides. 

Possums are active a night / Source: Shutterstock

How to hire a pest control expert

Licencing and qualifications

There are specific pest management licenses that professionals must obtain in Australia to be a pest control expert. These licenses can differ from state to state, so research and ensure your professional has all the relevant qualifications before hiring them.

Reviews, referrals & quotes

It’s always a good idea to obtain quotes from several different professionals before hiring one of them. Research any available online reviews to get a good understanding of the service and performance of prospective pest control experts. Lastly, getting referrals from friends or family is an excellent way to ensure you’re hiring someone who will do a good job.