Categories
Walls & flooring

How to fix a hole in the wall

How long does it take to fix a hole in plaster?

When there’s a hole in the plaster in the wall, it can take only a couple of minutes to repair. However, this does not include preparation and drying time. Fixing a hole requires a bit of precision and using the right tools to ensure the job is completed correctly. You’ll need to be open to repeating the process to ensure it’s reinforced correctly to avoid potential problems.

Materials and tools

  • Wall repair kit
  • Dust mask
  • Safety glasses
  • Putty knife
  • Trimming knife
  • Paint scraper with a wide blade
  • Sandpaper
  • Rag
  • Plaster compound
  • Jointing tape
  • Cork sanding block

How to patch a hole in the wall

  1. Clean the area: When you want to repair a hole in plasterboard, start by cleaning around the hole to remove any loose debris that may be present. Any small pieces of dust or particles can get stuck in the plaster and can prevent the surface from looking smooth once it dries. Tap down the edges of the hole with the handle of your putty knife and scrape around it to make it smooth. 
  2. Apply mesh: Peel off the back of a square piece of adhesive fibreglass mesh and secure it firmly over the hole when plastering holes in walls. There should be two to three extra centimetres of the mesh material around the hole to ensure there’s sufficient coverage. You can then add some adhesive tape to secure it.
  3. Apply plaster: Use plaster compound to fill the hole while sanding the surrounding paint to roughen it up. Use jointing tape to reinforce the hole and add a little more compound before it starts to dry. Learning how to prepare the hole and the surrounding surface can allow you to get the best results.
  4. Sand down: Use fine paper to sand down the patched area and smooth it out for a clean, professional finish. 
  5. Apply a second coat: After the first coat of plaster is dry, you can apply a second coat after lightly sanding it down and dusting the surface off with a clean rag. The second coat of hole filler should be slightly wider than the first coat and can be smoothed out with your paint scraper. Dust the surface off before you start to apply the first coat of paint to ensure it blends in well with the wall.
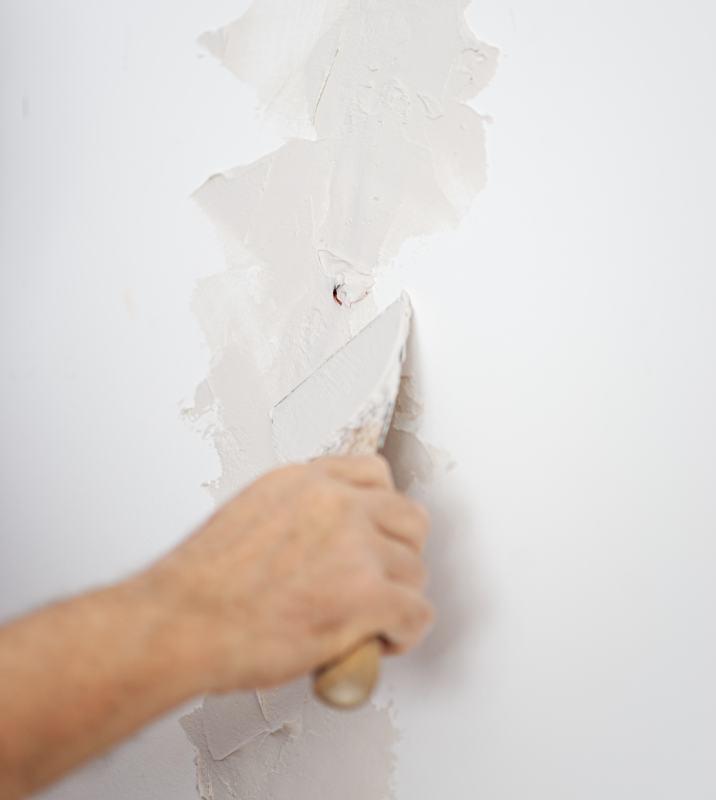
Plastering a small hole / Source: Shutterstock

How to fix a large hole in plaster wall

You can repeat the process of repairing a hole in a plaster wall when you have a larger hole but may need more wall filler and a larger piece of fibreglass mesh. When you’re ready to perform plaster hole repair, measure the hole in advance and add a few centimetres before cutting the material to the desired size. Consider doing multiple coats to prevent the hole from forming again in the future.

How to patch a hole in the ceiling?

When you have a hole that is present in a ceiling where there’s plaster, the process is slightly different compared to plastering a wall. Start by accessing the attic to inspect the hole if it’s larger than 30cm wide. Move any nearby wires away from the hole, or call a professional if you don’t feel it’s safe to do it yourself. 

Use a drywall knife to cut the damaged area out of the hole. Measure the amount of drywall that you removed to get an idea of how much mesh wall material and drywall type you’ll need to use to get proper coverage. Secure the mesh material with tape. Apply a thin layer of compound over the materials and allow it to dry before moving on to the next step.

You can now sand down the patched seams and wall hole filler with a fine-grit sanding block. More compound can be applied to the recessed seams in multiple layers, if necessary. 

Contact local plasterers

How to hire a plasterer

Licencing and qualifications

After looking for a qualified professional and narrowing down your options, you’ll need to look into the background of each plasterer you’re considering hiring for the task. Look up the plasterer’s license to verify they’re qualified to perform the job and can legally perform the work. You can also inquire about their experience in the industry to determine if they can complete the task correctly.

Read online reviews

Search for reviews online to read about former clients’ experience working with the plasterer to determine if they recommend the services to other people. You’ll take less of a risk with the professional you hire if you get an idea of the quality of work they perform and if they have good interactions with their customers. The reviews will offer insight into the reputation of the individual in the industry.

Request a quote

The cost of patching holes in plaster is one of the main factors to consider when deciding who you plan to hire to perform the work. Avoid hiring someone who gives you the lowest quote, which means they may cut corners or don’t have as much experience in the industry compared to other professionals. Although you may pay more, it can allow the work to blend in more with the wall and for it to last long-term without caving in again.

Categories
Building & renovations

How to soundproof a room

As the world seems to be getting noisier and noisier, most of us are becoming even more determined to keep as much noise as possible out of our living spaces. With increased traffic outside, as well as high-tech stereos and entertainment centres in our homes – not to mention the smaller yards separating houses, it seems as if were more vulnerable than ever to the noises of our neighbours as well as the sounds produced by the rest of the outside world.

Soundproofing with plasterboard

There are three types of plasterboard that are commonly used for soundproofing:

  • Barrierboard: This Australian-made plasterboard comes from a composite material that reduces outside noise levels by as much as 75 percent. Barrierboard is comprised of two sheets, with a layer of insulation in between. This rigid, 32mm board wont sag or bend, and can be applied directly onto standard walls without having to make construction changes to areas such as doorways.
  • Boral SoundSTOP: Especially engineered for areas with acoustic walls and ceilings installations. Its used in conjunction with the Quiet Living, CinemaZone and PartiWALL systems produced by Boral. One advantage of the Quiet Living system is that is uses the same width as a standard interior wall, so its compatible with standard window frames, door jambs and other features. Likewise, Borals CinemaZone system is specially designed to protect your home theatre room from outside noises while enhancing and controlling the noise levels from the theatre speakers. Note: Boral SoundSTOP is so effective that loud outside voices can only be heard as a quiet murmur indoors. If more sound blocking is needed, you can add another layer to the wall.
  • Gyprock Soundchek: This 10mm plasterboard is made with a thick, sound-reflective gypsum core thats layered with heavy-strength liner boards. It comes in two levels: STC 45, which can make conversations inaudible, and STC 50, which reduces sounds produced by music.

Enhancing your soundproofing

To enhance your plasterboard soundproofing, you can combine it with either wall or roof insulation to add another layer of protection. You can also apply it to solid doors that have been surrounded with protective door seals. If you have an entertainment centre or home theatre, you’ll want to also install soft carpeting and furnishings that are quiet and don’t creak. Additionally, take steps to ensure that light switches and power points aren’t placed back to back, as sound can leak through the gaps that were created for these installations.

Along with plasterboard, ensuring your home is properly insulated will help reduce noise / Source: Active Vac and Insulation

Soundproof doors

A soundproof door is heavily insulated to block out noise and vibrations from the outside. This reduction in noise is achieved with strong acoustic seals and quality insulation. Acoustic doors are made in accordance with standards of sound resistance and should be certified after testing. They are available in a wide range of materials like laminated steel, galvanised steel and also sheet metals.

Different types

Once you have considered your soundproof requirements, you can choose doors in different sizes and types.

The main doors available include the following:

  • Double or single sliding doors
  • Swinging doors, single or double.
  • Smoke or fire doors.
  • Magnamatic or electronic automatic doors.
  • Lightweight or heavy doors.

Soundproof windows

Noise from the street can get in easily through single glazed windows. The glass is thin, but there are also small holes and gaps around the window frame and joints that allow sound to transmit into your home. The sound can also travel through vibration as the noise hits the glass and vibrates through your house. Ensuring that your windows are well-sealed is one step to take, but getting them double glazed provides extra soundproofing.

Double glazed windows

Double glazed windows are completely sealed and do not allow the air to vibrate sound into your home. There are two layers of glass with a small gap between them, which helps to kill the vibration. Additionally, the extra pane of glass means that any outside noise has two panes to travel through before it can break into the peacefulness of your home. Double glazed windows can prevent the transmission of noise by up to 70 percent. New home builds will likely have double glazed windows, however older homes will need to retrofit these.

Contact local glaziers

Other soundproofing tips

In addition to plasterboard, soundproof doors and windows, here’s some other tips to minimise noise where it’s needed; for example a home theatre.

  • Ensuring adequate insulation throughout the ceiling and walls
  • Plush furnishing and carpet, as well as heavy window coverings that can absorb sound
Categories
Walls & flooring

Plaster vs render: What’s the difference?

Knowing the difference between plaster vs. render is essential for anyone tackling a construction or renovation project. Failing to grasp this distinction can lead to suboptimal outcomes, wasted time, and unnecessary expenses. This article aims to clarify render vs. plaster techniques, their applications, and when to use each one, helping you make informed decisions for your next project.

What is plastering and when should you get plastering help?

plaster
Plastering is used for interior walls. Source: Shutterstock

Plastering is the process of applying a smooth, durable finish to interior walls and ceilings. It involves spreading a mixture of lime, cement, sand, and water onto surfaces to create a seamless, flat finish. Plaster is commonly used for:

  • Smoothing rough interior walls
  • Repairing damaged drywall
  • Creating decorative finishes
  • Improving sound insulation

Common types of plaster include gypsum, lime, and cement plaster. Each type has specific properties suited to different applications and environmental conditions.

Plastering typically costs $20 to $90 per square metre, depending on the type of plastering work. More complex or ornamental plastering can cost up to $85 or more. Many plasterers also offer daily rates at around $240 or higher or hourly rates at $50 or more. Plastering costs can vary based on factors like job complexity, location, and the plasterer’s experience, so it’s advisable to obtain multiple quotes for accurate pricing.

What is rendering and when should you get rendering help?

render
Rendering is used for external walls. Source: Shutterstock

Rendering is the application of a cement-based rendering mixture to external walls to create a protective and decorative finish. It provides a durable, weather-resistant surface that can enhance a building’s appearance and improve its structural integrity. Render is typically used for:

  • Weatherproofing exterior walls
  • Improving thermal insulation
  • Enhancing curb appeal
  • Protecting brickwork or masonry

There are various types of render, including traditional cement render, lime, and modern acrylic or polymer-modified renders. Each type offers different benefits in terms of durability, flexibility, and aesthetic options.

Since rendering is more expensive than plastering, it’s recommended that you use the services of a qualified plasterer to complete rendering work for your home. It takes a skilled hand to achieve professional results.

Plaster vs. render: Which one applies to your needs?

If you’re wondering whether it’s better to use plaster vs. cement render for filling walls, here’s a breakdown of each.

a handyman using a trowel to plaster a wall
Call your local handyman to get your interior or exterior walls fixed. | Source: iStock

Material mixture and composition

Plaster typically consists of gypsum, lime, or cement mixed with water. This composition results in a softer, more porous material suitable for interior use. It contains less cement than render since it merely coats the interior walls and ceilings of buildings to prep them for painting or wallpapering.

Render, on the other hand, is made from cement, lime, sand, and water, creating a harder, more weather-resistant mixture ideal for exterior applications. Depending on the render, some key ingredients give it its definition; for example, lime gypsum gives the coating a creamy appearance, while finer sand can create a smooth finish.

Plaster composition allows for a smoother finish and better sound insulation, while the render’s robust mixture provides superior weather protection and durability against the elements. The material choice affects not only the appearance but also the lifespan and maintenance requirements of the entire surface.

Application techniques

Plastering typically involves three layers: a base coat, a second coat, and a finish coat. Each layer is applied with trowels and allowed to dry before the next is added. The process requires skill to achieve a perfectly smooth surface.

Plaster must be set and completely dry before painting the walls. A freshly plastered wall can take at least a week and up to a month to dry. You can tell when the plaster is completely dry when there are no dark patches visible, and the coating is light and even.

On the other hand, rendering usually involves applying one or two coats to exterior walls using a trowel or spray equipment. A workman may then finish it with different tools depending on the homeowner’s desired appearance—either a smooth, flat finish or with a texture or pattern. Also, some modern renders can be applied in a single coat, saving time and man-hours.

Durability and maintenance

a blue wall with two holes in the sheetrock from a wall being punched by hand
Get your damaged walls repaired by a skilled handyman. | Source: iStock

Plaster, being an interior finish, is less at risk of harsh conditions, but it can still be prone to cracking due to building movement or moisture issues. Regular painting and prompt repair of any cracks or chips can extend its lifespan.

Meanwhile, the render is exposed to the elements. While it’s certainly more durable, it requires proper maintenance to prevent issues like cracking or water ingress. Regular cleaning, repainting every 5 to 10 years, and addressing any cracks promptly can ensure that the render remains effective and attractive for decades.

Important note: Before undertaking any plastering or rendering work on older buildings (particularly those built from the 1930s to the 1970s), have the surfaces checked for asbestos. Consult a licensed asbestos professional if you suspect its presence.

Function and uses

Plaster is primarily used for internal walls and ceilings, providing a smooth, even surface that’s ideal for painting or decorative finishes. It’s excellent for creating intricate mouldings and ornamental features.

Render is used to coat external walls, both for protection and decoration. It shields the underlying structure from weather damage, improves thermal insulation, and can significantly enhance a building’s superficial appeal. Render is particularly useful for covering imperfections in brickwork or concrete surfaces or mending exterior walls’ cosmetic defects.

Sustainability and environmental impact

Both plaster and render have environmental implications. Traditional plaster and render mixes can generate significant waste and have a high carbon footprint due to cement production. However, the industry is moving towards more sustainable practices.

Eco-friendly alternatives like clay plasters and lime renders are gaining popularity. These materials have lower embodied energy, are often locally sourced, and can be recycled. Some innovative products incorporate recycled materials or industrial by-products, reducing waste and environmental impact.

Proper application techniques can minimise waste, and some companies now offer recycling services for leftover materials. Additionally, well-maintained plaster and render can contribute to a building’s energy efficiency, potentially offsetting its initial environmental cost over time.

Beyond the surface: rendering vs. plastering

Understanding the difference between render and plaster is crucial for any home improvement or building project. Both techniques serve unique purposes, with plaster enhancing interiors and render protecting exteriors. 

For the best results, consult a qualified plasterer or renderer who can assess your specific needs and provide expert advice tailored to your project. With the right application, you’ll achieve a stunning and durable finish that stands the test of time.

Ready to give your walls a refresh? Post a job on Oneflare and connect with top-rated plasterers or renderers near you.


FAQs on plastering vs rendering

Do plasterers do rendering?

Not all plasterers do rendering. Plastering and rendering are distinct trades, though some professionals are skilled in both. Plasterers primarily focus on interior work, applying plaster to walls and ceilings. Renderers specialise in exterior finishes, applying cement-based mixtures to outside walls.

If you need rendering done, it’s best to look for a skilled professional in that specific field. Always check their experience and qualifications for the specific job you need.

Is solid plastering the same as rendering?

Solid or hard plaster vs. render are similar techniques, but they’re not the same.

Solid plastering refers to the application of plaster directly onto brick, concrete, or stone surfaces, usually for interior walls. Rendering, on the other hand, is specifically the application of a cement-based mixture to exterior walls. Both techniques create a smooth surface, but rendering is designed to withstand outdoor elements and often has a coarser texture than solid plastering.

Can you plaster over a rendered wall?

It’s generally not recommended to plaster directly over a rendered wall. Render is designed for exterior use and has properties different from interior plaster.

If you’re looking to smooth out a rendered interior wall, it’s better to apply a skim coat of plaster rather than a full plastering job. For exterior walls, if you want to change from render to plaster, you’d need to remove the render first.

Always consult a professional before attempting to plaster over render, as improper application can lead to adhesion problems and a poor finish.