Categories
Construction

How to build stairs

If you are planning a DIY deck project, one of the most important parts is building the stairs. Maybe you need to add a short set of steps to reach your back door or a shed. These are projects that you can accomplish yourself, but most of the time, stairs on the inside of the home must be constructed by a licenced contractor. If you are thinking about building a small set of steps for your landscape or outdoor project, this article will help you understand the process.

How easy is it to build steps for a deck?

The answer to how easy is it to build steps for a deck is that it is a manageable process, but some parts of the process require time to get right. Outdoor timber steps are a relatively easy project as far as materials and carpentry skills are concerned. You can always purchase ready-made outdoor steps and attach them to your deck with minimal skills. The most challenging part of how to build steps for a deck is getting the steps level and the proper height. You want to make sure that they are easy to get up and down and do not slant and cause a tripping hazard.
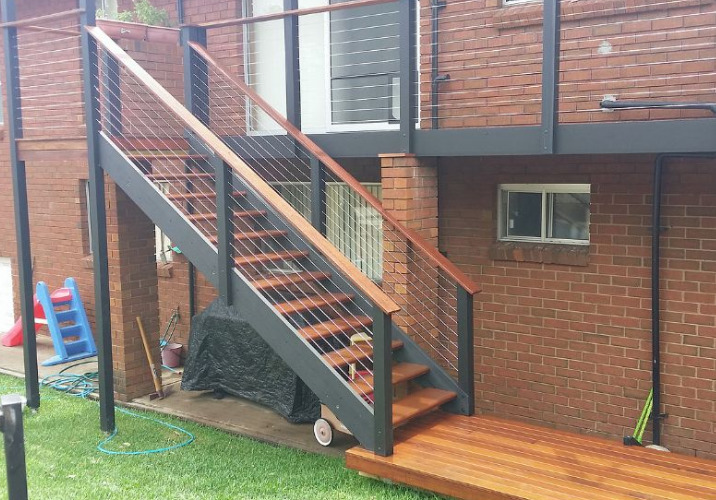
Stairs leading a second level / Source: Mitroteam Projects

What is the standard rise and run of stairs

Before beginning the process, make sure to check your local building codes, because even for a short set of outdoor deck stairs, some areas have strict regulations. The first thing that you need to know about how to build external timber stairs is the standard stair step height that is required. 

The first thing you must do is calculate the proper rise and run for the stairs. This is the most crucial part because it will affect the staircase’s stability and overall usability. The rise is the total height of the stairs from the ground. The run is how far out the stairs will need to go to create stairs that are not too steep and difficult to navigate. The height of each stair is a function of this calculation.

Materials and tools

Here are some of the basic materials and tools you will need to complete your staircase construction. Keep in mind that DIY stairs will require some basic carpentry tools, and purchasing the proper safety equipment is always a must. Make sure that you have all of the required tools and materials on hand before you begin your project.

  • Tape measure and carpenter’s pencil
  • Carpenter’s square
  • Spirit Level
  • Cordless drill and decking screws
  • Circular saw or hand saw
  • Clamps 
  • Lumber for the stringer, treads, and risers
  • Bracket designed to attach the stairs to the deck, house, and flooring 
  • Paint and approved outdoor sealant 

How to build deck stairs

Now that you have your materials, it is time to begin constructing the stairs. 

  1. Calculate the stair rise and run: The first thing you need to do is calculate the stair rise and run. You need to determine how many steps you will need to make the stringers carry the treads and risers. First, measure the total height that the stairs will need to cover. This will be measured from the ground or flooring to the deck’s top board. The standard step height is between 16.5 and 20.3 cm. The best step size for stairs is 17.7 cm on average. Divide the height of the rise by this number. This will tell you how many steps you need. The tread’s width needs to be no less than 22.8 cm so that your entire foot can fit on them. Multiply the number of stairs by the tread width, and this will give you the run of the stairs. This is the length the stairs will extend from the deck or home. 
  2. Measure and cut stringers: Once you have these measurements, it will allow you to cut the stringers accordingly. You will need to accommodate for at least 22.8 cm horizontally, and the stairs’ height. This template will look like a sawtooth pattern. It will have a place for you to attach the treads and risers securely. It is important to make sure that your cuts and measurements are accurate. Otherwise, your stairs could have a slant, which could cause a tripping hazard. This is the most critical part of the building process.
  3. Install stringers: The first thing that you need to do is to securely attach the stringers to the house or deck and the flooring or ground. If you are attaching to the ground, you will need to get brackets that hold H3 CCA posts. Special brackets will also be needed for attaching to wood or concrete surfaces. 
  4. Install risers: Next, use decking screws to attach the risers to the stringers securely. When installing the risers, make sure that everything is flush and secure. Countersink all of your screws to make sure that none of the heads stick out and can snag on clothing or shoes.
  5. Install treads: Installing the tread is a step that requires special attention. They should be securely attached with decking screws and countersunk, just as with the risers. Even if you accurately cut the stringers, it is still a good idea to double-check each tread as you install it with a spirit level to make sure that it is flat. Make sure you know how to level stairs before beginning this step. 
  6. Attach trim boards: Now, you can attach the trim boards and give your project a finished, professional look. 
  7. Varnish and seal: The final step is to varnish and seal the decking. Make sure to use a product designed for exterior decking. You should also choose one that will not cause slipping or become slippery when wet. Installing grips to the treads can help prevent a tripping hazard. Now, your deck stairs are ready to use. 

Contact local decking experts

How to build interior stairs

Building interior stairs uses a similar process as building outdoor stairs for decks. In some houses, the rooms’ size and way out may make the calculations trickier than for outdoor deck stairs where you have plenty of space. The process is similar, but building codes and stair dimensions are different for the house’s interior than for the outside. Most inside stairs require a licenced contractor for the job. 
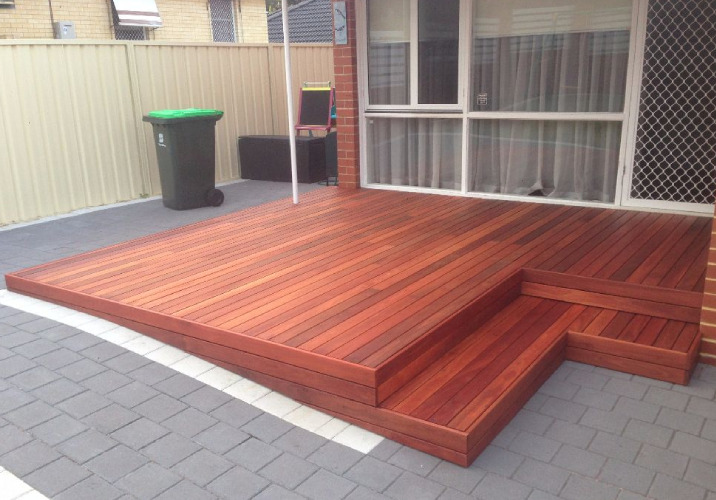
A simpler project / Source: Quality Timber Decking

How to hire a builder

As you can see, building a set of stairs looks like an easy process, but it is quite complicated. Suppose you get the calculations wrong or miscut one of the stringers. In that case, you can end up with a set of stairs that is a hazard, look unattractive, and that could land you fine if the inspector happens to see them. Safety is the most important consideration when building a set of stairs, so if you do not have the experience or knowledge to do it right, this is one job that is better left to the professionals. 

Licencing and qualifications

Your contractor must have a carpenter’s license and a general contractor’s licence to complete the job. Some locations have special requirements that must be met. It is up to you to make sure that you hire a contractor who is licenced and qualified to complete the job properly so that your stairs will be safe for you and your family.

Categories
Outdoor living

How to build a backyard chicken coop

Chickens are an excellent addition to a small farm or backyard in areas where they are allowed. Before your poultry journey begins, you need to construct a chicken coop and chicken enclosure, or chicken hutch, to keep them safe and happy. This is a project that you can do yourself, or you can hire a professional. This article will address the basics of building a chicken coop using the DIY route.

Benefits of having chickens

The benefits of owning backyard chickens go beyond the eggs. If you are a gardener, chickens and a produce patch are the perfect combination for many reasons. Chickens provide a natural fertilizer that helps promote foliage and fruit set. They also forage in the garden picking insects off the leaves without harming larger plants. Chickens are also the perfect way to dispose of surplus vegetables or that slightly overripe apple or banana. Chickens are also fun to watch and make wonderful pets. 

DIY chicken coop ideas

If you have decided to add chickens to your backyard, the first thing that you will need is a chicken pen. You can find plenty of chicken coop ideas online that are both practical and creative. Backyard chicken coops come in many shapes and sizes. 

One of the primary considerations is where you plan to place your chickens. They should have access to some sunshine and some shade throughout the day, but they should also have a secure place for nesting and sleeping at night. The minimum requirements are two to three square metres per chicken inside the coop and four to five square feet per chicken outside. These are the minimums, but your chickens will be happier the more room you can provide. When building a chicken coop, keep in mind that chickens will fight in a crowded area, just like us. 

Chickens are very beneficial animals to have as pets / Source: KC’s Pets At Home

Materials and tools

There are many different ways to build a chicken coop, including easy to build chicken coops that come in a kit. If you are doing it from scratch, you can decide on a wooden chicken coop, aluminium chicken coop, or use some other material. The plans and this article are for a simple chicken coop made of wood that anyone with basic carpentry skills can complete. 

  • Tape measure and carpenter’s pencil
  • Carpenter’s square 
  • Hammer and nails 
  • Cordless drill and screws 
  • Spirit level 
  • C-clamps or bar clamps
  • A retractable knife or utility knife
  • A circular saw or hand saw
  • Outdoor timber framing
  • Marine-grade plywood 
  • Treated fence panelling or other material for the outside of the coop
  • Treated H3 CCA fence rail
  • Fence mesh
  • Wire mesh panel
  • Hinges and door latches 
  • Chicken coop plans

How to build a chicken coop DIY

If this is your first time building a coop and you do not have a lot of experience with these projects, it might be best to purchase pre-made plans.

  1. Cut all the required timber: The first thing you need to do is cut all of the required lumber to the proper size. Make sure to do this carefully and follow all safety precautions. To ensure precision, measure twice and cut once.
  2. Assemble the side and back supports: You may choose to use posts set in concrete to do this. If you do not, make sure that the posts are secure and that the soil around them is compacted. You can also purchase special brackets specially designed for this purpose.
  3. Assemble the roosting box: Hens typically do not sleep in the same place as they lay. Also, roosters need their own space within the coop. The roosting box typically consists of four wood pieces that are nailed or screwed together, forming a square.
  4. Assemble the nesting box: Hens need a special nesting box to lay eggs and brood chicks. Constructing the nesting box is similar to constructing the roosting box. 
  5. Attach the outdoor area: Now it is time to attach the wire mesh to the outside of the coop and create the outdoor daytime area. When doing this, pay extra attention to ensuring that it is secure and will keep predators and rodents out. 
  6. Assemble and attach the walls: Now, you can connect the side walls recording to the plans. Make sure to close any gaps so that the coop will be protected from the weather and keep pests out.
  7. Cut and attach the flooring. Cut and attach the flooring to the floor joist assembly. One tip is to attach hardware cloth to the flooring’s underside before laying it down. This helps to prevent rodents and small predators from getting into the coop. They cannot chew through the hardwire cloth, but they will try to chew through a hardwood floor. 
  8. Create and assemble the door: Now it is time to assemble the door and attach it to the coop with hinges. 
  9. Cut and attach cladding: The main coop area’s last step is to connect the outside cladding. Once again, using a hardwire cloth on the inside will help secure the main coop area from rodents and pests.
  10. Install ramp and chicken wire: Although most chickens can manage short flights, many require a ramp to get into the coop. You should make sure that it is non-slip, not something that they will not try to peck and swallow, and it must have steps made from boards attached to the plank to prevent slipping.
  11. Create and attach the roof: The last part of the major construction is to attach the roof. Make sure to use roofing felt and either shingles or aluminium roofing materials. 
  12. Create and attach a nesting box roof: The final touches include attaching a roof to the nesting box. Hens like to feel like they are in a cozy, secured area. They should have enough room to stand up and move around, but most of the time, they will only be in this area for a short time while they are laying eggs unless they are brooding. 
The more space chickens have the better / Source: Shutterstock

How to hire a builder

As you can see, even though building a backyard chicken coop looks like a simple process, there are many steps. You must have some basic carpentry skills and knowledge to be successful. Sometimes, it is less hassle and can be cheaper to hire a professional who knows how to do it right.

Licencing and qualifications

Unless you are running electricity or plumbing to the chicken coop, most chicken coop builders only need a general construction licence or carpentry credentials to do the job. Call around and get several quotes before hiring a contractor. It would help if you also read reviews or ask for photographs of their finished projects. 

Categories
Gardening & landscaping

Grow your own frangipanis

Frangipani trees are not only beautiful, but they also smell absolutely delicious as they start to flower into spectacular shades of red, maroon, pink, orange, yellow and white. Best of all, they’re perfect for a wide variety of hot, dry climates because they’re not vulnerable to fire or drought. They can also grow in difficult soils, such as those with high salt content. If you’d like to grow your own frangipani trees, here are the basics you’ll need to know.

How to get cuttings

Frangipani trees are typically grown from cuttings that can be culled from woody or herbaceous stems, as well as from softwood, hardwood and semi-hardwood sections of the tree. In order to take a cutting, you’ll need to use a tree that is in very good health. Frangipani sap can irritate and burn skin, so use gloves while cutting. 

Cuttings taken in winter or the plant’s dormant period will do much better than clippings taken at other times of the year. It should be a healthy adult tree that has plenty of trimmings to spare. Cut a branch that is about 20cm long. Once you have it, leave the cutting in a cool, dry place for at least a week to make sure the end is completely dry. The cutting can’t be in contact with soil, water or anything else or it won’t dry properly.

How to plant the cutting

Once the frangipani cutting is completely dry, it’s time to plant in into a pot. Make sure the pot is filled with free-draining potting mix, or even sand because this type of tree does not like to have its roots in standing water. The pot should be elevated from the ground a little bit so that the airflow extends all the way around the plant. You can plant right into the soil if you like but if you do so make sure the plant gets full sun throughout the day as it will require a minimum of six hours of direct sun daily. Keep the soil warm by using mulch but don’t allow the mulch to cover the cutting itself.

Frangipani trees thrive in well-drained soil with a slight acid content, so try to maintain a pH measuring 6.1 to 6.5. While they grow well in most soils and climates, frangipani trees greatly prefer hot temperatures and don’t thrive in areas where there’s severe frost. If you live in a cold climate, plant your tree in a pot and keep it indoors during the winter.

Source: Shutterstock

Use water sparingly

Frangipanis can’t take much water. While you might want to give the cutting more and more water to make sure it will take root, this will actually hurt the cutting. Water the cutting only once every few weeks — it shouldn’t need more than this. Over the next few weeks, you should begin to see roots developing, and the tree will begin to grow.

Moving the frangipani

Once your frangipani tree has grown roots into the potting mix, it’s a good idea to transplant it into a bigger pot of into a garden if you did not initially plant into a garden. Be careful while transplanting the cuttings, however, as the fragile roots can be easily snapped.

Contact local experts

Maintenance

During cooler months, frangipani trees need to stay dry, but they can be watered regularly during warmer seasons. While your frangipani is growing, enrich the soil with organic fertilisers that have high levels of potassium, phosphorus and nitrogen, and add compost, fire ash and animal manure for maximum benefit. If your frangipani is potted, enrich the soil with a potting mix containing one-third sand, as well as a slow-releasing fertiliser.

Frangipani leaves are susceptible to moulds, rust and fungi. If these occur, apply fungicide sprays containing a solution of white oil and copper. Detergent or white oil mixed with milk powder also helps prevent powder-like mildew and rust. By nourishing the tree, you’ll help prevent disease and infection.

Frangipani trees thrive when they’re pruned, so prune and shape them regularly. If the branches are dense and crowded, prune them to a half or a third of their length. These branches will then sprout extra shoots from the pruned ends. To avoid these extra shoots, prune all the way back to the main trunk. This way, the tree won’t develop any more branches in that area.

If you aren’t an experienced gardener or you need a bit of advice concerning your frangipani trees, call a local nursery or landscape gardener for assistance. By giving your frangipani trees the care and maintenance they need, you and your family will be able to enjoy them for generations.

Categories
Construction

How to build a shed

Benefits of building a DIY shed

Australians have many reasons to consider building a shed on their property. It can provide practical solutions for storage and serve many useful purposes. On the outside, it seems like building DIY outdoor storage sheds would be a simple task, but it can be challenging, especially if it is your first time. This guide provides you with a basic overview of the steps. 

What type of shed should I build?

The first thing that you need to decide is what type of backyard shed you need. You can build a woodshed, garden shed, or a more sophisticated shed with electricity and specialized storage areas for tools. A shed can serve as a workshop, a separate office, or as an artist’s studio. A shed can also be the perfect playhouse for children, given that it is not also used as a storage space for tools.

You can build a shed from many different types of materials, including wood, block, or brick. If you’re looking for a space to store gardening tools, you have many choices in garden shed designs. You will need to decide what type of roofing you want and what kind of flooring, too. For roofing, you can choose options such as standing-seam metal roofing or traditional roofing shingles. You will also need to determine if you need amenities such as electricity and plumbing. Your shed can be as simple or complicated as you choose to make it. You can design it entirely from scratch, or you can choose many of the DIY shed kits that are available online. 

A shed connected to the house / Source: DT Home Improvement Services

What to do before building a shed

Whether you decide to design a shed yourself, purchase pre-made plans, or get a DIY kit, the preparation steps are the same. Here is what you need to do before you begin your DIY outdoor storage shed project.

  1. Choose an appropriate site. The first thing that you need to do is to choose a suitable location. Before you do this, it is a good idea to call your local Council to find out if there are any requirements. Many areas have ordinances that dictate how far away it can be from the main building, how far away it must be from property lines, and other requirements. Planning your site might have to centre around local conditions. 
  2. Take measurements and make a plan. The next step is to take measurements and make some drawings. It is a good idea to mark the area where the shed will go with marking paint. 
  3. Seek council approval. Local councils have different requirements for what you have to do to seek permission for shed construction. You will have to follow their procedures and get their approval before beginning the building process. Some of them might require inspections after the building is completed. You might have to follow special requirements if you live in an area that is prone to severe storms, fire, or floods. 
  4. Level the ground. Regardless of the method you choose for building your shed, the first step is to prepare the site and make sure the ground is level. Depending on the size, you may be able to do this by hand, or it may require renting excavating equipment. 

Materials and tools

Once you have approval and have your site prepared, you can now start gathering the tools and materials that you will need for the project. If you do not have all of them, it may be possible to rent them from a local tool rental store or home improvement centre. You might not need all the tools on this list, depending on the type of shed that you decide to build. Whether you are starting from cutting your own boards or you have purchased a DIY kit will also change the tools that you need or do not need. The following list is only a few suggestions for those of you who are choosing to do everything yourself.

Tools 

  • Jigsaw
  • Mitre saw
  • Hand saw
  • Circular saw
  • Drill
  • Impact driver
  • Pencil
  • T-square or carpenter’s square
  • Spirit level
  • Staple gun

Materials

Here are some of the materials that you might need, depending on what type of shed. Keep in mind that you will need different lumber for the piers, flooring, walls, and roofs. The amounts and types will depend on your building plans and local requirements.

  • Construction timber
  • LogLap cladding or other cladding 
  • OSB board 
  • Corner fence posts
  • Cement
  • Sand 
  • Waterproof sheeting 
  • Roofing felt
  • Shingles or metal for roof
  • Door hinges
  • A variety of screws
  • Windows (optional)

Contact local builders

How to build a shed from scratch

Here are the basic steps for building your shed. 

  1. Building the shed’s foundation. The foundation is the most crucial part of constructing the shed. The first step is to set the deck piers and beams. Next, you will attach the floor joists, and finally, install the flooring material. Sometimes, garden shed flooring can be dirt or other drainage material. The most important factor is that a wood floor will not be in contact with the wet or damp ground and that it allows for airflow underneath.
  2. Build & attach the wall framework. Next, you will begin framing the walls and constructing the doors and windows. It is essential to make sure that everything is square and flush when assembling the components. You can install the doors and windows at this time, too. 
  3. Build the roof rafters. Once the walls are up, you can begin constructing the roof rafters and attaching them to the walls. Most council regulations mandate the materials, spacing, and method of attachment. 
  4. Cover the wall. Now, it is time to attach the outer wall cladding. You can also do any outside trim work around the windows and doors. 
  5. Attach the roof. The last step is placing the OSB board on the roof rafters, installing the roof sheeting, and installing the shingles. 
A small shed for storage / Source: Zane Hand Painting

Once you have constructed your shed frame, it’s time to consider lining the interior walls. While you want a clean and polished look, it’s also important to stay within budget. Here are some things to consider when lining your shed interior:

How to line a shed:

  • Drywall or plasterboard is a common and simple option to use. It is a cost-effective and straightforward installation method that provides a smooth finish.
  • Plywood is another budget-friendly and straightforward option. It can be painted or stained to match your exterior or existing décor.
  • V-Joint cladding provides a finished look for the interior shed walls using thin strips of timber.
  • Tongue and groove timber panels offer a classic look with interlocking edges. They provide extra insulation to your shed and are easy to install with screw fixings.

Cheapest way to line a shed:

  • One of the most cost-effective ways to line a shed is by using oriented strand board (OSB) or particleboard.
  • Another cheap option is the plain metal or fiberboard that you may have used for the exterior shed walls.

Shed footings size:

The footings for your shed should be able to support the weight of your structure. It’s important to check local building codes before calculating your footing size. The general rule is to create footings that are about 4 inches thick and 4 inches wider than the shed base.

Sub board for shed:

A sub-board provides additional insulation between the framing and finish materials. Most commonly, 1/2-inch OSB or plywood is used as sub-board. It’s important to ensure the sub-board is installed flat and secure so that the finish material has a secure surface.

Overall, deciding how to line your shed walls depends on your preferences and budget. Ensure the footings are sized correctly and the sub-board is installed properly to make the most of your shed interior.

How to waterproof your shed

Whether you are building a garden shed or other type of structure, your DIY shed will need to be waterproof. There are several factors involved in waterproofing the shed. The first is the flooring. Some people choose to place a waterproof barrier between the floor and the ground to protect the boards underneath. 

The walls, windows, and doors typically involve caulking and sealing any holes or cracks. It is important to install the roofing according to the manufacturer’s instructions, paying attention to proper overlap, and all necessary steps. Creating a waterproof shed can be the most challenging part of the entire project, but it is also the most important. 

How to hire a builder or handyman

As you can see, there are many steps involved in building your shed. If you do not have all of the necessary skills, it can be a long and frustrating process. That is why many people choose to find a qualified professional to do it for them. Here are a few considerations for hiring someone to build your shed.

Licencing and qualifications

In many cases, one person or a team can build the shed without involving any outside contractors. If you want electricity or plumbing installed, there might be other specialty trades involved. The most important thing is to make sure that all of your professionals meet state and local requirements. It is vital that make sure they have reviews from many happy customers, too. Taking the time to plan and choose the right professional is the most important part of the process to ensure a shed that you will be happy with for many years to come.

Categories
Construction

Building your new pool

Swimming pools can turn a house into a home. It’s an inviting place for friends and family to interact, and it can be a place where memories are made. Kids can invite friends over and adults can enjoy a nice relaxing dip in the pool after a long day at work. The right swimming pool can be much more than an aesthetic feature of the home, it can become an integral part of your family’s way of life. Before you decide to jump into pool ownership, consider the following:

What you need to first consider

  • Price: Swimming pool installation is expensive. Inevitably, cracks and leaks will need to be factored into the pool upkeep budget. Also, landscaping that surrounds the pool can be costly to maintain. A pool’s upkeep will not only take time, but it can also be costly to buy the chemicals you will need. When choosing a pool, take some time to research the expense of the upkeep in addition to the initial construction of the pool.
  • Local government regulations: Make sure you know and adhere to any and all rules or regulations that your local council requires before allowing you to build a pool. You should create a professional site plan to avoid unnecessary headaches from accidentally cutting underground cables or disturbing drainage systems.
  • Child safety: If you have children or extended family that will be using the pool, it is vital that you stay informed on how to make the pool area safe for everyone. Legal requirements may include installing barriers to prevent children from entering the pool unattended.
  • Real estate value: Installing a pool will change the value of your home. While it will usually make the value go up, there is a chance it could reduce your home’s value. If you don’t keep the home maintained, or if potential buyers don’t want a pool, it might not be worth as much as you think when you put your home on the market.
Pools have the ability to increase the value of your home / Source: Serenity Pool Co.

Different pool types

Cement pools

Cement pools can be built in just about any shape, depth, or size. Special water features, such as fountains, waterfalls, and wave machines can be installed, creating dramatic backyard effects. They can be constructed indoors or out and can be heated. An attached spa, slide, and/or diving board are common options. A variety of finishes, colours and textures can be found while shopping for cement pools. Depending on weather, accessibility, size of the pool, and pool contractor, a cement pool will take two to six weeks to complete. New residential constructed pools go faster because trees, fences, and other obstacles are not in the way of equipment and vehicles. Cement pools are easy to maintain and clean with vacuum systems and chemicals. Find out how much cement pools typically cost in our guide.

Fibreglass pools

Fibreglass pools can be found in all colours, shapes, and sizes. Like cement pools, construction starts with excavating the area. These swimming pools are prefabricated at the factory and brought to the site. After excavation, the pool is lowered into the hole and secured. The whole process is much faster than cement pools, and the pool arrives in your chosen colour and finish. The total cost for these pools is significantly less than their cement counterparts. Fibreglass pools are supposed to be left full during the offseason and are easy to clean due to their smooth surfaces. Find out how much fibreglass pools typically costs in our guide.

Above-ground swimming pools

Above-ground pools are an option for those who rent or people who want to move them to a new location later. They can be assembled by contractors or by ambitious homeowners in a matter of hours or days. These pools are equipped with vinyl liners and are generally smaller than other pool types.

Contact local pool builders

Ground excavation for in-ground pools

If you are planning to build a new in-ground pool, you will need to find the right place for it on your property. Excavation is not just digging a hole; every backyard has different character traits and factors that must be considered. For example, consider the state of the soil, size of the yard, shape of the yard, and overall access to the yard. For the best results and least amount of risk, look into hiring professional excavators, regardless of the size of your project.

Installing the pool

After the basin has been dug out, the actual pool installation can begin. This is when your pool builder will take over and install the plumbing, place the swimming pool, instal all the lighting and wiring, and do all the finishing on the pool’s interior.

Before the building begins, double-check to be sure that the pool contractors have quoted all the detailed costs associated with the instal and that they are licensed and experienced builders with references.

Designing the fencing and landscaping surrounding your pool

After the pool is installed, it is now time to install the landscaping that will make up the environment around the pool area. This includes things like decks and pathways that can be made up of wood decking, stone pavers, or even stamped concrete. You will need to ensure the safety of all nearby children by installing a fence. This is a legal requirement in Australia.

There are so many different options for pool landscaping design / Source: The Pool Company

Finding the right pool builder

Contact local pool builders

Discuss how you will be using your pool – do you want something big enough to get a real workout in or for recreational swimming? Do you want a summer pool or something you can use year-round? Your pool builder should be able to work with your preferences.

Check their reputation

It is very important to choose a builder with a good reputation. The last thing you want is for something to go wrong with your investment. Ask any prospective builders for references and testimonials from previous customers.

Compare quotes

It is crucial to get an accurate quote for all your possible builders before you pick one. Compare these quotes, and make sure they all cover the same basics: the type of pool to be installed, materials to be used, pump and filtration, landscaping and fencing, coping, etc. By comparing several quotes, you can figure out problems, such as hidden costs beforehand – if one quote doesn’t mention a cost that all the others do, you’ll know there is a problem with that quote. Also, comparing quotes directly lets you narrow down your choices.

Categories
Construction

How to build a pergola

A DIY backyard project can be very satisfying to complete. It takes skills to build a modern pergola, which may be something you feel comfortable doing yourself. With cheap pergola kits available, even a novice builder has the ability to put together the outdoor structure. Keep reading this guide for a range of pergola ideas and how you can DIY one.

What is a pergola?

A pergola is an outdoor structure consisting of beams that support an open or closed roof. It’s open on all sides and can be freestanding, attached to a house, or come with a deck or patio. It offers protection from the sun, enhances the look of a property, and serves as a dedicated space outside for entertaining family and friends. There are many pergola ideas to choose from.

Different pergola styles

There are three main pergola styles to consider. They are freestanding, attached, with a deck or patio. Each has a different look and list of advantages. To better understand what makes each stand apart from another, we’ve listed a few of their key features below. When wanting to learn how to build a pergola, you must be clear on the type of structure you’d prefer to have built.

An attached pergola / Source: DRP Constructions & Carpentry

Freestanding

Freestanding pergola kits are for homeowners that want a pergola separate from their house. Choosing this kit style allows you to place the structure anywhere on your property that you see fit. It’s among the most accessible types of pergolas to build because it doesn’t require additional materials to attach it to another structure. It’s a structure that can be in the garden or another area of the yard where it gets a lot of use.

Attached

A structure of this nature is similar to a freestanding pergola in appearance. It is, however, an extension of the house. It can be entered from indoors and provides a unique experience sitting outdoors. You can paint timber pergola designs to match the exterior of the home and enhance its curb appeal.

With a deck or patio

A pergola built in this style is outstanding in appearance and function. It comes with a deck or patio perfect for grilling, container gardening, and drying off after swimming in the pool. The pergola is a welcome retreat on the hottest days and remains a place to sit around a firepit during the year’s colder evenings.

Tools and materials needed to DIY a pergola

If you’re considering building a pergola, you’re going to need specific tools and materials to be successful. To help you get organised, we’ve created lists for your reference. You’ll want to make sure that you have everything on hand before beginning the project to not experience interruptions along the way.

Tools

Easy pergola builds require some tools. You’re able to find them at your local hardware store if you don’t already have them in your toolbox. A saw and drill are necessary. So are bolts and other fasteners that allow you to join the boards together.

  • Saw
  • Drill
  • Measuring tape
  • Hammar 
  • Shovel

Materials

You’re going to need the beams for the posts, sides and roof of the pergola. It is your choice what type of wood you choose. A standard pergola consists of four posts, four header boards, crossing boards, and stringer boards. It is easiest to have these pre-cut to ensure they are the right lengths that match.

You will also require galvanised screws and pre-mixed quick-dry concrete.

Contact local builders

How to build a free standing pergola

Building a free standing pergola takes time but is well worth investing time put into the task. It’s a straightforward process consisting of several steps, which are listed here for you to follow. If you’re planning on doing it yourself, you’ll want to be mentally and physically prepared to complete the project. You’ll need to devote time and money to complete the easy DIY pergola.

  1. Clear the designated area: You’ll need to have a level place to build the pergola. It should be free of rocks, tree branches, and organic debris.
  2. Dig post holes: You can rent a post hole digger. It saves you time and energy by making fast work of the job. Ensure the holes are big enough so that the posts will be secure.
  3. Set the posts in place: You’ll need to put the posts in the holes. They form the supporting structure of the pergola. After you have put the poles in place, pour in the pre-mixed quick-dry concrete.
  4. Attach the beams and rafters: The top of your structure will provide you relief from the elements. Secure the beams and rafters to each other with the screws.
  5. Secure beams and rafters to the posts: Use screws to secure the beams and rafters to the posts that have been set in place.
  6. Paint: You can paint an easy DIY pergola kit to your liking. It can match the house in colour or compliment different elements of it because there is no one best way to paint a pergola.

Once the paint has dried, you can introduce the outdoor structure to your family and friends by hosting an outdoor get-together. You can also spend time working on your garden or catching up with friends while soaking up the sun. The use you get from the pergola is well worth the money spent building it.

How to build a pergola attached to the house

If building a freestanding pergola sounds too complicated, you can build the pergola as an extension of your home. Due to the simplicity of pergola design, you’ll only need a few more materials to give it extra stability. Cheap pergola kits vary in quality. If you decide to go this route, you’ll find the following instructions helpful in attaching it to the house.

Using one side of the house as part of the structure, you’ll need fewer support beams. You’ll need first to cut the lumber. Next, drill holes before marking hanger holes. Finally, cut out the notches and secure the joints. Once these steps are complete, you can paint the wood and let it dry.

A pergola over a pool / Source: Reds Landscaping

Additional tips on building a pergola

Building a pergola can be a great addition to your outdoor living space. Here are some tips to help you out when building your own pergola:

  • When planning your pergola, keep in mind that a continuous span is ideal, as it creates a cleaner and more finished look.
  • Pergola battens are an essential part of the construction. Choose a type of wood that is sturdy, attractive, and weather-resistant to ensure long-lasting outdoor beauty.
  • When securing your pergola battens, consider using stainless steel screws or hooks, as this will give you the most durable and long-lasting solution.
  • Consider installing shade cloth or outdoor curtains for additional privacy and shade on hot summer days.

By following these building tips, you can create a beautiful and functional outdoor space that will provide shade and style for years to come. Ensure you have the right tools and materials, and always consult with a local contractor or building code for additional support.

How to hire a builder

Hiring a qualified builder is among the most important decisions you will make if you don’t choose to DIY a pergola. There are qualifications and skills that a professional should possess before being allowed to work on your property. To help you discover what to look for in a builder, we’ve highlighted some of the most important considerations to make when searching for a capable company to assist you with your project.

Licencing and qualifications

Making sure that the builder you hire is licenced and qualified is imperative. Some states and territories require it. The requirements vary, but the professional must prove that they can build pergolas that are structurally sound. Find out how much it will cost to hire a builder in our cost guide.

Categories
Construction

DIY the perfect paved area

What are the benefits of having a paved area?

Pavers are an excellent way to add space to your backyard for gathering. They make a smooth, solid surface for benches, outdoor chairs, and outdoor grills. You can use them to create paths and add structure to the landscape design. Many different types of pavers are available, including brick, sandstone, and specialty concrete. Many people choose to install backyard pavers as a DIY project. This guide to DIY paving made easy will give you the basics. 

What tools and materials do I need for paving?

You can find patio pavers that give it a formal look or a more rustic, casual one. If you choose the DIY paver installation, here are a few tools that you need to have on hand. Depending on the paver base, some of these supplies needed might change. Here are some of the items that you will need before you begin. 

Paver supplies

  • String line
  • Paver sand
  • Marker paint
  • Paver sealer
  • Pavers
  • Concrete (optional)
  • Gap sand 

Tools

  • Rubber mallet
  • Brick or concrete saw
  • Wooden stakes for markers
  • Measuring tape
  • Shovel or spade
  • Spirit Level
  • Wheelbarrow
  • Plate compactor (Can be rented)
  • Trowel
  • Push broom

Safety equipment

  • Safety glasses
  • Sturdy gloves (leather or mechanic’s gloves)
  • Safety boots (steel toes are best)
  • Hearing protection
  • Long-sleeved shirt and heavy pants
A paved area makes a great entertaining space / Source: Decor Brick Paving

Preparing to lay pavers

Now that you have your supplies and equipment together, you are ready to begin. Here are the basic steps for laying pavers on sand. It might be noted that laying pavers on soil is not recommended because they will shift and move over time. 

  1. Measure the area’s size and shape. The first thing that you need to do is to determine the location, size, and shape of your paver area. Mark the edges of the area with stakes and string between them. The area can be any shape that you wish. 
  2. Choose a paving pattern. The next thing that you need to do is to design the paver area. You can find plenty of ideas online. You can use one type of paver for a uniform look or a combination for a custom look. 
  3. Contact your local council for approval. Next, you need to contact your local council and supply them with your plans for any approval processes that are necessary for your local area. 
  4. Clear the chosen area. Once you have approval, clear the areas of anything that is in the way. This includes perennial plants, sod, bushes, or trees. Next, you need to dig down a few inches and excavate the entire area. Make it as smooth as possible. 
  5. Prepare the ground with sand, gravel, or concrete. Next, put down a layer of sand, gravel, or concrete. The proper way to install pavers is to use a base of sand or gravel for stability. Laying pavers on concrete is another popular method. Laying pavers on soil is not recommended, but if you do, use a plate compactor to tamp down the soil as much as possible. 

How to lay pavers

Next, it is time to start installing the pavers. Here are the steps. 

  1. Set up a string line. When you first did the preliminary plan, you set up stakes and strings. Now, it is time to make sure they are solid and exactly where you want them. These will be your guide for laying the pavers. 
  2. Lay mortar mix and the first row of pavers. Laying the first row is the most important because it will set the spacing for the rest of the project. Take your time and get this one right. 
  3. Use a spirit level and mallet after laying each paver. When placing pavers on top of concrete or laying pavers on a sand and cement mix, you need to use the mallet to tamp them down until they are level. If you do not, you can create a tripping hazard. 
  4. Continue laying the next rows. Now, continue laying the next rows following your plan. Make sure to tamp and level each one as you go. 
  5. Cut pavers for the edges. The final step is to cut and place the pavers for the edges. Once this is finished, sweep sand over the pavers to fill in the cracks and add stability. 
  6. Let the pavers set. Allow the pavers to settle for at least a week before attempting to walk on them or use them. You might need to tamp some of them down again to make them level. Now, you wash them off with a hose and apply several coats of sealer. 

How to cut pavers

Cutting pavers must be done carefully so that they do not crack or splinter and cause harm. You can cut pavers with a hammer and chisel. Use a pencil or marker to draw a line all the way around the brick or paver. You will need to score all four sides. Use the edge of the chisel to score a groove around the paver. Now, you can use a larger chisel to continue chipping away until the paver is the right size and shape. You could also use a paver or concrete saw to cut the pavers. Make sure to use a diamond masonry blade and wear proper safety protection. 

How to lay brick pavers on grass

Laying pavers on sand is the preferred method. If you choose to lay brick pavers on grass, make sure to kill the grass with a poison. Before laying the brick, compact the soil with a plate compactor. Using paver sand is the recommended method because over time, even if you use grass killer, eventually weeds will grow between the cracks. 

How to calculate how many pavers you need

Here are the steps for calculating the number of pavers that you need. 

  1. Multiply the length by the width of the paver area in centimetres. This will give you the total square centimetres. If the area is not square or rectangular, measure it at the widest point. You can also break the area into sections and add them together. 
  2. Next, measure the width and length of the paver and multiply them together. For instance, a standard brick is 21.5 cm x 11.25 cm, which equals 241.9 cm. 
  3. Now, divide the total square centimetres of the paving area by the square centimetres for each paver, and you will have the approximate number of bricks or pavers that will be needed. 
  4. It is usually recommended that you purchase between 5-10% extra for breakage. If you find out that you do not have enough, finding a perfect match can be difficult, so it is usually best to buy a few extra. 
A more complex paving design / Source: We R Paving

How to hire a paver

As you can see, the process for creating a paved area in your yard has many steps, and it is hard work. If this is your first time, you might not be satisfied with your outcome. This is why hiring an experienced paver installer might be the best option. Here are some tips for hiring the right person for the job. 

Licencing and qualifications

Pavers who do hardscaping and pavers or pour hard outdoor surfaces might need special licences in some circumstances. For instance, they might need a licence for laying a poured concrete foundation. They might need a bricklaying licence for a brick patio. In some cases, they might need a landscaping licence. The best pavers in Australia have a certificate in paver installation. This certificate takes six months of coursework to complete. 

Categories
Gardening & landscaping

DIY: Build your own backyard greenhouse

Are you having trouble keeping the flowers and veggies in your backyard alive during the change of seasons? Building a DIY greenhouse in your backyard is an excellent idea. A DIY greenhouse owner can provide many important benefits, such as light, water and temperature control. You can make your own small greenhouse in your yard and allow your plants to thrive all year round. Keep reading for some easy homemade greenhouse ideas. 

What is a greenhouse?

Greenhouses are enclosed structures with a roof and walls of plastic, polyethylene, polycarbonate, or glass panels. They keep plants warm enough to grow all year round despite the temperature outside. You can learn how to build a greenhouse cheaply and keep it at the optimal temperature specific types of plants need to grow. Greenhouses can vary in size from small sheds to large industrial-sized buildings. If you want to learn how to build your own greenhouse, keep reading!.

What to grow in a greenhouse

In greenhouses, you can grow a variety of vegetables, fruits and flowers. You can sow seeds in trays and pots and transplant them outdoors later on. Some of the things people grow in greenhouses in Australia include:

  • Vegetables: Eggplant, tomatoes, peppers, lettuces, radishes and many other vegetables grow well in greenhouses.
  • Fruit: Greenhouses are also great for growing strawberries, cherries, grapes, pears, apples, melons and countless other fruits.
  • Flowers: Roses, lilies, violets, petunias orchids and hibiscus are some quality flowers that do well in greenhouses with proper soil, watering and sunlight.
Greenhouses are great for keeping plants alive during winter / Source: Shutterstock

Preparation for building a DIY greenhouse

There are several important steps you should take in preparation for learning how to build a greenhouse in your backyard. Here are a few key steps for building a small greenhouse either using greenhouse kits or making a homemade greenhouse.

Take note of sun exposure and direction

The orientation and sitting of a greenhouse are significant. Typically greenhouses are oriented north-south to maximize light interception. Be aware of how shadows cast by equipment, gutters and trusses can lead to the crops getting uneven light exposure as that can impact their growth.

Pick a spot with good drainage

Ensure the spot you choose for your greenhouse is level, moist and well-drained. This allows for the cultivation of a wide array of plants and will prevent root rot. 

Option to purchase a kit

If you want a high-quality greenhouse, but don’t have the skills or expertise to build one from scratch, you have the option to purchase affordable greenhouse kits. You can use kits to build strong and durable greenhouses quickly. 

What tools and materials you will need

The process for how to build a greenhouse out of wood or metal framing in your backyard requires several types of tools and materials. 

Contact local builders

Tools

  • Spirit level: To ensure all flooring, shelves, work areas and roofing is level.
  • Tape measure: To accurately measure the greenhouse area, framing, flooring, shelving, roofing and wall materials.
  • Large carpenter’s square: For ensuring right-angle legs are perpendicular to the base, angles from labelled pivot point are accurate. Additionally, this determines roof pitch, plot angles for roofs, and ensures walls are joined together at right angles.
  • Electric drill-driver: To insert screws in flooring, walls and roof.
  • Phillips head screwdriver: To insert or remove Phillips head screws.
  • Shovel or spade: To dig, holes and shallow trenches to make positioning bearers easier. 
  • Framing gun: Used to attach the parts of the frame to each other.
  • Staple gun: Used to connect plastic sheeting to the frame.
  • Foil fixers: Place between the staples and the plastic sheeting to prevent tearing.

Materials

  • Lightweight aluminium, steel, plastic tubing or treated pine: Used to build the framing
  • Clear polyethylene film, glass, acrylic, polycarbonate, fibreglass or plastic sheeting: Used for the walls and roof
  • Screws
  • Treated pine planks, gravel or cement: Used for flooring and shelving
  • Framing studs
  • Lengths of wood or metal: Cut to the height of the greenhouse walls. 
  • Sleepers or bearers
  • Gate/door hinges: To attach the door to the greenhouse structure
  • Lengths of timber or metal: Laid directly on the ground and used to support the flooring structure
Ensure you choose a location that gives the greenhouse optimal sunlight / Source: Shutterstock

How to build a greenhouse

  1. Cut timber: Cut the timber to be used for the frame and flooring or get precut metal for the frame.
  2. Build and secure the floor frame: Make a rectangle the size of the floor you want using sleepers or bearers on the level area. Fix them together using screws. Attach timber planks to the bearers using bugle screws to complete the floor frame. 
  3. Build the front frame: Join the measured and precut lengths of wood or metal together in a rectangular using screws to connect them and hold them in place to make the front frame. Lay out the door frame and fix it to the front frame using the framing gun. 
  4. Secure the studs: Put studs 45 centimetres apart and attach them securely to the outside of the frame.
  5. Build back and side frames: Using precut lengths of wood or metal, build the frames for the greenhouse’s back and sidewalls. 
  6. Secure plastic sheets to the frames: Wrap plastic sheeting over the frames. Pull it tight to each frame. Use staple gun and foil fixers to attach the plastic sheets to the frames. 
  7. Attach the door: Attach the door hinges to the side studs on the front frame using screws. Put a bolt on the door and a bolt pad on the adjacent front frame stud.
  8. Secure frames in place: Attach the front, sides and back to the base frame using screws or framing gun.
  9. Build and attach the roof: Build a roof frame using precut wood or metal. Attach the roof to the frame with screws or framing gun. Connect plastic sheeting or polycarbonate roofing to the roof frame with roofing screws. Make sure it’s smooth and firmly in place and your homemade greenhouse is complete!

How to hire a builder

If you find that making your own DIY greenhouse is more of a challenge than you though, you can always hire a builder to help get the job done. When finding the right professional for your job, always do prior research on the following before making any decisions:

  • Licencing and qualifications
  • Experience
  • Reviews and references
Categories
Construction

How to build a deck

Adding a deck to your home is a great way to have a place for gathering and enjoying the outdoors. A deck can add value to your home and give you more living area. Many people choose to install a DIY deck in their home. This can be an excellent way to save money on labour. However, it often turns out to be a more complicated process than many anticipate in the beginning. 

What do I need to do before I start building a deck?

Some areas of Australia require local council approval for you to build your deck. Before you begin sourcing materials, there are a few things that you need to do first. 

Research deck building standards

The first step is to research deck standards in your area. They will differ, depending on where you live. It is best to research how to build a deck off a house before you begin any planning and approval work. 

Take measurements and make a plan

Next, you will need to take measurements of the deck area, home attachment, and height. Make drawings because you will need them to submit to the council for approval. 

Apply for council approval

Each locality has its own application and approval process. At a bare minimum, they will need to see your building plans, and you might need to pay a fee. Some local areas require periodic inspections at specific points along the building process. 

Some of the items that council regulates on decks include the type of material that can be used, site setbacks from property lines, and construction standards. In some cases, you might need to meet special requirements in storm-prone, flood-prone, and bushfire-prone areas. They will also regulate stairs, handrails, and height. 

A deck can extend your entertaining space / Source: Willo Green

What materials and equipment do I need to build a deck?

Once you have council approval, it is now time to begin serious planning on how to make a deck and the things that you will need to do the job. Here are the bare minimum tools and materials that you need to consider having on hand. 

Tools

  • Shovel
  • Hand or powered saw
  • Screwdriver or rachet set
  • Measuring taps
  • Hammer
  • T-square
  • Builder’s line
  • Electric drill and appropriate drill bits
  • Adjustable wrench 
  • Bubble Level 
  • Wooden stakes 
  • Metal paint
  • Glue
  • Nail Gun 
  • Fastener

Materials

  • 6×6 or 4×4 posts
  • Treated wood for floor joists
  • Treated band boards
  • Concrete mix
  • Carriage bolts for band board at the house
  • Carriage bolts for the beam at posts
  • Single joist hangers to attach joists to house band
  • Galvanized joist hanger nails
  • Galvanized ringed nails 
  • Galvanized screws
  • Deck boards 
  • Railing pickets
  • Railing boards
  • Stain and/or sealer

The amounts of these materials will differ according to the size of the project. Building a deck on the ground is much easier than building a raised deck in many ways. Here are the steps of how to build a timber deck at ground level. 

How to build a deck

  1. Set out the deck plan: This is the most important step because a mistake here can spoil the entire project. Make sure everything is level and square. Make your lines with a builder’s line and spray paint. Take your time on this step and make sure that it is right. 
  2. Install stumps and bearers: This phase creates the foundation. It must also be done correctly so that the deck will be sturdy. In some areas, you must have an inspector come out for an inspection once the holes for the stumps are dug before proceeding. When installing decking bearers and joists, Australian standards must be followed precisely. 
  3. Install joists: Next, you can begin the framing process for the deck. These are the beams that will support the decking boards. 
  4. Lay decking: This is the final part of the deck and is the part that people will see. Make sure to stagger the seams so that there are no two ends in a line. 
  5. Seal deck: The last part of the process is to stain, paint, and seal your deck so that it will last for many years to come. 

When installing deck framing, decking bearers, and joists, Australian standards must be followed for spacing and attachment methods. 

Contact local decking experts

How to build a deck on concrete

Building a deck on concrete is different from building one on the ground. Many homeowners choose to cover their concrete deck with something a little more attractive. You will need sleepers and concrete screws to attach the wood to the concrete. This will require special concrete drill bits, concrete screws, and other specialty fasteners. The posts are then attached to the sleepers, and the joists and decking are installed, just like any other deck project. 

If you have an existing concrete patio, you can easily extend it with a wood deck to create the outdoor living space you’ve always wanted. Here are some tips on how to extend a concrete patio with a wood deck:

  1. First, measure the size of your concrete patio and calculate the size of the wood deck you want to build.
  2. Use a power washer to thoroughly clean the patio surface and allow it to dry fully before beginning construction.
  3. If the patio is not level, create a level surface by using leveling compound or installing a sleepers system.
  4. Install flashing around the patio’s perimeter to protect the wooden framing from getting wet.
  5. Begin building the deck using pressure-treated wooden beams as joists. Building on top of the concrete surface may require special care and usage of special fastening techniques to secure the wooden parts to concrete.
  6. Attach decking boards onto the joist with screws or hidden fasteners.
  7. Finally, add railings, stairs, and finishing details to complete the deck.

Extending a concrete patio with a wood deck can create a seamless transition from indoor to outdoor living areas. Be sure to consult with a local contractor or building code for additional support and guidance on building requirements to ensure a safe and sturdy end product. With the right tools and materials, you can have the outdoor living space of your dreams in no time.

How to build deck stairs

There are many different methods and techniques for building stairs. You can purchase pre-cut stringers, or you can cut them yourself with a saw. One method uses a series of stacked, framed boxes that are set on top of one another. You can also cut two boards and place the stringers and footing between them. 

The most important tip is to make sure that there is not a significant difference between the tops and bottom steps, as this can cause a tripping hazard. When the steps are finished, you might need to install a secure handrail according to your local building codes. You will also want to consider installing a rough tread for better footing. 

A multi-level deck with stairs / Source: Mitroteam Projects

How to hire a decking expert

As you can see, building a deck frame is a complicated process. When it comes to deck construction guidelines, NSW and other territories have different requirements. If you do not have the skills, time, tools, and know local regulations, the process can be challenging. Many times, it is more cost-effective in the long run to hire a professional who can get the deck installation done quickly and professionally. This means that you can start enjoying your deck sooner and without the hassle. 

Licencing and qualifications

The person that you hire will at least have to be a licenced builder. Australia has several different classifications of builders that include commercial, restricted residential, unrestricted residential, restricted to special structures, and other classifications. In your location, you might need to hire a specific type of builder for the job. Ask to make sure that the person you hire is not only licenced but that they are familiar with your local codes and regulations. 

Before making your decision, be sure to call several different ones for a price quote. Make sure to ask for references and to see pictures of completed projects. Make sure that you understand what is included in any quotes that you receive, and don’t forget to ask if the builder offers a warranty with their work. 

Categories
Roofing

Tips for roof cleaning

Many people don’t consider the work that goes into maintaining a roof until there is a problem. It doesn’t hurt to periodically inspect your roof to see if there is anything that needs to be done or if it is holding up under the weather and elements. Having someone look at it can help keep costs down as problems will be detected before they become big issues that will require a lot of money and time to properly fix.

How to clean a roof

Your roof type will determine the best method to clean it. Know what material your roof is made of before you get on it for cleaning. Here are the most common ways to remove built-up algae from your roof:

  • Pressure washing the roof. This will work best when you are dealing with a metal or tiled roof.
  • Chemical washing is best for any type of roof. Make sure it is safe to use with your roof and that it will be effective for your problem.

How to pressure wash it

First, acquire a pressure washer. Consider all the options you have, whether it is to rent or purchase a pressure washer. Once you have the pressure washer, do the following:

  • Start at the peak. This way you will work down and shoot the dirty water off the roof and avoid getting it under the shingles.
  • Do a small area first. Use medium pressure and keep the head about 30cm from the roof. Lower the wand to the roof until you are able to remove the mould and algae. Make sure to not use too much pressure and damage roofing materials.
  • Stand on a dry area while pressure washing. Only stand on areas already clean once you have started as algae becomes very slippery when it is wet.
Take lots of caution when using a high-pressure cleaner on a roof / Source: The Dirt Hunter

Using chemicals

The best option to use when doing chemical cleaning is chlorine. You can also use a weak solution of sodium hydroxide, however this is the more dangerous of the two options. Protect yourself from chemical burns by donning eye and hand protection.

Be safe

  • Have a spotter. If the roof has a steep pitch make sure that you have someone near to watch and get help if necessary.
  • Make sure the chemicals you use will not harm you or the plant life below as you spray it off the roof.
  • Make sure to use minimal pressure with the pressure washer. It will help you control it and will reduce any harm you may do to your roof.

Removing moss 

In addition to adding a rustic and charming look to your roof, moss may actually be damaging your roof. You’ll want to have any visible moss removed as quickly as possible to reduce your chance of roof damage. 

Why should you remove moss?

The damage caused by roof moss actually comes from rain water runoff. Large sections of moss can impede the flow of water from your roof. These sections of moss act like a dam and cause the water to back up under the shingles on your roof. Additionally, These pools of water take longer to dry and reduce the life of your roof. Over time, large patches of moss can cause roof damage and leaks. When you find small patches of moss, it’s a good idea to have them removed before they become larger and start causing these problems.

Contact local roof cleaners

How to remove moss from your roof

While a pressure washer can remove moss from your roof, it can also damage your roof. It’s best to have a professional pressure wash your roof to remove moss to avoid major roof damage. When done right, a high-pressure jet of water will lift the moss from your roof. Done improperly, your roof will be damaged or removed along with the moss.

Another option is to scrub the moss from the roof using a broom or brush with stiff bristles and soapy water. While it’s more difficult to damage your roof while removing moss in this way, it’s also a difficult and slow-going job.

If you catch the moss early enough, you can remove it by treating your roof with a solution of copper sulphate. Simply mix 45 litres of water with 2 kilogrammes of copper sulphate and apply the solution to your roof according to the product’s instructions. This will provide enough solution for an average size roof. However, larger or smaller roofs can adjust this recipe to suit their needs.

Before and after roof cleaning / Source: Maxxy Roofing

Stopping moss growth

The best way to stop moss from growing on your roof is to treat your roof with zinc carbonate on a regular basis. If you don’t feel like mixing up a batch and spraying it on your roof regularly, then you should consider using zinc strips. Simply install zinc strips at special places along your roof and wait for rain. Every time it rains, the zinc strips will release zinc carbonate which will wash over your roof. This reduces the amount of future moss growth with one easy installation.

Should you hire someone to clean your roof?

It’s much safer and easier to hire a professional to clean your roof. Scrubbing your roof by hand from a ladder is a precarious task, and improper use of a pressure washer could remove your roof along with the moss, algae or dirt. Instead, most people opt to hire a professional pressure cleaner or a roof maintenance company. Their experience enables them to remove moss with minimal damage to their roof. They’ll also be able to make recommendations for preventing or slowing future dirt and moss build up.