Embarking on a DIY interior paint project opens the door to infinite possibilities, but mishaps and interior paint problems may arise throughout the process. What was originally a simple revamp to your space can be a headache if you’re not properly prepared for the task.
But don’t worry! This guide will help you navigate various interior paint problems and the different solutions you can take to avoid them altogether.
8 Common interior painting problems and how to avoid them
Problem 1: Uneven paint coverage
Regardless of the colour palettes you choose, uneven coverage occurs when the surface isn’t prepared properly or when strokes and colours are inconsistent during application.
The solution:
Before you even think about painting a wall, take the time to prime your walls, doors, and other surfaces. Primer acts as a foundation, creating a smooth base for the paint to adhere to and ensuring uniform coverage.
Once primed, focus on maintaining consistent strokes while painting. You can’t rush good results, so patiently cover the surface with even coats. This not only guarantees a more aesthetically pleasing result but also minimises the chances of having to deal with patchy walls.
Problem 2: Peeling or flaking
Paint peeling on the wall / Source: iStock
Peeling paint is like a bad breakup between your walls and the paint. It happens when they don’t get along. Common culprits for paint peeling or flaking include a damp or wet surface, insufficient surface prep, temperature fluctuations, and low-quality paints.
The solution:
To ensure you don’t encounter these interior wall paint problems, always prep your surfaces by cleaning them and getting rid of dirt before putting on the first coats of paint. This makes sure the paint sticks better to the surface.
For addressing paint flaking incidents, don’t skimp on high-quality paint since cheap ones will crack over time. Additionally, invest in using suitable prepcoats and topcoats for longer-lasting results.
Problem 3: Bleeding
In the context of painting, bleeding is where old colours or patterns on a wall become visible or bleed through the fresh coat of paint applied. It’s more likely to occur when applying a new, darker colour over a lighter one, and the previous hue becomes noticeable.
The solution:
To prevent bleeding, using at least one coat of tinted primer can provide a neutral base that helps hide the old colour. This ensures a smoother and more consistent finish with the new paint.
Problem 4: Paint bubbles and blistering
Paint bubbles and blisters are often caused by painting in less-than-ideal conditions or temperatures, such as when it’s too hot, or you’re painting an area directly hit by the sun. This can turn your paint job into an absolute nightmare if left unaddressed.
The solution:
An easy solution to this can be to paint at a cooler time of the day to prevent any blistered paint from popping up.
Also, make sure your surface is completely dry with no signs of any moisture. If your walls are hiding moisture, the water trapped beneath the surface will make it difficult for the fresh coat of paint to adhere to the surface and cause it to bubble and blister.
Problem 5: Discolouration and fading
Using a paint roller to paint the wall white / Source: iStock
Walls that become more discoloured when they experience prolonged exposure to the sun. This can cause pigments in the paint to break down and lose their original vibrancy.
Fading, meanwhile, is the result of low colour retention, which might be due to low-quality, non-fade-resistant paints. These paints lack the durability to withstand UV exposure and extreme weather conditions, and as time passes, they become victim to general wear and tear.
The solution:
To combat these interior paint problems, you can start by choosing good quality paint brands, preferably ones with UV-resistant properties designed to resist fading. This can ultimately help delay any instances of fading or discolouration.
Problem 6: Brush or roller marks
If you’re working on a painted surface, you might notice brush or roller marks in some areas. These are the unintentional textured patterns left behind due to uneven application or inconsistent brush strokes, which can be a common problem for those who do the painting themselves. When struggling with this issue, you’re also potentially left with uneven coating on your external surfaces.
The solution:
Invest in a high-quality wire brush or roller suitable for the type of paint and surface you’re working on. If you’re using thick paint, consider thinning it slightly. Thinned paint tends to level more evenly, reducing the chances of visible brush or roller marks.
Problem 7: Blocking
Blocking happens when freshly painted surfaces stick together and is normally caused by not letting the paint fully dry between coats.
The solution:
As a good rule of thumb, don’t rush through the painting process. Allow each coat of paint to dry completely to avoid blocking issues. By giving the area enough time to dry off, you can enjoy smooth and separated layers.
Problem 8: Paint splatters
Paint splatter all over the floor as a woman paints the wall white / Source: iStock
You get paint splatters when tiny droplets of paint are unintentionally propelled onto surfaces beyond the targeted area. Several factors contribute to this common painting mishap, like brush and roller techniques used, painting too fast, or having too much paint on the brush or roller.
The solution:
Paint splatters can easily be minimised by using simple tips and tricks throughout the process, such as when painting a door. This includes having better control over your brush techniques, maintaining stroke consistency, avoiding overloading your tools, and not rushing the application process. It’s also advisable to protect adjacent surfaces with cloths, newspaper, or painter’s tape for added measure.
Additionally, paint splatters can easily be avoided if you hire qualified painters to do your interiors for you. Plus, you get to know how much paint jobs cost. Seasoned painters bring not just skill but a mastery of techniques that minimise the risk of mishaps.
Say goodbye to your painting problems!
When painting interiors, it’s easy for things to get messy. If you’re able to spot the different problems with painting interior walls and the steps you can take to minimise them, then giving your home a colour makeover should be a breeze! If you think you need professional help, you can always book professional painters.
FAQs on interior painting problems
What does a bad paint job look like?
A bad paint job is when your interiors look less than ideal than they should. This can mean having uneven coverage, patchy colouring across the surfaces, drips, runs, peeling or flaking of paint, etc.
How can you tell if wall paint is bad?
Peeling or flaking can indicate the paint has poor adhesion. Discolouration or mould can mean the paint has poor moisture resistance. Uneven coverage or a patchy appearance suggests problems with the paint application, possibly due to improper mixing or thinning.
Why do my walls look bad after painting?
Your walls could look bad after a paint job if they haven’t received proper preparation, like cleaning, sanding, or priming. This can lead to poor adhesion of the paint and an uneven or lacklustre finish.
Likewise, there are other external factors too to why your walls might look bad after being painted. These include having low-quality paint, inadequate mixing, incorrect application techniques, or moisture issues.
The exterior paint colours you choose for your home go beyond mere aesthetics; they shape the very mood and character of living spaces. Whether you opt for the allure of deep blues, the intensity of charcoal greys, or the warmth of earthy tones, your house exterior can make your property inviting and appealing.
If you’re looking to paint your house yourself, then let us help you! In this guide, we will journey through different colour schemes for home exteriors. You can not only enhance your home’s aesthetics through paint but also breathe life into its unique charm.
9 Moody exterior house paint colour ideas
1. Midnight blue
Midnight blue house exterior / Source: iStock
Deep shades of blue can be reminiscent of nighttime, elegance, and a tinge of mystery. It’s best to pair this shade with lighter accent colours for a timeless and classic aesthetic. Opt for a colour palette of crisp whites or creams for your home’s different architectural features, such as the mouldings or posts, to better suit the midnight blue base colour.
2. Mystical grey
Mystical grey is a versatile colour between cool and warm undertones, creating an intriguing and ever-changing appearance. Painting your house exterior with grey paint is ideal for those looking to add a touch of mystery, modernity, and enigmatic charm to a home.
3. Forest green
Turn your home into something you and other people can find relaxing by painting your home exterior forest green. Not only do they make for great exterior house paint colours, but they also bring nature’s serenity and calm. Pair these colours with shades and hues you can easily find outdoors, like brown, yellow, or white.
4. Charismatic charcoal
Modern house in white and charcoal colour palette / Source: iStock
The dark and brooding shades of charcoal black bring confidence and drama to your house. It’s not the usual shade homeowners go for, making it a bold choice for those who want to give a contemporary edge to their home’s exterior.
5. Bold maroon
If you want to make your home exterior a canvas for confidence and energy, try painting it a dark reddish purple like maroon. As a deep and sultry colour, maroon can effectively bring that luxurious yet at-ease feel to your house’s appearance.
6. Rustic brown
If you’re going for a more vintage vibe, a dark, rustic brown or beige colour turns your home exterior into a warm, cosy property. It also provides a timeless design for your home that promotes an inviting and welcoming atmosphere when you pass it or stand by your front door.
7. Muted sage
Big sage house with an entrance deck / Source: iStock
For a more subtle home that still captures visitors’ attention, muted sage can be your unique exterior paint colour scheme of choice. With its green base tones mixed with a bit of grey, this colour creates a calming sight and offers an understated exterior that blends well with the natural surroundings.
8. Elegant aubergine
This rich, eggplant-inspired dark brownish-purple colour adds opulence and uniqueness to your home. It’s not a usual colour that homeowners request for their exterior, and that’s why it’s a bold choice that’s definitely eye-catching and leaves a lasting impression. This daring choice exudes luxury and creativity and elevates your home from ordinary to extraordinary.
9. Ocean teals
Teal, a light blue shade, makes the perfect house exterior paint colour if you’re after hues reflecting serenity and coastal charm. It’s a versatile colour that works well with different architectural styles and facades. Additionally, it is great to pair with neutral or pastel accents, such as in your window or front door trims.
Tips for selecting a paint colour for your home’s exterior
If you’re considering giving your home exterior a dark and moody makeover, you should keep a few things in mind.
Consider the surroundings
Before painting your home exterior, have a thoughtful look at your current neighbourhood and immediate surroundings. Your goal should be to ensure your home works with the environment, not clash with it.
Have complementary trim and accents
Choose complementary colours for trim, accents, and other exterior details to create contrast and enhance your property’s overall design. Lighter trim can provide balance and highlight architectural features.
Test different paint samples
Painting your home is a big decision. Before you commit to a specific colour, try out your desired colour on a small part of your exterior. Evaluate how it appears under different lighting conditions and weather patterns to ensure it maintains your desired effect.
Assess the climate in your area
Darker colours absorb more heat than lighter ones, which can affect the temperatures inside your home. Before fully committing to painting your house exterior, be prepared for the potential impact it can have on your home’s energy efficiency and subsequent costs of maintenance.
Consult a professional
If you’re still unsure about the best colour for your home exterior or the painting process, consider consulting a professional painter or a colour expert for guidance and cost inquiry. With their expertise in their craft, they can readily help walk you through the entire process so you can achieve the desired results.
Moody hues, endless possibilities
Like light colours, deep and moody shades can create a sense of depth to any home exterior. Not only can they offer a cosy and unique atmosphere, but they help amplify its owners’ personality and character.
While the prospect of choosing and applying moody colours to your home’s exterior may seem daunting, the journey becomes infinitely easier with the help of professionals in the field. Their knowledge of colour selection, as well as precise execution, can turn your vision into a reality!
FAQs on moody exterior paint colours
How do I choose exterior paint colour combinations?
Choosing exterior paint colour combinations involves considering your home’s architectural style, surroundings and the dominant colour for the main body of the house.
Select accent colours for trims and architectural details to provide contrast and ensure they complement the roof colour. Test paint samples in different lighting conditions and consider the climate’s impact on colour choices.
Should exterior paint be lighter or darker?
Exterior paint depends on various factors, including your personal preferences, architectural style, climate, and the effect you want to achieve.
Your personal style and aesthetic preferences play a significant role. Some people prefer the timeless, classic look of lighter shades, while others are drawn to the drama and depth offered by darker colours.
What is the best paint colour for a home exterior?
Versatile options include neutral tones, whites or creams, earthy colours, blues, greys, greens, reds, and even black or dark grey for accents. To make the right choice, consider your home’s features, surroundings, and climate, and test paint samples in different lighting conditions.
Valentine’s Day is the perfect time to show your loved one how much you care. This year, why not take the opportunity to surprise your partner with a thoughtful and practical gift that you’ll both enjoy? Make this Valentine’s Day memorable with these seven home improvement ideas.
A clean and tidy home
Nothing says “I love you” like a clean and decluttered home. Your loved one will appreciate the effort put into making their living space clean, comfortable, and organised.
Fresh walls
Bring new life to any room with a fresh coat of paint. Choose your partner’s favourite colour or a neutral hue that matches their style. A fun wallpaper might be better if they prefer some bold prints. Here are some tips on how to install your own wallpaper.
Best painters near you
Kitchen upgrade
Kitchens are the heart of a home, and a small upgrade can make a big difference. Whether it’s new tiles, a new countertop, or even a new kettle, you and your partner will appreciate these improvements. Want to renovate your kitchen? Here’s how you can start.
Garden makeover
If your partner is passionate about gardening, consider giving them a beautiful outdoor space. Hire a professional landscaper to design and create a lush and vibrant garden that they can enjoy all year round.
Home office makeover
With more and more people working from home, a dedicated home office is a must-have. You could declutter, re-organise, clean and even buy new gear to make them more comfortable working from home.
Give the gift of a clean and comfortable home this Valentine’s Day. Surprise your partner by doing these projects yourself or hire a professional to help.
Driveways are one of the first things people see when they arrive on a property. Usually, they go unnoticed. However, they are usually are precursor of what’s to come or what to expect from the house. The saying, first impressions last longest, can very much apply to your driveways introduction to your home. Setting the standard high is very important to onlookers perception and setting the right tone.
So, with this in mind, we are going to give you a few tips and ideas on how to improve the overall look of your driveway.
Tip #1: Fixing general cracks
General surface cracks are really common in driveways over four to five years old. While small cracks aren’t going to ruin your driveway, if not addressed, can lead to a much bigger problem.
The type of cracks a driveway has is do with the materials. For example, if your driveway is made of concrete it will be prone to hairline cracks, for example asphalt. Hairline cracks, are pretty easily sealed over, usually with sealant. Fortunately, this repair job is super cheap and will only take about 20 minutes.
The cracks that you want to be aware of are called, alligator cracks. They get the name alligator cracks because they end up looking like the scales of an alligator. Visually, these look terrible and practically, they can expand and grow over time making your problems ten times worse. Fortunately, they only occur where the asphalt or concrete is weak on your driveway. This means fixing the cracks is really no big deal.
The solution
All you really have to do with these types of cracks are cut out and remove the affected area and re-seal it. Make sure the reseal is the same colour as the surface and that it’s levelled to prevent the replacement looking out of place.
Staining your driveway is one of the easiest ways to give your driveway a nice new look. This tip is for concrete driveways only. Applying a staining solution pretty much the same as staining a piece of wood.
All you need are the following four things:
Broom
Paint Roller & Paint Tray
Driveway Stain
Some Good Weather
We recommend using water-based stains over acid stains because means the better range of colours you can get. Concrete stain is a bit different to paint, as instead of just sitting on the driveway’s surface, the stain permeates into the concrete. This causes the stain to fuse with the concrete rather than just sit on top.
The solution
All you really have to do is sweep off your driveway and make sure there is no rubble, and as little dust as possible. Then, pour your concrete stain into your paint tray and apply the stain to a roller.
Make sure you work backwards from the bottom up to ensure that you are not walking over the work you have already done. Usually, the stain will dry within one day. However, make sure you read the instructions on your stain as all types are different.
Tip #3: Bring in the plant life
Simply putting in some plant life along the sides of your driveway can make a world of difference.
What we have found to make a big difference is placing fresh grass seed along the edges of a driveway. Once this fills in, it should come right up to the edges replacing an area that is typical pretty barren.
For some, the lack of grass on the surrounding edges of your driveway might not even be an issue. But for those that it is, and who are wondering why this is, here is the answer:
If you driveway does not have appropriate drainage channels, water will tend to run off to edges and onto the soil. This water will pool and, over time, erode the surrounding grass. While filling in the grass is not a long-term solution, it can act as a temporary fix.
If you intend to do a bit more heavy-duty garden work, such as planting some trees or thick bushes, be mindful of the root growth. As time goes on, tree and bush roots will burrow underneath your driveway. These can lead to general cracking in the future and eventually undermine the entire driveway.
Contact local landscapers
Tip #4: Lighting
Line the sides of your driveway with some LED lights.
Typically, this is something you want to do while your driveway is being constructed. That way, you can embed them into the concrete or asphalt. This will make the lights and the driveway look one and the same.
But have no fear! If your driveway is already built you can still add some awesome lighting features.
You can pick up some pretty cheap outdoor LED lights from amazon and best of all; they can run on solar power. All you need to do is place them in semi-concealed spot so as to ensure that they still get some sunlight and illuminate your driveway.
This has got to be the cheapest and easiest of all our tips. Simply pressure washing your driveway can take as little as 15 minutes and can make a world of difference.
Over time, your driveway will come into contact with oils and all other manners of stains and dirt. If you don’t already own a pressure washer, head down to your local hardware store and rent one for the day. Washing your driveway will take little to no time at all. A high-quality pressure washer will be able to wash all manner of stains off the surface.
Summer is perfect for enjoying the outdoors on warm sunny days. it is also time to tackle those small home improvement projects that you have been putting off all year. These projects do not have to be time consuming or expensive, but they need to be completed so that you can get on with your summer fun. We’ve put together a list of the top home improvement projects that you should tackle during the warmer months!
Outdoor projects
Outdoor projects are always easier to manage when the weather is warmer and the days are longer and lighter. These projects will help your outdoor spaces be a more enjoyable space to spend your time in.
Clean the swimming pool
Your swimming pool should be serviced and cleaned at the start of the summer months. Your upkeep during the summer season will be much easier as it will require just routine skimming, chemical treatments and vacuuming. Periodic removal of debris after summertime storms may be needed, but you will still have plenty of time for fun in the sun.
Clean out the gutters
Summer can be a risky time for fires, so it is a good idea to clean the gutters on your house of twigs and leaves. This will also keep rainwater from backing up and spilling over into unwanted areas. Call a gutter repair or cleaning service to get an estimate for the initial cleaning and inspection job. You can also do easy spot checks during the summer to keep the rain gutters clear.
Clean sidewalks and driveways
You can rent a pressure washer and blast the driveway to clean the accumulated oil and grime. The sidewalks around your home will really stand out after being washed with high-pressure. The local rental shop can recommend the proper detergent to use on these surfaces. Permanent stains on the driveway can be avoided by doing a yearly cleaning.
Mowing the lawn and trimming hedgerows during the summer months can be made easier if a maintenance program is in place. In early spring, call a landscape professional to come out and perform needed yearly tasks such as fertilising, pruning and pest control. You will only have to do minor trimming and mowing during summer, leaving more time for you to enjoy your yard.
Install a drip watering system
If you prefer to spend less time watering your lawn and garden by hand or moving sprinklers around, you may want to consider installing a drip irrigation system. Inexpensive do-it-yourself kits are available and are not difficult to lay in place. You will save money on water bills and have more time to enjoy your summer.
Contact local pool cleaners
Indoor projects
Renovations to the home are best done in the warmer months to avoid making contractors work in cold and wet conditions. Whether it’s a simple extension, addition or renovation to the kitchen or bathroom, it can give the feeling of a refreshed start – to start the year in the right way.
Fresh paint
Fresh paint can make your home look newer, brighter and more open. Summer is the perfect time to paint the interior and exterior of your home because the paint dries faster in dry weather. Summer hues are a good choice for paint colours because they will make your home appear brighter and happier all year. Good summer colour choices include white, yellow, mint and lavender. For more colour ideas, visit your local paint supply store or talk to a professional house painter.
If you have been thinking about renovating your kitchen, summer is the time to do it. The reason why is that you won’t be able to use your kitchen for cooking during the renovation process. During the summer, you can simply barbecue outside. Renovating your kitchen does not need to break the bank – you can make a few small but key changes to completely transform its look and feel.
Pest control
If you haven’t already noticed, warmer months usually tend to attract more bugs and pests around the home. Mosquitoes buzzing around your ear at night and an army of ants in your pantry are not the ideal way to relax during the summertime. Pests are on the rise as the weather warms and it’s important you have yourself and your family covered for the summer. Read more about ways to repel pests in the best way possible.
You absolutely need to be comfortable within your own home, and one way to ensure extreme discomfort is to have a home that is too humid. It feels lousy, and you’re also opening up your abode to some very harmful things. Humidity creates a moisture-laden home that could bring about a horribly unhealthy environment. It could lead to plenty of mould and other harmful allergens throughout the whole house. So, how do you combat this humidity? The easiest way is to invest in a good, strong dehumidifier. A good dehumidifier will take out all of the excess moisture in the air, making the whole home more comfortable and safer for anyone living there.
The benefits of a dehumidifier
They get rid of mould and musty odours
An excessively humid home can promote the growth of mildew and mould, which will end up emitting an unsavoury musty smell. Mould and mildew thrive in wet environments, and the smell is not easy to eradicate if you do not tackle the source of the dampness. A dehumidifier is beneficial in the sense that it removes the excess moisture from the air, which stops the growth of mould and mildew and eliminates the nasty musty smell. Mould and mildew can also be detrimental to your respiratory health, so using a dehumidifier can help prevent illness.
They promote the longevity of your home contents
Dehumidifiers help protect your home’s contents from the effects of excessive moisture. They also promote the longevity of items, such as clothing, books, food and shoes. These items will also never smell musty as a result. A dehumidifier will also prevent household pests, such as silverfish, from thriving, which helps protect your books and clothing.
Changing the water out of a dehumidifier / Shutterstock
They help enhance your health
A humid environment is not very conducive for those who are prone to airborne allergies and asthma. A dehumidifier would therefore come in very handy, as they promote temperature stability. Dehumidifiers also have the added benefit of including a filter that assists in eradicating air pollutants, such as dust, mould spores and pollen. This promotes a healthier indoor environment for you. Dust mites are also reduced within the home since they can only thrive in humid environments. This can help reduce allergic reactions and asthma attacks.
They are beneficial for drying clothes
Dehumidifiers are ideal when it rains and you are unable to hang your clothes outside to dry or if you prefer not to use a dryer. All you need to do to dry your clothes in record speed is secure them on a drying rack in close proximity to the dehumidifier. Another added advantage is that your wet clothes would not be adding to your home’s humidity. Dehumidifiers are also able to dry clothes overnight, and they are also more energy-efficient than dryers since they use less power. This means you’ll have lower electricity bills, which also makes dehumidifiers a cost-effective choice.
Types of portable dehumidifiers
Absorbent
For small areas that require the removal of moisture, an absorbent dehumidifier is an ideal option. For instance, the Hippos you observe in department stores, hardware stores and supermarkets are containers that hold absorbent material like silica gel. This material absorbs the moisture in the air and pushes the water down to a collection area. Once it is full, you simply dispose of the excess water. This is ideal in cupboards and closets. For smaller areas, utilise sachets or silica gel, which will help mitigate mould.
Refrigerant
By drawing warm, moist air from the room, a refrigerant dehumidifier runs the air through several coils that have been cooled and returns dry air to the environment. This process is extremely effective because the warm air meets the cold coils, resulting in condensation. This water then drips into a bucket, which must be periodically emptied. Another option is for the excess water to drain through a special tube. These dehumidifiers are available in a variety of sizes to fit any room and can be easily moved. Additionally, for extra-moist areas, several can be run simultaneously.
Desiccant
Similar to refrigerant dehumidifiers, this equipment sucks warm, moist air and also expels dry air. The difference is that as opposed to removing the moisture-utilizing cold coils, there is a bed of desiccants inside, which absorb the moisture. The excess water is then drained into a bucket, which must be emptied. Similarly, the other option is a special tube that drains directly outside. Additionally, these are available in a variety of sizes and can easily be moved and paired with other dehumidifiers.
Dehumidifiers can be small and compact / Source: Shutterstock
Finding the right dehumidifier for your house
The first thing you should do is examine the layout of your house so you can pick out just the right type of dehumidifier. Examine the space where you’re going to put in the dehumidifier. Take into account how big or how small the space is, how much average humidity is in the space, and how much you use the room. If you have a smaller room you’d like to make more comfortable, there’s no need to pick up a gigantic dehumidifier – and vice versa. Check-in on the specifications on every dehumidifier. Look at the capacity first. Your average dehumidifier for a one- or two-bedroom home should be able to take out 10 litres of water from the air every day, while ones designed for bigger houses need at least double that capacity. Next, look at how much noise the dehumidifier will produce. If you have it in an area where you’re constantly working, louder dehumidifiers might quickly become annoying.
You also want to look for a home dehumidifier that is easily transportable. Try to avoid the super-heavy ones, and look for dehumidifiers that can be moved from one room to another. You should also definitely invest in a dehumidifier that has a device called a ”humidistat” This device automatically adjusts the levels, so you’re not constantly turning the dehumidifier up and down.
Climate considerations
Where you live also plays a part in choosing the right type of dehumidifier. The wetter the area you live in, the more powerful your dehumidifier should be, as there’s that much more moisture that needs to be removed from the air. If your climate is a more temperate one, you might want to get a smaller, more portable dehumidifier that can easily be moved from one room to another. That’s all you should need. If you have any questions about the capacity of the dehumidifier, ask a local expert at a home-supply store. They should be able to give you all the information you need.
Whether you’re planning a new home build, conducting a renovation or looking to make some minor updates, there are plenty of ways to ensure your kitchen is sustainable.
Eco-friendly kitchen renovations
The first step in refreshing your kitchen is don’t discard – recycle. Before you touch anything, take a few snapshots of your kitchen and spread the word around that you’re looking to renovate. What seems like trash to you might be someone else’s treasure. Someone else nearby might want to take all of those unwanted kitchen fixtures off your hand, which might save you a lot of time and trouble, and possibly earn you some extra budget.
There are many factors to consider when creating a more eco-friendly kitchen design / Source: SG2 design
After that, decide on the scale of your renovation. Should you go all-out and change everything, or are you just looking for a few cosmetic touches? You might want to keep using some of your cabinets. There’s no need to toss them if you’re just putting in a bigger pantry or different kitchen island. Additionally, there is always the option of refacing the kitchen instead of replacing everything. Just try a new set of drawers or door fronts or a new coat of paint on everything. Those little changes might be all that you need for a new look.
Green kitchen appliances
All the different heat-using appliances in the kitchen – the oven, microwave, toaster, fridge – make that room one of the most energy-inefficient places in the entire house. The first thing to do to save energy is to look for the right appliances. Check out the Energy Rating labels. Choose a fridge that isn’t too big for what you’re going to use it for. Use gas for your oven instead of electric energy. Install “smart” appliances that know how to operate at peak energy efficiency.
Eco-friendly appliances benefit both the owner and the planet. Manufacturers must comply with strict environmental standards to earn the Energy Star rating displayed on every product. Because of the legal requirements and increasing awareness and sophistication of consumers, manufacturers now compete not only on performance and cost, but also on the energy efficiency of the appliance.
Buying eco-friendly appliances
By law, Energy Star labels and the rating system for appliances must be in clear language and easy to understand. Each star represents an increment of energy efficiency. The higher the number of stars, the higher the appliance rated in the efficiency tests. When an appliance uses both electricity and water, the label must rate for both. Dual use appliances, such as heater/air-conditioner units, must have separate ratings for each function.
However, a lot of work and research goes into those simple labels. Each appliance is submitted to a series of rigorous tests before it receives its star rating. Depending on the appliance, the difference between the star ratings represents a dramatic difference in the item’s energy usage. For example, the difference of a single star on an appliance may mean it is 25 percent more efficient than the lower rated competitor. As a result, a three-star refrigerator may be more expensive than a two-star model, it will be run up to 25 percent more efficiently. The difference in electricity costs will pay for the unit over time.
Contact local kitchen renovators
One exception to the Energy Star is ovens and stovetops. They are typically not labeled. As a consumer, you must decide which is better for you. Generally, gas units are considered more efficient and cheaper to operate. If you prefer an electric range, consider an induction system. It is more expensive initially, but cheaper and safer to operate.
Other eco-friendly and green alternatives include compact fluorescent lights and LED lights. Consider adding solar panels to your home and converting to solar hot water heating. The true benefit of eco-friendly appliances and other products is that over the life of the unit you save energy, you save money, and you help save the environment.
Materials
The materials you use to construct your kitchen also make an environmental impact. Try using recycled timber, recycled glass or engineered stone when constructing your floor or benchtop – it will look just as good and will do wonders for the earth.
Key Takeaways: • Kitchen splashbacks are essential for protecting walls from moisture, grease, and food splatters while enhancing kitchen aesthetics and potentially contributing to property value. • From ceramic tiles and glass panels to stone slabs and timber options, each material offers distinct benefits for various kitchen styles and maintenance requirements.
A study showed that kitchen renovations were Australian homeowners’ number one home improvement project. Yet, many overlook one of the most crucial design decisions that can make or break the entire space: kitchen splashbacks. Splashbacks don’t just protect walls from cooking chaos; they can also transform a bland kitchen into a stunning centrepiece or, if chosen poorly, undermine even the most expensive makeover.
There are different types of kitchen splashbacks for every need and homeowner personality. This guide explores the most sought-after splashback materials among Australian homeowners, their unique properties, and the care routines that will maintain their beauty and performance for decades.
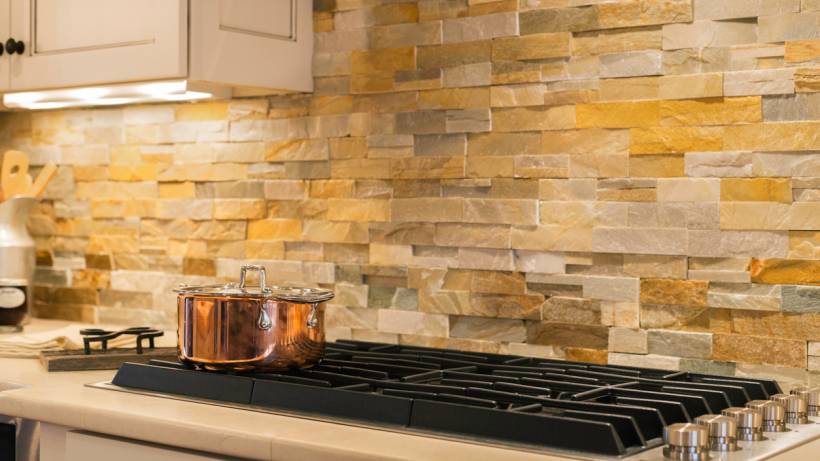
Understanding kitchen splashbacks and their benefits
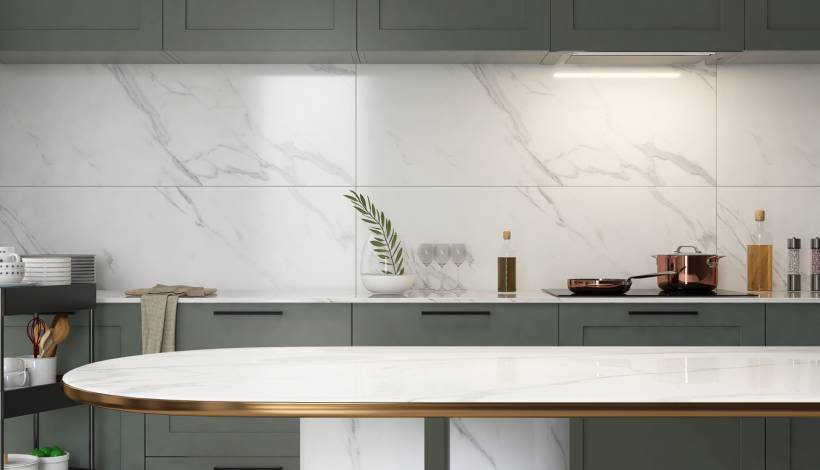
A modern kitchen with marble-effect splashback tiles. | Source: iStock
A kitchen splashback is a protective surface that goes behind cooking and prep areas and sinks, where walls face regular exposure to moisture, heat, and food particles. Beyond their primary protective function, different types of splashbacks for kitchens deliver various advantages:
Hygiene
Splashbacks provide surfaces that are easier to sanitise than painted walls, reducing bacterial growth and maintaining kitchen cleanliness standards. Their non-porous nature prevents the absorption of cooking odours and contaminants.
Aesthetics
You can choose from various splashback designs to give your kitchen visual depth. Recent trends favour earthy tones and natural textures, with materials such as stone and timber finishes bringing warmth and character to kitchen environments.
Property value
With the right and fitting splashback for your home, it can enhance your home’s market appeal and contribute significantly to returns from kitchen renovations. Quality installations show attention to detail and long-term thinking that appeals to prospective buyers.
What are the different kitchen splashback materials in Australia?
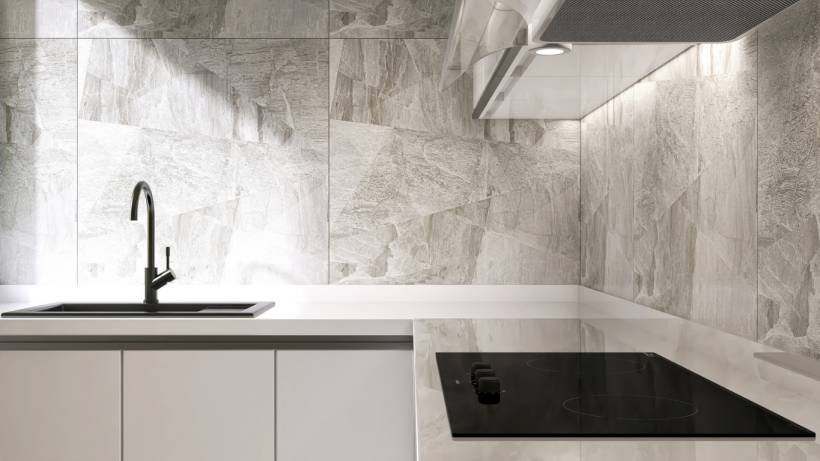
A sleek kitchen featuring a stone-look backsplash and countertop. | Source: iStock
Australian kitchens showcase several types of kitchen splashbacks based on material. Each type offers distinct characteristics suited to different cooking styles, maintenance preferences, and design themes.
Ceramic and porcelain tiles
Ceramic and porcelain kitchen tiles remain popular among Australian homeowners due to their versatility and practical benefits. These tiles offer affordability, straightforward installation, and a range of classic, appealing options. Of these two, porcelain has higher water resistance, which makes it even better for particularly humid kitchens.
Features: Both materials are highly durable, but porcelain offers superior resistance to water absorption and thermal shock. The wide variety of colours, patterns, and sizes means you can achieve any design, from understated neutrals to bold, dramatic pieces. Large-format tiles are also effective for creating clean, elegant lines with less grout.
Finishes/Options: Ceramic and porcelain splashbacks come in high-gloss, matte, textured, or stone-look surfaces. Glossy tiles reflect light and brighten a space, while matte and textured finishes offer a softer, more tactile feel. Meanwhile, stone-look porcelain brings a luxe and natural appeal while still being durable. There are also mosaic options in various finishes and sizes that give a sleek, low-maintenance look.
Best for: Homeowners seeking cost-effective solutions with extensive design flexibility. Tiles look great for both traditional kitchen designs, like a Hampton-style kitchen and contemporary designs.
Pros: • Cost-effective–ceramic tiles range from $20–30/m², while porcelain tiles are around $70/m² • Easy to replace individual tiles if damaged • Good heat resistance • Simple to clean using standard household cleaners
Cons: • Grout lines can stain and need periodic retouching • Requires more upkeep than seamless surfaces (e.g. glass, stone) • Complex patterns or irregular layouts increase installation difficulty
Glass splashbacks
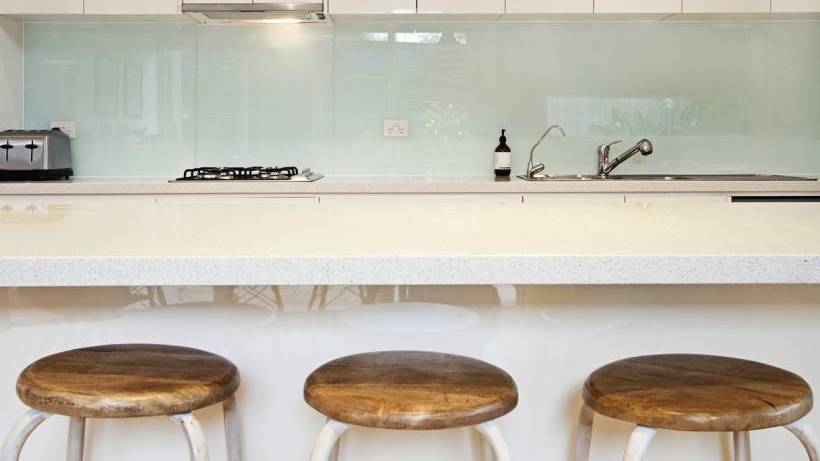
The sleek and minimalist design of a glass splashback. | Source: iStock
Glass is one of the most common types of splashbacks for kitchens in Australia, especially those using tempered glass for improved safety and durability. They deliver sleek, reflective surfaces that suit modern kitchens and are easy to maintain.
Features: Tempered glass is three to five times stronger than regular glass, providing excellent durability and heat resistance. Their non-porous surface prevents water absorption, eliminating concerns about cracking, swelling, or staining.
Finishes/Options: Available in numerous colours, including bold blues, vibrant greens, and sophisticated neutrals, with options for clear, bronze, or smoked finishes. Custom colour matching allows coordination with existing design elements.
Best for: Contemporary kitchens that prioritise minimal maintenance over pattern variety. It’s also suitable for smaller kitchens where light reflection creates spacious illusions.
Pros: • Quick wipe-downs remove grease, splatters, and fingerprints with ease • Superior durability with minimal maintenance • Excellent light reflection that can make small kitchens appear larger
Cons: • Higher initial costs from $30 to $120 per square metre (excluding installation) • Extended installation timeframes and professional installation requirements for measurement, fabrication, and fitting • Highly polished finishes may also create glare issues in bright spaces
Stainless steel splashbacks
Stainless steel applications in residential kitchens create looks that feel both innovative and classic, ranging from standalone installations to comprehensive coverage across entire spaces. This material brings commercial kitchen durability to a residential setting.
Features: Outstanding heat resistance and hygienic properties make stainless steel ideal for active cooking areas. The material resists corrosion, staining, and bacterial growth while providing contemporary industrial aesthetics.
Finishes/Options: Available in brushed, polished, and textured finishes. Standard gauges provide adequate protection while heavier options offer enhanced durability for high-use situations.
Best for: Contemporary kitchen designs where functionality takes precedence over decorative elements. It’s particularly suitable for serious cooking enthusiasts who value commercial-grade performance.
Pros: • High durability, easy cleaning, and recyclability • Superior heat resistance compared to alternatives, making it ideal for gas cooktop applications • Generally costs less than premium glass or stone
Cons: • Prone to scratches, fingerprints, and watermarks, requiring careful cleaning techniques • Industrial appearance may not suit all design preferences and architecture
Acrylic splashbacks
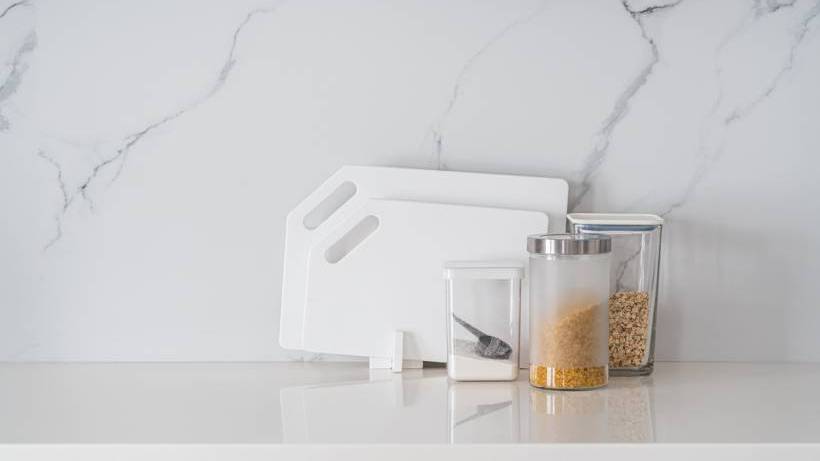
Close-up view of a minimalist kitchen design. | Source: iStock
Acrylic splashbacks provide a glass-like appearance at reduced costs with simplified installation processes. For example, lustrolite is a popular high-gloss acrylic option that mimics glass while offering lightweight installation and superior stain resistance.
Features: Lightweight construction facilitates easier installation compared to glass while maintaining a similar visual appeal. Non-porous surfaces resist staining and moisture absorption effectively.
Finishes/Options: Available in extensive colour ranges with gloss and semi-gloss finishes. Custom colour matching accommodates specific design requirements.
Best for: Cost-conscious renovators seeking glass aesthetics without premium pricing. It’s suitable for DIY installations where professional glass fitting exceeds budget limitations.
Pros: • Significantly lower costs than glass with easier installation requirements • Less likely to break than glass due to its higher impact resistance • Can be suitable for DIY installation in some cases.
Cons • Susceptible to scratching, requiring careful cleaning with soft cloths and mild cleaners • Limited heat resistance compared to glass or stone alternatives—maintain appropriate distance from heat sources
Timber and plywood splashbacks
Wood-like materials add rustic appeal and tremendous warmth to kitchen spaces, with modern moisture-resistant tiles providing natural beauty on top of the durability you demand. Professional carpenters, however, advise that if you want to use natural timber, moisture resistance should be a top priority.
Features: Timber applications offer a minimal, warm look when applied across kitchen spaces, including cabinetry and flooring. Modern treatments enhance moisture resistance while preserving natural characteristics.
Finishes/Options: Natural timber offers various species with distinct grain patterns and colours. Engineered options provide enhanced stability and moisture resistance while maintaining authentic appearances.
Best for: Country-style and modern-country kitchen styles that emphasise natural materials and high-quality craftsmanship. This makes it suitable for homeowners prioritising warmth and organic textures.
Pros: • Unique natural beauty with potential for customisation through staining or finishing • Creates an inviting, warm atmosphere that complements various design styles • Resists moisture better than untreated timber while maintaining the same aesthetic
Cons: • Requires careful sealing and regular maintenance to prevent moisture damage • Limited heat resistance; appropriate distance from cooking surfaces is necessary
Stone splashbacks
An elegant kitchen with a textured stone backsplash. | Source: iStock
Stone splashback materials represent premium choices for sophisticated kitchen designs and work particularly well in luxury kitchen renovations.
Features: Matching splashback and benchtop material combinations using stone create sophisticated, cohesive flows throughout kitchen spaces. Natural stone provides unique patterns while engineered options offer consistent appearances and enhanced durability.
Finishes/Options: Stone splashbacks, particularly granite, marble, and quartz, offer durability and luxurious appearances when matched with coordinating benchtops. Natural stones showcase individual characteristics with polished, honed, or textured finishes.
Best for: Luxury kitchen installations where premium materials justify higher investments. Consult our benchtops cost guide for more detailed cost advice.
Pros: • Superior durability and easy maintenance with low porosity, preventing liquid and bacteria absorption • Exceptional heat and scratch resistance with long-term aesthetic preservation • Generally costs less than premium glass or stone
Cons: • Higher costs than most alternatives; professional installation for natural stone is significantly more expensive • Marble splashbacks are also soft and porous, making them susceptible to marking and staining.
How do you maintain and clean your kitchen splashback?
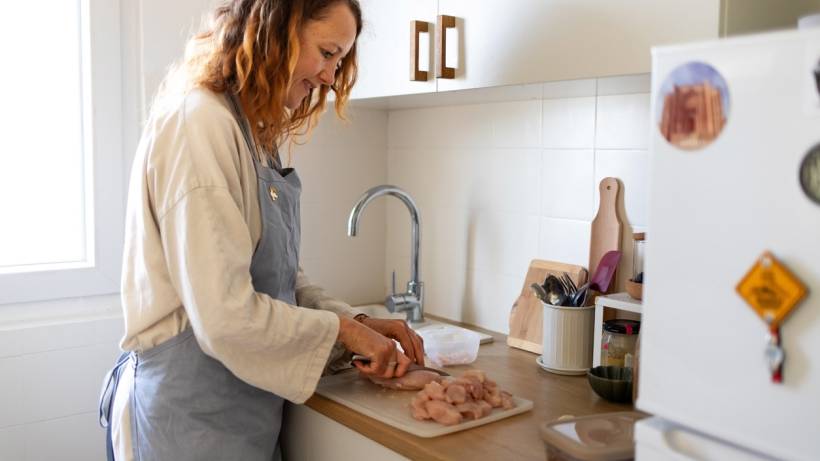
Preparing food in the kitchen. | Source: iStock
What type of splashback is best for the kitchen? The answer is the one that you can maintain. Like most things around a typical home, a splashback for the kitchen needs regular maintenance to extend its lifespan while preserving its appearance. While different materials require specific approaches, most principles apply across all installations.
Wipe spills right away
Removing spills and food splashes right away prevents permanent staining to splashbacks or grout. Developing a habit of cleaning spills as they occur maintains a splashback appearance with minimal effort.
Use appropriate cleaning materials
Your splashback material determines appropriate cleaning products, ranging from simple glass cleaners to specialised stainless steel solutions.When uncertain, water-diluted gentle dishwashing detergent provides safe cleaning for most materials. Regardless of your splashback type, avoid harsh or abrasive chemicals that can cause permanent damage.
Choose the correct cleaning tools
Using appropriate cleaning cloths maintains the splashback’s finish. Avoid abrasive options like metal or plastic scourers, which can damage or scratch surfaces. Instead, opt for lint-free cloths or paper towels to clean marks and spills. Then, after cleaning, it’s best to wipe over surfaces with a dry, clean cloth.
Clean according to cooking frequency
Heavy cooking requires daily splashback cleaning to prevent grease buildup, while weekly thorough cleaning suits moderate cooking patterns. Adjust cleaning frequency based on your cooking habits and splashback exposure.
Apply proper cleaning techniques
Use circular motions when cleaning glass surfaces to avoid streaking, rather than wiping up and down or left to right. Remember to let the cleaning solutions sit for several minutes before wiping to soften stubborn residues.
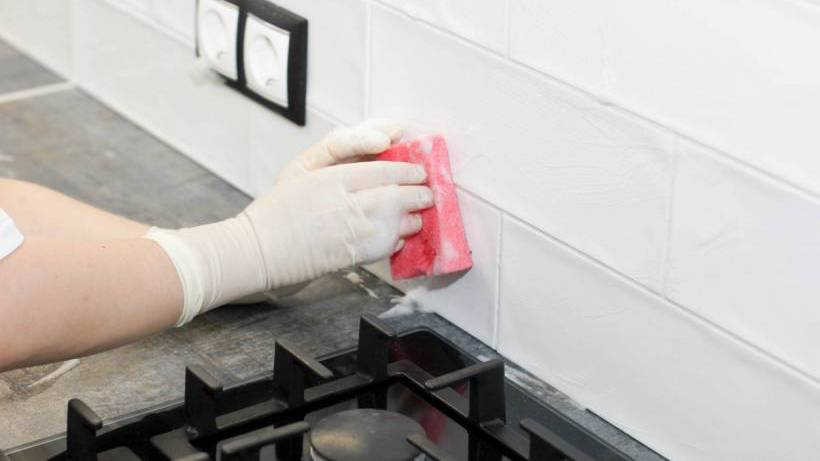
Maintain sealing and water protection
Sealing splashbacks protects them from water damage regardless of material type. Stone splashbacks require resealing every few years, while tile splashbacks need grout resealing periodically. Make sure to check the integrity of silicone borders that help maintain water impermeability, as these may need replacement over time.
Most modern kitchen splashbacks encounter issues during their lifetime. Fortunately, they can be resolved with proper knowledge and a little elbow grease.
Grout discolouration or mould growth
For light discolouration: Mix equal parts water and white vinegar in a spray bottle. Spray affected areas, let sit for several minutes, then scrub gently with an old toothbrush. Rinse well.
For stubborn stains: Create a paste using baking soda, dish soap, and water. Apply to discoloured areas, allow adequate contact time, then scrub gently with a soft brush.
For mould growth: Use appropriate mould cleaning products following the manufacturer’s instructions and ensure good ventilation. However, consider a professional assessment if mould persists, as this may indicate moisture penetration issues.
Surface scratches
Glass splashbacks: Minor scratches sometimes improve with appropriate polishing compounds applied with soft cloths in circular motions. On the other hand, deep scratches may need professional assessment to determine if repair is more cost-effective than replacement.
Acrylic surfaces: Light scratches may respond to gentle polishing with appropriate products designed for acrylic surfaces.
Stainless steel: Buff minor scratches following the grain direction using appropriate stainless steel care products and microfibre cloths. Unlike glass, avoid circular motions when polishing stainless steel surfaces, which can worsen the appearance.
Surface stains
Oil and grease stains: Apply baking soda paste to stained areas, allow adequate contact time, then remove gently with a soft cloth.
Hard water marks: Mix equal parts white vinegar and water, apply to marks, wait several minutes, then wipe clean. For persistent marks, lemon juice provides natural acidity.
Food stains: Address them right away with a dish soap solution. For set stains, check the manufacturer’s recommendations for appropriate cleaning methods.
Chips/cracks
Ceramic/porcelain tiles: Small chips can often be concealed with colour-matched repair compounds available from tile suppliers. Clean the area, apply according to manufacturer’s instructions, and allow adequate curing time before cleaning.
Glass splashbacks: Any crack compromises structural integrity. Stop using the area right away and contact professionals for assessment. Temporary measures may prevent the issue from worsening until a professional can inspect the problem.
Stone surfaces: Minor chips may be repairable with suitable products, though professional assessment often provides the best guidance for matching patterns and achieving proper finishes.
Choose the right kitchen splashback for your home
Strike a balance between your preferences, commitment to maintenance, and budget. In addition, how often you cook matters, as premium materials like natural stone offer beauty and durability but demand higher maintenance and a greater upfront investment.
Connect with trusted kitchen renovation experts who can guide you through material selection, design planning, and professional installation to create the kitchen of your dreams. For comprehensive pricing information, explore our detailed kitchen renovation costs guide to help budget your project effectively.
FAQs on kitchen splashbacks
Can I put a new splashback over old tiles?
Installing splashbacks over existing tiles is possible in many situations, provided the current surface remains firmly attached and level. The additional thickness may require adjustments to electrical outlets and trim pieces. A professional assessment will help ensure proper adhesion and long-term stability.
When planning installation, consider what’s included in quotes, warranty coverage, and whether building inspection compliance documentation is required. For electrical modifications, work with qualified electricians to ensure safe compliance with Australian standards.
How high should a kitchen splashback be in Australia?
Standard Australian practice installs splashbacks at 600mm above benchtop surfaces for electric and induction cooktops, thoughnewer rangehood manuals often recommend 650mm regardless of cooktop type.
Note that areas behind gas cooktops requirespecific clearance considerations due to safety regulations outlined in Australian Standard AS/NZS 5601.1. For gas cooktop installations or modifications, consult a licensed plumber who understands these compliance requirements.
What is the most durable splashback material for a busy kitchen?
Quartz and porcelain offer exceptional durability with heat, stain, and scratch resistance, making them ideal for active cooking environments. Both materials provide easy maintenance while withstanding heavy daily use without compromising appearance. For comprehensive durability comparisons, explore our kitchen benchtop materials guide.
What’s the difference between ceramic and porcelain splashback tiles?
Porcelain tiles absorb less water than ceramic alternatives, making them more suitable for high-moisture kitchen environments. Porcelain also demonstrates superior durability and stain resistance, though ceramic tiles offer broader design variety at lower costs.
Do stone splashbacks need to be sealed in Australia?
Natural stone splashbacks require periodic sealing every two to three years to maintain protection against moisture damage and staining. Engineered stone alternatives often require less frequent sealing due to their dense structure and consistent composition.
Kitchen cabinets don’t just provide storage; theyre also a primary focal point for any kitchen. Switching up your kitchen cabinets is an easy way to add a decorative touch to any type of kitchen space, no matter what the size. Vinyl wrap are durable enough to stand up to everyday wear and tear, and they also look fabulous. Made from medium-density fiberboard (MDF) thats been cut, shaped and coated with glue, and then covered with pressed vinyl that goes completely around the door so that there are no visible joints.
Vinyl wrap doors are incredibly versatile, as MDF panels can be cut and shaped in a huge range of styles, from simple, flat designs to ornate surfaces that resemble carved wood. The vinyl wrap is available in a wide array of colours, textures and finishes, including simulated wood veneers and glosses.
Vinyl wrap doors are extremely popular with homeowners on a budget because they can replicate the look of wood so well. They cost significantly less than natural wood cabinets, but you have to look closely to see the difference. In addition to smooth wood grains, vinyl wrap can also simulate the look of different varieties of textured wood. This means that if you already have wood features in your kitchen, you’ll be able to select vinyl door coverings that will tone in beautifully.
Caring for vinyl wrap doors
Vinyl wrap doors are ideal for kitchen cabinetry because theyre incredibly durable. The MDF material is scratch resistant, so you dont have to worry about chips and marks. It is also engineered to seal out water and moisture, so your cabinets wont be in danger of warping. In addition, vinyl wrap doors require very little maintenance. You’ll never need to sand, paint or revarnish your vinyl wrapped doors, and they’ll never need furniture oil. To clean them, all you need to do is wipe them with a soft cloth or sponge and warm soapy water, and then allow them to air dry. Avoid using chemical cleaners, as these may damage the vinyl. For stubborn stains, you can apply a bit of methylated spirits, and then rinse clean. Otherwise, the only other maintenance you’ll need to do is oil the hinges occasionally.
2. New benchtops
What is the first thing to wear out in the kitchen? Often it is the benchtop. From all the spilling, chopping, and general wear and tear that benchtops take, upgrading to a new laminate, granite, or even marble top can make a vast improvement to the overall modernised look of your kitchen.
There are several different factors that need to go into your benchtop selection. First, think about how big you’ll need to make your benchtop; as a general rule, they should be between 600-900mm deep. Remember, if they’re too wide, you won’t be able to reach all the items you’ll need – but don’t make it too small as to detract from the food preparation! Figure our how many people are going to be preparing food, and get a benchtop that has room enough for all of them to do the work.
After that, you’ll have to figure out what your benchtop will actually look like. This is important, since the benchtop is such an important, dominating part of the kitchen.
Benchtop materials
You want to pick out a tiled benchtop that both fits into the existing decor and is practical enough to fit into your lifestyle. More serious cooks might want to go for heat and scratch-resistant materials, while casual cooks might want to go for laminates. Additionally, figure out how much of a renovation you’d like to do. Just replacing the benchtops might be more complicated than it seems – you might have to figure out how structurally sound your kitchen is before you do any work.
Granite is durable and resistant but needs to be sealed on a regular basis. The blended material Corian is seamless, stain- and heat-resistant and available in a range of options. The marble looks great but requires plenty of sealants. Quartz is low-maintenance and very durable. Concrete is very popular nowadays and can be cast right on-site, but has to be sealed often. Laminate is economical and versatile. Tiled kitchen benchtops offer plenty of designs, and are available in several different materials. Hardwood is sturdy and perfect for the home cook who wants to get serious.
Contact local kitchen renovators
From bargain to expensive, kitchen benchtops are available at a variety of prices. However, even if you are on a strict budget, do not skip the laminate benchtops. They are highly cost effective and will last for many years with little maintenance. Also, they are available in a variety of colours, effects and patterns. There are finishes that resemble stone or timber, so you can have that look without the cost. Additionally, laminates are available in designer options to provide stylistic flare to your kitchen. Use laminate benchtops in conjunction with laminated splash backs, doors and drawer fronts.
5. Splashbacks
Consider filling the gap between your new counters and cabinet doors. Connect your cupboards and benchtop elements by installing new splashbacks. Options for this feature include acrylic splashbacks, glass splashbacks, and even LED splashback which can install straight over your existing one.
One of the quickest and least expensive ways of giving your kitchen the makeover it deserves is to add some personal touches. Let’s take a look at how we can do this on a budget:
Grow flowers on your windowsill: Find a colourful flower or useful herb to grow indoors on a windowsill.
Update your small appliances: You do not have to run out and buy a new stove or refrigerator unless you really want and need to. Instead, you can just update some of the smaller, frequently used appliances in your kitchen. Think about adding an element of colour while you’re out shopping for these; it will bring a new element to your kitchen countertops.
Also, think about swapping out those old handles and hinges for some new, interesting ones. There is a lot of freedom in this upgrade, as home decor suppliers have a huge range of options for you to choose from.
5. A fresh coat of paint
One of the easiest and most effective ways to hit refresh on a tired space is a fresh coat of paint. Depending on the layout of your kitchen, this could be a great option.
Another option to revamp your kitchen is a door respray or finish. You could paint over suede paint with a more durable and easier-to-clean 2-pack paint, or opt for a Japan black finish for a sleek and modern look. However, if you’re not confident in your DIY skills, it’s best to leave it to the professionals to avoid a potential floor disaster.
In addition, if you have a display cabinet that does not seem to be getting the most attention, think about painting its back wall with a bright vibrant colour that can breathe a new life into it.
There is a lot of talk about sustainability these days, especially when it comes to home design. Finding a sustainable home design is important not only for your budget’s sake, but also from an eco-conscious view point as well. Australia now has stringent requirements for builders of new structures to create buildings that are sustainable and energy efficient.
Designing a sustainable home
Designing a sustainable home is about choosing materials that are not necessarily cost-effective now, but will last the longest and provide the most wear. It is important when designing a home that you ensure that the design will work for some time to come with energy efficient aspects such as a north facing living room, energy efficient windows, open floor plan, and more.
Sustainability is the ability to endure through change and requirement. A sustainable home design is not only appealing and attractive but energy efficient, spacious, and provides effective use of square footage. Other aspects of sustainability include good insulation, sealed windows, energy efficient heating system and minimal use of natural resources.
Sustainable home design principles
Sustainable home design principles include:
Prime location, orientation and landscaping to maximize exposure to natural sunlight and breezes.
Solar energy elements
Water recycling and efficiency
Alternate energy sources such as solar or wind power
Low energy consumption
Recycled materials
Ways to create a self sufficient home
1. Save water
Unless you have a well somewhere on your property, going completely off the grid when it comes to the water supply is nearly impossible; still, it doesn’t mean that there’s nothing you can do to save water and minimise its consumption. You can collect rainwater from your own rooftop and use it for the toilet, washing clothes, and watering plants. What is more, if you properly maintain your rainwater tank and follow the Department of Health’s guidelines, you can use it for cooking too. Having a rainwater tank can save you a lot of money. You can also save water you used for washing your hands and use it to flush your toilet, for example.
2. Waste management
We all make a lot of waste every day, but if you start sorting it, recycling, and making compost, you will be able to minimize the impact you have on the environment. Compost is easy to make, all you need are organic materials you can layer: scraps of vegetables from your kitchen, grass clippings after mowing your lawn, dry leaves and twigs in autumn, as well as shredded paper. You will also need a bit of soil in order to create a concoction which becomes humus which you will be able to use to fertilize your garden naturally. Keep in mind that dairy and meat products shouldn’t be thrown in compost bins, as these attract the ‘wrong’ kind of insects.
3. The sun is your friend
It’s possible to produce your own electricity and not pay for it by installing solar panels on the roof of your home or pick free-standing ones and leave them in an open area. Solar panels use the sun’s rays and warmth and convert them into electrical energy which you can use to power your home in any way: for cooking, electrical appliances, charging your phone… You name it! Even though they used to be rather expensive and difficult to get, solar panels are more affordable today than ever. They will allow you to save a lot of money too: a 5kw solar system will save you up to $1800 a year. As the electricity prices rise every day, solar panels are a common sight everywhere.
Solar is a renewable source of energy and can help save you money on bills / Source: Hot Water Heroes Pty Ltd
4. Natural heating & cooling
Your heating and cooling systems are taking up a lot of energy and money, so by switching to solar panels, your monthly bills will be significantly lower. Your reliance on these can also be reduced, however, if you make small changes in your household: if you opt for increased ceiling and wall insulation as well as double glazed windows, you won’t have to rely on artificial heating and cooling. The best thing is that both of these things can be added as building sustainability upgrades for your modular home. Also, you’ll want to close off areas of your home which you aren’t using all the time: living room during the night and bedrooms during the day.
Wrap up
Turning to alternative sources to provide your own heating, cooling, and water, as well as to manage your own waste is a great way to do something for our planet. You might think that it’s not much, but you’d be surprised to discover how much those ‘little things’ matter when you consider the bigger picture. Attaining self-sufficiency is challenging, but definitely worth it, and if you’re willing to put in more effort, you’ll manage to get your own self-sufficient home and do something for the environment.