Lighting plays an important role in the design of any room, especially a multifunctional space like a living room. Not only is it used to illuminate a space and promote functionality, but it can also create a certain ambiance and elevate the living room décor. Yet, despite such an important role, lighting still remains one of the most neglected design elements. Something as simple as wall lights can completely transform your space and give it a really cool look. If you want to beautify your living room and accentuate its features, using these wall light ideas as design inspiration.
How to choose a living room lighting scheme
Layers: First things first, you need to make sure that your living room has an appropriate, layered lighting scheme. Installing several sources of lights, including wall lights, will provide you with a balanced lighting scheme and a harmonious ambiance that exudes comfort, style and functionality.
Ambient: Your space should have a general source of light that will illuminate the entire space. This type of lighting is also called ambient lighting. For instance, a stylish pendant or a chandelier can not only work as a show stopping feature in the room, but also as general lighting.
Task: Your living room should also have task lighting that will illuminate specific areas and provide you with focused light necessary for performing tasks, such as reading or working.
Accent: Accent lights is the last layer of lighting that your living room should have. These lights are used to create a dramatic effect and illuminate a decorative item or they themselves may work as embellishments. Incorporating all of these types of lighting will fill your living room with a stunning glow, support its different purposes and enable you to enjoy your space to the fullest.
The purpose of the lighting will determine what kind of wall lights you should get.
Ambient light: Go with wall fixtures with translucent glass lamps, as they will illuminate your space with a diffuse glow while also embellishing your living room.
Task light: Try a wall sconce as it provides a more focused glow
Number, strength & position
The number of ceiling lights you have will affect how many wall lights you’ll need in your living room. The position of your living room wall lights is yet another factor to have in mind when buying them. Since wall lights are typically placed at eye level, you need to pick the size and style that will work well when set against the background.
Style
When it comes to style, you should go with wall lights that fit in the general design of your living room. For instance, if you have a modern living room, you should go with a simple, sleek design with clear lines that will fit into the minimalist nature of contemporary style. On the other hand, iron fixtures are a much better choice for an industrial living room. The design and style of your wall lights is as important as their purpose because it will enable you to use them as stylish embellishments and create a cohesive look in your living room.
Contact local electricians
Wall lights & atmosphere
Lighting can have a major effect on your living room, its style and overall atmosphere. When installing wall lights, you should consider what you want to achieve. They can be used as both task and accent lights, helping you create completely different effects. Before implementing them to your space, you should consider how they will work with other lights. You should also consider whether you want to use them to enhance the functionality of your living room or create a particular visual effect. These decisions will greatly influence what type of wall lights you should buy and the way you’ll use them in your living room.
Another important factor to have in mind when installing additional lighting fixtures is whether there is a functioning electricity connection in your living room. You may need to install additional lighting switches or solve certain electricity problems before installing new wall lights. This will prevent any electricity-related accident and damage, so it’s an essential step that you shouldn’t skip. Of course, if you’re not experienced in dealing with electrical installations, it’s advisable that you call in an experienced professional.
Creative ideas for installing wall lights
Wall lights are simple details that offer a world of creative ideas that can help you elevate your living room décor and create a stylish, elegant ambience. If you want to create an artsy effect, you can use these fixtures to illuminate your artwork. These wall lights should be subtle yet impactful, with a strong glow that will accentuate your paintings. For a similar effect, you can use them to illuminate a collection of decorative embellishments. Placing them a bit lower and closer to the collection will accentuate details while the position will create an unusual visual appeal.
Stunning wall lights can be used as stylish decorations that can stand out on their own. You can pair up two wall lights and place them right next to each other on an empty wall. This way, you’ll let the style and design of the lights come into focus, creating a strong, dramatic effect. Furthermore, if you like this idea of using multiple identical wall fixtures, you can line them up approximately eight to ten feet from one another for a stunning vibe. If your living room has a dark, empty corner, a wall light will give it a completely different dimension. Placing wall fixtures in opposite living room corners can make the entire room seem wider.
The way you use wall lights with other lighting fixtures can also create an enticing ambiance in your living room. You can match wall lights with pendants and lamps to create a harmonious, cohesive appeal. On the other hand, mismatching them can also create a beautiful effect, fill your space with diversity and give it an authentic character.
Wall lights might seem like simple, barely noticeable elements, but they can actually help you create a real wow effect in your living room.
Lighting is the most important element for setting the mood of a
Lighting is the most important element for setting the mood of a room. LED downlights have become increasingly popular as an energy-efficient and versatile lighting solution for residential and commercial spaces. While the benefits of LED downlights are clear, it’s important to emphasise proper installation for the best performance.
This article provides homeowners with an in-depth look at the advantages of LED downlights and offers practical tips for their correct installation. Know what to do when undergoing LED downlight installation to transform your space.
Why choose LED downlights?
Get the right downlight types for your needs | Source: iStock
LED downlights stand out from other types of lighting because of their many benefits, like energy efficiency, long lifespan, and versatile lighting options. Unlike traditional incandescent or fluorescent bulbs, LEDs use 75% less energy yet last longer than other bulbs, resulting in reduced energy consumption and lower utility bills.
They also have a much longer operational life, often exceeding 25,000 hours, and come in various styles and colour temperatures to suit different lighting needs.
Choosing the right downlight size and frequency for your space
Downlighting can provide general lighting or be used to spotlight specific features. They come in various colour temperatures, shapes, sizes, and finishes, and offer options to suit any need or preference. Here are a few considerations to keep in mind when selecting your lighting.
Downlight size
This refers to the physical diameter; choose smaller lights for compact spaces and strategically place them in larger areas. This approach makes for effective lighting without overwhelming the ceiling or undersizing the light in a large room.
Beam angle
Beam angles determine how light is distributed, with some lights having a more narrow scope and others covering a wider area. When spacing your lights, think ahead here for proper overlap and account for ceiling height, which affects brightness and spread.
Downlight placement
Proper placement of downlights is a must for balanced lighting. Typically, you divide your ceiling height by two and use this number as a spacing guide; for example, a 2.8-meter ceiling would require downlights spaced 1.4 metres apart.
Tools and materials you’ll need
While you may need a licensed professional to help out with installation, homeowners can prep ahead by gathering the necessary tools for a quick and seamless process. Having these accessories ready will help give a safe and efficient installation when your licensed electrician completes the setup.
Below are just some materials that might come in handy for preparing your space:
Lighting units
Transformer (for low-voltage lights)
Recessed lighting trim
LED light bulbs
Cordless drill
Hole drill bit or hole saw
6.35 mm drill bit
File (for smoothing hole edges)
Wire connectors
Wire strippers or pliers
LED downlights installation: A step-by-step guide
Make sure the LED lights are fixed to its position correctly | Source: iStock
LED downlight installation offers a large number of benefits, ranging from aesthetic preferences to quality-of-life improvements. This step-by-step guide on how to install LED downlights will walk you through the process, from initial preparation to final installation, ensuring a smooth and safe experience.
Step 1: Turn off the power and assess the space/positioning
Switch off the lights for safety | Source: iStock
Before any electrical work, make sure the power in the area is turned off. Locate your home’s main electrical panel and switch off the circuit breaker that controls the area where you’ll be working. For good measure, you can use a voltage tester to confirm power is off in a specific area.
Step 2: Fitting the downlight
For this step, you will need a cordless drill, a hole drill bit or hole saw, a file, and measuring tape. Start by identifying the spots on the ceiling where the downlights will be installed. Use the hole drill bit or hole saw to cut out the marked sections
Once the holes are cut, use the file to smooth the edges, creating a clean and precise fit for the downlights. Proper fitting is essential so the lights exactly match the ceiling and can function as intended.
Step 3: Wiring the downlights
Prepare all the tools and materials needed for the task | Source: iStock
You can do the first two steps by yourself or hire a professional for a faster and more efficient process. However, it’s highly recommended to hire a licensed electrician to ensure all electrical connections are safe and compliant with local codes. They will run the necessary wiring through the ceiling, connect the downlights to the power source, and secure all connections using wire connectors.
Step 4: Installing the LED downlights and trim
After wiring is complete, fit the downlight housings into the prepared holes. Secure them accordingly and make sure they’re snug and stable before being used. Attach the recessed lighting trim to give a finished look and insert the LED bulbs into the fixtures.
Step 5: Testing the lights
Elevate your room’s ambience with LED downlights | Source: iStock
When the downlight installation has been secured to your liking, turn the power back on at the main electrical panel. Test the lights to see if they work properly and its the brightness is to your liking. Check for any flickering or dimming issues and make adjustments as needed.
Step 6: Cleaning up
Remove any debris, tools, and materials used throughout the installation process. Clean the work area thoroughly so that no leftover materials or hazards are left behind. Wipe down the downlights and surrounding area to remove any dust or stains.
Plan for regular maintenance to keep your downlights in optimal condition. Dust the fixtures periodically to prevent buildup, and check for any signs of wear or damage. Replace bulbs as needed and ensure all electrical connections remain secure. Regular maintenance will help extend the life of your LED downlights and maintain their performance.
Contact local electricians
How to hire an electrician
Now that you know how to change downlights and what is involved, hiring a professional who can do the job right the first time makes sense. In Australia, each state has different licencing requirements for electricians, but all agree that you should not install lights without the proper training and credentials. Here are a few questions you should ask before hiring an electrician.
Are you licensed to install lighting in my local area?
Can you provide a certificate of proper installation, if needed?
What is your plan for installing the lighting, and will you work with me to achieve a design that I am happy with?
Brighten up your space with LED downlights!
When done correctly, changing LED downlights can greatly elevate your home or workspace by providing superior lighting that enhances the overall ambience and functionality of the space.
While it is possible to install LED downlights yourself, hiring a professional electrician can make the process much more convenient and hassle-free. With the necessary expertise and experience to handle all aspects of the installation, they can make sure your LED downlights are installed correctly and safely, allowing you to fully enjoy the benefits of enhanced lighting in your home or workspace.
FAQs on installing LED downlights
Do you need an electrician to install led downlights?
While installing downlights yourself is possible, hiring a licensed electrician for the actual wiring and electrical connections is often recommended. The installation process involves working with electrical systems and ensuring proper placement and fitting, which can be complex and safety-critical.
Are downlights expensive to install?
The cost of installing downlights can vary widely depending on several factors, including the type and quality of the downlights, the complexity of the installation, and local labour rates. Generally, the cost includes both the price of the downlights themselves and the fees for professional installation.
What happens to LED downlights if the wrong dimmer is installed?
Using the wrong dimmer with LED downlights can lead to several problems, including flickering, inconsistent dimming, and reduced lifespan of the downlights. Incompatible dimmers may cause the LEDs to flicker or not dim smoothly, and can lead to overheating or inefficient operation, potentially shortening their lifespan.
A ceiling fan is an excellent addition to any room of the home. Even if you have an AC, a ceiling fan can help it work more efficiently by circulating the air. Ceiling fans range in price from $89 to $350 or more. Then, you have an additional ceiling fan installation cost of between $200-$300. This might have you asking the question if you can install it yourself.
Can I install a ceiling fan myself?
The technical answer to this question is yes, but you cannot do so in Australia. The main reasons why DIY ceiling fan installation is illegal in Australia are two-fold. The first is that it involves electricity, and there is a risk of fire hazard or electrocution if you do not do everything right. The second is that if the ceiling fan is not mounted correctly, it can fall or damage the ceiling. These are the best reasons to hire a trusted professional instead of doing it yourself.
Where to hang a ceiling fan
The most common place to hang a ceiling fan is in the centre of the room, but this is not always the case. You might want a ceiling fan in a specific location, like over the bed or in one half of an entertainment room. The ceiling fan placement must also take into consideration the location of any wires or pipes above the ceiling. It must also be mounted securely to the ceiling beams.
Here are some of the tools and materials that your ceiling fan professional will bring with them to do the job.
Fan with mounting kit
Fan support brace
Wall control switch
Hammer
Nails
Drywall saw
A multimeter or circuit tester
Wire strippers
Screwdrivers
Drill or driver
Contact local experts
How to install a ceiling fan
Here are the basic steps to installing a ceiling fan that your professional will have to do. These steps are not complete instructions and are for information only.
Turn off the power: The first thing to be done is to turn off the power at the circuit panel. Your professional will double-check with the circuit tester to make sure no power is flowing in the wires.
Remove the old fan: Unscrew the lightbulb cover and remove the bulbs. Lower the fixture and loosen the electrical tape and wire nuts. Disconnect the wires and remove the existing ceiling box.
Install the hanging bar: The adjustable hanging bar and electrical box will be screwed to the beams and fastened according to the manufacturer’s instructions. This is the most important part of the installation to ensure the fan does not wobble and damage the ceiling.
Assembly and hanging: Assemble the fan according to the instructions and attach the fan assembly to the ceiling electrical box. Connect the wires, making sure to follow all local and state guidelines regarding the amount of exposed end, types of wire nuts, lack of kinks, and other considerations.
Attach blades and trim: Assemble and attach the blades and trim. Now it is time to turn on the power and test the fan.
Safety precautions to take when installing a ceiling fan yourself
Installing a ceiling fan involves several safety hazards. The first is that it involves electricity. If you do not know how to connect the wires properly, it can cause a fire. There is also the potential for an electrical shock. Also, you will be on a ladder working with your hands overhead. If you are not used to it, you can easily fall. Not only are you working on a ladder, but you are lifting heavy objects and working at odd angles. That is another reason why hiring a professional who is knowledgeable and used to the working conditions is a good idea.
If you want to have a new ceiling fan installed, you must have the work performed by a licenced electrician. In some states, you can face heavy fines and even prison time for connecting a fan to the wires of your home. Here are some things you should ask when hiring an electrician to install your fan.
Are you licenced to work in my location?
Can you provide proper certificates after the installation?
Are you insured, and do you offer a warranty on your work?
How many DIYers does it take to change a light bulb? One, maybe two with the other one to assist. But when it comes to wiring a light switch, you’ll need to work with a pro to get the job right safely.
So, how do you wire a light switch? Or rather, how do the professionals do it? Keep reading to learn more.
Australian laws surrounding wiring a light switch
Light switch wiring in Australia and other electrical work requires licences. Your electrician must also give you a certificate proving their work complies with local laws.
Next, you’ll need permission from your local council. While not all electric jobs may need permits, it’s best to check! Resources like Standards Australia and the Housing Industry Association have details on electrical installations and wiring rules. Your state’s WorkSafe site will also have lists of rules specific to your area.
Safety comes first when figuring out how to wire a light switch in Australia. After all, faulty electrical wiring is a fire hazard and may cause electrocution. This precaution is so crucial that in Queensland, you could face up to AUD 600,000 in fines and five years in prison if you do electrical wiring yourself.
Leave the task to the experts | Source: Shutterstock
Safety precautions when needing lighting and electrical work
Don’t work on switches and wires on your own.When supervising your electrician or tradie, make sure you observe safety measures. These include:
Turning off the power before you start
Using protective gear (e.g. rubber gloves)
Using insulated tools (e.g. a wooden ladder)
Ensuring access to fire extinguishers and first aid kits
Never do it yourself; consult a licensed electrician
Tools and materials: What you’ll need
Here’s what a licensed electrician will need to wire a light switch:
Safety gloves
Safety glasses
Pliers
Utility knife
Measuring tape
Screwdriver
Multimeter voltage tester
Wooden ladder
Wire strippers
Light switch (standard light switch, two-way, or dimmer switch)
Cables and connectors (as needed): You can find the right size and type of Clipsal light switch wiring at hardware stores.
Contact local electricians
How to wire a light switch
Now that the materials are ready, it’s time to begin! Here are the steps you may expect a professional electrician to follow when wiring a light switch in your home.
It’s important to switch off the lights before getting to work for safety | Source: iStock
Step 1: Cut off the power
All electrical work starts with turning off your main power source. This keeps your electrician (and you) safe during the process. Your electrician should have a multimeter to ensure all circuits are switched off. While you’re with an electrician, you could also ask about installing a circuit breaker, if you don’t have one already.
Step 2: Remove the cover and switch
The electrician will then loosen the screws and pull the switch away from the wall. Do note that the light switch will still be attached via its wires.
Step 3: Inspect the wiring
Next, it’s time to inspect the wiring. The electrician will use an electrical tester to identify live wires and check if they are insulated or bare. There are usually three wires attached to a switch: a hot black wire, a neutral white wire, and a ground copper wire.
It’s important to inspect the wiring to see if they are long enough for the new switch. Otherwise, your electrician will need to strip some of the insulation.
Step 4: Disconnect the old wiring
After inspection, the electrician will detach the wires using a screwdriver. If the switch has push-in connections, a little push with a screwdriver can release the wires from the assembly. Once it’s freed, the electrician will discard the old switch.
Step 5: Connect the new wires
Connecting the new wires can get tricky. That’s why it’s good to call in the pros when you need to change a light fitting in Australia.
During this step, the electrician will ensure that the wires are all matched and everything is wired correctly.
Step 6: Install the new light switch
Now it’s time for switch assembly.
Each wire should have 1/2–3/4 inch of wire exposed and bent into a hook. This will wrap around the screws on the switch. If the end of the wire is frayed, the electrician will trim it before wrapping it clockwise around a screw on the switch. They’ll do this on the black wire, then again on the white and copper wires.
Next, the electrician will tighten the screws and check all connections to make sure everything is snug.
The type of light switch can also affect how it is installed:
For standard light switches, the electrician will use loop-in wiring. They’ll connect a cable to each terminal on the switch, wire it, and then attach the faceplate.
For two-way light switches, they’ll loop the cables through one terminal and then another before securing it and attaching the faceplate. They’ll likely use diagrams for wiring a two way light switch.
For dimmer switches, there should be two terminals for the live wires; one labelled “L” and another with a neutral symbol. Both wires will be connected to their terminal points, then wrapped with electrical tape so that no copper is left exposed. Exposed copper will cause short circuits, so your electrician needs to be very careful.
Step 7: Replace the switch plate and do a quality inspection
Once all the wiring is done, the electrician will reattach the switch plate and screw it in. Then, you can turn the power back on and test your new light switch.
Don’t forget to inspect your electrician’s work and ask for the necessary certificates for the wiring.
How to hire an electrician
Know when to call a pro for assistance | Source: iStock
In Australia, even simply connecting a light switch requires a licensed professional. Thankfully, it’s easy to find a cost-effective electrician near you. It’s convenient, safe, and much better than having to pay a fine.
When hiring an electrician for the first time, you’ll want to consider the following:
Know your task and budget requirements. Make sure you know whether you need only simple light switch wiring, a dimmer switch, or maybe even help with your switch board?
Know your certificates and training levels. Check with your local council or building code regarding the certificates needed to wire a light switch.
Get at least three quotes for the job, but put safety first. Canvassing will help you get a better idea of how your task is priced. Look out for suspiciously low quotes that may be red flags.
Read reviews and ask for references. It’s good to hire someone trusted by homeowners just like you.
Safety comes first when wiring a light switch
Working with light switches and wires isn’t for DIYers alone. These kinds of projects require licensed electricians. Now that you know the laws, materials, precautions, and processes involved, you’ll better know what to expect when working on your house rewiring project.
Light-load circuits like those in your switches and bulbs usually use 1.5 mm2 wire. Still, it’s best to check with an expert if you plan to purchase the wire yourself.
What is a common terminal for wiring light switches?
The common terminal is where the live wire is attached. It usually comes in black, but it may be brown in newer homes or red in older homes. A licensed electrician will know the right colours for terminals and wires when wiring a light switch in your home.
Does it matter which wire goes on a switch?
Wire colours can be confusing! But when connecting a single pole light switch, it doesn’t always matter which wire goes into what terminal on a switch. This is because switch terminals are interchangeable; however, it’s vital for complex switches to follow the specific placement. Still, it’s best and often legally required to call in a pro electrician to work on your light switch and its wires.
Can I change light fittings myself in Australia?
No, you can’t. In Australia, light switch fitting and wiring must be done by a licensed electrician, with permission from your local council. Doing electrical work without a licence will result in a fine and time in prison since faulty electrical work poses serious risks to lives and property. So, while you can pick out a new light fixture and switch from halogen to LED lamps, you should leave the actual electrical work to the pros.
Home theatre systems are becoming more popular and more affordable, with Australians paying more attention to the setup of their speakers than ever before. Before home surround sound systems, a TV’s built-in speakers were all people would use when watching TV. A decent stereo system would simply consist of a couple of speakers on the floor and perhaps a subwoofer for a bit of extra bass. Today, however, five speakers is the least you’ll see for any decent surround sound system. The question is, where do all these speakers go? With this thought in mind, let’s consider the benefits of choosing ceiling speakers, rather than regular speaker systems.
Freestanding speakers Vs. built-in speakers
If you are not planning on moving home any time soon, built-in speakers are the best option. Regular floor speakers take up space, no matter how they are set up. To avoid this as much as possible, most people push them into the corners of the room, but this simply leads to reduced sound quality. That means you’ll need to rearrange your furniture to get the best sound possible. In addition, having a host of speakers dotted around the room can make it look cluttered and messy.
Wireless speakers don’t come with these annoyances. However, they don’t completely eliminate the problems of floor or shelf speakers either. The only option you have when completely removing these issues is installing either wall or ceiling speakers.
Why the careful placement of ceiling speakers?
Some might be under the impression that you can just stick your speakers anywhere, and it will be just fine. However, if you want high-quality sound that can be heard equally throughout the room, correct placement is key. Remember, you will be making holes in order to fit your ceiling speakers, so planning in advance is important. Otherwise, your ceiling could end up with some unnecessary extra holes, and speaker cables might need to be cut and/or moved.
Source: Shutterstock
Correct placement of your ceiling speakers
Consider the main, most-popular seating area in the room, and plan around that point. Make sure that you always balance everything out. In other words, your front-left and front-right speakers should be an equal distance from the determined point. The same goes for the rear-left and right speakers. You centre channel speaker needs to be placed in a central position under the TV. The subwoofer should be placed as low to the ground as possible as well as in a central position towards the back of the room. While it is important to place your centre channel speaker and subwoofer in the correct positions, the real trick is getting those ceiling speakers right. Be advised that, once they are fitted, it is unlikely that you will be able to move them around other than slightly within their housings.
Inspect your ceiling first
Before going ahead and making holes, you must inspect your ceiling properly. Make sure that there are no objects, such as beams, in your way. Such objects will cause an obstruction, so you will have to work around them and place your speakers in the next best location.
Choosing speaker mounts
When choosing speaker mounts, there are several things that you need to consider. First of all, do you want to drill holes in the ceilings? If this is not a problem for you, ceiling mounts are ideal. If, however, you don’t want to drill holes, or you can’t because you are renting, speaker stands are usually best.
You also need to consider whether you are likely to rearrange the furniture in the room at any time. This is important because getting the most out of your speakers and their position will involve you sitting in the right place. If, for example, you change where you sit, you will need to adjust the position of all of the speakers to optimise the sound from the cinema system. It isn’t a problem If you are using floor stands, but it certainly is if you have mounted stands on the ceilings.
Let’s not forget that it is also possible to mix floor mounts with ceiling mounts. For example, you could use mounts for your front speakers and then speaker stands for the surround sound speakers. It really comes down to personal preference and whether you want to use one type of mount or another or a combination of both to achieve the best sound possible.
Contact local electricians
The benefits of wall speakers
The only downside of ceiling speakers relates to the sound they deliver when compared to wall-mounted speakers. This is because:
The main speakers are directional. Wall-mounted speakers are easier on the ears because they mimic the areas that sound actually reaches our ears in real life. We are not used to hearing sounds coming from above us, so this can take time to adjust to. However, some new models have begun to address this issue to produce sounds that are more realistic.
The subwoofer is omni-directional, meaning that the bass pulses travel all around the room. Many people will say that ceiling subwoofers will reduce sound quality, although this can be overcome by simply having the subwoofer on the floor, with the other speakers on the ceiling.
A good home theatre system is not complete without a good set of speakers. If you aren’t happy with your current freestanding speakers, consider getting some ceiling or wall speakers installed. If you want to save space, ceiling speakers may well be your best option.
A switchboard is an electric power board that holds individual switches to control different power needed to certain areas of your home.
What does a switchboard do?
Often referred to as a power box or a meter box, this board takes the entire load of the incoming electrical feed and separates it into switches rated for a specific amount of voltage. For example, a refrigerator needs more power than a table lamp plugged into an outlet. Voltages are measured by what the switch is for, then set up accordingly.
You can also find the main switch inside a meter box in addition to the switches on the switchboard. This single switch is to shut down all power from the entire board.
What should I do if my lights or power points aren’t working?
If there is an overload on one of your switches, that particular switch will automatically flip off. For instance, a living room with nothing but outlets and overhead lighting may not be prepared to accept an electric area heater. When used, it may tell the switch that it is not wired for that much power. Go to your switch box and check if all the switches are on. Chances are, there will be one that has flipped off. Instead, use another breaker that has a higher voltage setting or check with a licensed electrician for advice on increasing power.
Labelling a switch board can make using it a lot easier / Source: Got U Wired
What should I do if all the electricity has gone off in my house?
In the case of all lights in the house turning off, several things could be the cause. Check your neighbour’s homes for any sign of lights. If their lights are out as well, there is probably a broader issue that is out of your control. If your neighbours have lights, check your main switchboard for signs that the main power switch has switched off. Switch it back on and make a note to check with your switchboard electrician to find the cause.
Safety tips for your switchboard
High voltage is nothing to play around with. Unless you are a licensed electrician, keep your DIY skills to turning the switches on and off. These switches are made for the average homeowner to use in case of a power surge or overload. Learning how to use a switchboard is easy as long as you don’t try and remove the switches. Only trained professionals are able to determine what is tied to a switch and how to approach a problem.
There are times when a switchboard will wear out or need repair. A few of these signs include:
Lights begin to flicker
Circuit breakers are always tripping
Circuit box contains old ceramic fuses
Switchboard feels warm when circuit is tripped
Never attempt to remove a switch to uncover a problem
Only a licensed switchboard electrician has the tools and knowledge to understand the problem. Voltage can be deadly to the inexperienced homeowner.
Avoid sparks or fire
Sparks or fire signal an emergency, and you should contact a licensed electrician immediately. Follow his instructions and wait for his arrival.
Label all switches
Labelling is a simple idea, but many homeowners do not follow. You can save a lot of time and frustration in knowing which switches control different parts of your home.
Check your circuit breakers
Circuit breakers play a crucial role in safeguarding electrical systems and preventing potential hazards. In Australia, RCBOs (Residual Current Circuit Breakers with Overcurrent Protection) are commonly used for enhanced safety. These devices combine the functions of both a residual current device (RCD) and a circuit breaker, providing protection against electrical shocks and overcurrent situations. When installing RCBOs, it’s important to follow the appropriate wiring diagram, such as the one provided by Clipsal, to ensure correct and safe installation in accordance with Australian electrical standards.
Contact local electricians
What to look for when hiring an electrician
Licensing
A qualified electrician will have completed trade school and spent four years as an apprentice. However, there is an exception to completing an apprenticeship. It can be challenging to find a master electrician to study under. It is possible to take the required courses that range from 6 to 18 months and pass a final exam. While being able to obtain a license, it can be challenging to find employment with a company without the on-hand experience of an apprenticeship.
Insurance
Your electrician should be able to provide a copy of their insurance for mishaps that could occur.
Experience
Experience is the key to understanding different areas of electricity. If your candidate has not completed an apprenticeship program, ask for references of past clients or seasoned electricians that can vouch for their work.
Quotes
Get three quotes from licensed electricians and compare the costs. Electricians in Australia average around $45 per hour for their services. The cost can vary according to region, experience and specialty.
Highlights: • Focus your budget on professional waterproofing, plumbing, and electrical work. You can save money on DIY tasks like painting, decorative fixtures, and vanity updates. • Strategic wall and floor updates using budget-friendly materials and using LED lighting, water-efficient fixtures, and consistent finishes can dramatically transform the space without major structural changes.
Dreaming of a spa-like bathroom retreat but worried about the cost? You’re not alone. A bathroom renovation consistently ranks as one of the highest return-on-investment home improvements, potentially increasing property value by up to 10%. The challenge lies in achieving that magazine-worthy look without draining your savings account.
The good news is that transforming your bathroom doesn’t require a six-figure budget. With smart planning and strategic choices, you can create a stunning space that feels both luxurious and functional. This guide reveals practical bathroom renovation ideas on a budget that deliver maximum impact for your dollar, helping you prioritise where to save and invest wisely.
What are the benefits of renovating your bathroom?
It’s the small things that can have a big impact on your bathroom renovation / Source: ESTEEM Constructions
When you’re looking for ideas for bathroom renovation on a budget, you want upgrades that extend beyond mere visuals. These improvements can transform your daily routine while boosting your home’s value and appeal:
Increased property value:Bathroom renovations typically recoup 60-80% of their cost when selling, making them one of the smartest home improvement investments.
Enhanced daily comfort: Modern fixtures, better lighting, and improved storage make your morning and evening routines more pleasant and efficient.
Improved functionality: Strategic layout changes and smart storage solutions can maximise space, particularly in smaller bathrooms.
Better energy efficiency: Upgrading to LED lighting, low-flow fixtures, and energy-efficient ventilation reduces utility bills while supporting environmental goals.
Health and safety improvements: New waterproofing, slip-resistant flooring, and proper ventilation create a safer, healthier environment that prevents mould and water damage.
Where to save vs where to spend when doing a budget bathroom renovation
A newly renovated bathroom can add serious value to your home / Source: Origin Bathrooms
Smart budget bathroom renovation ideas focus on understanding which elements deserve investment and which offer opportunities for savings. This strategic approach ensures your renovation delivers lasting value while staying within budget.
Top 3 areas where you can cut costs
Painting and wall treatments
DIY painting can save you plenty compared to professional services. Quality moisture-resistant paint costs around $60 to $100 for an average bathroom, while special tile paint can refresh existing surfaces for under $80.
Decorative fixtures and accessories
For a cost-effective update, consider swapping out accessories like towel rails, toilet roll holders, and shower caddies yourself. Online retailers offer a wide variety of affordable options, with many pieces costing between $20 and $50.
Vanity updates
Refreshing an existing vanity with new paint, handles, and hardware could be as affordable as $150 or up to thousands. This approach can achieve a completely transformed look for a fraction of the cost.
Top 3 areas you shouldn’t skimp on
Waterproofing and structural work
Poor waterproofing could lead to costly damage that can run over $10,000 to repair. Professional waterproofing doesn’t come cheap; some may even cost $500 to $2,000, depending on the extent of the work. However, this investment can be worthwhile in the long run.
Plumbing and electrical
Plumbers and electricians ensure safety and compliance. Cutting corners here risks expensive repairs, safety hazards, and insurance issues.
Quality tiling in wet areas
Proper tile installation in showers and around baths prevents water damage. Professional tiling could range around $50 to $80 per square metre to ensures durability and waterproof integrity.
Renovation ideas for every part of the bathroom you can do on a budget
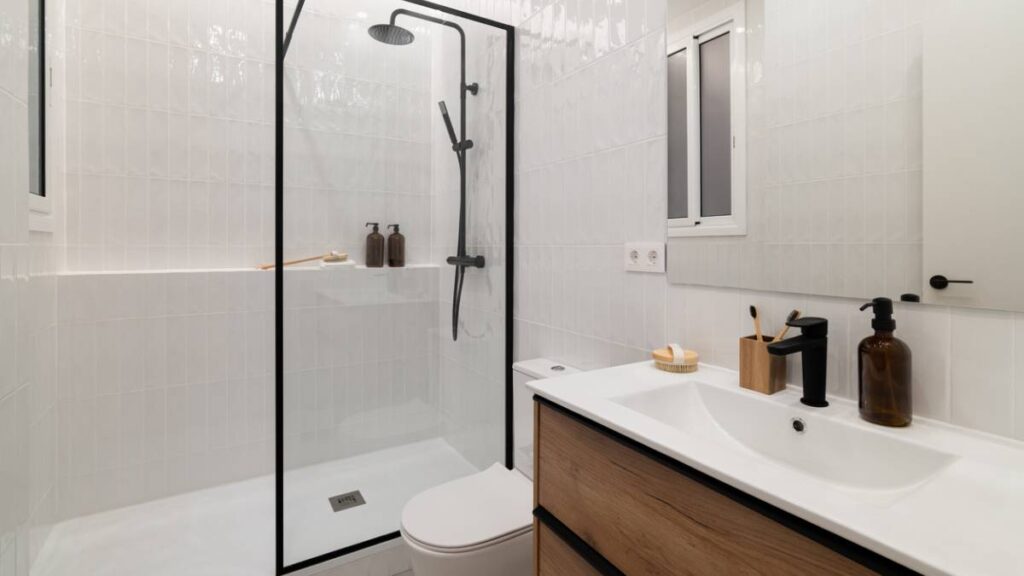
Fixtures can add real impact to your budget bathroom renovation / Source: ESTEEM Constructions
Transform each area of your bathroom systematically with targeted improvements that maximise visual impact while controlling costs. These small bathroom renovation ideas on a budget work particularly well in compact spaces.
Bathroom walls
Fresh walls instantly modernise any bathroom and provide the foundation for your entire bathroom design scheme.
Replace the wall tiles
Partial bathroom tile replacement focuses the budget where it matters most. Remove and replace tiles around the vanity or in the shower. Consider subway tiles or mosaic feature walls for contemporary appeal, or larger format tiles to reduce grout lines and create a cleaner, more spacious feel. Light-coloured tiles reflect natural light, making small bathrooms appear larger and brighter.
Repaint the walls
Moisture-resistant paint transforms bathroom walls for $60 to $100 in materials. Semi-gloss or satin finishes resist humidity while providing easy cleaning. Light colours like soft whites, pale greys, or warm beiges create an airy atmosphere that makes spaces feel larger.
For accent walls, thinkdeeper colours like navy or forest green behind the vanity to add depth without overwhelming the space.
Install splashback panels or peel-and-stick tiles
Acrylic splashback panels provide waterproof protection with minimal disruption. These panels come in various finishes, including marble-looking, timber-style, or solid colours.
Peel-and-stick tiles offer DIY-friendly installation for $20 to $40 per square metre. While not suitable for shower areas, they work well as backsplashes behind vanities or as accent features.
Bathroom floors
A modern bathroom. / Source: iStock
Budget bathroom renovation ideas for flooring focus on materials that combine affordability with moisture resistance.
Install slip-resistant flooring
Vinyl plank flooring designed for bathrooms costs $25–65 per square metre and easily installs over existing surfaces. Modern luxury vinyl replicates timber or stone appearances while providing superior water resistance and comfort underfoot.
Meanwhile, textured surfaces and bevelled edges add visual interest while improving safety. Choose planks with built-in underlay for added comfort and sound reduction.
Play with tiles
Mix tile sizes and patterns to create visual interest without premium costs. Make things interesting by combining large-format tiles with smaller mosaic borders for custom looks.
Another tip: matching wall and floor tiles creates a seamless flow that makes small bathrooms feel larger. Alternatively, contrast light walls with darker floors to ground the space and hide dirt.
Consider polished concrete or pebble tiles
For a modern, low-maintenance look, a polished concrete finish is a great option. However, costs vary significantly depending on the method. The most budget-friendly option, a ‘grind and seal’ finish, can start at around $50 per square metre. A more robust, mechanically polished concrete finish typically starts at $100 per square metre.
Pebble tiles add natural texture and create a spa-like ambience. Install them in shower floors or as accent strips for tactile interest that enhances the sensory experience.
Contact local bathroom renovation experts
Shower and bath area
The shower and bath area typically receives the most use and attention in bathroom renovations.
Replace the showerheads
High-pressure showerheads cost $100-500 and install easily without plumbing modifications. If you want a transformative daily shower experience, explore rain showerheads, handheld options, or water-saving models.
Want more luxurious showers? Multi-function showerheads combine rainfall and targeted spray patterns for that luxe feel at a moderate cost. Look for models with flow restrictors to reduce water consumption.
Switch glass shower screens with acrylic
Choose shower screens that resist yellowing and scratching while offering easier installation and replacement. Acrylic shower screens cost 40% to60% less than glass while providing similar functionality.
Frameless acrylic screens create open, spacious feelings in small bathrooms. For professional installation guidance, learn about shower screen installation techniques to ensure proper fitting and sealing.
Opt for a walk-in shower and bath area
Remove shower doors entirely for an open, accessible design that costs nothing but creates significant visual impact. This approach works best with proper waterproofing and floor drainage.
Conversely, you can consider installing a floor-to-ceiling tile feature wall or mosaic accent to define the shower area without physical barriers. This creates the illusion of a bigger space while improving accessibility.
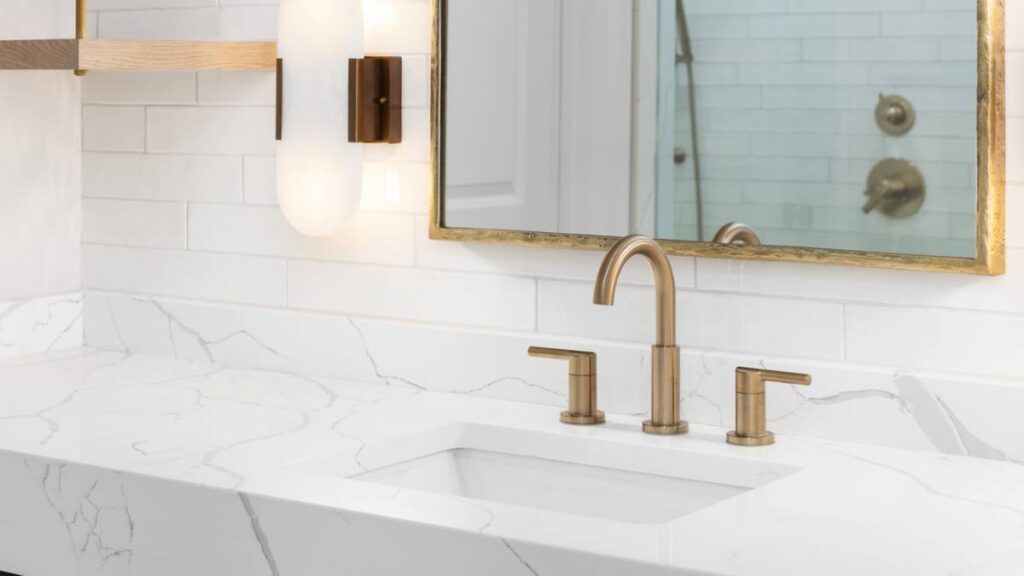
Vanities and storage
A bathroom vanity. / Source: iStock
Smart storage solutions and vanity updates provide both functional and aesthetic improvements. Ready-made vanities are cheaper than custom options, while still delivering style and functionality.
Install smart storage
Floating shelves cost between $30 to $80 and provide essential storage without consuming floor space. Install them beside mirrors, above toilets, or in shower niches for toiletries and decorative items. Mirrored medicine cabinets combine storage with essential functionality.
New cabinet handles can instantly modernise any vanity. For a cohesive design, choose consistent finishes throughout the bathroom, such as brushed brass, matte black, or chrome. This is useful if you’re renovating your bathroom piecemeal or designing a modular bathroom.
Also think about replacing your tapware to complement your handle choice. Modern mixer taps with waterfall or swan-neck designs add luxury appeal without premium costs.
Paint the mirror frame
Transform existing mirrors with specialty paint designed for glass and metal surfaces. Metallic spray paints in gold, bronze, or black cost under $20 and create custom designer looks.
Mask the mirror surface carefully and apply multiple thin coats for professional results. This technique works particularly well with ornate or dated frames.
Lighting and finishing touches
Proper lighting and coordinated finishes create cohesion and enhance the functionality of your renovated space without breaking the bank.
Upgrade to LED lighting
LED downlights cost $15 to $40 each and reduce energy consumption by 75% compared to halogen alternatives. For comprehensive illumination, install them over vanities, in showers, and as general ceiling lighting. Backlit mirrors combine task lighting with storage.
Match finishes
Consistent finishes throughout the bathroom create a sophisticated, designer appearance. Choose one primary finish (chrome, brushed brass, or matte black) for all tapware, handles, and accessories.
This coordination principle extends to lighting fixtures, towel rails, and even tile trim. Mixing more than two finishes can create visual chaos in small spaces.
Add/replace towel rails and shower caddies
Heated towel rails add luxury while providing practical towel drying. Choose models that complement your finish scheme and provide adequate hanging space. Keep in mind that for a hardwired, polished look, you will need to budget for professional electrical installation, which can add several hundred dollars to the total cost.
Corner shower caddies maximise storage in compact shower areas. Stainless steel or powder-coated options resist rust and maintain appearance over time.
Place an indoor plant
Low-light plants like snake plants, ZZ plants, or pothos add natural elements that soften hard bathroom surfaces. Synthetic alternatives provide similar visual benefits without maintenance concerns.
Choose decorative pots that complement your colour and finish choices. Position plants away from direct water exposure while ensuring adequate light for living varieties.
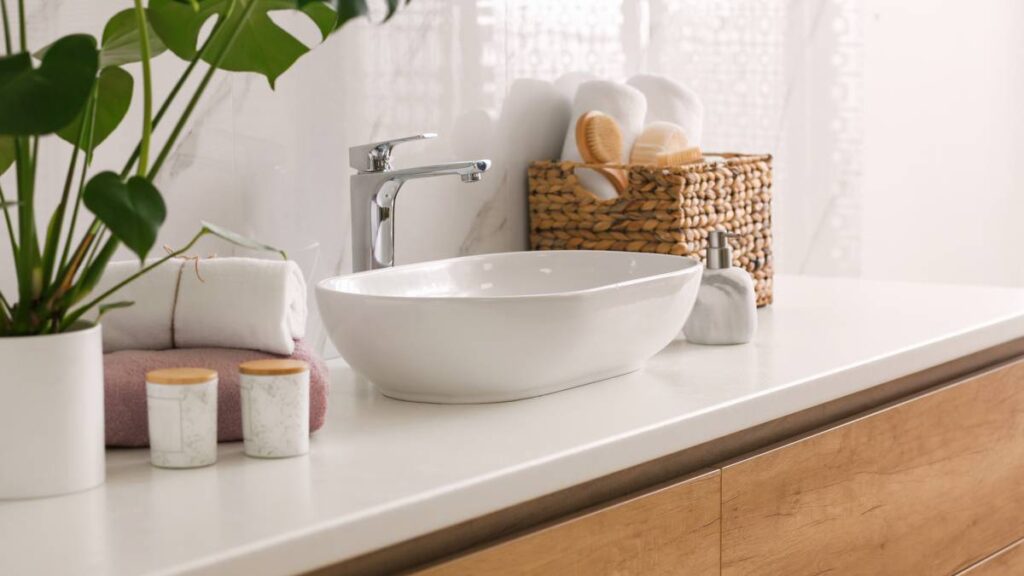
Eco-friendly and sustainable budget bathroom renovation tips
A clean bathroom countertop. / Source: iStock
Sustainable choices in bathroom makeover ideas on a budget deliver environmental benefits while reducing long-term operating costs. These improvements often pay for themselves through reduced utility bills.
Low-flow showerheads and dual-flush toilet mechanisms reduce water consumption by a significant amount without sacrificing performance.
LED bulbs last 15–25 times longer than incandescent alternatives while using 75% less energy. The higher initial cost is offset by reduced replacement and electricity costs.
Bamboo vanities, recycled glass tiles, and reclaimed timber accents provide unique character while supporting environmental goals.
Energy-efficient exhaust fans prevent moisture problems while consuming less power. Proper ventilation extends the life of all bathroom materials.
Low-VOC paint products and finishes improve indoor air quality while often costing similar amounts to conventional alternatives. They’re particularly important in small, enclosed bathroom spaces.
Time for a bathroom makeover
Creating your dream bathroom on a budget requires strategic thinking rather than unlimited funds. The key lies in understanding where to invest for maximum impact and where smart savings won’t compromise quality or safety.
The most successful bathroom renovations on a budget balance DIY enthusiasm with professional expertise. While you can do some tasks yourself, professionals should handle the majority of the heavy lifting. Start planning your project with trusted bathroom renovation experts today.
FAQs on bathroom renovations
How much does a budget bathroom renovation cost in Australia?
Budget bathroom renovations typically cost $8,000 to $15,000 for basic updates, including painting, new fixtures, and cosmetic improvements. Mid-range renovations with some structural changes cost $15,000 to $25,000, while high-end renovations can exceed $30,000.
Can I renovate a bathroom myself in Australia?
You can handle cosmetic work like painting, installing accessories, and replacing non-plumbing fixtures yourself. However, licensed professionals must complete waterproofing, plumbing, and electrical work to meet Australian building standards and maintain insurance coverage.
Is it worth renovating a bathroom before selling?
Yes, bathroom renovations typically return a significant amount of their cost when the property is sold. Focus on neutral colours, modern fixtures, and quality finishes rather than highly personalised design choices.
Do I need building permits for bathroom renovations?
Minor cosmetic updates don’t require permits, but structural changes, plumbing alterations, or electrical work typically do. Check with your local council, as requirements vary by location and scope of work.
What mistakes should be avoided when renovating a bathroom?
Common mistakes include inadequate waterproofing, poor ventilation, choosing style over function, and attempting complex plumbing or electrical work without proper licensing. Always prioritise quality structural elements, even when working with tight budgets.
Which bathroom fixtures give the best value for money?
LED lighting, water-efficient showerheads, and quality tapware provide excellent value through energy savings and durability. Bathroom resurfacing of existing tiles and vanities often delivers better value than complete replacement.
Those analog televisions that were so prevalent in the country for half a century? They’re now officially obsolete. A few years ago, digital television replaced the old analog version. And while you might have a digital TV – you might not be aware of just how important the digital TV antenna is. With that in mind, we’ve put together this guide to digital television antennas; check this out before you purchase anything for your household.
Television antennas are meant to connect the television stations broadcast to your entertainment unit. This broadcast signal is actually a radio wave set to a specific frequency. An antenna receives these signals and relays them to your system, where they are converted into images and sound. The division of these frequencies has been broken down into VHF or Very High Frequency, which is used for analogue channels and UHF or Ultra High Frequency, which is used for digital broadcasts.
Fortunately, just because digital television uses an alternate frequency band, it doesn’t mean consumers need to purchase a new antenna to get the new digital signals. The problem lies in the fact that while any antenna can pick up both UHF and VHF signals, they tend to not be effective enough at picking up all the available signals.
Types of antennas
With all the different antenna varieties on the market today, it might be hard to decipher between which one will work best for your setup. With all the complex features that make up a quality antenna, the configuration of each separate part can really make a difference.
UHFantennas: The acronym here denotes Ultra High Frequency. These are the most effective when they are in alignment with a television station’s primary tower emitting transmissions. These are also known as “line of sight” antennas.
VHF: These types of antennas are also called Very High Frequency antennas. They provide better flexibility and do not operate like the UHF antennas, where they need to be aligned with a transmission tower to derive a signal. The standard VHF antenna is what is called a dipole antenna. They use parallel bars arranged in a horizontal pattern and are able to pick up signals from multiple directions. They are not good at receiving UHF frequencies though. A newer addition to the standard dipole antenna, called a Yagi, has allowed dipole antennas to pick up an even wider range of frequencies. These types of antennas are bigger than the UHF ones, as they use a more extensive antenna surface due to lower VHF frequencies.
Uni-directional: These antennas receive signals from just one way.
Multi-directional: These antennas are able to receive signals flowing via multiple directions.
Indoor: These types of antennas are smaller, making it possible for you to install inside your home and in close proximity to your television. An example of this is the humble rabbit ears antenna. Indoor antennas are also able to receive both analogue and digital indicators.
Outdoor: These types are huge and are affixed to the roof of your home. They receive better reception than other types of antennas, like your indoor types, due to their larger size. Outdoor antennas can also receive both analogue and digital indicators.
Amplifiers: These are often required when one needs to improve the signal. They are usually affixed between the television and the outside antenna or built into the indoor antenna. Amplifiers should be used with caution because they are able to worsen your reception by automatically amplifying other sounds besides the signal.
Digital TV antennas
So what does your average antenna do? Simply, it takes the broadcast signals sent through the atmosphere and brings it straight to the television. You can pick up digital signals from your analog antenna, but the picture won’t look very good. A digital antenna also offers you the opportunity to pick up a larger range of frequencies and channels. You’ll need to purchase a good, new antenna that is configured specifically for your household; if you live in a remote area, though, you might have to put in a signal amplifier to get better television reception.
Prior to rushing out and buying a new antenna, it is suggested that you try to adjust your current antenna to fix the trouble. The first thing you want to do is take note of the channels and the position of your antenna that works best. Then, adjust it accordingly.
Dodgy antenna cable
Antenna cables, like anything else, can suffer from wear and tear, whether indoors or external. It is possible that the exterior layer of the cable has deteriorated, letting in other matters that can damage the cable and reduce your signal strength. A good way to test this is to take note of how your antenna is affected by wet weather.
Problems with antenna sockets
A common issue that affects antenna strength is the quality of the socket used. In some cases, the outlet may have gradually loosened over time, impacting the antenna’s ability to receive signals effectively. The connection between the socket and the lead to the external antenna could also be a contributing factor. It’s also worth checking for any leftover insulation that might be obstructing the signal transmission. This issue can occur with various types of sockets, including Telstra cable sockets. By addressing these potential problems, you can improve the signal reception and ensure a reliable antenna performance.
Damaged fly leads
If you find your antenna is losing strength because of a damaged fly lead, you are in luck. It is one of the easiest problems to solve. Essentially, a fly lead connects the antenna to the television. Fly leads can easily become damaged because they get knocked about. If you think the problem may lay with the fly lead, test it out by replacing it with a spare.
Becoming digital
Everything is becoming digital, so you need the right equipment to accommodate that. Ensure that your antenna can receive a digital signal. A lot of older antennas are not able to receive digital signals, so you may need to think of upgrading to one that does.
A wrong-facing antenna
One of the common misconceptions about antennas is that they can be put in any direction. Antennas that face the wrong way can really have a negative impact on the strength your reception. If you think your antenna may be facing the wrong way, then you can call out a professional to help you change that. It is best to have your antenna facing the direction of the local broadcast tower and not towards any large buildings that could weaken or block your signal.