Categories
Design & decor

How to organise your wardrobe and shoes

Our wardrobe houses our favourite shirts, treasured trousers and doesn’t forget our shoes, but too often, the inside of our closet can become disorganised and cluttered. 

Digging up an old sweater is a challenge and you can hardly find enough space to store your new winter coat, but with these simple storage solutions, coordinating an outfit will no longer be time-consuming and overwhelming. Refresh your closet space with our simple and effective wardrobe organisation tips.

Group and display

To make extra room in your closet, start by grouping similar items in your closet. The key is to ensure your clothes are easily visible and reachable by organising existing items according to their category-shirts, pants, skirts, coats and dresses. Group your items further by organising seasonally or by colour. Allocate different zones for each category and maintain a neat closet by keeping frequently worn items like gym gear, in an easy to reach location to minimise rummaging through your closet.

While you’re updating your wardrobe space, take the opportunity to donate clothes that you no longer wear. If your closet space is overflowing, here’s a rule that can be useful: With each new purchase, donate an existing item in your closet. Generally, items unworn for six months or more, are unlikely to be worn again.

Use baskets to organise shelves / Source: Shutterstock

Maximise available space

A lack of closet space can be attributed to disorganisation or simply not using all of the available room in your closet space. Whatever your current clothing storage situation is, get into the habit of using all of the available space. Start by revamping your sock and belt drawers with dividers for an efficient and well-organised approach that will condense your socks and belts in one easy to find location.

If your closet contains shorter items such as shirts and skirts, adding another rail bar will maximise your available space, creating two columns of hanging space. Alternatively, make the most of unused floor space with stackable boxes and baskets to store seasonal items and handbags. If you’re lacking in floor space, add hooks to a spare wall or position a hook behind your closet door to hang bags, hats, scarves or display your favourite outfit.

Open up a stuffy wardrobe with sliding doors that are mirrored or coloured to match the tone of your walls. Sliding wardrobe doors add ambience to a space and are a DIY alternative to a small wardrobe space.

Hang smart

Invest in space-saving hangers that will help organise your items in similar categories and maximise your closet space. Thin hangers are ideal space savers, but different clothes may require a specific type of hanger to preserve and extend the life of your items. Tiered hangers or combined coat and trouser hangers are great options when you are strapped for space.

Create shelves

Maximise your existing wardrobe with open shelving options that will give you more space to stack and store. The key to wardrobe shelving is to ensure your items are visible and accessible. Avoid deep drawers but rather, replace them with transparent drawers.

Open shelves, drawers and wire baskets are modern wardrobe solutions that allow you to store folded items, ties and shoes in a small space.

Change the way you reach for items in your closet with these simple but versatile storage solutions that will maximise your existing wardrobe space and help organise and store items effectively.

Contact local a handyman

Shoes

They clog up your entrance, invade your wardrobes and suffocate your hallways. Shoe storage is an enigma, but with the right storage solutions, you can continue to indulge your shoe obsession, expand your collection of favourite heels and still have enough room for a few of his pairs too. Here are a few of our favourite shoe storage ideas:

Go vertical

Strapped for space but juggling an endless shoe collection? Pairs of shoes take up lots of floor space so store your pairs vertically with mounted shelves or steel bars to display and store effectively. Repurpose towel racks or create a bespoke shelf by converting a ladder into a storage unit or housing your beloved heels or along a towel bar.

Shoe library / Source: Shutterstock

Create a shoe library

There’s little value in owning a beautiful pair of shoes if you keep them stuffed in the bottom of your wardrobe. Create a shoe library that will leave Carrie Bradshaw drooling with functional and stylish solutions for your beloved shoes. Visibility and accessibility are integral to a long lasting and efficient shoe storage solution, so rather than tucking your shoes away in their original packaging, store shoes in transparent containers and clear drawers to minimise time spent searching for your shoes. Other solutions include hanger units that can hang from wardrobe railings or can be mounted behind your door.

Stacks on

We aren’t advocates of hiding away your shoes under the bed, in a hideaway drawer or the pit of your garage. Shoe boxes are inexpensive, stackable solutions that will help you group similar shoes together, save time searching for a pair of shoes and will also give your wardrobe an uncluttered look.
Categories
Design & decor

Interior design tips for autumn

As the days get colder and the nights are cutting in, you may have been thinking of ways to decorate and accessorise your home to make it warm and cosy for Autumn. Choice of colour palette, fabrics, textures, lighting and accessories are essential in creating the perfect ambience in your home this season. Whether you’re planning on re-painting your living room, changing up the lighting in your bedroom, updating the cabinetry in the kitchen or wish to re-tile your bathroom, there are many different home decor design considerations to think about.

To find out which design elements we should be incorporating into our homes this Autumn, we speak to Oneflare Interior Designer Alison Leeder, of Melbourne based Leeder Interiors, to get her expert opinion on the top home trends for fall.

Colours

Autumn is renowned for its beautiful display of colours. Whether you choose to add these to your home through soft furnishings, art, or a new coat of colour to the walls, it will instantly create a different ambience. 

Adopt nature’s example and bring in the hues of autumn with warm neutrals, rich reds, burnt oranges and mustard yellows to create a cosy and homely decor. The ombre tones of withering leaves or the blurred shades of an autumn sunset will always guarantee your home is in sync with the season.

Pops of warm autumns and florals / Source: Topshelf Interior Design

Textures

Growing accustomed to the new season comes easy with warm cushion covers and sofa blankets. Get your indoors feeling new by updating your curtains, carpets and bedsheets with an autumn colour palette.

Choose curtain colours that showcase nature by drawing on shades of gold, burnt orange, rich browns and creamy tones. Neutrals colours and splashes of yellow can also contribute some autumn charm to your home.

Keep in mind that although it precedes winter, the autumn months have a different decorative element to winter. Remember to:

  • Opt for soft rugs and patterned cushions and throws that will accentuate the autumn colours
  • Make sure your window coverings are sufficient. Roller blinds let out so much heat, while lined curtains insulate your home much more effectively. Not only do they keep the warmth in, visually they add warmth to a room.

Lighting 

You can never have too many lamps. Table lamps and floor lamps add a warmth and glow that overhead lighting can’t match. Make sure you’ve opted for warm bulbs instead of cool bulbs to add to the feel of the space. If you only have downlights, create a softer lighting scheme by using a dimmer. 

Textured bed layering / Source: Lindy De Waal Interiors

How to bring autumn into your space 

Kitchens: Rustic kitchens have recurring elements such as open shelving or hanging pendant lights. Open shelves provide the opportunity to showcase rustic pots and pans, mason jars or even plants. Wooden textures and colours create an atmosphere that invites nature inside. 

Living room: Your living room will be getting a lot more love as autumn settles in, be inspired by the colours and textures around you. Bring in rustic dried flowers, leaves and textural natives to enhance autumnal vibes.

Simple and natural decorations in your living room space can add an organic flair by bringing the outdoors in. Surround side tables and coffee tables with scented candles for an extra seasonal glow.

Bedroom: Play with rugs, throws and cushions to create a layered, warm and cosy adobe to embrace the season. 

Contact local interior designers

Hiring an interior designer 

If you’re still feeling a little stuck or undecided on which decorating trends to follow this Autumn, Oneflare have professional and accredited interior designers near you that can help you achieve your home design goals. Interior designers will be able to bring your decorating ideas to life through their expert training in creating rooms that are both aesthetically pleasing and functional.

When hiring an interior designer it is important to have a plan and budget in mind for the project you want to work on and make this crystal clear to the designer you hire. That way your designer can work to a spec that is appropriate to your budget. It is also a good idea to check out the designer’s past work and customer reviews to see if they have worked on similar projects, with the same desired outcome as your own. 

Categories
Design & decor

How to paint doors

Many homeowners in Australia want to know how to paint doors properly. If you want to paint your old door and give it a long-lasting finish, there are several simple steps you have to take. It takes the right tools and supplies, proper door preparation and good painting techniques to get quality results. Selecting the right type and colour paint also impacts the way doors look after being repainted. The following tips for painting doors or repainting doors can create doors that make a lasting impression on people entering any room or home.

Materials and tools

  • Ladder or stepstool: Use the ladder or stepstool to reach the top hinge holding the door in place. 
  • Drill/screwdriver: Use the drill or screwdriver to remove the screws holding the door in place, put lag screws into the top and bottom of the door and remove the hinges, doorknobs and other door hardware.
  • Sawhorse: Lay the door flat with the lag screws on each end on the sawhorse.
  • Tarps or sheets of plastic: Use the tarps or sheets of plastic to cover the floor under the area where you will be cleaning, sanding and painting the door.
  • Grease cutter cleanser and some rags: Apply liquid or spray cleanser to the door to remove oil, grease, dirt and stains using the rags. 
  • Sander/sandpaper/chemical stripper: Remove paint buildup on a wooden door with a sharp carbide or stainless steel scraper and smoothen with the sander. Using the best sander for doors is important. On metal doors use sandpaper. Use chemical stripper on doors made of fibreglass to remove flaking paint.
  • Filler: Fill door dents, cracks and holes with spackling compound, two-part filler or epoxy wood filler.
  • Door primer paint: Paint the entire door with door primer paint that’s grey or white primer whether you are painting internal doors or external doors.
  • Paint trays: Pour a little paint at a time into the paint trays. 
  • Paint, high-density foam mini rollers and paintbrushes: Using a paintbrush, edge in around panels and windows. Use mini rollers to paint the entire door. 
  • Painter’s tape: Cover weather stripping with painter’s tape so the door won’t stick when you re-hang an exterior door. 
A fresh coat of paint can make a huge difference to your home’s look / Source: Ozland Painting Group

What type of paint to use on doors

Oil-based paints are ideal to use when painting interior doors. Water-based paints are better for exterior doors and damp areas.

How to prep interior doors for painting

The following are some simple steps for preparing interior doors for painting.

  1. Clear the area and lay down a drop sheet: Remove furnishings from the area where the door will be cleaned and painted and cover it with protective tarps, plastic strips or drop sheets. 
  2. Remove door: Take the door off its hinges and remove the doorknobs, handles, locks, kick plates and other hardware.
  3. Wash the door: Apply spray or liquid cleanser to the door and use rags to clean and wash off the door.
  4. Sand the surface: An electric sander or sandpaper can be used to remove loose paint and smoothen out imperfections in the door’s surface.

How to fill cracks before painting

The first step in filling cracks is to clean the wall thoroughly to remove any debris. Then, use a putty knife to apply a filler such as spackle or joint compound over the crack, making sure to press the filler deep into the crack to ensure maximum coverage. Once the filler is dry, use sandpaper to smooth it down to a flat surface, being careful not to sand too much and cause further damage. Finally, wipe the wall with a damp cloth to remove any excess dust before priming and painting. By properly filling cracks, you can achieve a smooth and flawless finish for your next painting project.

Popular filler brands you can consider are Buidler’s Bog, Elmers, and Minwax.

How to paint a door

Here some simple steps and helpful tips for painting doors. 

  1. Apply a primer if necessary: When painting bare wood or putting a light colour over a much darker one, you should apply a primer. When using self-priming paint or painting over surfaces painted in a similar colour, primer isn’t required. 
  2. Apply an undercoat: When applying an undercoat, use a paintbrush to do the edges of the door. Then use a paint roller for doors in a ‘W’ pattern to cover the door with undercoat evenly. 
  3. Paint edges: Use a paintbrush to paint the door’s edges to seal it and keep moisture out. Apply the same number of coats as on the main surface.
  4. Paint the main surface: When painting the door’s main surface, use a paint roller for doors. Apply the paint using a ‘W’ pattern technique for a neater, more even coverage. Painting doors with a roller is the most efficient way to get the job done.
  5. Leave to dry and apply a second coat if necessary: Leave the painted door to dry for a few hours. If you see imperfections or incomplete or uneven coverage, apply another coat of paint.
  6. Reattach door when completely dry: When repainting doors, to prevent them from sticking, let them dry completely before reattaching them. That takes 6 to 24 hours depending on the paint, temperature and moisture in the air.

Contact local painters

How to paint door frames

When painting door frames, first put down a plastic drop cloth and use 7.6-10.2 cm painter’s tape to line the wall area around the door frame. Clean the frame with grease-cutting cleanser, sand it lightly, fill in any small chips and gouges using wood putty. When painting door frames, the right door paint is important. Use semi-gloss, latex interior paint or exterior trim paint, if the frame opens outside.

Use angled tip handheld brushes for efficiency, precision and to get into tight spaces. Hold the metal band below the bristles for better control over paint placement. Start painting from the frame’s upper inside corner using long, sweeping strokes. When you get to the interior surface’s bottom, repeat the process on the opposite side. Work your way outside the frame and paint the jambs on both sides. To avoid leaving seams, overlap your strokes. Let it dry for 2-6 hours and apply a second coat. 

How to paint a door without removing it

The best way to paint a door without removing it is first to wedge the door and cover the hinges, doorknob and lock with painter’s tape. Clean the door to remove grease, especially near the doorknobs and handles. Use a paintbrush on the top, edge and bottom of the door. Use a foam roller when painting doors with a roller. When you are done painting, carefully remove the painter’s tape. 

Before and after a new paint job / Source: BODEK Painting & Plastering

How to hire a painter

Hiring the right painter is essential. There are three main factors to look out for to ensure you hire the right professional for your job. 

Licencing and qualifications 

Make sure the painter you hire has the proper licencing and qualifications.

Years of experience

It would help if you chose a painter with years of experience painting and who knows lots about door paint and the best way to paint a door. 

Positive reviews and references

Do some research before you hire a painter to do door painting. Choose one that consistently gets good reviews and can provide a list of references for door painting they have done. 

Find out how much a painter will cost to hire in our guide.

Categories
Walls & flooring

How to paint a wall

How to prep walls for painting

Fill in surface cracks

Before you look for easy painting ideas, make sure that you know how to prep the walls. You should start with a quick inspection for cracks in the wall. Filling in those cracks with putty and letting it dry overnight ensures that your paint goes on smoothly and that you don’t need multiple coats.

Sand down

If you filled in surface cracks, you need to sand down those cracks before painting. Fine grit sandpaper removes any excess putty and won’t leave behind scratches and gouge marks. You generally want to let the putty dry overnight before sanding it.

Clean walls

As you look for painting tips, you will find that many people recommend cleaning your walls before painting those surfaces. All you need is a little dish soap that you mix with water and apply it to the walls. Cleaning the wall removes any substances that can keep the paint from sticking.

Apply tape a lay a drop sheet

When preparing walls for painting, both painter’s tape and masking tape works well. It goes on smoothly and comes off cleanly without leaving residue behind. Use the tape to block off your outlet and baseboards as well as any other surfaces that you do not want to paint. It’s also a good idea to lay a drop cloth will protect the floors from the paint.

Laying a drop sheet is an important part of preparation / Source: MMPC

Purchase enough paint

Always determine how much paint you need before starting the job, especially if you choose a custom blend. Though home improvement stores follow paint mixture recipes, they cannot guarantee that a new batch will perfectly match your old batch of paint. One litre of paint will cover up to 6.5 square metres. Measure the size of the room and divide it by 6.5 to roughly see how many litres of paint you need.

Required tools

  • Paint/masking tape
  • Drop cloths
  • Primer: Tinted primers match the colour of the paint that you choose and reduce the amount of paint needed. When painting interior walls, you should always use at least one coat of primer first.
  • Brushes: Brushes are helpful for painting areas that you cannot reach with a roller and blending the borders and corners of a room with the rest of the wall.
  • Rollers: To paint a large room in less time, invest in one or more rollers. Rollers are also reusable. Once you finish painting, rinse off the rollers with some clean water and let them sit outside for a few hours to dry. You can use them when you need to repaint or touch up a room later.
  • Tray
  • Ladder: A ladder helps you reach the top of the room and apply both the paint and primer. It also helps you stay safe until the job is done.
  • Clean cloth: Having a few clean and dry cloths nearby can help you take care of accidents as they happen. If you knock over a can of interior wall paint, you can quickly mop it up before it creates a permanent stain. A dry cloth will also help you remove paint that drips onto other surfaces. 

Tips for painting a wall

How to cut in painting

Cutting in painting is a technique that helps the areas around the corners and baseboards blend with the rest of the wall. Whether you use a brush or roller, go over those surfaces with a brush. Use the brush to apply smooth, streaks of paint around the border or corner and pull the brush towards the centre of the room. You can then go over those areas with a roller to smooth out any rough spots.

Contact local painters

How to paint a wall with a roller

Learning how to paint with a roller can save you some time because the roller covers a larger area with paint in less time than it would take with a brush. Pour enough paint in your trap to completely coat the bottom and fill it halfway up the sides. Run the roller through the paint and along the base of the tray. When you pull it towards you, the tray removes any excess paint from the roller. You should then paint a large uppercase “W” in the centre of the wall. As you use more paint, expand the size of the W and move the roller in different directions. This helps you fill in gaps and provides a smooth coat of paint.

How long does it take paint to dry?

The amount of time it takes for the paint to dry depends on the type of paint that you used. It typically takes six to eight hours for most interior house paints to dry. If you use a primer, you need to wait at least an hour for it to dry before applying the paint. You should not remove the tape or move back into the room until you give the paint a full 24 hours to dry. High humidity levels and cold temperatures are two factors that can increase the drying time.

How many coats of paint do you need for a wall?

Most walls need a minimum of two coats. Even if you use a primer, you need two coats of paint. Apply the first and let it dry completely before applying the next coat. If you find that traces of the old paint are still showing, you’ll need to apply a third coat. You may need multiple coats to hide brush marks and other mistakes, too.

Darker paint colours make a great feature wall / Explore Painting

How long does it take to paint a room?

It’s difficult to say how long it takes to paint a room because it depends on the size of the space and how quickly you work. Plan on spending at least four hours to paint a smaller room and up to six hours to paint a larger room. If you use any unique or custom painting techniques, the process will take even longer. 

Tips for painting a feature wall

A feature wall is usually a different colour to the other walls and serves as a focal point in a home. When painting a feature wall, choose colours that work together and use a roller to provide an even coat of paint. You may want to use stencils to add a unique design to the wall, too.

How to hire a painter

Licensing and qualifications

Whether you want to know how to repaint a wall or where to start on your project, consider hiring a pro. Painters in Australia need a Certificate III in Painting and Decorating. They can get this through a registered organisation or a specialty institution. Some also receive their training through an apprenticeship program. 

Categories
Gardening & landscaping

A complete guide to indoor plants

Indoor plants have become a calling card of the millennial decor, and with good reason. Once extremely popular (the 1970s saw a boom in indoor plant life), this style is suddenly back in vogue. Try it out – you might be pleasantly surprised at the difference in the house after you bring some flora inside.

If you’re looking to hop onto the trend and unsure where to start, here’s some helpful tips on which plantlife might be the best addition to your home.

Benefits of indoor plants

Indoor plant life can add a real boost to your home. A few of the right kinds of plants can add a touch of beauty to any room in the house, especially for extremely urban environments where nature is limited to what springs up between the cracks in the cement. In those cases, you should definitely try to add just the slightest touch of green to your life. Having plants around is also very relaxing. Coming home to see your plants grow is automatically revitalising and helping to take care of them can serve as a calm, soothing release after a long day.

Indoor plants look great, and also help to purify the air in your home / Source: Alice Bonicelli Interior Design

Another bonus? Plants will help clean and purify the air around you – removing pollution. So not only will your house look better, you’ll breathe better in it. You don’t even need a whole garden’s worth of plant life; just one or two will work wonders! 

Types of indoor plants

There are a myriad of options when it comes to selecting a type of indoor plant. While considering your options, it’s important you consider how much maintenance and light they require – and if that fits your home and lifestyle.

If you decide to bring a few plants inside your house, there are a few specific species you should try. 

  • Weeping Fig plants are extremely durable. If you’re the forgetful type who might go a few days without watering or caring for your plants, this kind of plant should still be just fine. Weeping Figs also last for quite a long time. 
  • Peace Lily plants are quite beautiful and grow fine in darkened parts of the house; just be sure not to overwater them.
  • Philodendron, or”Xanadu” plants are compact plants that also do very well in darker areas.  
  • Lady Palm trees grow very slowly but look very beautiful – just ensure that they are placed in rooms without air conditioning. 
  • Dracaena trees are also very elegant, but need to be watered constantly. 
  • Poinsettias aren’t just for Christmas anymore. They do very well as indoor plants and add a nice touch of colour to any apartment. 
  • Orchids add an exotic, gorgeous touch to any home, and they also come in plenty of beautiful varieties.  

Caring for your indoor plants

Select plants which go with the overall room decor. Indoor plants are the perfect way to decorate an empty corner, or as a room divider, or as a connecting link between your indoor and outdoor areas.

Tending to your indoor plants

Plants need to adjust to a new environment before they can be permanently left indoors. They can be taken indoors anytime, if you have a year around regulated heating system at home. If not, try to get the plant acclimatised before bringing it indoors fully, in order to avoid damage. Place it on the southern end of the house where it will not get direct sunlight, while also reducing the quantity of food and water afforded it. You can ascertain whether it has adjusted well and take it indoors when it shows signs of new growth.

Plants have growth spurts during the warmer season, and should be taken outdoors to have fertiliser applied. Water soluble fertilisers have an advantage over organic ones as they are odourless. Fish and organic seaweed are perfect fertilisers as they allow the plants to absorb the essential nutrients. For aesthetic value and rapid growth, it is advisable to prune your plants occasionally. To keep away sap sucking pests, you could spray the plant with a special oil meant for the purpose.

Where to place indoor plants to give them adequate light

Exposure to direct sunlight is detrimental to the health of your indoor plants. On the other hand, lack of sufficient light can lead to pale and unhealthy plants, with thin, long, and weak stems; stunted new leaves, and overall stunted growth. They thrive best in well-lit areas with filtered sunlight. When leaves mature naturally, they turn yellow and fall off.

You need to understand the temperature and sunlight needs of your plant in order to position it best in your home. Plants which thrive in darker places are the Rochford holly fern, the Parlor and Kentia palms, aspidistra and sansevieria. Plants like the Devils ivy, Boston ferns, African violets, the Madonna lily, weeping figs and dracaenas, do well in bright spaces.

Water requirements of indoor plants

A plant needs more water during the summer, and less water if it is kept in dimly lit areas. However, it is advisable to check the soil for dampness before adding more water. Leaving water in the saucer can lead to rotting of the plant root. Brown spots on the leaves signal over watering, which is the greatest cause of plant death.

The best plants for your bathroom

The bathroom can be a tricky room in your home to decorate with plants and flowers. The limited amount of light and excessive humidity can be a nightmare for many plant species, but there are actually some that thrive in just these conditions. Here are some plants that you can keep in your bathroom to add some personal style and help keep the air fresh.

  • Aloe Vera: Just like many other members of the succulent family, aloes do not require too much attention. They can get by just fine with a dash of sunlight and some water once a week or so.
  • Bamboo: Lucky bamboo, despite the name, is not actually bamboo. It is a tough indoor plant that will thrive in either water, soil or crystal soil. If its green colour begins to fade or dull, simply make sure your bamboo gets an extra dose of sun.
  • Chain of hearts: Aptly named, this is one house plant you will love! Its heart-shaped leaves look especially stunning when this plant is displayed as a hanging arrangement. This plant also only needs to be watered moderately during the warmer summer months.
  • Dieffenbachia: You may know this plant better as dumb cane. It has broad, oval-shaped leaves and can do very well without much light at all. On the other hand, this cream and green beauty will need some extra water to help it flourish.
  • Ferns: Ferns are known to enjoy rainforest type settings. This means loads of moisture in the air and indirect sunlight.
  • Figs: With their glossy leaves, figs can handle moderate light but will need some extra water in the summer.
  • Orchids: Nothing quite compares to the beauty of an orchid. Whether in bloom or not, they will give your bathroom a real touch of class. They do very well with a medium amount of light. You can ease off on the watering during the winter months, but summer calls for a regular watering routine.
  • Spider Plant: This plant is part of the lily family and does very well without much care at all. It will need an adequate amount of light and looks especially stunning when displayed in hanging form.
Stylish modern white bathroom with bathtub and indoor plant on windowsill
Source: Ryan Linnegar Photography

Spotlight on maidenhair ferns

Who wouldn’t love to have a maidenhair fern in their living room or their kitchen? With its delicate, lacy appearance and soothing green hues, a maidenhair fern is a resilient plant that can make an ideal addition to your house.

As the name suggests, a maidenhair fern is a type of fern that can be grown both indoors and outdoors. There are many varieties of maidenhair ferns and some varieties, like the \”Fragrans,\” thrive better indoors as they cannot tolerate excessive sunlight. Similarly, other varieties, like the Valley Mist and Rough Maidenhair, are commonly grown outdoors. 

Contact local gardeners

Caring for maidenhair ferns

Location: If you are growing an indoor maidenhair fern, choose a spot that is not prone to temperature fluctuations, like the bathroom. At the same time, make sure that the position remains fixed as maidenhair ferns are very sensitive to changes in moisture, temperature, etc. Indoor ferns can be grown in pots, hanging baskets, or terrariums. Finally, never place them in a dark spot, and protect them from temperature extremes.

If you are interested in growing outdoor ferns, select a spot that is partially shaded since these ferns require only moderate sunlight and an appropriate level of moisture. 

Sunlight: They require adequare, yet moderate sunlight. Place them in a well-lit spot but out of direct exposure if outdoors

Water: You will need to water your maidenhair fern regularly as they thrive under high moisture conditions. They also require regular application of liquid fertilisers for proper growth and development. If you are worried that you might forget to water your maidenhair fern regularly, invest in a self-watering pot. These pots have a reservoir of water, which is released into the plant at regular intervals.

Pests: Maidenhair ferns are also prone to infections in the form of pests. Therefore, make sure that you use a protective spray like Confidor, but always use the spray outdoors where there is decent ventilation. 

Repotting: Typically, these ferns need to be repotted once in two years. In the meantime, if the ferns become too large, repot and divide them into two or three parts. To ensure regular growth, use high quality potting mixture with adequate levels of sand and peat. While potting, be careful not to insert the crown of the fern inside the soil as this would arrest further growth. Finally, prune dead ends with a simple pair of scissors every now and then. 

Categories
Walls & flooring

How to paint tiles

Tiles play a pivotal role in defining the aesthetic of a space, but trends change, and sometimes, so should your tiles. If you’re wondering how to paint bathroom tiles or refresh your kitchen, having your tiles painted is an easy, affordable solution instead of a tile replacement. Here are some tips on how to paint tiles, ensuring a smooth DIY experience. 

What is tile paint?

Tile paint is a type of paint designed specifically for painting tiled surfaces, including walls and floors. When you use ordinary house paint, it will not stick to the tiles. Even if the paint sticks, it will begin peeling away. Choosing the right type of paint is the first step in this DIY job.

What to know before painting tiles

Painting old tiles white using a paint roller | Source: iStock

Before diving into the paint cans, here are three important things you should keep in mind for a flawless tile-painting experience. 

  • Choose the right tiles. Not all tiles are created equal, and you need to select the right type for their use and functionality. For instance, it’s ideal to get non-slip tiles for the bathroom. Meanwhile, ceramic or porcelain tiles provide a solid surface for the paint to adhere to.
  • Surface preparation is key. Give your tiles some TLC before diving into painting. Clean and sand the existing tiles to remove the glaze and ensure proper paint adhesion. 
  • Select the right paint. Investing in good quality tile primer and paint for tiles from a reputable store is essential for a finish that stands the test of time.

Benefits of painting your tiles 

Renew the look

Painting over tiles is an easy way to renew the look of any room. Many people choose trendy colours when they install tiles and later find that the tiles look dated and out of place. Choose from a myriad of colours to give your space a fresh, contemporary feel.

Changing your tile’s colour can have a dramatic effect / Source: Brightr Solutions

Cheaper than replacing them

Replacing your tiles and hiring a pro to do it costs a lot. You need to pay someone to remove the old tiles and check for water damage, and you also need to pay for new tiles and grout/other materials. Painting tiles is a wallet-friendly alternative to a complete tile replacement. You can also conceal dated or imperfect tiles, turning flaws into features.

Easy DIY

Knowing how to paint tiles can turn a weekend into a home improvement project with minimal time and readily available supplies. Depending on the size of the space, you might need as little free time as a few hours. Most jobs take a weekend or less and require supplies that you can get from any home improvement store.

Create custom and personal designs

Unleash your creativity by crafting personalised designs, making your space uniquely yours. While you can draw inspiration from what other DIY enthusiasts did, you don’t need to rely solely on their ideas. You can combine new colours and come up with your own designs.

What you’ll need

Gather the essential tools and equipment to ensure a seamless and successful project. Having these tools and materials on hand should prepare you well for your tile painting project with confidence.

  • Tile cleaner: To thoroughly clean and prep the tiles before painting.
  • Sandpaper and sanding block: Use fine-grit sandpaper to remove the tile glaze and use the sanding block to smoothen the surface.
  • Masking tape or painter’s tape: Essential for protecting surfaces you don’t want to paint, such as appliances and outlets.
  • Paintbrushes and rollers: A combination of brushes and rollers helps cover different areas efficiently.
  • Paint trays: To hold and distribute the paint while using a roller.
  • Drop cloths or plastic sheets: Protect your flooring and surrounding areas from paint splatter.
  • Paint stirrer: Ensure your paint is thoroughly mixed before application.
  • Tack cloth: Use to wipe away dust and debris after sanding.
  • Tile primer: Choose a high-quality primer for better adhesion.
  • Tile paint: Make sure it’s a durable paint suitable for tiles.
  • Sealer: For added protection, especially in high-traffic areas or if painting floor tiles.

Safety gear:

  • Protective gloves: Shield your hands from chemicals in cleaners and paints.
  • Safety glasses: Keep your eyes protected from dust and debris.
  • Respirator mask: If working in a confined space, ensure proper ventilation and protect yourself from fumes.

A step-by-step guide on painting tiles

Step 1: Repair any damaged tiles

Showing a cracked tile | Source: iStock

Begin the prep work by treating any chips or cracks with TLC to ensure a smooth surface. Caulk can repair any thin cracks or minor chips by applying a small amount while wearing gloves and levelling it with your finger.

For major flaws, use an exterior-grade waterproof spackle. Apply a little amount and wipe away the excess with a putty knife, bringing the filler down to the tile surface.

Step 2: Clean and sand the tiles

Fill a bucket with warm water and TSP cleanser (Trisodium phosphate). Wipe the tile down with gloves to remove dirt. Begin at the top and work your way down, changing the water as needed. Let it dry after rinsing with clean water. 

Use sandpaper to scuff up the glazing without sanding down to the tile body while wearing safety gear. To prevent beeswax from embedding, clean the tile with water and dry it with a tack cloth.

Step 3: Protect non-paintable areas

Shield your furniture, appliances and other items from accidental paint splatters by using masking tape and sheet plastic. Protect outlets and appliances to ensure that your paint lands only where it is supposed to.

Step 4: Prime the surface

Grab your tile primer and fill a lined tray with bonding primer. Apply thin applications with a roller, and be careful not to press too firmly. Using a roller ensures that you don’t miss any parts of the tile and that the primer goes on smoothly. The primer can take a few hours or longer to dry or cure. 

Step 5: Paint the tiles

Painting bathroom tiles to renew the look | Source: iStock

Choose high-quality tile paint and apply it evenly with a roller. You can also spray paint your tiles if it’s easier and you have the right equipment on hand. 

Avoid overloading your roller or paintbrush to prevent drips. Fill in the gaps and smooth down the edges with a paintbrush.

If you want to create unique patterns, use a cut sponge, prefabricated stencil, or handmade painter’s tape stencil. Before attempting patterns, check the manufacturer’s instructions regarding drying times.

Enhance the overall aesthetic by delicately painting the grout lines. Use a fine brush or a specially designed grout paint to accentuate these details, creating a cohesive and professionally finished appearance.

Contact local painters

Step 6: Let the paint dry and cure

It is best to let the tile paint dry completely overnight, although it may only take a few hours. If humidity slows the drying process, operating fans and leaving windows open will draw moisture from the air and help the paint dry faster.

Step 7: Apply a second coat

When buying tile paint, make sure you have enough for multiple coats, as the exact quantity needed depends on the job. Darker tiles generally require more tile paint than lighter ones. Additionally, surfaces with accent tiles, patterns, or unique designs may need extra coverage. Using a primer to conceal old tiles reduces the overall tile paint required. If old tiles are visible through the paint, you may need multiple coats.

Step 8: Apply a sealer

Finally, apply two coats of polyurethane sealer after the paint has fully set. Allow the paint to cure for 24 to 48 hours before applying the sealer to ensure it is no longer tacky to the touch, promoting excellent bonding.

Preserve the beauty of your painted tiles with regular maintenance. Clean them gently with a mild detergent, and avoid abrasive cleaners to extend the life and vibrancy of your newly painted tiles. With proper care, your painted tiles will continue to enhance your space’s aesthetics for years.

Transform your space with fresh coats of paint

Tile painting emerges as a versatile and cost-effective home remodelling option. The possibilities are endless, and knowing how to paint tiles allows you to personalise your surroundings.

If you decide to let a pro handle the job, choose someone with the right qualifications. Painters in Australia need a Certificate III in Painting and Decorating, which goes to those who did apprentice programs and took the right classes.

Hiring a skilled painter can ensure that your house painting endeavour goes off without a hitch. They can assist you in selecting the right kind of paint and colour to complement your style and emphasize your tiles. With a single brush stroke, you may transform, refresh, and customise the style of your kitchen or bathroom!


FAQs on painting tiles

What kind of paint do you use on bathroom wall tiles?

  • Epoxy paint: Ideal for bathroom wall tiles, known for durability and moisture resistance.
  • Latex or acrylic paint: This option is user-friendly and especially effective with a bonding primer.
  • Oil-based paints: Suitable but requires proper ventilation due to fumes.
  • Tile paint or refinishing kits: Offers specialized formulations for tile surfaces.

Ensure thorough surface preparation, including cleaning and priming, for optimal paint adhesion and lasting results.

Does painting over kitchen and bathroom tiles last?

If you use high-quality paint and properly prepare the surface before painting, your painted tiles will last many years without needing to be repainted.

Can you paint over the kitchen splashback tiles?

Yes. Paint is one of the simplest and most cost-effective ways to remodel your home. A few cans of paint can transform your kitchen’s walls, cabinets, kitchen island, table, chairs, and even your splashback.

Categories
Design & decor

How to decorate your walls with poster printing

If you’re trying to impress your guests when they come over to your place, make sure to decorate your interiors accordingly. Working on the wall colours is not the end of the story, as you have to focus on other ways to make that colour pop up. Wall colour will only speak when there are posters on them. Posters can emphasize more on the wall background and will portray a picture of your style or personality. So, next time you want to improve the condition of your interior design, then focus on the right posters you have to choose for the same.

Poster design trends

There are a myriad of poster designs that pop up with an internet search, including many intricate and detailed designs. Often simplistic design is a better choice, even when your heart goes for a complex one. Everything depends on the background wall, its colour, and more. To top it all, if the walls are textured, then the poster designs will vary quite a lot. The choice of poster printing depends a lot on other criteria.

Mix & match for the right options

Just because you have only one free wall, that doesn’t mean you have to go for a big portrait of a poster. Why not try to place multiple mall posters to create more as a collage feel? It is promising and can emphasize your personality and style well.

  • You can take your photographs from various trips, laminate them into some smaller posters, frame them and place them to a wall.
  • It helps in creating some perfect memories, whenever you look at those frames, and will oomph up your wall design.
Personalised prints allow you to display your favourite memories / Source: Sakari Design

Now let’s look at colour

There are two ways to use multiple shorter posters to decorate a wall in an Australian household. You can either opt for the black and white pictures or coloured posters.

  • The black and white pictures are perfect for the whiter wall shades. Even if you have beige or other subtle colours in-wall, these black and white pictures are perfect.
  • Then you have colourful posters to be placed on lighter shade walls. For example, if you have a light sea green wall, then colourful smaller posters can lift up the value of the place.

If you have a dull coloured wall, then putting up framed posters can enhance its beauty to a whole new level. It is incredible how few simple pieces of artwork can change the entire look of your dull wall.

Less is always more

Always remember that it is time to give a minimalistic approach to a style. If you are planning to revamp your old place, it is always wise to not go anywhere else and embrace simplicity. These designs focus more on balanced posters and furniture rather than dealing with the colours, textures, or shapes of the walls. So, keep that in mind as well, while using posters to decorate the interior walls of your place.

Art prints vs posters

Like everything else, there are acceptable and awful banners and workmanship prints. In any case, the principle distinction between them is that workmanship prints are typical of better quality and are more novel than banners. This is on the grounds that banners are made on a mass scale and everybody winds up having indistinguishable or nearly indistinguishable duplicates of a similar picture.

The best craftsmanship prints are distinctive on the grounds that they are made by authentic craftsmen. Getting them can likewise be a method of supporting rising nearby specialists in your general vicinity.

These aren’t the main advantages in picking workmanship prints over banners. Keep reading to find out more.

The benefits of choosing art prints for your home

The uniqueness of various workmanship prints absolutely makes them famous among inside planners and mortgage holders. Be that as it may, they have more advantages, including:

  • They come in different styles that can supplement any inside style or room
  • They can improve your mindset and even increment office confidence
  • Craftsmanship prints are moderate, not normal for gathering unique bits of workmanship – yet at the same time offer a decent degree of uniqueness
  • Gathering workmanship prints is a decent method of putting away recollections since the photograph collection has gotten obsolete for the majority of us

How to use art prints to style a home 

The entirety of the advantages above are magnificent motivations to utilize them to style your home – however, how might you use craftsmanship prints to style a room?

1. Set the mood

One of the advantages referenced above is the number of choices you get from craftsmanship prints. This empowers you to discover a craftsmanship print that you like and one that will coordinate your inside plan.

You can make use of shading to differentiate and complement a portion of the room or pick an indistinguishable craftsmanship print that flawlessly fits into your style. From dim to brilliant and from theoretical to nature, there is a craftsmanship print for everybody out there.

You can likewise use craftsmanship prints to mirror the room itself and set its pace. For instance, you could discover craftsmanship prints portraying waves or the sea for the restroom and find tranquil mountains or night falls for your room to assist you with unwinding before bed.

Contact local interior designers

2. Make a focal point 

For most homes, the TV goes about as the point of convergence in the front room with all the furniture encompassing it. This can be a disgrace since what is a dark mirror isn’t as fascinating as a bit of charming artistry.

You can utilize craftsmanship prints to occupy guests’ consideration away from the TV to your connecting with craft prints by setting them deliberately in the focal point of the room. The equivalent should be possible in your room by setting them over the bed or in a lounge area over a divider inverse the eating table.

By making them a point of convergence in the room you can change the style of the room, however, you can likewise cause the space to feel greater in light of the fact that it distracts from the room’s corners or dividers (for the most part where the TV is put).

Since many Australians are now spending their time on DIYs and renovating their home, make printed artwork your next DIY project. If interior design isn’t your thing, speak to one of our interior designers for tips on how to transform your home.

Categories
Design & decor

Choose the best bath towels

A bathroom towel is for more than just drying your hands or towelling off after a shower. Towels can and should be decorative bathroom features that reflect the style of the room and the owner. Emphasise and complement the bathrooms colour scheme, and show off your personal taste with the right towels. The colour should complement the bathrooms walls, curtains, and bathroom accessories, as well as your own stylistic sensibilities.

Look for quality

If you want the perfect bathroom towels, you need to look for quality. Bathroom towel quality is determined by the material the towel is made of and the GSM, which is the grams of material per square metre. The higher the GSM, the more absorbent the towel will be. The minimum GSM you should consider is 550 GSM; anything less will not be very absorbent. You will also want to purchase cotton towels because cotton does an excellent job of absorbing water and is extremely soft. Egyptian and Supima cottons are the best. Another good material for bathroom towels is a bamboo/cotton-fibre blend, which produces an absorbent, silky material.

Inspect the towels before buying

Don’t base your decision to purchase towels solely on the manufacturer’s tag. Towels can have the right GSM and be made of the right materials yet can differ in feel depending on the manufacturing techniques used. Unfold the towels and feel them. Do they feel soft and fluffy? Are the fibres sticking up or laying flat? Does the towel feel heavy? A good-quality towel should have a good amount of weight to it, should feel soft and fluffy and have fibres sticking out.

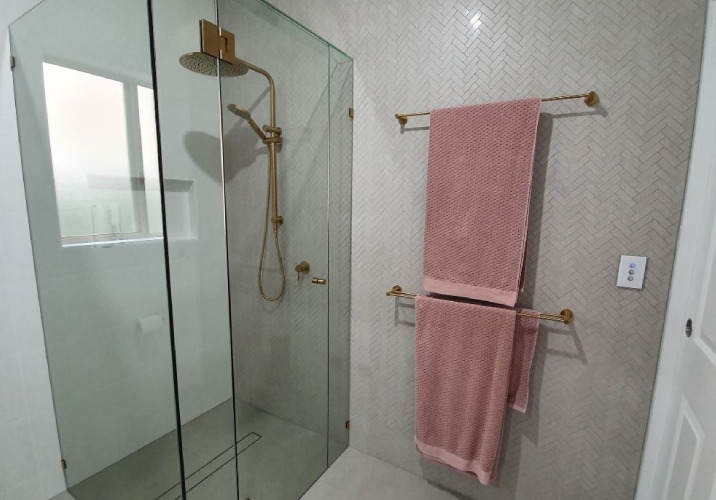
Two pink towels on a towel rack in a white bathroom
Coloured towels make a statement in a neutral bathroom / Source: Hando Homes

The price

You should expect to pay more for high-quality towels than poor-quality ones, but in the long run, you will actually be saving money because high-quality towels last much longer than lesser-quality towels. You can, however, save some money and get a good deal by shopping around. Look for sales at department stores and linen stores. With a little searching, you may be able to save as much as 50% on the purchase price of your new bathroom towels.

Colour

The colour of your bathroom towels should match the design of your bathroom. Classic white towels will match any bathroom, but the white colour stains easily. You can opt instead for neutral tans, browns or greys. However, if your bathroom is boring or dull, you might want to get bright-coloured towels. Bright greens, blues, pinks, reds, oranges, purples and the like may give your bathroom the extra boost it needs to look cheerful and fun.

If you’re still unsure, a good idea is to consider your shower curtain colour. Find a colour you like on your shower curtain and bring it out with towels that match. Emphasizing a pleasing colour in your shower curtain by placing other matching details around the bathroom can tie the whole room together.

Contact local bathroom experts

Patterns

Patterns should be used sparingly. Bathrooms are often small spaces, and loud patterns can loom large. If you find a pattern you like, you can tone it down by using it with other towels in solid, neutral shades.

Towel storage tips 

Keep accessibility in mind

Your home is where you should feel comfortable and where everything should be within easy reach. When storing your bath linens and towels, some handy tips to ensure easy access include investing in a decorative towel hamper or basket or a bath cabinet or drawers. Installing a stainless steel rack near your shower space is another option.

Save space by using the rolling method of storage

Try rolling your towels before storing them. The rolling technique helps save precious space and also reduces wrinkles. The rolled towels can then be neatly piled in a basket or an open shelving cabinet. To add a special touch, you can explore your creative side and install a repurposed wine rack to store your towels in.

A dark blue bath towel and hand towel in a bathroom with dark tiles
Dark coloured towels complement dark bathroom interiors / Source: Origin Bathrooms

Enlarge a small bathroom by installing a railed towel rack

Investing in a stainless steel rack for your bathroom is a good space-saving idea. The upper shelf can be used to store fresh towels, while the bottom rail can be used to hang the towels that are being used.

Store your towels in sets and make them appealing to the eye

A good idea, especially if you are using an open cabinet to store your fresh towels, is to pack them in matching sets. This can be achieved by rolling the bath towel, hand towel and washcloth with the largest towel as the cover. Tie them together with a ribbon to add an aesthetic touch. Having your towels in sets can save you the trouble of searching for a particular matching piece when required.

Store your towels according to usage

When using a chest of drawers or a storage rack, pile your towels with the most recently used ones at the top and the cleanest and freshest ones at the bottom. This method can help prevent dust from collecting and will ensure even usage.

Install wall shelves to save space and provide efficient storage

Use wall shelves liberally yet aesthetically, to maximise storage space in your bathroom. Various ideas include installation on an open wall, above the toilet or over a window or door. Install additional shelving units in your bath cabinets. Invest in wicker baskets to hold your towels, which can be placed on the shelves. Using adjustable shelves allows flexibility to add extra racks or rearrange your towels.

Categories
Design & decor

Study room ideas for your home

Whether you have been a student for a while or you’ve decided to start studying again after a long break, creating the perfect study environment at home is imperative to better learning strategies, understanding your materials and passing with success.

There’s more to creating a study space than just setting up a desk in your home. While this may seem like the obvious first step for many people, there are a few factors that can help you to study more efficiently and have a learning space you can be truly proud of.

Create an ergonomic workspace

Having a safe and healthy study environment immediately means you have a productive study space. No matter what size room you have for studying, creating a space that is ergonomic will help you to study comfortably.

One of the keys to better ergonomics having the right chair. Choose a chair that can be adjusted to help you sit at your desk in the most natural position possible. Your wrists, hands and forearms should be straight, in-line and parallel to the floor.

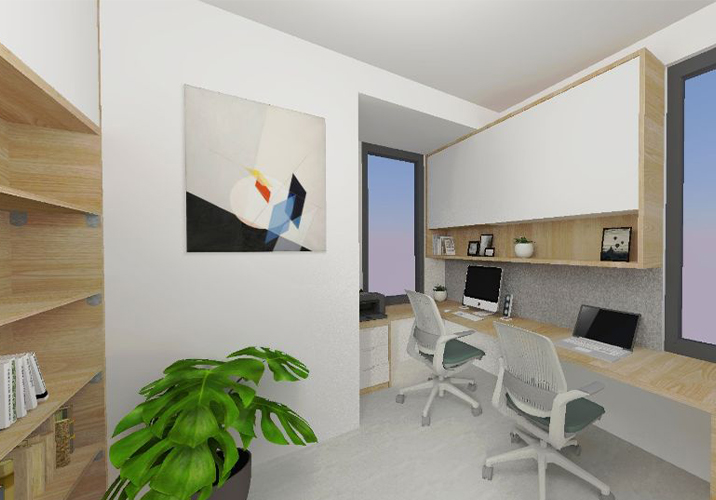
Ensure your home study space is ergonomically set up / Source: RJ Design Studio

Adjustable desks are also a great addition to your space, particularly a desk that can also convert into a standing desk. These desks allow you to adjust their height so you can stand and work. Sitting for several hours at a time is bad for your body, so switch up your study routine. This gives you room to be more active and keep your circulation flowing throughout the day and lengthy study sessions.

Other items to consider include your mouse and keyboard. There are many ergonomic choices on the market. Most of them may look a little strange, but they’re actually designed to place the user in the best possible position that allows you to sit in a more natural position.

Finally, consider the lighting and temperature of your study area. Consult with an interior designer to get your lighting placed at a perfect spot. There is nothing worse than having to sit at a desk to study when it is either too cold or too hot and the lighting just isn’t right. By installing additional cooling/heating and extra lighting (if needed), you can have a comfortable and productive study space.

Adopt an agile work policy

Originally used in the software development industry, agile processes have been used by many companies, industries and now, homes, in order to get through difficult and/or technical projects. Studying can be an overwhelming task and if you’re studying via distance education or self-paced learning, the challenges can be quite difficult to conquer.

Adopting an agile work policy in your studies can mean:

  • You have a solid understanding of what is required of you and in what order of importance those tasks are
  • Transparency to see where your study efforts are going
  • Tracking your progress in real-time
  • Better focus on your tasks
  • A clear understanding of execution order

It can be as simple as using a whiteboard/corkboard or a large sheet of paper on your wall. Using three columns, you will have a ‘to do’ column, an ‘in progress’ column and a ‘completed’ column’.

The ‘to do’ column will give you a visual representation of the tasks you need to do for your studies and, if you use post-it notes to write your tasks down, you can easily re-arrange your notes to show which tasks are top priority, and which ones can wait.

As you complete tasks, you can move them to the ‘in progress’ column and when completed, the third and last column. Another great reason to use this method is so that anyone else in your family (kids or your partner) can see exactly what’s on your plate and whether they need to give you some space with your studies!

Scrum is an agile framework for completing complex projects. Whether you want to use Scrum as a way to get through your home tasks and studies, or whether you want to utilise that knowledge for the workforce, there’s no doubt that adopting an agile work policy at home can help you to stay focused on all of your tasks.

Contact local interior designers

Reduce any distractions

Studying at a university or education facility can be distracting at the best of times. At home, it seems anything and everything in the house is trying to lure you away from your good intentions of studying hard.

Whether it’s binge-watching Netflix all afternoon or simply just household chores like the laundry, there are several ways you can eliminate these distractions to help you study better.

When setting up your study space, choose an area of the home that is away from family members who may be moving through the house. Therefore, a corner of the main living room may not be ideal. If you have a space that is away from the main home (such as a granny flat or a basement), this could be a perfect place to set up. Just make sure your space is ergonomic with plenty of light and fresh air! This way other people (or pets) aren’t likely to distract you while you’re trying to study.

Creating your own “study hours” will also be helpful. Creating a schedule for your studies will help you to be more focused during those times, as they have been deliberately set aside for your studies. It can also help other family members understand that it’s an important time for you to catch up on studies and know not to distract you.

Stay up-to-date with the latest news, learning hubs & courses

Increasing your knowledge is something that will always pay off throughout your lifetime. A part of studying more means staying up-to-date with the latest in news, courses and resources that can help you with work and future studies.

Google have a number of handy resources, including Digital Garage. Here, you can indulge in free courses to help you stay up-to-date on everything from social media, emailing and Adwords certifications.

Reading articles and news stories from sites such as Copyblogger, Forbes, Entrepreneur and Tim Ferriss and the Four Hour Work Week will help you to stay in the loop with everything related to business, psychology, productivity and even how to improve your writing.

Whether you’re just a student or you’re studying towards starting your own business, keeping up-to-date with the latest news and views can help you understand more about your industry.

If you love studying but can’t find the time to go to a university or college every week, online studies may be the perfect choice for you. Because you have the perfect office and study area set up in your home and you know how to better manage your time and be free of distractions, studying online couldn’t be easier. There are a wide range of education providers who offer educational resources completely online.

Wrap up

It doesn’t matter if you plan on studying one course or a few, having the perfect set-up at home can give you a personal edge to help you study better and productively. From setting up your office in the best area of the home, to better time and activity management, ergonomic furniture and the right online course, you’ll be able to study efficiently, all from the comfort of your own home.

Categories
Design & decor

How to nail minimalist home design

A minimalist decorated room exudes a contemporary and calm feel. It rides off the notion of ‘less is more’, and its style is all about restraint and simplicity. It’s an extremely popular and relevant style, yet it can be challenging to execute perfectly. Here’s how to nail a minimalist home design.

What is minimalist home design?

It is the art of making your interiors functional, comfortable and beautiful, while using as much empty space as possible. In this form of interior design, you play with outdoor views and light around the room, and create an eye-catching focal point. The concept of de-cluttering your home is meant to bring peace and harmony, and gives everything a supremely free-flowing look. It’s all about removing all of the headaches that come with the messes in a cluttered house, leading to stress-free, supremely relaxing living. Minimalism can bring about a very healthy, all-is-calm feel for everyday life. 

Source: Visualising Interiors

A completely minimalist lifestyle will include very few extra things around the house. You won’t see frilly, decorative window covers, heavy throw rugs, or lots of extraneous pillows, cushions or tablecloths around. Most of the walls and most of the floors will be clean and clear. There won’t be any rugs on top of carpets, there won’t be many wall treatments or floor coverings, and there will only be a few art pieces hanging around – and they will be very strategically placed. 

Selecting minimalist furniture

Cost is not an important factor in choosing furniture for a minimalist home. You will be buying only a few pieces, so assign a generous budget and focus on style instead. A single couch, perhaps supplemented by a couple of side chairs, should do in the living room. Avoid beds with headboards, as these are hardly functional but take up space. Give preference to beds with built-in storage drawers, so that you don’t have to buy a separate chest of drawers to hold your belongings. While picking minimalist furniture, ensure that their size is proportionate to your rooms.

Contact local interior designers

Minimalist flooring & walls

Flooring has a big contribution to the ambiance of a room. Generally in minimal design timber, bamboo and more recently, vinyl is used. For your walls, opt for neutral colours like white, black and grey, or subtle earth tones for some warmth and dimension. Minimalist furniture means that both the walls and flooring will be very noticeable, so choose colours that complement each other. For example, beige walls would look great with hardwood flooring. You can take away the drab, sterile look of a home painted white or grey by adding stone veneer wall tiles for a natural look. Alternatively, paint a short wall in a contrasting colour and texture to convert it into a feature wall.

Maintaining a minimalist home

The advantage of limited furniture is the ease of cleaning. You won’t have piles of magazines gathering dust on the coffee table, or a number of greasy appliances on the kitchen countertop. Cleaning is still required regularly, though, because even the smallest stain is clearly visible in the bright, open space.

Minimalist design tips

Keep accents to a minimum

While keeping furnishings to only the most functional elements is a plus, don’t think that you have to keep accent pieces to the bare minimum. Instead of filling your space with meaningless small pieces, choose just one or two statement pieces. One large piece of art on the wall is better than a dozen smaller pieces scattered around the room.

Source: Ryan Linnegar Photography

Inject subtle personality

When deciding if you want to decorate your abode in a minimalist way, it can be a difficult task in executing the right balance between having it too cluttered or even too empty. A cluttered space can make you feel stressed and confused, whereas an empty space may cause feelings of emptiness and sadness. To avoid your home not really feeling like a home, scatter some well-placed family photos or favourite books in different areas to make the space familiar.

Simple symmetry

Simplicity through symmetry in design and layout is another element of minimalist design. We naturally feel more calm with symmetrical visuals, and this principle gives your furniture pieces room to breathe.

Source: Lindy de Waal Interiors

Light & bright

Large windows are common in minimalist homes as it allows natural light to fill the room and the use of light colours for walls has the ability to make the room appear larger.

Source: Whitefox Interiors

Don’t be afraid of colour

A common misconception is that in minimalist design, the only colours that can be used are neutral hue colours – this is wrong. It’s true that a light, simple and neutral hue colour scheme should be adopted, but accent colours are also essential. Whether it may be a bright teal blue or a splash of green, an accent colour can give life to a room.

The use of some greenery in this bathroom is a clever way to liven up the space / Source: Visualising Interiors

A minimalist home has the appearance of simplicity, but when it comes to decorating your home to be simplistic, it may prove to be more complex than you think. Connect with an expert interior designer to help you nail the minimalist style you desire.