Starting a carpentry business in Australia can feel like a big step, especially when you’re working with limited resources and handling everything on your own. From deciding your service area and evaluating your niche to hiring your carpenters and securing your first clients, the early stages of this type of business require careful planning and the right strategies to succeed.
This guide will show you how to start a carpentry business on a small scale, focusing on practical steps to build your portfolio, attract clients, and set your business up for steady growth. With the right approach, you can establish yourself as a trusted carpenter and create opportunities for long-term success in the industry.
- Step 1: Identify the market of your carpentry business
- Step 2: Plan for seasonal trends in the carpentry industry
- Step 3: Research market rates and analyse competitors in the carpentry industry
- Step 4: Explore funding options for your carpentry business
- Step 5: Develop a strategic carpentry business plan
- Step 6: Register your carpentry business
- Step 7: Hire your carpenters
- Step 8: Invest in the right carpentry tools and equipment
- Step 9: Find clients for your carpentry business
- Step 10: Get paid for your carpentry services!
- Build your future — start growing your carpentry business today!
Step 1: Identify the market of your carpentry business
Before launching your carpentry business, it’s crucial to identify the services that are most needed in your area. Understanding the demand will help you focus on the right offerings, attract clients more effectively, and position your business to stand out in a competitive market.
Explore different types of carpentry services
As outlined by the Australian Government, carpenters are highly skilled in constructing, installing, renovating, and repairing structures and fixtures using wood, plywood, wallboard, and other materials. With a wide range of services to offer, it’s important to focus on those that match your expertise and appeal to your target clients.
Below are some of the most types of carpentry services in Australia.
Custom furniture making
Custom furniture making involves designing and building unique, high-quality furniture pieces tailored to a client’s specifications. This service appeals to homeowners looking for bespoke solutions that reflect their personal style and add value to their space.
Cabinetry and joinery
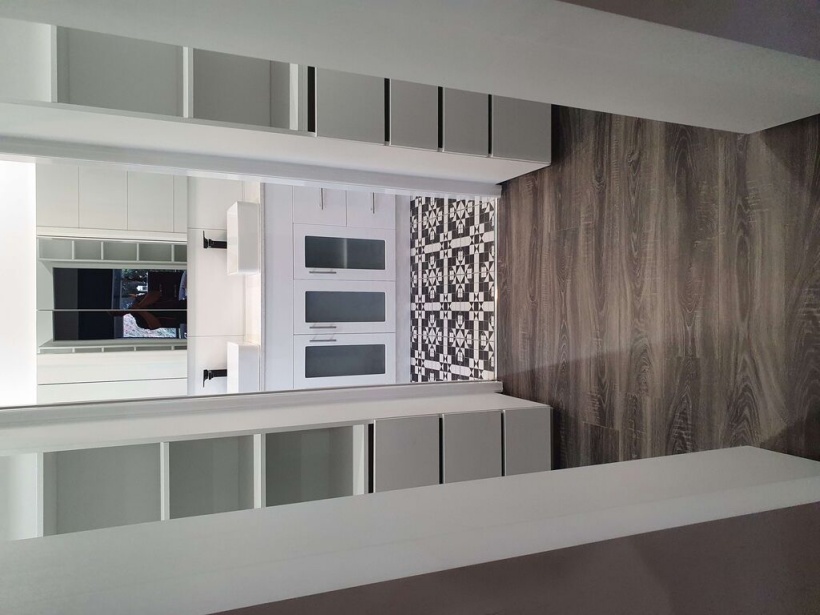
Cabinetry and joinery services focus on creating built-in cabinets, shelves, and storage solutions for kitchens, bathrooms, and other parts of the home. This service is ideal for residential renovations and small commercial projects where precision and craftsmanship are key.
Home renovation carpentry
Home renovation carpentry includes tasks like installing doors, building stairs, adding skirting boards, and trims, as well as building outdoor sheds. It’s an essential service for clients looking to renovate their homes without taking on full-scale construction work.
Commercial carpentry
Commercial carpentry involves larger-scale projects such as fitting out offices, retail spaces, or restaurants. This service requires working with businesses to provide functional and aesthetically pleasing woodwork solutions that meet industry standards.
Outdoor carpentry
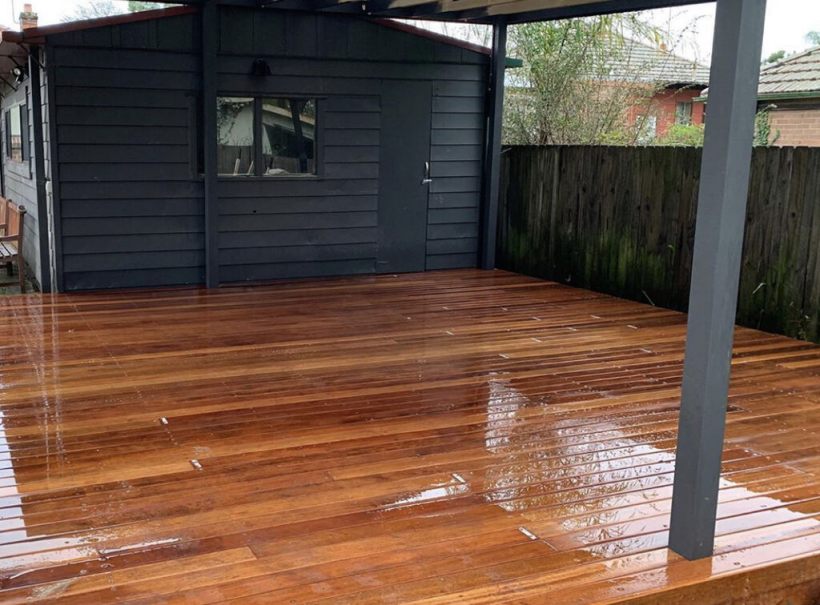
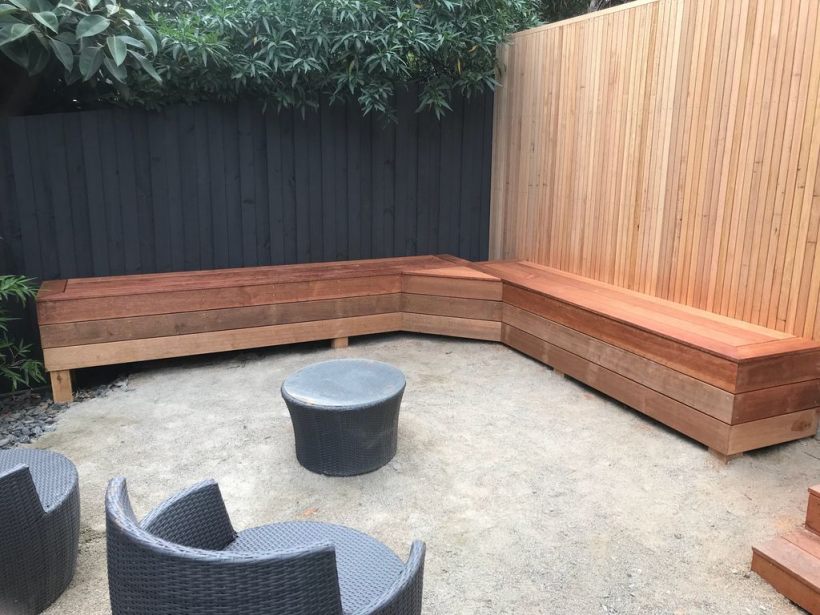
Outdoor carpentry focuses on creating decks, installing pergolas, repairing fences, and building garden features. These projects appeal to homeowners looking to improve their outdoor living spaces and add value to their properties.
Wooden flooring installation and repair
Wooden flooring services include installing new wooden floors or repairing existing ones to restore their appearance. This service is in demand for both residential and commercial properties, where durability and a polished look are priorities.
Bespoke carpentry
Bespoke carpentry offers custom, one-of-a-kind woodwork solutions, including tailored furniture, decorative features, and detailed joinery. This service attracts high-end clients seeking unique, handcrafted elements for their homes or businesses.
Shopfitting and retail displays
Shopfitting carpentry involves building custom shelving, counters, and display units for retail stores. This service helps businesses optimise their space and create a professional, attractive layout to showcase their products.
Carpentry for building construction
Carpentry for building construction services and businesses includes tasks like framing walls, installing roof trusses, and other structural woodwork for residential or small commercial projects. This service requires collaboration with builders and contractors to deliver reliable results.
Restoration and heritage carpentry
Restoration carpentry focuses on repairing and preserving historical woodwork in heritage homes or buildings. It involves specialised skills to maintain the integrity of original designs while ensuring the structure remains functional and safe.
Custom floor design and inlays
Custom floor design and inlays involve crafting decorative wooden floor patterns, borders, or inlays to enhance the aesthetics of a space. This service appeals to clients seeking high-end finishes and personalised flooring solutions.
Choose your carpentry business niche
Selecting a niche for your carpentry business allows you to focus your skills, attract the right clients, and differentiate yourself in the carpentry market. By specialising in a particular area, you can develop expertise, deliver higher-quality work, and build a reputation that sets you apart from general carpenters.
Custom furniture niche
The custom furniture niche involves designing and crafting one-of-a-kind pieces tailored to a client’s specific needs. This niche requires creativity and attention to detail, catering to homeowners or businesses looking for unique and functional designs.
- Pros: High demand for unique, handcrafted furniture pieces.
- Cons: Can be time-consuming and may require specialised tools and a well-equipped workshop.
Outdoor carpentry niche
Outdoor carpentry focuses on building structures such as decks, pergolas, fences, and garden features that enhance residential or commercial outdoor spaces. It’s a popular niche in Australia, where outdoor living is a key part of home improvement and lifestyle.
- Pros: Steady demand for outdoor improvements, especially in residential areas.
- Cons: Work is weather-dependent, and may require durable materials and outdoor-grade tools.
Cabinetry and kitchen renovation niche
This niche includes designing custom cabinets, shelving, and storage solutions as part of kitchen and bathroom renovations. It is a highly sought-after service, as many homeowners look to improve functionality and style in these essential spaces.
- Pros: Strong demand from homeowners undertaking kitchen and bathroom upgrades.
- Cons: Requires precision and can involve tight project timelines to meet client expectations.
Heritage restoration niche
Heritage restoration carpentry involves repairing, restoring, and preserving original woodwork in heritage-listed homes and buildings. This niche requires a deep understanding of traditional carpentry techniques to maintain historical integrity while ensuring structural safety.
- Pros: Niche market with opportunities for high-value, specialised projects.
- Cons: Projects can be labour-intensive and require expertise in traditional carpentry techniques and materials.
Commercial shopfitting niche
The commercial shopfitting niche focuses on creating customised interiors, including counters, shelves, and displays, for retail shops, offices, and restaurants. It often involves balancing functionality and aesthetics to create spaces that are both visually appealing and practical for businesses.
- Pros: Offers high-value contracts with the potential for ongoing business relationships.
- Cons: Often involves strict deadlines and requires compliance with industry-specific standards and regulations.

Decide on the service area for your carpentry business
Determining where to establish or expand your carpentry business is crucial for its success. By identifying regions with the highest demand for carpentry services, you can position yourself in areas where your business is more likely to thrive.
The table below highlights the demand for carpentry services across various cities in Australia, based on Oneflare’s job posting data from 2024. We’ll break down the demand in each city and explore the factors driving the need for professional carpentry in these areas.
| City | Percentage Share of Total Carpentry Job Demand |
| Carpentry services in Melbourne | 28.9% |
| Carpentry services in Sydney | 20.7% |
| Carpentry services in Brisbane | 18.3% |
| Carpentry services in Perth | 12.8% |
| Carpentry services in Adelaide | 4.2% |
Australian cities with the highest carpentry job demand
Melbourne leads the market with 28.9% of the total carpentry job demand in Australia. The city’s high demand stems from its continuous urban development and vibrant construction industry. Renovation projects and an increasing number of property developments contribute significantly to the need for skilled cabinet makers and carpenters.
Sydney ranks second, capturing 20.7% of the job demand. As one of Australia’s largest metropolitan areas, Sydney experiences a steady demand for carpentry due to a mix of residential and commercial projects, including home renovations and commercial fit-outs in its bustling urban spaces.
Brisbane follows with 18.3%, driven by its growing population and housing sector. The city’s expansion in suburban developments and infrastructure improvements supports a robust market for carpentry services.
Australian cities with lower carpentry job demand
Perth, accounting for 12.8% of demand, and Adelaide, with 4.2%, represent markets with comparatively lower demand. Even so, small cities like them still hold opportunities. Perth’s demand is largely linked to its suburban housing market, while Adelaide’s slower-paced development allows carpentry businesses to focus on specialised services like custom furniture making and heritage restoration.
In these smaller regions, carpentry businesses can stand out by targeting niche markets and offering unique services that cater to local demand, such as bespoke carpentry for renovations or eco-friendly building practices.
Step 2: Plan for seasonal trends in the carpentry industry
Understanding seasonal trends in the carpentry industry is essential for managing fluctuations in demand and optimising operations. Certain times of the year may see an increase in client requests, while other periods may experience a slowdown.
By aligning your services with seasonal needs—such as promoting indoor carpentry projects like cabinetry or custom furniture during winter—you can maintain steady revenue and ensure the long-term stability of your carpentry business, regardless of demand fluctuations.

Planning for seasonal trends in the carpentry industry ensures your business can adapt to fluctuations in demand | Source: Tradie Taskforce East Melbourne
Identify popular seasons for carpentry services
According to Oneflare’s 2024 data on the total job postings for each type of service, the top three peak months for carpentry services in 2024 are March, October, and January. These months represent periods of high activity in the carpentry sector, driven by a combination of seasonal trends, consumer demand, and project timelines.
March typically sees the highest demand, fuelled by favourable weather conditions ideal for construction and outdoor projects. Additionally, many clients resume home improvement and renovation plans after the summer holidays, making it a busy time for carpenters.
January also experiences significant demand as homeowners and businesses look to start the year. During this month, most of these clients are executing their renovation plans, setting new goals, and initiating fresh projects.
October marks another month with a demand for carpentry jobs, driven by a mix of pre-summer renovations and preparations for the peak real estate season. Clients often seek carpentry services to complete home upgrades, outdoor spaces, or aesthetic improvements before the busy holiday period or to align with real estate market trends.
These three months provide excellent opportunities for carpenters to capitalise on heightened demand and maximise their business growth.
Plan strategies to adapt to seasonal fluctuations
Seasonal fluctuations can impact the demand for carpentry services, with slower periods creating uncertainty for many small business owners. By planning ahead and implementing strategies to keep work steady, you can maintain consistent income and stay productive throughout the year.
Plan ahead for peak seasons and book carpentry projects in advance
Peak seasons, such as warmer months when outdoor projects are popular, can bring a surge in demand for carpentry services. To maximise these opportunities, reach out to clients in advance and schedule projects ahead of time. This ensures you have a steady pipeline of work during busy periods and can manage your workload effectively.
Diversify your carpentry service offerings
Expanding your range of services can help you adapt to slower seasons and attract new clients year-round. For example, if outdoor carpentry slows during winter, you can shift your focus to indoor projects like cabinetry, furniture repairs, or home renovations. Offering a variety of services allows you to fill gaps during seasonal lulls.
Build relationships with other industries needing regular carpentry services
Collaborating with industries such as real estate, property management, or building and construction can provide consistent work throughout the year. For example, property managers often need carpenters for ongoing maintenance, repairs, and renovations, while real estate agents may require upgrades to prepare homes for sale. Building these relationships can lead to repeat projects and long-term partnerships.
Post on lead generation sites to secure recurring carpentry clients
Using lead generation platforms like Oneflare can help you connect with homeowners and businesses looking for carpentry services, even during slow periods. By consistently promoting your services and building a reputation on these platforms, you can secure recurring clients and maintain a steady flow of projects throughout the year.

Register your carpentry business on Oneflare today and connect with clients searching for trusted carpenters like you!
Step 3: Research market rates and analyse competitors in the carpentry industry
Before setting your prices, it’s essential to research the market rates for carpentry services and assess the competition in your area. Understanding how other carpenters price their work and what services are in demand will help you set competitive rates and position yourself effectively in the market.
Understand the cost of common carpentry services
Carpentry costs can vary depending on the type of service, materials used, project complexity, and location. By familiarising yourself with average price ranges, you can confidently decide how much to charge for your carpentry work while ensuring they align with industry standards and client expectations.
Here, let’s look at how much carpentry services cost in Australia:
| Type of Carpentry Service | Average Cost Range |
| General carpentry cost | $40 to $120 per hour |
| Decking installation cost | $2,300 – $4,500 per project |
| Deck sanding and refinishing cost | $750 to $1,600 per project |
| Custom cabinetry installation cost for kitchen renovation | $2,500+ (average per job) |
| Kitchen benchtop installation cost | $200 – $2,000 per m² |
| Timber retaining walls cost | $250 to $450 per m² |
| Hardwood flooring installation cost | $20 to $150 per m² |
| Floating timber floor installation cost | $20 to $90 per m² |
| Parquetry flooring installation cost | $45 to $150 per m² |
| Staircase construction cost | $1,000 to $4,000 |
Do take note that the costs listed above are average estimates and may vary depending on factors such as location, materials used, project complexity, and individual service providers. It’s important to conduct your own research and tailor quotes to suit your specific business and client requirements.
Decide how to charge for carpentry services
Deciding the pricing structure for your carpentry services ensures you’re fairly compensated for your work while keeping your rates competitive. Different types of projects may require different pricing methods, depending on the scope, complexity, and duration of the job.
Hourly rate for furniture repairs and minor installation
Charging an hourly rate is ideal for smaller jobs like furniture repairs, door hanging, or minor installations where the work can be completed within a short timeframe. This method ensures you’re paid for the time spent on the project, including any unexpected challenges that may arise.
Clients also appreciate the transparency of hourly rates, as it allows them to estimate costs for small, straightforward tasks without committing to a large project.
Flat project rates for defined carpentry projects like kitchen cabinetry
Flat project rates are well-suited for clearly defined carpentry tasks such as building custom cabinetry, fitting shelves, or renovating kitchens, where the scope and timeline are agreed upon upfront. This pricing structure allows you to include the cost of materials, labour, and other expenses in a single, fixed price, providing clarity for both you and your client.
It also reduces the likelihood of disputes over costs, as the client knows exactly what they will pay for the completed project.
Cost per square metre for large-scale projects like decking
For large-scale projects such as decking, flooring installation, or timber retaining walls, charging per square metre provides a consistent and straightforward pricing method. This approach accounts for the size of the job and helps clients clearly understand how the costs are calculated.
It’s particularly useful for jobs that require significant material usage, as you can factor in variations in material costs and project complexity to ensure you remain profitable.
Milestone or staged payments for complex projects like bespoke carpentry
Milestone or staged payments are ideal for large, complex projects such as bespoke furniture, full-home renovations, or shop fitting. This structure involves breaking the total cost into payments tied to project milestones—such as an initial deposit, progress payments, and a final payment upon completion. It ensures steady cash flow throughout the project while giving clients confidence that payments align with work progress, reducing risk for both parties.
Evaluate your unique selling points (USPs)
Identifying your unique selling points (USPs) will set your business apart from other carpenters and give your clients a reason to choose you over others. Highlighting these strengths will help you attract the right clients and build your reputation.
Custom carpentry solutions for every client
Offering custom carpentry solutions allows you to tailor projects to suit your client’s specific needs, styles, and preferences.
Whether it’s bespoke furniture, tailored cabinetry, or one-of-a-kind outdoor structures, personalised services demonstrate your ability to deliver unique results that can’t be bought off the shelf. This level of customisation appeals to homeowners and businesses looking for creative solutions that enhance the functionality and aesthetic of their spaces.
Eco-friendly materials and sustainable carpentry practices
Incorporating eco-friendly materials and sustainable carpentry practices can be a strong differentiator for your business. By using responsibly sourced timber, reclaimed wood, or low-waste methods, you can attract environmentally conscious clients looking to reduce their carbon footprint.
Promoting sustainability not only helps the environment but also positions your business as forward-thinking and aligned with modern values.
Exceptional attention to detail and quality carpentry
Exceptional attention to detail ensures that every cut, joint, and finish is crafted to perfection, delivering results that exceed client expectations. Whether you’re working on small repairs or large bespoke projects, focusing on precision and quality will set you apart from competitors. Clients value carpenters who take pride in their work and are willing to go the extra mile to achieve flawless results that stand the test of time.
End-to-end carpentry service from design to installation
Providing end-to-end carpentry services means managing every stage of a project, from initial consultation and design to final installation. This comprehensive approach simplifies the process for clients, as they only need to work with one provider to bring their vision to life. Offering a complete service builds trust, ensures consistency, and positions you as a reliable expert who can handle all aspects of a project seamlessly.
Promoting these USPs on platforms like Oneflare can help your carpentry business stand out and attract clients seeking tailored services that competitors may not offer | Source: Prolux Carpentry Group
Step 4: Explore funding options for your carpentry business
Securing funding for your carpentry business is an essential first step, and it’s crucial to seek professional advice before making any financial commitments. Consulting with financial planners and local accountants can help you understand the implications of each option and choose the best fit for your business goals.

Self-funding
Self-funding involves using personal savings or funds from family and friends. This approach allows full control over finances without needing to meet lender requirements, although it also involves using personal financial resources.
Small business loans
Australian banks and financial institutions offer small business loans designed for startups. These loans generally require a business plan, financial projections, and a good credit history. Small business loans can provide the capital needed for startup expenses, with set repayment terms and interest.
Secured and unsecured business loans
Both secured and unsecured business loans are small business loans that can be viable funding options for purchasing initial carpentry business supplies, equipment, and transportation assets.
Secured loans offer manageable, low-interest rates, provided collateral is available. This collateral could include personal assets such as residential properties or assets associated with your carpentry business, like vehicles, carpentry tools, and equipment.
Meanwhile, an unsecured loan offers businesses fast access to funds without collateral. However, they generally have higher interest rates with shorter loan terms than secured loans, so the monthly payments can be higher.
Government and industry programs
Certain Australian states provide grants and financial support for small businesses, especially those with innovative or eco-friendly services. These programs are structured to assist with initial costs and often have specific application requirements and conditions.
The New Enterprise Incentive Scheme (NEIS) is one of the government programs in Australia that supports job seekers who want to start small businesses. This offers new entrepreneurs mentorship, accredited training, and income support to help them sustain themselves while establishing their businesses without requiring immediate profit. However, NEIS does not directly fund business costs, so startup capital would still need to be sourced separately.
Equity Investment
Startup carpentry businesses can secure significant funds without taking on debt that needs immediate repayment through equity investment. It’s a funding option where investors provide money to a business in exchange for ownership shares to get a stake in the company.
There are two types of equity investors: angel investors and venture capitalists (VCs). Angel investors are typically high-net-worth individuals who invest their personal funds into early-stage companies in exchange for equity. Meanwhile, venture capitalists are firms or groups that pool funds from multiple investors to support high-potential businesses.
Step 5: Develop a strategic carpentry business plan
Starting a carpentry business requires a well-thought-out business plan. This plan will be your roadmap, guiding you through each stage of starting and running your business.

It should include key elements, such as:
- Executive summary
- Company profile
- Business description
- Market analysis
- Services offered and pricing strategy
- Marketing strategies
- Budget and cash flow forecast
- Operations plan
- Risk mitigation strategy
- Long-term growth plan
Now, let’s dive into the step-by-step process to create a business plan tailored to your carpentry business.
Draft an executive summary
First, begin with the executive summary, which is a brief overview of your carpentry business and your goals. This section gives readers a quick sense of what your business is all about. Summarise what services you’ll offer, your target market, and what sets you apart from competitors. It’s often best to write this last so it truly reflects the rest of your plan.
Write your carpentry business description
Your carpentry business plan also needs a clear company description. In this section, outline the foundational details of your carpentry business, including its legal business structure (e.g., sole trader, company, partnership, etc.), ownership details, business name, and location.
Moreover, your company description should describe your business’s vision, mission, and core values. This section will provide essential context as you move into the more operational and financial specifics of your business plan.
Describe your carpentry business niche and types of services
The next step is to define the focus of your carpentry business, whether it’s general carpentry services, custom furniture making, cabinetry, outdoor structures like decking, or a specialised niche such as eco-friendly woodworking or bespoke designs.
Clarify why you chose this niche and provide a brief description of your target market. For instance, your target audience might include homeowners seeking high-quality and durable carpentry solutions, businesses requiring commercial fit-outs or customised interiors, or clients looking for unique offerings such as sustainable materials, intricate designs, or tailored furniture pieces.
Analyse your market and define your customer base
Once you have completed writing your company profile and carpentry business niche, it’s time to define your customer base. First, you’ll need to conduct a market analysis to understand your target customers, local competitors, and industry trends.
From there, outline who your ideal clients are, what they need, and how you plan to serve them better than competitors. This analysis will help you identify market gaps and inform your service offerings.
Outline your carpentry services and pricing strategy
Your business plan should also specify the types of carpentry services you’ll offer and your pricing approach. Consider the costs of supplies, labour, and other expenses to price competitively yet profitably. Plus, think about whether you’ll offer package deals, discounts for repeat clients, or seasonal promotions.
Detail your marketing and sales plan
For your marketing and sales plan, you need to map out how you’ll attract and retain clients. Detail your marketing channels—such as social media, SEO, or partnerships—and any customer loyalty or referral programs. Think practically about your initial steps to grow your client base and raise brand awareness in your target market.
Create a budget and forecast cash flow
The budget and forecast cash flow is a crucial part of your business plan. For this section, it’s wise to break down your startup costs, monthly operating expenses, and anticipated revenue.
Include one-time expenses such as equipment and marketing materials, as well as recurring costs like supplies, transportation, and insurance.
Then, project your cash flow to understand when you’ll reach profitability and how to manage finances through any seasonal ups and downs.
Establish an operations plan
The operations plan details how you’ll manage day-to-day operations, including hiring, training, and scheduling. Here, describe systems you’ll implement to maintain high-quality service, handle customer feedback, and manage bookings or billing. This section is key to ensuring smooth, efficient operations as your business grows.
Develop a risk mitigation strategy
After the operations plan, develop a risk management plan to address potential challenges and safeguards for your business. Identify key risks when starting a carpentry business, such as injuries from using power tools or handling heavy materials, falls from working at heights during construction, and accidental damage to property during installations or repairs. Outline safety protocols and detail the types of business insurance coverage needed, like public liability insurance or workers’ compensation insurance.
Conclude with a long-term growth plan
Lastly, conclude with a long-term growth plan to demonstrate your vision for the future and commitment to sustainable growth. In this section, you need to define both short-term and long-term objectives of your business, such as adding new carpentry services, increasing your client base, or expanding to new locations. Outline strategies to retain existing clients, such as loyalty programs, and how you plan to scale your marketing efforts.
Step 6: Register your carpentry business
To start a carpentry business, you may need to obtain registrations, carpentry licenses, and permits. As a business owner, it’s your responsibility to make sure you’re compliant with all applicable laws and meet your tax obligations.
For information about registering your business or applying for an ABN, we recommend you check out this helpful information from the Australian government.
Step 7: Hire your carpenters
Building a reliable team for your carpentry business is essential for your company’s success and growth. Below, we’ll discuss how you can hire carpenters near you and ensure that they meet your business’s needs.

Write job description
First and foremost, you need to create a job description that highlights your business and what you offer. Be transparent about job duties, hours, pay, employment type and any training opportunities. Describe specific tasks (such as constructing custom furniture, installing cabinetry, or building outdoor structures like decks or pergolas) and any qualifications or technical skills required. This helps candidates understand expectations from the start and ensures a good match for the role.
Most candidates also appreciate knowing the pay range, benefits, or potential for growth within the company. If you offer flexible hours, a supportive team environment, or training for new employees, mention these aspects. This can make your ad stand out and attract applicants who genuinely want to be part of a stable, rewarding role in a growing company.
Use local Australian platforms to advertise your job
After crafting the job ad, post it on multiple platforms to maximise its visibility. To reach the best candidates and find the right carpenters for your business, you may consider advertising on platforms that are popular and effective in Australia, such as:
- SEEK – Australia’s largest job board, ideal for professional job seekers across industries.
- Indeed Australia – a wide-reaching job platform, popular among full-time and part-time job seekers.
- Jora – a job aggregator that pulls listings from various sources, increasing visibility.
- Workforce Australia – a free job advertising service from the government, suitable for small business owners.
You might also consider posting on social media platforms such as Facebook, LinkedIn, or Instagram if you have a business page. For a local touch, posting on community boards or participating in job fairs can attract applicants in your area.
Don’t overlook employee referrals, either—current employees often know reliable candidates, and offering a referral bonus can incentivise them to help bring in great new hires.
Screen and interview thoughtfully
As applications start coming in, review them carefully to find candidates with the right qualifications and experience. Conduct initial interviews with the most promising applicants to gauge their interest in the role, carpentry skills, and alignment with your business.
This is the perfect chance to ask questions that reveal their previous experience, problem-solving abilities, and reliability. For example, you might ask how they managed challenging carpentry projects in the past, dealt with challenges such as warped timber or complex design requirements, or met tight deadlines while delivering high-quality craftsmanship and ensuring customer satisfaction.
It’s also helpful to perform criminal history checks and reference checks to ensure the trustworthiness of your candidates. This is particularly important if your carpenters will work in sensitive environments like offices or schools. A quick call to past employers can provide insight into their reliability, history, and work quality.
Make an offer and onboard your new hire
When you’ve selected your top candidate, make a clear and detailed job offer that outlines pay, benefits, work hours, and expectations.
Once they’ve accepted your offer, the next step is running a smooth onboarding process to set up your new hires for success. Start with training sessions to introduce them to your carpentry business’s standards, client communication protocols, and the specific workflows or tools they’ll use to ensure efficient and high-quality carpentry services.
If possible, have them shadow an experienced team member for their first few shifts so they can learn on the job. After their first week, check in with them and provide feedback to support their improvement and integration into the team.
Offer ongoing support and fair treatment
A supportive work environment promotes employee retention. Openly address concerns about shifts, workload, and safety. This initiative will help create a positive work culture that encourages loyalty and productivity among your staff.
Step 8: Invest in the right carpentry tools and equipment
Having the right tools and equipment will allow you and your team to deliver high-quality carpentry work. Investing in reliable, industry-grade equipment will also keep your carpenters safe while on the job, and help you meet client expectations.
Each carpentry business niche requires specialised tools and equipment. Here’s a breakdown of key items, their estimated costs, and where to purchase them in Australia:
| Carpentry Tools and Equipment | Price Range (AUD) | Where to Buy |
| Circular saws | $150 – $500 | Sydney Tools |
| Chisels | $20 – $150 | Timbecon |
| Planers | $200 – $600 | Carbatec |
| Nail guns | $300 – $800 | Tools Warehouse |
| Measuring tools (e.g., tape measures, squares) | $15 – $100 | Total Tools |
| Workbenches | $200 – $1,000 | CWS Store |
| Clamps | $20 – $200 | Major Woodworking |
| Safety gear (gloves, goggles, etc.) | $20 – $150 | Bunnings |
Note: Prices are approximate and may vary depending on retailers, brands, and product quality.
Step 9: Find clients for your carpentry business
Attracting clients is key to getting your carpentry business off the ground and generating a steady income. By combining online strategies with local networking and referrals, you can build awareness, secure new carpentry job leads, and establish your business as a trusted name in the community.
Expand your online presence
It goes without saying that nowadays, having an online presence is crucial for reaching potential clients and showcasing your work. From building a professional website to promoting your services on lead generation platforms and social media, expanding your online presence will help clients find and trust your business.
Build your carpentry business website
A website is essential for establishing your carpentry business’s credibility and providing clients with easy access to your services. It allows potential clients to learn about your offerings, view testimonials, and request quotes directly. Working with a web designer can ensure a user-friendly, optimised site that effectively showcases your services and improves search visibility.
To guide you, we’ve compiled examples of successful carpentry business websites that display the effectiveness of building a good website to boost brand credibility and improve customer experience.
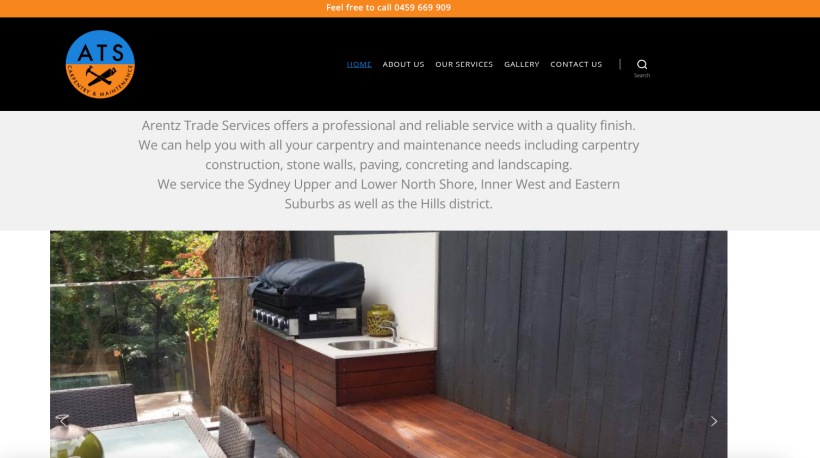
Arentz Trade Services’ website
Arentz Trade Services’ website is highly effective in attracting clients through its visually impressive project gallery, which showcases high-quality images of completed works like decking, landscaping, and timber structures. This feature immediately highlights their craftsmanship and the value they deliver, helping build trust with potential clients.
The site’s clean design, easy navigation, and prominent contact details ensure a seamless user experience, encouraging visitors to inquire and take the next step.
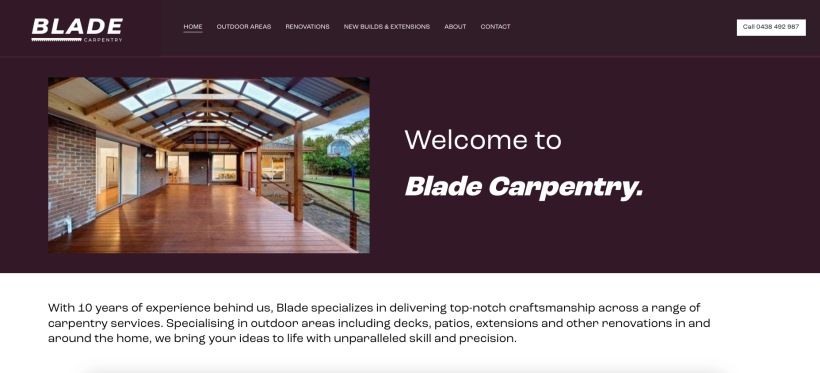
Blade Carpentry’s website
The Blade Carpentry website effectively attracts clients with its clear service breakdown and focus on outdoor carpentry solutions, such as decks, pergolas, and verandahs. The clean, professional layout highlights their expertise in renovations and new builds, helping visitors quickly find the services they need.
Combined with easy-to-access contact details and visuals that showcase their craftsmanship, the site establishes credibility and encourages potential clients to reach out.
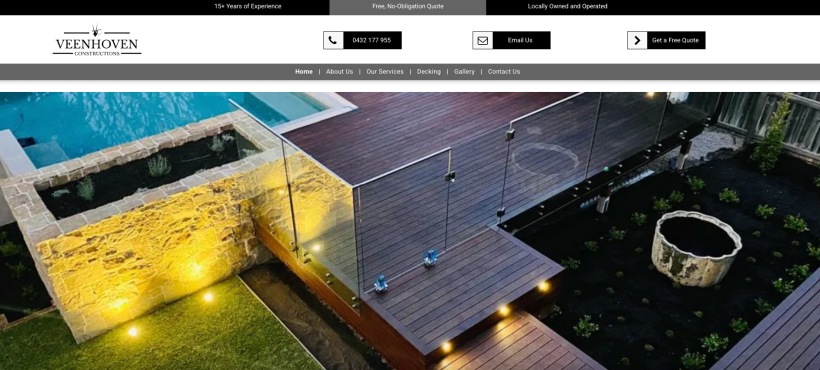
Veenhoven Constructions’ website
The Veenhoven Constructions website effectively attracts clients with its clear focus on decking, patios, and general carpentry services, supported by over 15 years of experience. The site’s clean design highlights their expertise, with well-organised service categories, professional imagery showcasing completed projects, and a user-friendly layout.
Key features like a free quote option, visible contact details, and an emphasis on local areas served (Redland Bay, Victoria Point, and Brisbane) make it easy for potential clients to connect. This combination of credibility, transparency, and high-quality visuals establishes trust and encourages inquiries.
Post on lead generation platforms
Posting on lead-generation platforms is one of the most effective ways for carpentry businesses to find clients. These platforms connect you directly with clients actively searching for carpentry services, providing an immediate source of leads.
Oneflare, in particular, allows you to showcase your carpentry expertise without upfront fees, making it easier to attract clients with minimal risk. This platform’s job posting system helps bring in quality leads and enables you to specify job types, budgets, and locations, so you can target projects that fit your capabilities and business goals.
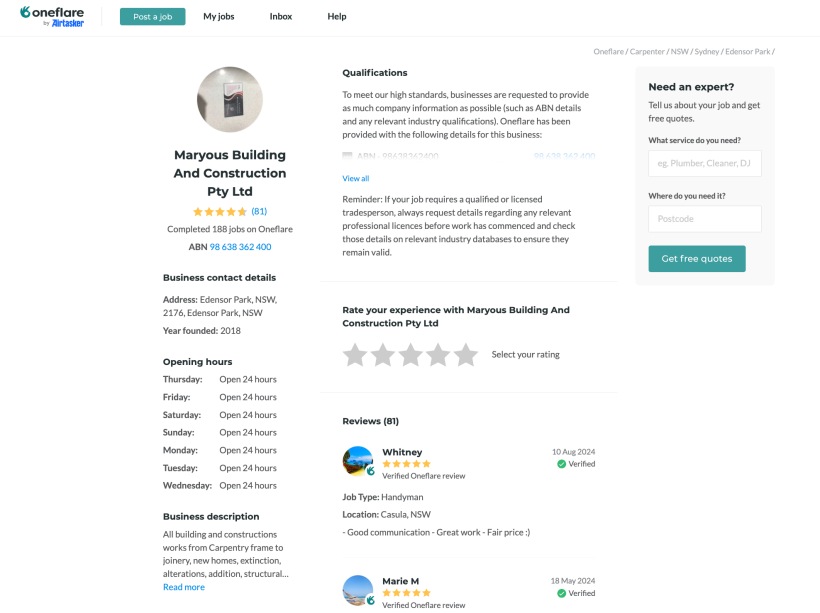
Get started on Oneflare by registering your carpentry business today—connect with clients, post targeted jobs, and grow your business with ease!
SEO and paid search for visibility
SEO and paid search improve your website’s visibility in search engine results, attracting organic traffic. While effective, SEO requires regular updates and can be costly in competitive areas. Consulting an SEO specialist helps implement ranking strategies to boost your business’s online presence.

Social media advertising
Social media advertising helps you reach a wide audience and showcase your carpentry services and client works visually. Targeted ads on Facebook, Instagram, and even TikTok can attract local clients, but maintaining a presence requires ongoing posting and budget management. A social media manager can optimise your campaigns for consistent engagement.
The following sections provide samples to inspire you and give you an idea of how social media advertising works. They showcase effective strategies for boosting a carpentry business’s visibility on Facebook, Instagram, and TikTok.
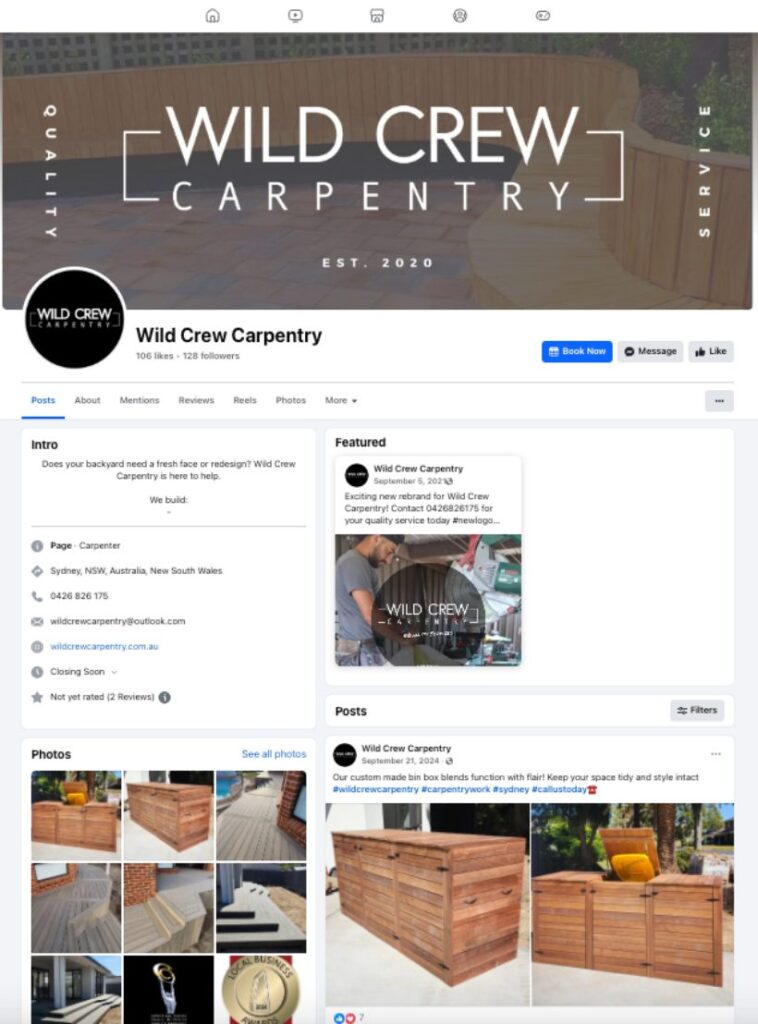
Wild Crew Carpentry – Facebook advertising
Wild Crew Carpentry’s Facebook page effectively attracts clients through high-quality project images that showcase their carpentry skills, such as custom furniture, outdoor structures, and renovations. Their Facebook page shows ongoing projects, helping build trust with potential customers. They have also strategically added their contact details and website link, making it easy for users to enquire or request quotes.
Berbuilt Constructions – Instagram advertising
BerBuilt Constructions uses their Instagram page to feature high-quality images of their completed projects, including decking, cladding, kitchen renovations, and outdoor carpentry. The clean layout and well-organised story highlights allow visitors to quickly view their expertise and range of services.
The page’s visuals highlight professional craftsmanship, while contact details and location information in the bio make it easy for clients to connect. This combination of detailed project imagery, clear service categories, and direct communication options makes the page highly effective in building trust and generating leads.

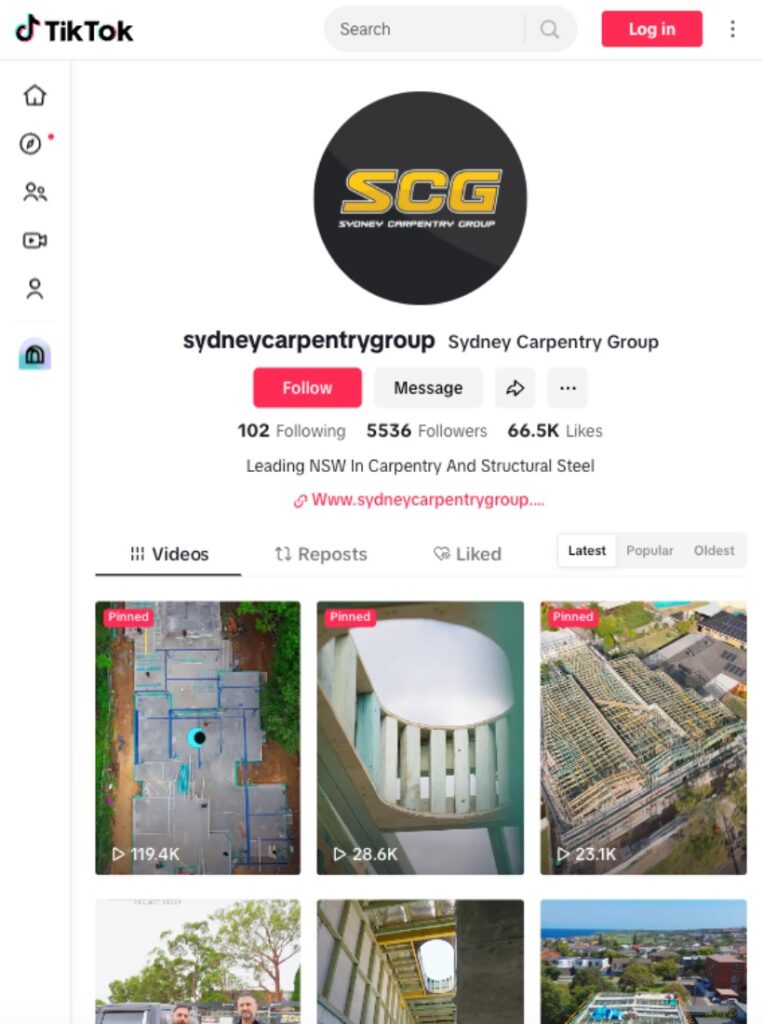
Sydney Carpentry Group – TikTok advertising
Sydney Carpentry Group’s TikTok strategy combines cinematic visuals with powerful music and engaging on-site content to showcase their carpentry work. Their use of drone footage highlights the scale and quality of their work, making it easy for viewers to envision similar carpentry jobs for their homes or businesses.
Additionally, their videos featuring carpenters working on projects add a relatable and behind-the-scenes element. By showing their work in action, they show their expertise, hard work, and attention to detail, which helps build trust with potential clients.
Build your carpentry business’s reputation through reviews and referrals
A strong reputation is key to long-term success. Encourage satisfied clients to leave reviews on your website or lead platforms like Oneflare to boost credibility and attract new carpentry clients. Consistent reviews on a platform ensure reliable feedback, helping potential clients trust your quality.

Take bookings and manage quotes efficiently
Responding quickly to quote requests can also help you win carpentry jobs, as clients often select the first reliable response. In fact, Oneflare data reveals that 60% of winning quotes are submitted within 60 minutes of the job posting, highlighting that faster quotes significantly boost job success rates.
Here are some tools that can help with automated booking and quoting:
- Calendly – Enables easy scheduling by allowing clients to book available time slots directly, reducing back-and-forth communication.
- Square Appointments – Provides booking, invoicing, and payment processing in one platform, helping streamline the client experience.
- Setmore – Offers online booking with customisable reminders, plus client management and integration with social media for easy appointment setting.
- HoneyBook – Combines booking, quoting, and invoicing, letting you automate responses and manage projects all in one place.
- Zoho Bookings – Integrates with Zoho CRM to manage client relationships, offers automated reminders, and allows for easy rescheduling.
These tools help you automate responses, manage quote requests, and follow up with clients, ensuring that no lead falls through the cracks.
Step 10: Get paid for your carpentry services!
Now that you have everything set up, from choosing your business niche and setting up your service area, to finally finding your clients, it’s time to finally get paid for your carpentry services. Here’s how:

Choose a reliable accounting software
Managing payments is a lot easier with a dedicated accounting system. This will save you time, reduce errors, and give you a clear picture of your finances.
Some popular accounting software options commonly used in Australia are:
- Xero – easy-to-use software with invoicing, bank feeds, and reporting.
- MYOB – offers payroll, tax tracking, and inventory management.
- QuickBooks Online – handles invoicing, expense tracking, and payments.
- Reckon One – customisable and budget-friendly, with modules for payroll and invoicing.
- Sage Business Cloud Accounting – simple solution for expense tracking and payroll.
Create a carpentry business invoice
Creating a professional invoice template is essential to get paid quickly. The invoice should clearly list your services, rates, and payment terms.
Many accounting platforms offer customisable carpentry services invoice templates, but you can start with free templates and modify them as needed. Consider these free carpentry invoice templates as a guide:
Canva’s carpentry invoice templates
It’s easily customisable with fields for services, rates, and payment terms. You can also add your logo and other brand elements to maintain consistency across all client communications.

Conta’s carpentry invoice templates
It provides a customisable, downloadable template specifically tailored for different businesses, like carpentry businesses. The good thing about these templates is that they’re compatible with Google Docs, Microsoft Word, and Excel, allowing you to easily tailor them as needed.

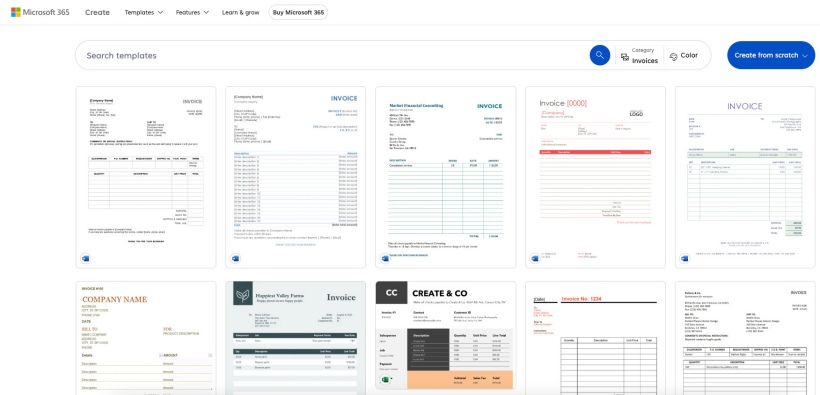
Microsoft Office’s carpentry invoice templates
It offers free invoice templates that are straightforward and professional and can be saved as a PDF. Even better, they have Excel-based templates that can automate calculations, streamlining the billing process and reducing errors.
Zoho’s carpentry invoice templates
The template offers a clean and organized layout, ensuring clarity and professionalism in client communications. It includes essential sections such as service details, additional charges, taxes, and terms and conditions, facilitating accurate and transparent billing.

Set up a bank account for business payments
Separating personal and business finances with a dedicated bank account makes it easier to track income, manage deposits, and handle reconciliations. Most banks offer online options specifically for businesses, streamlining all your financial needs in one place.
Offer digital payment options
Make payments easy and convenient for clients by providing digital options like Apple Pay, Google Pay, credit cards, and bank transfers. Many clients, especially those booking carpentry services through platforms like Oneflare, prefer the flexibility of paying directly from their devices. Offering digital payments not only enhances client satisfaction but also speeds up the payment process, helping you maintain a reliable cash flow.
Establish clear payment terms
Define your payment terms upfront to avoid confusion—include due dates, late fees, and preferred payment methods. Clear terms, such as a 14-day payment window, help maintain a steady cash flow and foster professional client relationships.
Build your future — start growing your carpentry business today!
Starting a carpentry business in Australia can be a rewarding journey when you take the right steps. From identifying your niche and setting competitive rates to showcasing your work and attracting clients, success comes down to planning and connecting with the right opportunities.
Take the next step by registering your business on Oneflare. Join a platform where homeowners and businesses actively search for skilled carpenters like you. Sign up today, showcase your services, and start growing your carpentry business with confidence!
FAQs on how to start a carpentry business
How do you deal with wood waste?
Dealing with wood waste effectively is important for both cost management and sustainability. You can repurpose offcuts for smaller projects like furniture or joinery work, recycle clean wood waste for mulch or compost, or donate usable scraps to local community projects or schools.
For larger waste, partnering with recycling facilities and waste management solutions inlike Cleanaway and Veolia, ensures responsible disposal while reducing environmental impact.
What is the difference between a subcontractor and a full-time employee?
A subcontractor is an independent worker hired to complete specific tasks or projects, often bringing their own tools and managing their own schedule. They’re not entitled to employee benefits like sick leave, superannuation, or holiday pay.
In contrast, a full-time employee works directly for your business under an employment contract, typically receiving a fixed wage, benefits, and a regular schedule. Choosing between the two depends on your workload, budget, and business structure.
How much does it cost to start a carpentry business?
The cost to start a carpentry business can range from $5,000 to $15,000, depending on the tools, equipment, and services you plan to offer. Basic costs include purchasing essential tools (e.g., saws, drills, and sanders), safety gear, and materials, as well as setting up insurance, marketing, and a vehicle for transport. Starting small and investing gradually as you take on more projects can help manage costs effectively.


