Starting a cleaning business offers a rewarding opportunity to build something meaningful from the ground up. With steady demand for cleaning services in homes, offices, and commercial spaces, you’re entering a market where the potential for growth is strong.
But, as with any business, careful planning and informed decisions are the key to success. In this article, you’ll learn the step-by-step guide to starting a successful cleaning business, from choosing your niche to attracting your first clients and managing your operations effectively.
- Step 1: Identify your cleaning market
- Step 2: Plan for seasonal trends in the cleaning industry
- Step 3: Research market rates and analyse competitors in the cleaning industry
- Step 4: Explore funding options for your cleaning business
- Step 5: Develop a strategic cleaning business plan
- Step 6: Register your cleaning business
- Step 7: Hire your cleaning employees
- Step 8: Invest in the right cleaning tools and supplies
- Step 9: Find clients for your cleaning business
- Step 10: Get paid for your cleaning services!
- Kickstart your cleaning business today!
Step 1: Identify your cleaning market
To succeed in the cleaning industry, it’s crucial to identify first your market niche and understand the unique needs of your target audience. By defining your niche and service area, you can tailor your offerings, focus your marketing, and distinguish yourself from competitors.
Explore different types of cleaning businesses
The cleaning industry encompasses various specialised services, each catering to different types of clients and needs. Here are some common types of cleaning businesses to consider:
Full house cleaning services
Comprehensive cleaning for residential properties includes routine maintenance and deep cleaning for all rooms.
Commercial cleaning services
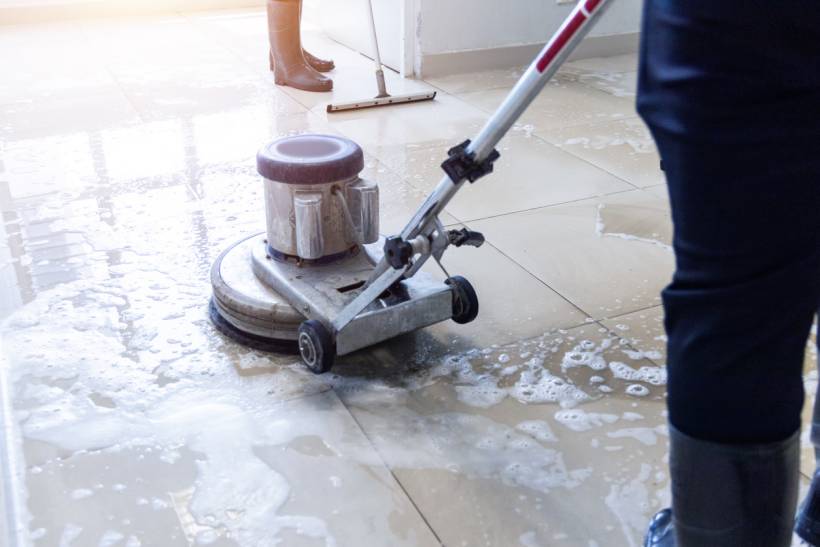
Commercial cleaning services include cleaning tasks for business spaces, such as office cleaning, retail store cleaning, and warehouse cleaning, focusing on creating a clean and professional environment.

End of rental cleaning services
End of rental or end of lease cleaning services include detailed cleaning tasks for rental properties, ensuring move-out standards are met.

Eco-friendly cleaning services
Eco-friendly cleaning uses environmentally safe, non-toxic products, appealing to eco-conscious and health-focused clients.
Specialised cleaning services
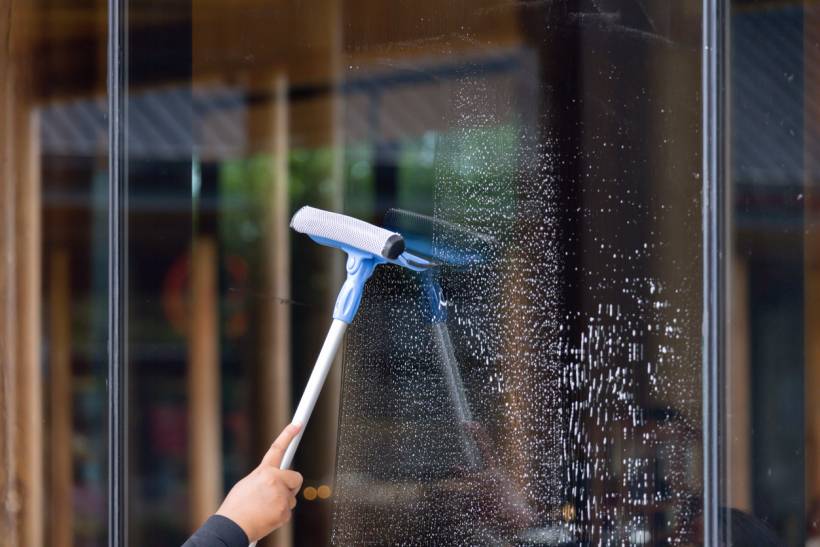
Specialised cleaning services cater to those with specific cleaning needs, such as carpet cleaning, window cleaning, grout cleaning, and roof cleaning.

Post-construction cleaning services
Post-construction cleaning offers cleanup after construction or renovation, removing dust, debris, and residues to make the space ready for use.
Medical and healthcare cleaning services
Medical and healthcare cleaning services involve strictly regulated cleaning for healthcare facilities, focusing on sanitation, disinfection, and biohazard management.
Industrial and warehouse cleaning services
Industrial and warehouse cleaning services include heavy-duty cleaning tasks for industrial sites and warehouses, ensuring safety and compliance with sanitation standards.
Crime scene and trauma cleaning services
Crime scene and trauma cleaning services offer specialised cleaning for crime scenes and trauma sites, involving biohazard removal and deep sanitisation.
Hoarding cleanup services
This type of cleaning refers to compassionate cleaning and waste removal for hoarding situations, restoring safe and livable conditions.
Choose your cleaning business niche
Once you’ve explored the types of cleaning businesses, you can narrow down your focus to the niche that aligns with your expertise and interests. Here’s a closer look at some common cleaning business niches:
Full house cleaning service niche
Full house cleaning covers comprehensive services for homeowners, including everything from dusting and vacuuming to deep cleaning bathrooms and kitchens. This niche is ideal for households looking for regular upkeep or extensive cleaning before or after an event.
- Pros: Ability to offer subscription-based services, predictable income, high demand for regular cleaning.
- Cons: Physically demanding work can be time-intensive for larger homes.
Commercial cleaning service niche
Commercial cleaning involves maintaining workspaces like offices, retail stores, and warehouses. These services often include cleaning floors, restrooms, and shared spaces to create a clean and professional environment for employees and customers.
- Pros: Often steady contracts, larger profit margins, strong demand in urban areas.
- Cons: Requires more employees, possibly higher upfront costs for industrial equipment.
End of rental cleaning service niche
This service focuses on preparing properties for new tenants or helping renters meet move-out cleaning standards. Often called “end of lease” bond cleaning, it typically involves detailed cleaning to make a property feel brand new.
- Pros: High demand in rental-heavy areas, lucrative one-time fees.
- Cons: Strict client expectations, higher time investment for comprehensive cleaning.
Eco-friendly cleaning service niche
Eco-friendly cleaning services cater to clients seeking environmentally-conscious cleaning options. Using green products and methods appeals to health-conscious and environmentally aware customers.
- Pros: Attracts environmentally aware clients, and can charge premium rates.
- Cons: Higher cost for eco-friendly products, may have a small market demand.
Decide on the service area for your cleaning business
Choosing the right service area is also essential to your cleaning business’s success, as demand varies significantly across different regions. By focusing on areas with higher demand, you can position your business to maximise client acquisition and growth potential.
The table below shows the demand for cleaning services across different cities in Australia, based on Oneflare’s job posting data from 2024. We’ll break down each city’s demand and explore the factors driving the need for cleaning professionals in these cities.
| City | Percentage Share of Total Cleaning Job Demand |
| Cleaning services in Sydney | 26.7% |
| Cleaning services in Melbourne | 26.3% |
| Cleaning services in Brisbane | 14% |
| Cleaning services in Perth | 8.7% |
| Cleaning services in Gold Coast | 3.9% |
Australian cities with the highest cleaning job demand
As the leading market, Sydney captures 26.7% of the total cleaning demand in Australia. This high demand is driven by Sydney’s dense population, a thriving rental market, and a fast-paced lifestyle that increases the need for professional cleaning among both residents and businesses.
Close behind with 26.3% of total demand, Melbourne’s market is fueled by its bustling city life, frequent property turnover, and a growing commercial sector, all of which contribute to consistent demand for cleaning services.
Meanwhile, Brisbane is a solid mid-tier market, representing 14% of total demand. Its steady demand comes from a mix of residential and commercial needs, particularly as more families and businesses move to Brisbane seeking a balanced lifestyle and affordable property prices.
Australian cities with lower cleaning job demand
While these top cities offer high demand, other areas with lower demand, such as Perth and Gold Coast, still present viable opportunities. Smaller markets often mean less competition, allowing cleaning businesses to stand out by offering specialised or niche services, such as pool cleaning and pressure cleaning.
Additionally, businesses in these areas can benefit by forming strong relationships with repeat clients, as smaller communities often favour established, trusted providers.
Step 2: Plan for seasonal trends in the cleaning industry
Understanding seasonal trends in the cleaning industry will help you manage demand fluctuations and optimise your operations.
For example, many clients might search for ‘bathroom cleaners near me’ during the busy holiday season when they’re hosting guests. In contrast, quieter periods, such as late summer, may see fewer cleaning requests as families take vacations or prioritise outdoor activities.
Some months bring a surge of customers, while others may slow down, making it crucial to plan ahead. Strategic adaptation to these cycles ensures consistent cash flow and business stability throughout the year.

Identify popular seasons for cleaning services
The most popular seasons for cleaning services are late autumn, mid-winter, and spring, with November, January, May, and July consistently showing the highest demand, according to Oneflare’s 2024 data on the total job postings for each type of service.
Key factors influencing these peak times include lease turnovers and holiday preparations. Seasonal cleaning habits, especially in spring and autumn, also contribute to the increased demand for various services, as homeowners refresh their homes after winter or prepare for the colder months ahead.
Peak season for end-of-lease cleaning services
July, October, and May mark the busiest times for end-of-lease cleaning services. These months often coincide with the mid-year and spring lease turnovers, particularly around July and October, when renters move out and aim to recover their security deposits.
Spring’s warmer weather is also popular for moving, with families and students adjusting to new homes or renewing leases.
Peak season for home cleaning services
For home cleaning services, November, January, and May are top demand months. November is prime time as people prepare their homes for holiday gatherings, while January brings a surge in bookings for New Year deep cleans. May is also a traditional spring cleaning season when homeowners look to refresh their spaces after the winter.
Peak season for window cleaning services
Window cleaning sees its peak season in September, October, and November. These months straddle late autumn and early spring, times when homeowners want their windows in top condition—either to keep them sparkling for winter or to let in bright spring light.
Peak season for steam carpet cleaning services
Steam carpet cleaning services are most in demand during January, November, and May. After the holiday season in January, many clients want to refresh their carpets, tackling stains and accumulated dust from family gatherings. Spring in May and late autumn in November also draw clients eager to improve indoor air quality as they prepare for new seasonal shifts.
Peak season for office cleaning services
Demand surges for office cleaning services in March, May, and July, likely due to spring maintenance schedules and summer office events. Many businesses take advantage of these times to schedule deep cleanings, particularly for workspaces and public areas, to create a clean, productive environment for employees and clients. This trend highlights significant office cleaning business opportunities for service providers looking to expand their client base during peak demand periods.
By identifying these peak months, cleaning businesses can better allocate resources, ensure adequate staffing, and run targeted marketing campaigns to capture client interest during these high-demand periods. Preparing for these times not only ensures smooth operations but also maximises revenue potential during peak seasons.
Plan strategies to adapt to seasonal fluctuations
Adapting to seasonal fluctuations is key to maintaining a steady revenue flow in the cleaning industry. By proactively planning around these shifts, you can make the most of high-demand periods and fill gaps during slower months.
Strategise cleaning promotions for off-peak months
To attract clients during slower months like April, offer targeted discounts and service bundles. For example, create a “spring cleaning bundle” combining carpet and window cleaning at a reduced rate to boost bookings. A referral program during these months, such as “refer a friend and save $20,” encourages clients to bring in new business, perfect for home cleaning services.
Allocate resources during high-demand cleaning periods
In peak months like January, March, and May, ensure adequate staffing and boost advertising to capture high demand. Add temporary or part-time staff for periods of increased office or end-of-lease cleaning.
Build cleaning subscription models for year-round stability
Subscription packages help maintain consistent income. Offer monthly home cleaning plans for regular upkeep or seasonal packages, like a spring & autumn deep clean package, which includes carpet and window cleaning. This approach ensures steady bookings and appeals to clients who prefer hassle-free scheduling.
Post on lead generation sites to secure recurring clients
Another effective way to secure a steady flow of recurring clients is by posting your services on lead-generation sites, like Oneflare. By posting your services and using localised keywords like “carpet cleaning near me”, or “local house cleaning”, on the platform, you can attract local and nearby clients who need regular services, such as weekly office cleaning or monthly home cleaning.

With these strategies, your cleaning business can effectively manage seasonal shifts, build client loyalty, and create a consistent revenue stream throughout the year.
Register your cleaning business on Oneflare today to showcase your expertise and start connecting with clients actively searching for your services!
Step 3: Research market rates and analyse competitors in the cleaning industry
Setting appropriate rates is crucial for attracting customers while ensuring profitability. To determine how much to charge for cleaning services, research average market rates in your area and analyse competitors’ pricing to help you position your services effectively.
Understand the cost of common cleaning services
Cleaning services costs in Australia vary by several factors. The service type is a primary driver, with general cleaning being the most affordable. On the other hand, deep cleaning and end-of-lease cleaning demand higher prices due to greater time, detail, and expertise.
Meanwhile, costs are also higher for specialised services such as window and carpet cleaning because they typically require specialised tools, raising costs. Prices can increase further if eco-friendly products are used for these services.
Here’s a breakdown of typical cost of cleaning services in Australia:
| Type of cleaning service | Price |
| Basic house cleaning | $90–$180 per service |
| Window cleaning | $20 per window or $45 per hour |
| End of lease cleaning | Around $250 for two-bedroom units |
| Carpet cleaning | $77–$185 for two- and three-bedroom units |
| Roof cleaning | $38–$80 per hour |
| Oven cleaning | $150 per job |
However, remember that these prices can change depending on the property size and condition. Of course, larger homes or offices incur higher fees due to increased time and effort. At the same time, spaces that need intensive work due to dirt or disrepair are more expensive than well-maintained ones needing basic upkeep.
Location affects pricing as well. If you’re establishing a cleaning business in cities like Sydney and Melbourne, the costs are generally higher than in regional areas.
Understanding these rates is vital as it helps set competitive prices while ensuring your business remains profitable.
Decide how to charge for cleaning services
There are several methods for charging clients, each with its advantages:
Hourly rate for routine home cleaning services
Charging by the hour offers flexibility, allowing you to adjust rates based on the time required for each job. This method is often ideal for routine home cleaning, where the scope may vary based on the property’s condition.
Flat rate for basic cleaning services
A flat rate provides clients with clear, predictable pricing for specific services. This approach works well for standard jobs, where you can estimate cleaning service costs upfront and offer a straightforward rate.
Per-square-foot pricing for commercial cleaning services
Per-square-foot pricing is commonly used in commercial cleaning, where the size of the space directly influences the cost. This method allows for precise pricing, which is beneficial when cleaning large office buildings, retail stores, or warehouses.
Per-project pricing for specialised cleaning services
For more complex jobs, like end-of-lease or post-construction cleaning, per-project pricing is often preferred. This approach factors in the specific requirements, time, and resources needed to complete the job, offering a customised price for each unique project.
Conducting competitor analysis is crucial to avoid underpricing or overpricing your services, especially as new business owners often risk undervaluing their work.
Evaluate your unique selling points (USPs)
Differentiating your cleaning business from competitors is essential to attract clients and establish a strong brand.
Below, you’ll find some unique selling points (USPs) to consider, each tailored to appeal to specific customer needs and preferences:
Eco-friendly cleaning services
By using non-toxic, biodegradable cleaning products, you can attract customers who prioritise sustainability and health. For example, you can advertise your eco-friendly cleaning practices for services such as grout cleaning or oven cleaning on lead generation sites like Oneflare, highlighting that your solutions are safe for both families and the environment.
Fast response times for urgent cleaning needs
Providing same-day or next-day cleaning services, especially for high-demand services like end-of-lease cleaning or emergency carpet cleaning, can help you stand out. By marketing your ability to respond quickly to specific cleaning services, you can attract clients in need of immediate assistance.
Specialised cleaning expertise
Targeting specific services allows you to reach clients with unique cleaning needs, such as those who need deep upholstery cleaning for furniture or grout restoration for tile surfaces. By focusing on these specialised services, you can appeal to customers looking for professionals who understand the intricacies of these tasks and deliver exceptional results.
Flexible scheduling options
Offering flexible scheduling options can be a strong USP, particularly for clients with busy lifestyles or unique timing needs. Providing evening, weekend, or custom time slots allows clients to book services at their convenience. For instance, office clients may prefer after-hours cleaning to minimise disruption, while residential clients might need early morning or weekend slots.
Pro tip: Promoting these USPs on platforms like Oneflare can help your cleaning business stand out and attract clients seeking tailored services that competitors may not offer.

Step 4: Explore funding options for your cleaning business
Securing funding for your cleaning business is an essential first step, and it’s crucial to seek professional advice before making any financial commitments. Consulting with financial planners and local accountants can help you understand the implications of each option and choose the best fit for your business goals.

Self-funding
Self-funding involves using personal savings or funds from family and friends. This approach allows full control over finances without needing to meet lender requirements, although it also involves using personal financial resources.
Small business loans
Australian banks and financial institutions offer small business loans designed for startups. These loans generally require a business plan, financial projections, and a good credit history. Small business loans can provide the capital needed for startup expenses, with set repayment terms and interest.
Secured and unsecured business loans
Both secured and unsecured business loans are small business loans that can be viable funding options for purchasing initial cleaning supplies, equipment, and transportation assets.
Secured loans provide small businesses with secure, manageable, low-interest rates loans, as long as collateral is provided. The collateral can be personal assets such as residential properties or an existing business cleaning asset like fleet vehicles and sanitising equipment.
Meanwhile, an unsecured loan offers businesses fast access to funds without collateral. However, they generally have higher interest rates with shorter loan terms than secured loans, so the monthly payments can be higher.
Government and industry programs
Certain Australian states provide grants and financial support for small businesses, especially those with innovative or eco-friendly services. These programs are structured to assist with initial costs and often have specific application requirements and conditions.
The New Enterprise Incentive Scheme (NEIS) is one of the government programs in Australia that supports job seekers who want to start small businesses. This offers new entrepreneurs mentorship, accredited training, and income support to help them sustain themselves while establishing their businesses without requiring immediate profit. However, NEIS does not directly fund business costs, so startup capital would still need to be sourced separately.
Equity Investment
Startup cleaning businesses can secure significant funds without taking on debt that needs immediate repayment through equity investment. It’s a funding option where investors provide money to a business in exchange for ownership shares to get a stake in the company.
There are two types of equity investors: angel investors and venture capitalists (VCs). Angel investors are typically high-net-worth individuals who invest their personal funds into early-stage companies in exchange for equity. Meanwhile, venture capitalists are firms or groups that pool funds from multiple investors to support high-potential businesses.
Step 5: Develop a strategic cleaning business plan
Starting a cleaning business requires a well-thought-out business plan. This plan will be your roadmap, guiding you through each stage of starting and running your business.

It should include key elements, such as:
- Executive summary
- Company profile
- Business description
- Market analysis
- Services offered and pricing strategy
- Marketing strategies
- Budget and cash flow forecast
- Operations plan
- Risk mitigation strategy
- Long-term growth plan
Now, let’s dive into the step-by-step process to create a business plan tailored to your cleaning business.
Draft an executive summary
First, begin with the executive summary, which is a brief overview of your cleaning business and your goals. This section gives readers a quick sense of what your business is all about. Summarise what services you’ll offer, your target market, and what sets you apart from competitors. It’s often best to write this last so it truly reflects the rest of your plan.
Write your cleaning company description
Your cleaning business plan also needs a clear company description. In this section, outline the foundational details of your cleaning business, including its legal business structure (e.g., sole trader, company, partnership, etc.), ownership details, business name, and location.
Moreover, your company description should describe your business’s vision, mission, and core values. This section will provide essential context as you move into the more operational and financial specifics of your business plan.
Describe your cleaning niche and types of services
The next step is describing what your cleaning business will focus on, whether it’s residential cleaning, commercial spaces, or specialised services like window or gutter cleaning. Explain why you chose this niche and include a brief description of your target market, such as busy households or local businesses.
Analyse your market and define your customer base
Once you have completed writing your company profile and cleaning niche, it’s time to define your customer base. First, you’ll need to conduct a market analysis to understand your target customers, local competitors, and industry trends.
From there, outline who your ideal clients are, what they need, and how you plan to serve them better than competitors. This analysis will help you identify market gaps and inform your service offerings.
Outline your cleaning services and pricing strategy
Your business plan should also specify the types of cleaning services you’ll offer and your pricing approach. Consider the costs of supplies, labour, and other expenses to price competitively yet profitably. Plus, think about whether you’ll offer package deals, discounts for repeat clients, or seasonal promotions.
Detail your marketing and sales plan
For your marketing and sales plan, you need to map out how you’ll attract and retain clients. Detail your marketing channels—such as social media, SEO, or partnerships—and any customer loyalty or referral programs. Think practically about your initial steps to grow your client base and raise brand awareness in your target market.
Create a budget and forecast cash flow
The budget and forecast cash flow is a crucial part of your business plan. For this section, it’s wise to break down your startup costs, monthly operating expenses, and anticipated revenue.
Include one-time expenses such as equipment and marketing materials, as well as recurring costs like supplies, transportation, and insurance.
Then, project your cash flow to understand when you’ll reach profitability and how to manage finances through any seasonal ups and downs.
Establish an operations plan
The operations plan details how you’ll manage day-to-day operations, including hiring, training, and scheduling. Here, describe systems you’ll implement to maintain high-quality service, handle customer feedback, and manage bookings or billing. This section is key to ensuring smooth, efficient operations as your business grows.
Develop a risk mitigation strategy
After the operations plan, develop a risk management plan to address potential challenges and safeguards for your business. Identify key risks, such as equipment malfunctions, employee accidents, and liability concerns. Outline safety protocols and detail the types of insurance coverage needed, including general liability and workers’ compensation.
Conclude with a long-term growth plan
Lastly, conclude with a long-term growth plan to demonstrate your vision for the future and commitment to sustainable growth. In this section, you need to define both short-term and long-term objectives of your business, such as adding new cleaning services, increasing your client base, or expanding to new locations. Outline strategies to retain existing clients, such as loyalty programs, and how you plan to scale your marketing efforts.
Step 6: Register your cleaning business
To start a business, you may need to obtain registrations, licenses and permits. As a business owner, it’s your responsibility to make sure you’re compliant with all applicable laws and meet your tax obligations.
For information about registering your business or applying for an ABN, we recommend you check out this helpful information from the Australian government.
Step 7: Hire your cleaning employees
Building a reliable team of cleaners is essential for your company’s success and growth. Below, we’ll discuss how you can hire the right employees for your cleaning business and ensure that they meet your business’s needs.

Write job description
First and foremost, you need to create a job description that highlights your business and what you offer. Be transparent about job duties, hours, pay, employment type and any training opportunities. Describe specific tasks (like vacuuming, dusting, or sanitising) and any physical requirements. This helps candidates understand expectations from the start and ensures a good match for the role.
Most candidates also appreciate knowing the pay range, benefits, or potential for growth within the company. If you offer flexible hours, a supportive team environment, or training for new employees, mention these aspects. This can make your ad stand out and attract applicants who genuinely want to be part of a stable, rewarding role in a growing company.
Use local Australian platforms to advertise your job
After crafting the job ad, post it on multiple platforms to maximise its visibility. To reach the best candidates and hire cleaning employees effectively, you may consider advertising on platforms that are popular and effective in Australia, such as:
- SEEK – Australia’s largest job board, ideal for professional job seekers across industries.
- Indeed Australia – a wide-reaching job platform, popular among full-time and part-time job seekers.
- Jora – a job aggregator that pulls listings from various sources, increasing visibility.
- Workforce Australia – a free job advertising service from the government, suitable for small business owners.
You might also consider posting on social media platforms such as Facebook, LinkedIn, or Instagram if you have a business page. For a local touch, posting on community boards or participating in job fairs can attract applicants in your area.
Don’t overlook employee referrals, either—current employees often know reliable candidates, and offering a referral bonus can incentivise them to help bring in great new hires.
Screen and interview thoughtfully
As applications start coming in, review them carefully to find candidates with the right qualifications and experience. Conduct initial interviews with the most promising applicants to gauge their interest in the role, cleaning skills, and alignment with your business.
This is the perfect chance to ask questions that reveal their previous experience, problem-solving abilities, and reliability. For example, you might ask about how they handled challenging cleaning tasks in the past or how they ensured they met schedules and client expectations.
It’s also helpful to perform criminal history checks and reference checks to ensure the trustworthiness of your candidates. This is particularly important if your cleaners will work in sensitive environments like offices or schools. A quick call to past employers can provide insight into their reliability, history, and work quality.
Make an offer and onboard your new hire
When you’ve selected your top candidate, make a clear and detailed job offer that outlines pay, benefits, work hours, and expectations.
Once they’ve accepted your offer, the next step is running a smooth onboarding process to set up your new hires for success. Begin with training sessions to go over your company’s cleaning standards, customer service guidelines, and any safety protocols they need to follow. Training is essential for Work Health and Safety (WHS) compliance and minimises risks.
If possible, have them shadow an experienced team member for their first few shifts so they can learn on the job. After their first week, check in with them and provide feedback to support their improvement and integration into the team.
Offer ongoing support and fair treatment
A supportive work environment promotes employee retention. Openly address concerns about shifts, workload, and safety. This initiative will help create a positive workplace culture that encourages loyalty and productivity among your cleaning staff.
Step 8: Invest in the right cleaning tools and supplies
Investing in the right cleaning supplies and tools ensures high service quality, safety, and efficiency. But, before making any big purchases, make sure to tailor your selections based on your budget and the specific cleaning tasks your business handles.
Bear in mind, though, that each cleaning niche requires specialised tools. Here’s a breakdown of some key cleaning supplies and tools, and their estimated costs:
| Cleaning supplies and tools | Price range | Where to buy |
| Vacuum Cleaners | $150–$400 | Bunnings Warehouse – Vacuum Cleaners & Accessories |
| Carpet Cleaner Machines | $500–$1,500 | Bunnings Warehouse – Carpet Cleaners & Accessories |
| Mops and Buckets | $50–$100 | Woolworths – Mops, Buckets & Brooms |
| Microfiber Cloths | $20–$50 | Officeworks – Sponges & Cloths |
| Dusting Tools | $20–$40 | Officeworks – Dusting tools |
| Squeegees and Extension Poles | $30–$80 | CleanX – Squeegees |
| Window Cleaning Solutions | $20–$50 | Bunnings Warehouse – Glass & Window Cleaners |
| All-Purpose Cleaning Agents | $10–$30 | Woolworths, Coles, Bunnings Warehouse |
| Disinfectant Sprays | $30–$80 for bulk | Officeworks, CleanX, Bunnings Warehouse |
| Stain Removers | $20–$60 | Bunnings Warehouse, Woolworths, Kmart |
| Oven Cleaners | $20–$60 | Bunnings Warehouse, Coles |
| Grout Brushes | $20–$60 | Bunnings Warehouse |
| Plant-Based Cleaning Agents | $20–$80 | Flora & Fauna, Biome, Bunnings Warehouse |
| Reusable Cleaning Cloths | $20–$40 | Biome, Woolworths, Flora & Fauna |
| Eco Mops | $50–$100 | Biome, Flora & Fauna |
| Biodegradable Trash Bags | $10–$30 | Woolworths, Coles, Bunnings Warehouse |
| Protective Equipment (gloves, masks) | $10–$30 per set | Officeworks, Bunnings Warehouse |
As you may have noticed in the table above, prices vary widely for cleaning supplies and tools in Australia. Costs are higher for cleaning products made from high-grade materials and chemical-resistant plastics. Having ergonomic designs that enhance durability and ease of use can also increase costs.
Rising demand for sustainable products such as eco mops and plant-based cleaning agents also further drives up prices, as these items must meet environmental standards and certifications. Additionally, suppliers factor in logistics and regulatory compliance costs to ensure consistent product availability and safety.
Step 9: Find clients for your cleaning business
Knowing how to get more clients for your business is essential for growth and ultimately, for long-term success. There are several strategies that can help you attract clients, establish credibility, and stand out from competitors.
Expand your online presence
Nowadays, having an online presence is critical for reaching clients. Here are some effective ways to build your online presence:
Build your cleaning business website
A website is essential for establishing your cleaning business’s credibility and providing clients with easy access to your services. It allows potential clients to learn about your offerings, view testimonials, and request quotes directly. Working with a web designer can ensure a user-friendly, optimised site that effectively showcases your services and improves search visibility.
To guide you, we’ve compiled examples of successful cleaning business websites that display the effectiveness of building a good website to boost brand credibility and improve customer experience.
QBEES Cleaning Services
QBEES’ website stands out with its warm and inviting design, using consistent branding and professional imagery to create a sense of trust and reliability. The seamless layout, paired with easily accessible service information and straightforward contact options, ensures a smooth user experience that encourages inquiries.

Charis Home Cleaning
Charis Home Cleaning’s website has a friendly and professional design, emphasising trust and professionalism through testimonials and personalised service descriptions. The homepage effectively uses inviting images, clear service categories, and a straightforward contact form, making it easy for potential clients to connect and feel confident in their choices.

Tenants Cleaners
Tenants Cleaners‘ website effectively attracts cleaning clients through its user-friendly design and comprehensive service information. The site features clear navigation menus, detailed descriptions of various services, and an easy-to-use quote request form, ensuring visitors can quickly find and request the cleaning help they need.

Post on lead-generation platforms
Posting on lead-generation platforms is one of the most effective ways for cleaning businesses to find clients. These platforms connect you directly with clients actively searching for cleaning services, providing an immediate source of leads.
Oneflare, in particular, allows you to showcase your cleaning expertise without upfront fees, making it easier to attract clients with minimal risk. This platform’s job posting system helps bring in quality leads and enables you to specify job types, budgets, and locations, so you can target projects that fit your capabilities and business goals.

Get started on Oneflare by registering your cleaning business today—connect with clients, post targeted jobs, and grow your business with ease!
SEO and paid search for visibility
SEO and paid search improve your website’s visibility in search engine results, attracting organic traffic. While effective, SEO requires regular updates and can be costly in competitive areas.

Consulting an SEO specialist helps implement ranking strategies to boost your business’s online presence.
Social media advertising
Social media advertising helps you reach a wide audience and showcase your cleaning work visually. Targeted ads on Facebook, Instagram, and even TikTok can attract local clients, but maintaining a presence requires ongoing posting and budget management. A social media manager can optimise your campaigns for consistent engagement.
The following sections provide samples to inspire you and give you an idea of how social media advertising works. They showcase effective strategies for boosting a cleaning business’s visibility on Facebook, Instagram, and TikTok.
SA Breeze Cleaning Services – Facebook advertising
SA Breeze Cleaning Services exhibits good social media advertising. It effectively uses its Facebook page to engage a local Adelaide audience. By showcasing cleaning work through photos and videos, it visually communicates its quality standards.

Their strategic use of hashtags and location-specific tags also enhances visibility, making the brand easy to find for clients seeking reliable services. Additionally, detailed service information and accessible contact options strengthen credibility, while the visual content helps build trust in their professional cleaning services.
Jan’s Property Care – Instagram advertising
The Instagram account for Jan’s Property Care emphasises its authentic and dynamic approach to showcasing their cleaning services. Their page prominently features videos of actual cleaning work, giving followers a behind-the-scenes look at their processes and the effort they put into delivering exceptional results.

The Big Clean Co – TikTok advertising
The Big Clean Co also exemplifies how cleaning businesses can leverage TikTok’s dynamic platform to connect with a broad audience. Through short, engaging videos, they share cleaning tips, product recommendations, and insights into their daily operations.

Owner Kacie Stephens uses an approachable and authentic tone, which resonates well with viewers and makes the brand relatable. Her content is both informative and entertaining, effectively showcasing the company’s expertise and personality. The use of trending sounds and hashtags further expands their reach, attracting potential clients while building a community around practical cleaning knowledge.
Build your cleaning reputation through reviews and referrals
A strong reputation is key to long-term success. As a startup, it’s very important to encourage your first batch of satisfied clients to leave reviews on your website or lead platforms like Oneflare to boost credibility and attract new clients. Consistent reviews on a platform ensure reliable feedback, helping potential clients trust your quality.

Take bookings and manage quotes efficiently
Responding quickly to quote requests can also help you win jobs, as clients often select the first reliable response. In fact, Oneflare data reveals that 60% of winning quotes are submitted within 60 minutes of the job posting, highlighting that faster quotes significantly boost job success rates.
Here are some tools that can help with automated booking and quoting:
- Calendly – Enables easy scheduling by allowing clients to book available time slots directly, reducing back-and-forth communication.
- Square Appointments – Provides booking, invoicing, and payment processing in one platform, helping streamline the client experience.
- Setmore – Offers online booking with customisable reminders, plus client management and integration with social media for easy appointment setting.
- HoneyBook – Combines booking, quoting, and invoicing, letting you automate responses and manage projects all in one place.
- Zoho Bookings – Integrates with Zoho CRM to manage client relationships, offers automated reminders, and allows for easy rescheduling.
These tools help you automate responses, manage quote requests, and follow up with clients, ensuring that no lead falls through the cracks.
Step 10: Get paid for your cleaning services!
Now that you have everything set up, from choosing your business niche and setting up your service area, to finally finding your clients, it’s time to finally get paid for your cleaning services.

Choose a reliable accounting software
Managing payments is a lot easier with a dedicated accounting system. This will save you time, reduce errors, and give you a clear picture of your finances.
Some popular accounting software options commonly used in Australia are:
- Xero – easy-to-use software with invoicing, bank feeds, and reporting.
- MYOB – offers payroll, tax tracking, and inventory management.
- QuickBooks Online – handles invoicing, expense tracking, and payments.
- Reckon One – customisable and budget-friendly, with modules for payroll and invoicing.
- Sage Business Cloud Accounting – simple solution for expense tracking and payroll.
Create a cleaning business invoice
Creating a professional invoice template is essential to get paid quickly. The invoice should clearly list your services, rates, and payment terms.
Many accounting platforms offer customisable blank cleaning invoice templates, but you can start with free templates and modify them as needed. Consider these free cleaning invoice templates as a guide:
Canva’s cleaning invoice templates
Canva’s cleaning invoice is easily customisable with fields for services, rates, and payment terms. You can also add your logo and other brand elements to maintain consistency across all client communications.

Conta’s cleaning invoice templates
Conta’s cleaning invoice provides a customisable, downloadable template specifically tailored for cleaning services, The good thing about these templates is that they’re compatible with Google Docs, Microsoft Word, and Excel, allowing you to easily tailor them as needed.

Microsoft Office’s cleaning invoice templates
Microsoft Office’s cleaning invoice offers free invoice templates that are straightforward and professional and can be saved as a PDF. Even better, they have Excel-based templates that can automate calculations, streamlining the billing process and reducing errors.

Zoho’s cleaning invoice templates
The invoice template from Zoho offers a clean and organised layout, ensuring clarity and professionalism in client communications. It includes essential sections such as service details, additional charges, taxes, and terms and conditions, facilitating accurate and transparent billing.

Set up a bank account for business payments
Separating personal and business finances with a dedicated bank account makes it easier to track income, manage deposits, and handle reconciliations. Most banks offer online options specifically for businesses, streamlining all your financial needs in one place.
Offer digital payment options
Make payments easy and convenient for clients by providing digital options like Apple Pay, Google Pay, credit cards, and bank transfers. Many clients, especially those booking cleaning services through platforms like Oneflare, prefer the flexibility of paying directly from their devices. Offering digital payments not only enhances client satisfaction but also speeds up the payment process, helping you maintain a reliable cash flow.
Establish clear payment terms
Define your payment terms upfront to avoid confusion—include due dates, late fees, and preferred payment methods. Clear terms, such as a 14-day payment window, help maintain a steady cash flow and foster professional client relationships.
Your path to success starts here — kickstart your cleaning business today!
Starting a cleaning business is a rewarding venture that offers endless potential. From identifying your market to creating a strong online presence, each step prepares you for a successful launch.
Taking the first step is crucial, and if you’re ready to grow your cleaning business, post your services on Oneflare today and connect with new clients. This digital marketplace helps startup businesses like you reach your target market so you can steadily grow your client base.
Empower your goals and see your business flourish with Oneflare!
FAQs on how to start a cleaning business
How much capital do I need to start a cleaning business?
In Australia, startup costs for a cleaning business typically range from $1,500 to $15,000, depending on equipment, supplies, and marketing needs.
What is the best type of cleaning business to start?
The best type depends on your goals and market demand. Residential cleaning requires minimal equipment, while commercial cleaning offers steady contracts but may need more staff. End-of-lease cleaning is lucrative in rental-heavy areas and eco-friendly cleaning appeals to environmentally-conscious clients.
Do you need a website to start a cleaning business?
A website isn’t mandatory, but it helps build credibility and reach more clients. A basic website showcasing your services, contact info, and client reviews can boost customer trust and loyalty, making it easier to stand out in the market.


