Categories
Design & decor

Bathroom paint colour ideas

Choosing the right bathroom paint colours is important for creating an inviting, soothing, and functional environment. In this guide, we’ll look at a variety of bathroom paint colour schemes to help you transform your bathroom into a sanctuary of comfort and style.

11 bathroom paint colour ideas 

1. Serene and creamy white

a white bathroom basin
Cream-coloured walls give a modern and minimal ambience | Source: iStock

Ideal for minimalist or contemporary aesthetics, as well as those wanting a clean, airy space, white paint brings a timeless elegance to the bathroom or powder room. It creates an illusion of space, making it one of the best paint colours for small bathrooms while also providing a versatile neutral backdrop for various decor styles. 

To enhance this colour, complement it with touches of natural textures like rattan or bamboo for warmth.

2. Bold black accents

Do you want a bold and dramatic design for your bathroom walls? Black paint creates a striking contrast against lighter wall colours, making a powerful design statement. 

Pair this colour with sleek, modern chrome or stainless steel fixtures and accessories to emphasise its best features. You may also consider incorporating wall painting techniques like geometric patterns or graphic artwork to amplify the contemporary aesthetic and balance the darkness with pops of vibrant colours or metallic accents for visual interest.

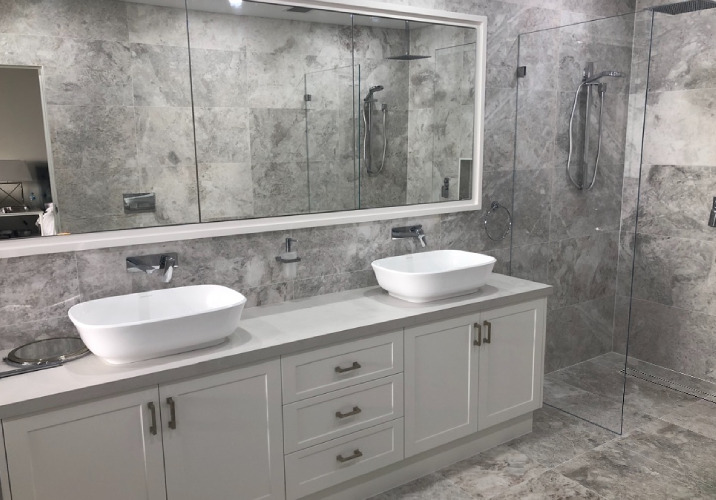
3. Subtle grey elegance

Grey is one of the modern bathroom paint colours perfect for creating a sense of understated sophistication. It’s softer than a bright white, yet emanates classic features. If you dislike bold colours but don’t want to stick with white, go with a soft grey. You may also consider layering multiple shades of grey to add depth and complexity to this colour.

4. Energising earthy greens

a white bathtub against a green wall
Give a touch of luxury with green | Source: iStock

Whether you’re a nature enthusiast or simply want an organic vibe in your bathroom, wall or tile colours ranging from soft sage to deep shades of forest green evoke a connection with the outdoors. Incorporate natural elements such as wood, stone, or rattan in the decor if you want an earthier vibe. 

You may also contrast the richness of the green tones by using white fixtures and accessories and adding bursts of lively colours such as mustard yellow or terracotta for visual flair. To complement the natural motif, consider using botanical prints or leafy plants.

5. Playful blush pink

If you enjoy a touch of romance and softness in your surroundings, you might love playful blush pink as your bathroom paint colour! Adding white accents and floral prints to your bathroom walls adds warmth and femininity to the space and can be further elevated. 

6. Electric violet

With electric violet, you can display allure and edgy sophistication for your bathroom. This vibrant and bold shade makes a powerful statement on its own, allowing the rest of the bathroom decor to remain minimalistic. Pairing electric violet with sleek and simple furnishings such as a mirror, towel rack, and pedestal sink creates a striking contrast that highlights the intensity of the colour.

7. Calming coastal blues

dual-toned bathroom walls with a large mirror
Bring the aquatic vibes with blue | Source: iStock

Are you looking for a seaside-inspired hideaway? Coastal blue bathroom paint colours, reminiscent of the ocean and sky, can create a relaxing and peaceful atmosphere! 

For a beachy vibe, accent this colour with natural materials like driftwood, seagrass or shells. Pair with white or sandy beige for a light and airy look, and add navy or blue for depth and contrast. To complement the beach motif, consider using nautical elements such as rope detailing or striped patterns.

8. Golden hour orange

One of the warm paint colours you can use for the bathroom, orange hues, brings a vibrant energy to the space, similar to that of the golden hour when the sun casts a beautiful glow. These hues create a flattering cast when you’re dressing up, regardless of the hour, making these the suitable bathroom vanity paint colours. Incorporate white or cream to balance the orange tones and add soft lighting fixtures or candles to create a sense of freshness. 

9. Lemony yellow

With the bright and cheery colour of lemony yellow in your bathroom, you may enjoy a comfortable warmth all year round! This brilliant colour evokes a sense of enthusiasm and vibrancy in a space, that reminds of sunny days and citrus groves. 

This colour palette, combined with alabaster and slate grey, strikes a perfect blend of freshness and sophistication. You may enhance this colour palette with Mediterranean-inspired details like Spanish tile floors and traditional clawfoot tubs.

10. Sun-scorched terracotta

a bathtub against terracotta walls
Make it cosy with terracotta | Source: iStock

Terracotta can be used on bathroom walls to bring a rustic and earthy charm to the space. You may combine this with other earthy, clay-hued tones to create a coherent colour scheme, or you may add matte black accents to contrast the warmth of the terra cotta. Include tribal-patterned decorations to reinforce the desert vibe, providing texture and visual interest to the space.

11. Bold crimson red

Red paint or tiles, particularly in bold shades like crimson, are not for the faint of heart, yet they communicate strength and confidence. Despite its intensity, crimson red has a more universal tone, appealing to a broader spectrum of tastes. Pairing this passionate colour with natural components like wood or stone gives it a more grounded feel, moderating the red’s intensity while keeping its energy presence in the space.

4 tips when selecting a bathroom colour scheme

Consider lighting

Take into account the natural and artificial lighting in your bathroom when selecting paint colours. Lighter hues can help brighten up a dark space, while darker colours can add depth and drama to a well-lit room.

1. Think about size

Lighter colours can make a small bathroom feel more spacious, while darker colours can make a large bathroom appear cosy and intimate. Consider the size and layout of your bathroom when choosing paint colours.

2. Coordinate with fixtures and accessories

Coordinate your paint colours with the existing fixtures, tiles and accessories in your bathroom for a cohesive look. Choose colours that complement rather than clash with the existing elements in the space.

3. Test before you commit

Always test paint colours on a small section of the wall before committing to a full application. Colours can look different once they’re on the wall, so it’s essential to see how they look in your specific space.

4. Consider maintenance

Keep in mind that bathrooms are high-moisture environments, so choose paint finishes that are durable and easy to clean. Semi-gloss and satin finishes are ideal for bathrooms as they resist moisture and are easy to wipe down.

Transform your bathroom with colour

Selecting the right paint for bathroom walls and tiles is an exciting opportunity to express your style and create a space that reflects your personality and taste. Whether you prefer calming neutrals, bold jewel tones or vibrant hues, there’s a perfect paint colour out there waiting for you!

If you’re unsure where to start your next bathroom makeover, consider hiring a professional painter who can help bring your vision to life. Your bathroom can become a sanctuary of style, comfort, and relaxation with their expertise and guidance!


FAQs on bathroom paint colour ideas

What is the best colour to paint a small bathroom with no natural light?

Choosing light and airy colours that can help brighten the space is best. Opting for soft whites, pale greys, powder blues, light beiges, or pale yellows can make the room feel larger and more inviting by reflecting more light. These colours create a sense of openness and freshness, enhancing the overall ambience of the bathroom. 

Do you need special wall paint in the bathroom?

Yes, it’s recommended to use special wall paint designed for bathrooms. Bathrooms are typically high in moisture and humidity, which can lead to issues like mould, mildew, and peeling paint if regular wall paint is used. 

Special bathroom paint formulations are designed to withstand these conditions better, offering features such as mould and mildew resistance, moisture resistance, and easy cleaning. Look for paints labelled as “bathroom paint,” “kitchen and bath paint,” or “moisture-resistant paint” to ensure durability and longevity in your bathroom.

What paint colour goes with grey tiles in the bathroom?

Grey tiles in a bathroom can be complemented with various colours to create a coherent look. Choose soft white for a clean, timeless look or cool blues like aqua or navy for a relaxing spa setting.

Warm neutrals like beige or taupe can warm up the space, while modest greens give a natural and peaceful accent. Consider testing paint samples to find the perfect match for your specific shade of grey tiles and personal style preferences.

Categories
Bathroom & laundry

Adding a vanity to your bathroom

No matter how large or small your bathroom is, the vanity should be its centrepiece. An attractive, well-constructed vanity adds the conveniences of a sink basin, as well as cabinet storage and countertop space. Here are some tips for choosing the right vanity for your bathroom.

The basics

The bathroom vanity is simply the area around the sink – the sink fixture and the cabinetry around it. You’ll use it just about every day when you wash your hands, brush your teeth, shave or just get a drink of water. Since you’re going to see and use it all the time, it’s important to get the right design for your bathroom – not just for aesthetic purposes, but for practical ones too.

You’ve got an enormous range of options in choosing a bathroom vanity. You can go big or small, and you can choose from an array of different materials – wood, MDF, or laminates, for example. Go with a moisture-resistant material for the frame that surrounds the sink, since it will definitely encounter some wetness after installation. You have a much wider range of choices when it comes to the benchtop. You can get that made with just about any type of material and in any sort of colour. Choose what best matches the rest of your bathroom.

You’ll also want to choose between a single-sink layout and a double-sink layout. Choose the double-sink if you’re concerned about sharing a single sink during those busy mornings or the single-sink layout if you think it’s not going to be that busy!

Source: S.F.D Caringbah

Picking out the right vanity

Like Goldilocks and the porridge, you need to pick out the vanity that is just right for your bathroom. Size is a consideration. The vanity needs to fit into the bathroom, but not seem out of place. It should be big enough to store all of the things you need, but not so gigantic that it overwhelms the rest of the room. Once you’ve got the size sorted out, choose between a single-sink and a double-sink layout, and make sure you have all the storage space you’ll need.

From there, it’s time for the fun part – picking out the vanity’s design. You have to make sure that the design goes with the rest of the bathroom. An ornate, French-styled vanity goes well with a country-like bathroom, while an opulent marble vanity gives a good burst of class to any luxurious bathroom. Choose carefully, and be sure to keep maintenance in the back of your mind – wood vanities are extremely susceptible to rot and require constant monitoring to make sure they don’t decay. 

Contact local bathrooms experts

Features to look for 

Before you start shopping for a bathroom vanity, take a good look at the proportions of your bathroom. Will a rectangular vanity fit best, or should you opt for an oblong shape? Likewise, you’ll also want to prioritise your needs. If you need extra space to store toiletries, medications, cosmetics and hair products, you’ll need to find a vanity that has plenty of storage space and drawers. If you have a large family and your bathroom is a hub of activity in the morning, you might also want to consider getting a vanity with two sink taps.

It’s also a good idea to consider maintenance issues. You may love that benchtop made of exotic hardwoods, but don’t choose it unless you’re willing to do the regular maintenance it will take to keep it oiled and properly cleaned. There are a wide variety of laminate materials that are easier to clean and will look just as good.

Your vanity will more or less set the decorative style for the rest of your bathroom, so if you have a contemporary look, then opt for a streamlined vanity with simple touches. Likewise, if your bathroom is more decorative, you’ll want to choose a more ornate vanity that can be a showpiece for the room.

Source: Illawarra Bathrooms

Beauty in simplicity

Bathroom plumbing is now being routed through the walls rather than underground. You don’t have to hide the plumbing by mounting your toilets and vanities on the floor. Stylish wall-mounted units are now catching on. The older plumbing layout also meant that the space under the counter was fully used up by the sink and its associated pipes. Now, with the plumbing safely out of the way, you can instal actual drawers to the side of the sink instead of making do with drawer facades. These drawers offer ample space to store a number of useful items for convenience and ease of reach. Floor-mounted vanities were also bulky and created the effect of a cramped space. The wall-mounted models look light and trendy, without compromising on the storage capacity inside. They make the bathroom look more spacious, colourful and lively.

By doing a bit of homework and asking for advice from a professional, you’ll be able to find a vanity that is not only aesthetically pleasing but also fits your bathroom — and your budget.

Categories
Bathroom & laundry

Choosing a rain shower head

If you’re trying to conserve more water in your household – a rain shower head may be the solution you’re looking for. Rain shower heads are now more stylish, use less water, and as a result, are more energy efficient. Not to mention they turn a daily ritual into a luxury, adding a touch of resort living into your home. Rain type shower heads have continued to gain popularity in recent years as people become more conscious about water conservation.

How do rain shower heads work?

Rain shower heads conserve water by simply using less. They build pressure inside by having smaller holes and releasing less water.

Earlier shower heads had larger holes for the water to flow through, and therefore used more water. Earlier models were not as efficient, and consumers complained of a ”needle and pin” type of spray. Today’s models feature adjustable heads and can make the water spray finer. They can also add more flow with just a turn of the shower head. Engineers developed a technology called ”Laminar Flow” that forces bigger droplets of water to flow into each other, simulating rain.

Source: Building Boys

Rain Shower Head Styles and Sizes
Rain shower heads are available in several different styles and shapes. They can be rounded, square, or oval, but they are all designed to save water. They all spread the water out over a larger area, giving the sensation of a rain shower. There are ceiling mounted rain type shower heads that are fixed and are pre-adjusted. These come in different styles that are usually dictated by shower choice. They can come customised with stereo systems and LED displays as well. Wall mounted rain shower head units can be adjusted for flow rate and height for taller or shorter people. Handheld heads are also available for those who may need to sit down while taking a shower.

Contact local experts

Installing a rain shower head

Some rain shower heads are available in kits that can be installed by homeowners. These are typically more inexpensive and can be easily attached to the existing shower pipe. If you are considering a complete renovation of an existing bathroom or adding a new one, the options for rain shower heads are wider. Decide what type and where you want it installed before proceeding with the plumbing phase of the bathroom renovation.

If you live in an older house or flat, it may may be time for a shower head upgrade. A rain shower heads help you reduce water consumption and save money.

Categories
Bathroom & laundry

How resurfacing can transform your bathroom

Does your bathroom look like it needs a facelift? If it makes you sigh in defeat instead of pleasure when you look at it, probably so. One option would be to hire a professional to come in, gut it and put it back together. However, if your bathroom is structurally sound, a better and less expensive alternative is to resurface it. Resurfacing can hide and repair chips and stains in a bathtub or sink at a fraction of the cost of replacement.

When resurfacing is the right choice

Before you commit to a larger project, it is best to determine if bathroom resurfacing is enough. In this process, you will apply a new surface agent to the surfaces present. There are many ways you can do this. Some of the areas that you can easily resurface include the following:

  • Wall tiling
  • Cabinets
  • Baths and basins
  • Splashbacks
  • Vanity tops

You should not use this method on flooring, though. Because of the foot traffic these surfaces get, it will be hard to actually see lasting improvement overall. Keep in mind that if you do want to use this process on flooring, a professional should be hired for the job.

There are many instances in which bathroom resurfacing is a better option. Resurfacing your existing bath will only cost about 25% of the cost of installing a new bath. This process still remains one of the most cost-effective options for tiles as well, though you have to factor in labour costs.

Remember that this is also a process that is faster than renovations. In short, you can have the entire job done in a few hours rather than the weeks it will take to renovate the space.

Source: Ryan Linngar Photography

How hard can it be?

Resurfacing a bathtub or ancient bathroom tiles is a totally different experience than painting a wall or installing wallpaper. If you were to resurface a bathtub yourself, you will likely get an ugly, uneven, dishevelled mess and you would have to call a professional to fix your mistake. Rather than wasting your time and energy on this difficult project. You may want to contact an expert right away. Here is a look at why you should leave resurfacing to the professionals instead of doing it yourself. 

What gives bathroom resurfacing a bad name?

What is the difference between a tiled wall that has been painted over by an amateur and a resurfaced wall handled by a professional? When a professional does it, you won’t be able to tell that there is tile underneath. Professional resurfacing provides perfect or near-perfect results, whereas if you did the job yourself you would have a mess, a headache, and a bill for a professional. 

Price, of course, plays a major factor. While many people see DIY as a way to save money, you could actually be spending more money by tackling this by yourself by fixing your mistakes, and there will be mistakes. But aren’t professionals expensive? You could actually be saving yourself money by hiring a professional and having it done right the first time. Not to mention, resurfacing a bathroom is a lot cheaper than a full-fledged bathroom overhaul.

Contact local bathroom resurfacing experts

Not convinced?

If you’re not convinced yet, think about this: when you have your resurfacing done by an expert, the work will come with a warranty. If anything goes wrong within the warranty period, the bathroom resurfacing specialist will fix it for you. If you tackle the job yourself and something goes wrong, you have only yourself to blame. Although warranty periods differ, if you get the job done by the pros, you can expect your tub, sink or tiles to still be looking great for up to 15 years.

When renovation makes the most sense

There are other instances in which bathroom renovation is the best route to take. If you want to move fixtures around or you want to change the entire appearance of the room, this is a good option.

  • You may want to make drastic changes, such as converting your bathroom into a wet room. Renovation is necessary for this instance.
  • You may want to replace the current bathroom fittings, but you may also need to replace the sink or bath in order for the new fittings to work well and look good.
  • Resurfacing will not help when you want to have a brand new look that uses things like glass bathroom tiles or more modern splashbacks.
Source: Buildtech Homes

Hiring a resurfacing expert

Your bathroom resurfacing company should have demonstrated experience and full qualifications. Ask to see certificates for industry-related qualifications and all necessary insurance. Find out how long they have been providing bathroom resurfacing, and ask to see photos and testimonials from their previous clients. Make sure they use accredited bathroom resurfacing products, so you can be sure your resurfaced bathroom will be safe and durable.

Categories
Real estate & moving

7 quick ways to add value to your home

If you’re looking to put your house on the market, or you simply want to update the look of your abode without spending a fortune – rather than thinking big renovation projects and interior design makeovers, it’s useful to think on a more micro level. There are multiple simple and budget-friendly ways to increase the value of your home to have it appear more desirable, with the help of a few experts.

1. A splash of paint

Just like fashion trends, interior wall paint colours can change. Painting the walls can lift the whole mood and atmosphere of your home while appearing in-style and modern. If you’re happy with the colour, but your walls are starting to look tired, a fresh coat can make the world of difference in making your home feel shiny and new.

Source: Ryan Linnegar Photography

Redesigning the colour scheme of your walls, while still keeping in mind your current decor, can completely transform the look and feel of your home without spending a fortune.

2. Update your outdoor space

With summer having just arrived, us Aussies love our outdoor living areas – socialising with mates, Sunday barbeques with family and even to relax by ourselves from time to time. Adding a deck to your outdoor entertaining area can exude a laid-back and modern atmosphere, facilitating any occasion. Hiring the right expert to install and design your decking will certainly increase the value of your home, and the main positive is that decking can sometimes be one of the more budget-friendly options for outdoor living areas.  

Another outdoor aspect is the garden. Arranging a garden clean-up is simple, and it can do wonders to your area. Clean-ups by themselves are effective, but they can also provide a blank canvas for adding any shrubbery or trees, which are definitely expected to lift the overall impression of your home.

3. Clean your carpets

Hiring a professional to deep clean your carpets is a cheaper option than replacing your flooring all together, and it can still increase the value of your home. Most of us tend to vacuum our carpets, without much regard for the hidden dirt that has accumulated over the years that we can’t see. Experts can transform your carpet to appear brand new, which not only makes a difference in the look of your carpet, but also the smell within your home.

4. Kitchen upgrades

Rather than renovating the whole space to increase the attractiveness and value of your house, consider the smaller details that can really lift the design of your kitchen. If you’re on an extremely tight budget, think of replacing cupboard doors or handles. Or perhaps you’re willing to spend a little more on improving your kitchen area; consider replacing kitchen benchtops.

5. Change the light switches

Something so simple as changing the light switches can make a difference in the eyes of potential buyers of your home, or even just the impression of your friends if you’re not looking to sell. The installation or upgrade of light switches is one of the cheaper services that electricians provide. Standard white switches can tend to look yellow over time, usually only noticed when they are replaced. Head to a hardware store and perhaps opt for coloured or metal switch plates instead of a standard white switch to spruce up your home in a subtle way.

6. Bathroom updates

The bathroom is often the easiest room in the house to look dated. Luckily, there are a few simple tweaks you can do to give it a fresh feeling. Firstly, install some new shower screens for an instant lift. If the old one is looking ugly or cloudy from all those years of use, a new shower screen will deliver a fresh, beautiful look. You can go for one that is fully frameless or semi frameless, and you have plenty of different glass options for the screen.

Source: Visualising Interiors

Adding a new vanity is another good option for the bathroom. Putting in a new one could give you more storage, or just make for a fresher look from the older and scarred one that already sits in there. Don’t forget, you need a vanity that’s got plenty of storage and easy access, and one that has enough sink space for everyone who’s going to use it. Figure out what type of material is best for the bench top, and figure out how big it has to be before you construct anything. You can also explore adding in a heated towel rack, new towels and bathmats or a mirror de-mister.

Finally, it’s worth considering resurfacing the bathroom. This is a good, superficial makeover that does a lot of good. If you have chipped, tired or ugly tiles, resurfacing could make for an efficient answer to your problems. Contact a professional and see what they could do. With a little bit of work, your new tiles will give the whole room a fresh, charming look.

Contact local bathroom renovation experts

7. Add a skylight

Skylights bring natural light into your home, reducing the need for artificial light and energy usage. A home that has lots of daylight appeals to home to buyers because it makes the home seem warmer and brighter. It also requires much less energy to keep it attractive and liveable.

Different types of skylights

Skylights come in many different shapes and sizes, from rectangular to circular and diamond-shaped to triangular. They can use either glass or plastic glazing that is: flat, arched, domed or pyramid shaped. Tubular skylights are another option; these can even be funnelled through a building or down to different storeys of a home.

You can have a fixed or openable skylight, depending on your tastes. Fixed skylights have to stay in place and can’t be opened — they serve solely as a source of light. Openable skylights can be opened whenever you like by using either a manual turn or a motorised control to open the pane and help ventilate your home. These can increase your energy efficiency even further by creating a cooling source, which will also increase your home’s value.

Skylights do have to be well-insluated to make sure that they are not letting in extra heat — with the sun beating down directly on them all day, this can be a problem in summer months. It’s a good idea to find ones that offer insulation that surrounds the skylight and that also use glazing to stop heat from penetrating. Blinds are also a good idea so that on extra sunny or hot days you can screen off the light from the skylight.

Categories
Bathroom & laundry

Storage ideas for your bathroom

In your bathroom, the amount of storage space you need is surprising. When renovating a bathroom or building a new one, be sure to address the storage space to ensure that you have enough in the future. This will make the bathroom much easier to navigate as well as more fun. The following are solutions for getting the most out of your bathroom storage.

Plan

Prior to the renovation, utilise the planning stage to design your storage. Consider the items you wish to keep in the bathroom. Although keeping towels and electrical items handy is convenient, make sure the correct ventilation exists so that moisture does not have detrimental effects. It is unsafe to allow electrical components to corrode and towels to form mildew.

Take measurements

Before purchasing bathroom storage, measure your bathroom adequately. Make a small blueprint of your bathroom taking the consideration where your tub sink and toilet is placed. Also, take into consideration how tall your walls are. Storage units don’t have to be floor units, they can be attached to the wall as well. Once you have done this, decide whether you want freestanding or portable storage. Portable storage can be moved around the bathroom when you find it it’s no longer useful in one area. However, built-in storage cannot be moved it becomes a permanent part of the bathroom structure.

Recessed nooks above baths and in showers are ideal for products / Source: Modern Living Constructions

Innovate

Be creative when placing your storage units. Do not only use vanities and medicine cabinets. Instead, utilise the space in your walls and recessed cabinets which will provide additional room without decreasing the floor space of your bathroom. Additionally, placing recessed nooks around the shower will really open up your bathroom.

Use fixtures

Use vanities with many drawers and shelving units with specialised trays that can be opened for quick access. These fixtures are perfect for applying cleansers at night and cosmetics in the morning. There are even modular units that can be customised to your exact requirements, so you remain organised.

Keep an open mindset

If you are lucky enough to have a large bathroom, utilise different forms of storage for visual interest and to create depth. For instance, combining a vanity, recessed cabinets, wall shelving and baskets will open up your bathroom.

Utilise temporary storage

For those who cannot renovate the bathroom, there are additional temporary storage options that can be implemented. Corner shelving units, regular shelving and hanging shelves are excellent temporary storage choices. Additionally, baskets, boxes and a variety of other containers provide exceptional storage options that can be used anywhere and are available in a variety of colours and styles.

Using storage to match your accessories

If you have a lot of plain accessories you might want to try decorative hooks. These can be installed directly into the wall or hung over the bathroom door on the bar.

Contact local bathroom experts

Corner shelves

Corner shelves come with and without doors and may be used to store things such as personal items and linen.

Linen cupboards

If you have enough room in your bathroom to add a 5-foot linen cupboard this might be ideal. Not only can you store most of the things your bathroom in a living covered, but it also makes the bathroom look more attractive.

Floating shelves

Floating shelves are not enclosed, therefore making the perfect opportunity to add character and style to your bathroom. These are the perfect vessel for towels or everyday washing products and can add a unique charm to the room.

Maximise cabinet, shelf and drawers space / Source: KTR Creations

Pull-out storage 

Pull-out storage has been long-used in kitchens – it also works really well in bathrooms. This type of storage is considered hidden and it definitely saves space – it can be built into almost any narrow space. Since most bathroom products are quite small, it provides a perfect and cosy spot for your essentials such as; bottles of nail polish, moisturiser and makeup.
Adequate storage is crucial to the success of any room. Whether you would prefer to have your items and belongings hidden away, or you want to make a statement, these bathroom storage ideas have something for everyone. Feeling inspired to make some storage adjustments? Oneflare can connect you to a professional bathroom renovator in your area to bring your vision to life. Receiving up to three quotes on your job request will also mean you’re able to keep within your budget or get a better idea on what the project may realistically cost.

Categories
Bathroom & laundry

How do modular bathrooms work?

If you’re in the process of adding an extension to your home or even building a new home, you have three main options when it comes to the bathroom. You can either gut your bathroom and start from scratch, have a custom-made bathroom designed, or install a modular bathroom. A modular bathroom is definitely something you may want to consider. It is the most economical solution because it cuts down on construction costs and is mostly maintenance-free. So you may be asking: what is a modular bathroom? Keep reading to find out and see how it may benefit you.  

What are modular bathrooms?

Modular bathrooms are becoming a popular option for bathroom renovations, and it is easy to see why. With modular bathrooms, most of the hard work has been done for you, in a factory or warehouse. Modular bathrooms are shipped in flat boxes and delivered to your home. If you are handy, you may want to install the modular bathroom yourself, but there is always the option to have a technician come out and do the handy work for you. 

Source: Protek Design

Modular bathrooms come in a diverse selection of styles, with a variety of features and designs that allow you to create a bathroom that best suits your family’s unique needs. You can still express your personal style and create some customisations. Some of these options include: 

  • Sizes and Shapes: There are a wide variety of shapes and sizes to choose from including smaller square-shaped suites to larger rectangular spaces. There are even modular bathrooms that allow easy access for disabled family members. 
  • Standard Features: Each modular bathroom comes complete with a toilet, shower, sink basin, and tap.
  • Optional Features: There are many optional features to choose from including a variety of lighting and fans, vanity styles, the option between a sliding or pivoting door, and much more.

Modular bathrooms are designed to make bathroom renovations quick and easy. Shipped in flat boxes that include everything you need to be comfortable in your bathroom, modular bathrooms are a no-hassle, no-stress alternative to the ordinarily time consuming and expensive bathroom makeover. In addition, modular bathrooms are stylish and easy to clean. It is easy to see why so many people are opting for a modular bathroom as opposed to hiring a contractor to rebuild a livable space.

Cost-effective without sacrificing quality

Modular bathrooms are a quality product, and because you don’t have to buy fittings and floor tiles from separate places, replacing any pieces is easy; no more chasing down which store you bought which fitting from, and no more trying to match colours. They’re amazingly versatile, as well; you can select the fittings, colours and size of the bathroom. You can choose the number of entrances your modular bathroom has, and you also have the option of placing the bathroom wherever you want.

Contact local bathroom experts

The installation process

The great thing about modular bathrooms is that they don’t require any preparation work before or tiling after the bathroom is installed. They are complete kits! You may want to hire a handyman if there are some sections that you do not feel comfortable installing, but it is not required. The kits come in flat packs that can fit through doorways or be carried upstairs. To assemble the module, you’ll just need common household tools and then caulk for the seams to make the bathroom watertight. As for plumbing, everything is included in the kit except the external plumbing, which just needs to be hooked up.

Types of outdoor modular bathrooms

Modular bathrooms are so versatile and come in such a variety of styles that there are even options for outdoor bathrooms! This is perfect if you have a pool or tool shed that you spend time in outdoors. Outdoor modular bathrooms are like indoor units, and some of the various configurations include change rooms with showers and toilets for swimming pool areas. Another use for an outdoor modular bathroom could be to simply have an extra bathroom without extending your home.

Categories
Bathroom & laundry

Renovating your bathroom? Here’s where to start

A beautiful bathroom is your private sanctuary, a place for long, relaxing baths and pampering.  It may be one of the smallest rooms in the house but it’s one with a lot of components and should be one of the most considered spaces when renovating.  If you’ve decided to update your bathroom, some careful planning can go a long way to ensuring your end result is what you’ve been dreaming of.

Here are some things to consider when planning your bathroom renovation.

What do you want to achieve?

Are you looking to create a luxurious space that feels like an exclusive spa, or do you need a practical bathroom that will meet the needs of a family of 5? It’s important to start your planning process with your goals in mind to ensure you and your family’s wants and needs are met. Who will be using this bathroom and will their needs be met? Think about what are absolute must haves and what you’re prepared to compromise on. Write a list of what you don’t like about your current bathroom so that you can rectify these problems in the next.

Start your bathroom renovation planning with the end goal clearly in mind / Source: Ryan Linnegar Photography

Budget

Knowing how much you have to spend is critical when planning a renovation. Can you afford a total remodel or do you just want to change the vanity and fixtures? Having a budget will make it much easier to determine your parameters and will ensure you get maximum bang for your buck. The size of the space, the materials you choose and whether you’re going to be doing any of the work yourself will affect the cost of a renovation.

Get inspired

Look for design inspiration in magazines, online or in showrooms. Keep your goals in mind, along with the rest of your home – the bathroom should ideally continue the flow of the décor. You don’t want your bathroom to quickly date so be wary of trends. Do your homework and find classic, timeless designs you’ll love for a long time to come. Collate a collection of inspiring images, get samples and actually see the products where possible instead of just looking online. Utilise visual rendering technology where possible to give you a better idea of what your finished bathroom will look like.

Design & layout

In a space as small as a bathroom, design and layout is critical to ensure functionality and usability. You don’t want to end up with your knees hitting the edge of the bath every time you use the toilet or a tiny shower that you’re disappointed with.  Get familiar with the space you have to work with and once you have a preliminary design, ensure it’s to scale.

There are lots of space saving ideas for a bathroom. Things like corner vanity units can really open up your space or having a sliding door instead of a traditional hinged door can work wonders.

Determine the focal point of the bathroom when you enter the room and be sure to plan for quality materials and fixtures in this area. The primary fixtures are the toilet, sink, bathtub and/or shower stall. Think about clearances, such as the shower door hitting the main door. If you are laying in the tub, do you want to be staring at the toilet? Also, where are the utilities such as water, sewer and electricity located? The less you have to move existing utilities or run new ones, the more economical the bathroom will be. 

Some things other questions to consider:

  • Is there adequate ventilation?
  • Do I want a wet room or a shower screen?
  • Is the shower large enough?
  • Are there enough windows and do they need to be moved?
  • Is there enough storage space?
  • Is the bath large enough?
  • Is there enough natural light?
  • Are there enough power outlets?
  • Is there enough benchtop space?
  • What will the height of the sink be if it’s a bowl sink?
  • Is there enough room for the door to open?
Your bathroom design should be both beautiful and practical / Source: Lifestyle Extensions & Renovations

Lighting

Lighting choice is critical in a bathroom. You need to have different lighting for different functions – a bright light for applying make-up and soft, muted lighting for a luxuriously long soak in the bath. Be sure to include layers of decorative, task, accent and ambient lighting to achieve a beautiful yet practical design that will meet all of your needs.

Timing

If you are project managing, plan your trades and services in the correct order to avoid costly mistakes. If you’re doing a lot of the work yourself, make sure you’ve done your research. The more mistakes, the longer it takes, and the longer you’ll be without a bathroom and using the gym showers.

Have everything you need

Before you take to your old bathroom with a sledgehammer, make sure you have everything you need on hand. It can be a long wait for those porcelain tiles from Morocco to arrive when you don’t have a usable bathroom. Check that all of your materials have arrived undamaged so you don’t hold up progress having to get replacement materials at the last minute.

Spend money wisely

Assess what can be saved from your existing bathroom. If you can work with some of the things you’ve already got you’re going to save a considerable amount of money. Tiles can be re-grouted, baths can be resurfaced and walls can be painted, there are lots of things you can do to refresh your space without doing a total demolition job. Just changing the vanity unit or the fixtures and fittings can really transform a bathroom.

Don’t be tempted to buy the cheapest options available for everything. Buy quality where you can and splurge on a few key pieces that will really set the tone of the space and add to its luxury.

Think about whether you absolutely need to move the location of the shower, toilet, bath and vanity units – doing so may mean you need to need to move the plumbing which can be costly. Sometimes it’s absolutely worth doing but you need to weigh up.  Perhaps you could upgrade the toilet instead of moving it, or change the old shower screen to a sliding screen. There are plenty of ways to improve your space without spending a fortune. Be smart with your budget and it will stretch a whole lot further.

Contact local bathroom renovators

Storage

Clutter isn’t appealing in a bathroom and can quickly ruin your carefully planned aesthetic. Those tacky plastic hangers for shampoo and conditioner can be avoided if you plan to have a recessed area built in to your shower. Choose your vanity unit wisely and in accordance with your storage needs. Whilst pedestal basins may look fantastic, they aren’t exactly practical if you’re short on storage space.

Think about what you keep in your bathroom now and plan for plenty of space, especially if the bathroom is being used by multiple people. Consider options such as recessed cabinetry, vanities, medicine cabinets, over the toilet storage, and eye level shelving to keep your bathroom looking organised and provide a place for everything.

Do you need to have plans drawn up or council approval?

Depending on the extent of your renovation, you may need to have plans drawn up or gain local council approval. Most councils allow for minor changes that don’t alter the structure or services such as plumbing, drainage and electrical, however it is always best to check what your local government’s policies are.

Categories
Bathroom & laundry

How to fix a leaking toilet cistern

What is a toilet cistern?

A toilet cistern, also known as the tank, is one of the most essential components of toilets and is where water is stored before it’s used to flush the toilet. It’s located above the toilet bowl and may also be higher above the toilet, connected by a single pipe. The cistern has a flushing mechanism in proximity to it to control the water.

Types of toilet cisterns in Australia

1. Concealed Cisterns: These cisterns are installed within the wall cavity, making them completely hidden from view. They are commonly used in modern bathrooms to create a sleek and minimalist look.

2. Close Coupled Cisterns: This is the most common type of cistern used in Australia. The cistern is mounted directly on top of the toilet bowl and connected with a flush pipe.

3. High-Level Cisterns: These cisterns are mounted high on the wall above the toilet bowl and connected with a flush pipe. They are a classic and elegant option often used in heritage homes or to create a vintage look.

4. Low-Level Cisterns: Similar to high-level cisterns, low-level cisterns are mounted on the wall, but much closer to the toilet bowl. They are a good option for those who want a traditional look without the height of a high-level cistern.

5. In-Wall Cisterns: These cisterns are installed within the wall cavity but have an access panel for maintenance. They are similar to concealed cisterns but are easier to access if repairs or maintenance are needed.

6. Dual Flush Cisterns: These cisterns have two buttons or levers that allow you to choose between a full flush or a half flush, depending on the amount of water needed to clear the bowl. They are a popular option for those looking to reduce their water usage. 

7. Caroma Uniset Cisterns: This cistern is a specific type of close-coupled cistern that features a unique design and built-in inlet and outlet valves. It is a popular choice in Australia due to its ease of installation and water efficiency.

8.  Fowler Ware Toilet Cisterns. These cisterns are known for their durability and reliability. They typically have a traditional design and are made of ceramic. These cisterns operate using a flushing mechanism that releases water from the cistern into the toilet bowl to remove waste.

What does a cistern do?

A cistern operates using a valve that controls the water flow with the help of a plastic float. The float is responsible for regulating the water level inside the tank by opening or closing the valve depending on how much water is present. The valve fully opens each time the toilet is flushed to allow more water to enter the cistern and refill it to the required level.

How to replace a toilet cistern?

Suppose the toilet cistern becomes damaged or develops flush tank water leakage. In that case, you’ll need to replace it by completing a few steps. You can complete the project yourself because it’s a simple and common plumbing repair. Start by turning off the shutoff valve clockwise and completely drain out all of the water from the tank. You can use a sponge to absorb any remaining moisture.

Use an adjustable wrench to hold the nut under the tank bolt and unscrew the bolts with a screwdriver. After completely removing the tank, lay it down. In some cases, the washer may not move and come loose. Try using an adjustable wrench to turn it. You can now insert the new spud washer before removing the bolts and gaskets.

You’ll then need to clean around the holes of the tank with a sturdy wire brush to remove any of the old bold gasket, which may still be present on the inside and outside of the tank. The new gasket will only seal properly if the surface is clean. The new gaskets will need to be firmly seated onto the bolts. Reinstall each nut on the bottom of the cistern and tighten them by hand until they feel secure.

The last step of the DIY leaking toilet repair process is tightening the nuts and bolts and alternating to each side until it looks like the gaskets are seated. It’s also important to avoid tightening the bolts too much, which can cause minor cracks to form on the toilet cistern.

How to repair a toilet cistern?

There are a few common ways to fix a leaking toilet cistern to restore its operation and prevent the problem from escalating.

1. Repairing the flush valve – Located in the middle of tanks, the flush valve is one of the main components of the leaking toilet cistern and operates with a float ball. Bend the float arm down to shut off the water. Adjust the water level and also consider replacing the ballcock valve with an updated float-cup style fill valve to avoid potential problems in the future.

2. Fixing a loose flush handle – The lift chain should be reconnected to the lift arm from the flapper. You can also adjust the handle mounting nut located inside of the cistern by rotating it counterclockwise.

Light brown tiled bathroom with double vanity, stand alone bathtub and toilet.
Don’t let a leaking toilet cistern ruin your bathroom / Source: Euroluce Pty Ltd

Toilet cistern washer replacements

Cistern washer – Inlet

You can replace a leaking toilet cistern inlet valve by turning off the water supply to the toilet and flushing the toilet. Remove the blue top and remove the arm from the float cup adjusting rod. Remove the cap by turning the arm counterclockwise before removing the inlet valve head seal.

Cistern washer – Outlet

When you need to perform a toilet cistern washer replacement for the outlet, start by shutting the water off through the mains isolation or the stop tap. Thoroughly drain the tank and remove the old seating washer. The seat should be in good condition before you install the new cistern waster outlet. The seat should be smooth to prevent the new washer from leaking. Install the new piece and verify that the clips are in position.

How to fix leaking cistern valves?

Cistern inlet valve – Remove the lid and flush the system and turn off the water valve before draining all of the water out by flushing the toilet. Remove the broken parts and attach the new pieces onto the cistern inlet valve. As the tank fills with water, check the water level while tightening connections and looking for leaks.

Cistern outlet valve – Turn off the water supply and remove the lid on the toilet cistern. Flush the toilet to remove all of the water and use a sponge to absorb any remaining moisture.

How to fix a cistern flush?

You can fix a cistern flush to avoid wasting any more water when the inlet valve doesn’t shut off once the water reaches the desired level. Start by checking for leaks in the tank with the use of vegetable dye. Lower the float arm to ensure the ball starts to sit lower to ensure the inlet valve shuts off sooner.

Adjust the float levels by adjusting the screw on the float arm and ball to ensure the inlet valve shuts off. Keep a close eye on the water level markings to ensure the water hits the appropriate level. Gently remove the damaged parts and install the new pieces. Check to see everything fits securely. Place the lid back onto the cistern and connect the water valve. Flush the toilet again and check to see if the toilet is still leaking.

When should I call an expert?

It’s important to know when to contact a professional to ensure your toilet continues to operate correctly after you spot toilet leaking. Calling a plumbing expert will allow you to get the toilet back in working order and consult the help of someone with more training and experience.

Contact local plumbing experts

The Problem Persists

You’ll need leaking cistern repair if the problem isn’t resolved with your attempts. You may follow each step and still have questions. You may also have caused more extensive damage during your dripping toilet attempt.

The Parts Aren’t Damaged

After inspecting the parts on your leaking toilet tank, you may not spot any areas where the problem is located. Calling a professional will allow you to hire someone who can diagnose the problem and remedy it if it’s an underlying issue that’s not related to the parts.

You Have Questions

You may have further questions about the mechanisms and operation of your toilet cistern to address, which is when a professional can help. You may want to know how to stop a toilet cistern from overflowing or how to prevent damage or wear to the parts.
If the above steps have not fixed your problem or if you lack confidence in your DIY abilities, it may be time to call a licensed plumber.

Categories
Bathroom & laundry

Budget-friendly bathroom renovation ideas

Highlights:
• Focus your budget on professional waterproofing, plumbing, and electrical work. You can save money on DIY tasks like painting, decorative fixtures, and vanity updates.
• Strategic wall and floor updates using budget-friendly materials and using LED lighting, water-efficient fixtures, and consistent finishes can dramatically transform the space without major structural changes.

Dreaming of a spa-like bathroom retreat but worried about the cost? You’re not alone. A bathroom renovation consistently ranks as one of the highest return-on-investment home improvements, potentially increasing property value by up to 10%. The challenge lies in achieving that magazine-worthy look without draining your savings account.

The good news is that transforming your bathroom doesn’t require a six-figure budget. With smart planning and strategic choices, you can create a stunning space that feels both luxurious and functional. This guide reveals practical bathroom renovation ideas on a budget that deliver maximum impact for your dollar, helping you prioritise where to save and invest wisely.

What are the benefits of renovating your bathroom?

Modern bathroom with marble wall tiles, timber basin and shower/bath.
It’s the small things that can have a big impact on your bathroom renovation / Source: ESTEEM Constructions

When you’re looking for ideas for bathroom renovation on a budget, you want upgrades that extend beyond mere visuals. These improvements can transform your daily routine while boosting your home’s value and appeal:

  • Increased property value: Bathroom renovations typically recoup 60-80% of their cost when selling, making them one of the smartest home improvement investments.
  • Enhanced daily comfort: Modern fixtures, better lighting, and improved storage make your morning and evening routines more pleasant and efficient.
  • Improved functionality: Strategic layout changes and smart storage solutions can maximise space, particularly in smaller bathrooms.
  • Better energy efficiency: Upgrading to LED lighting, low-flow fixtures, and energy-efficient ventilation reduces utility bills while supporting environmental goals.
  • Health and safety improvements: New waterproofing, slip-resistant flooring, and proper ventilation create a safer, healthier environment that prevents mould and water damage.

Where to save vs where to spend when doing a budget bathroom renovation

New honeycomb tiled shower with two shower heads.
A newly renovated bathroom can add serious value to your home / Source: Origin Bathrooms

Smart budget bathroom renovation ideas focus on understanding which elements deserve investment and which offer opportunities for savings. This strategic approach ensures your renovation delivers lasting value while staying within budget.

Top 3 areas where you can cut costs

Painting and wall treatments

DIY painting can save you plenty compared to professional services. Quality moisture-resistant paint costs around $60 to $100 for an average bathroom, while special tile paint can refresh existing surfaces for under $80.

Decorative fixtures and accessories

For a cost-effective update, consider swapping out accessories like towel rails, toilet roll holders, and shower caddies yourself. Online retailers offer a wide variety of affordable options, with many pieces costing between $20 and $50.

Vanity updates

Refreshing an existing vanity with new paint, handles, and hardware could be as affordable as $150 or up to thousands. This approach can achieve a completely transformed look for a fraction of the cost.

Top 3 areas you shouldn’t skimp on

Waterproofing and structural work

Poor waterproofing could lead to costly damage that can run over $10,000 to repair. Professional waterproofing doesn’t come cheap; some may even cost $500 to $2,000, depending on the extent of the work. However, this investment can be worthwhile in the long run.

Plumbing and electrical

Plumbers and electricians ensure safety and compliance. Cutting corners here risks expensive repairs, safety hazards, and insurance issues.

Quality tiling in wet areas

Proper tile installation in showers and around baths prevents water damage. Professional tiling could range around $50 to $80 per square metre to ensures durability and waterproof integrity.

Renovation ideas for every part of the bathroom you can do on a budget

Modern dark tiled bathroom with dark fittings.
Fixtures can add real impact to your budget bathroom renovation / Source: ESTEEM Constructions

Transform each area of your bathroom systematically with targeted improvements that maximise visual impact while controlling costs. These small bathroom renovation ideas on a budget work particularly well in compact spaces.

Bathroom walls

Fresh walls instantly modernise any bathroom and provide the foundation for your entire bathroom design scheme

Replace the wall tiles

Partial bathroom tile replacement focuses the budget where it matters most. Remove and replace tiles around the vanity or in the shower. Consider subway tiles or mosaic feature walls for contemporary appeal, or larger format tiles to reduce grout lines and create a cleaner, more spacious feel. Light-coloured tiles reflect natural light, making small bathrooms appear larger and brighter.

Repaint the walls

Moisture-resistant paint transforms bathroom walls for $60 to $100 in materials. Semi-gloss or satin finishes resist humidity while providing easy cleaning. Light colours like soft whites, pale greys, or warm beiges create an airy atmosphere that makes spaces feel larger.

For accent walls, thinkdeeper colours like navy or forest green behind the vanity to add depth without overwhelming the space.

Install splashback panels or peel-and-stick tiles

Acrylic splashback panels provide waterproof protection with minimal disruption. These panels come in various finishes, including marble-looking, timber-style, or solid colours.

Peel-and-stick tiles offer DIY-friendly installation for $20 to $40 per square metre. While not suitable for shower areas, they work well as backsplashes behind vanities or as accent features.

Bathroom floors

A contemporary, clean bathroom featuring white subway tiles, a black shower frame, and a wooden vanity. - budget bathroom renovation ideas
A modern bathroom. / Source: iStock

Budget bathroom renovation ideas for flooring focus on materials that combine affordability with moisture resistance.

Install slip-resistant flooring

Vinyl plank flooring designed for bathrooms costs $25–65 per square metre and easily installs over existing surfaces. Modern luxury vinyl replicates timber or stone appearances while providing superior water resistance and comfort underfoot.

Meanwhile, textured surfaces and bevelled edges add visual interest while improving safety. Choose planks with built-in underlay for added comfort and sound reduction.

Play with tiles

Mix tile sizes and patterns to create visual interest without premium costs. Make things interesting by combining large-format tiles with smaller mosaic borders for custom looks.

Another tip: matching wall and floor tiles creates a seamless flow that makes small bathrooms feel larger. Alternatively, contrast light walls with darker floors to ground the space and hide dirt.

Consider polished concrete or pebble tiles

For a modern, low-maintenance look, a polished concrete finish is a great option. However, costs vary significantly depending on the method. The most budget-friendly option, a ‘grind and seal’ finish, can start at around $50 per square metre. A more robust, mechanically polished concrete finish typically starts at $100 per square metre.

Pebble tiles add natural texture and create a spa-like ambience. Install them in shower floors or as accent strips for tactile interest that enhances the sensory experience.

Contact local bathroom renovation experts

Shower and bath area

The shower and bath area typically receives the most use and attention in bathroom renovations. 

Replace the showerheads

High-pressure showerheads cost $100-500 and install easily without plumbing modifications. If you want a transformative daily shower experience, explore rain showerheads, handheld options, or water-saving models.

Want more luxurious showers? Multi-function showerheads combine rainfall and targeted spray patterns for that luxe feel at a moderate cost. Look for models with flow restrictors to reduce water consumption.

Switch glass shower screens with acrylic

Choose shower screens that resist yellowing and scratching while offering easier installation and replacement. Acrylic shower screens cost 40% to60% less than glass while providing similar functionality. 

Frameless acrylic screens create open, spacious feelings in small bathrooms. For professional installation guidance, learn about shower screen installation techniques to ensure proper fitting and sealing.

Opt for a walk-in shower and bath area

Remove shower doors entirely for an open, accessible design that costs nothing but creates significant visual impact. This approach works best with proper waterproofing and floor drainage.

Conversely, you can consider installing a floor-to-ceiling tile feature wall or mosaic accent to define the shower area without physical barriers. This creates the illusion of a bigger space while improving accessibility.

Vanities and storage

A close-up shot of a bathroom sink featuring a marble-effect countertop and antique brass fixtures. - budget bathroom renovations ideas
A bathroom vanity. / Source: iStock

Smart storage solutions and vanity updates provide both functional and aesthetic improvements. Ready-made vanities are cheaper than custom options, while still delivering style and functionality.

Install smart storage

Floating shelves cost between $30 to $80 and provide essential storage without consuming floor space. Install them beside mirrors, above toilets, or in shower niches for toiletries and decorative items. Mirrored medicine cabinets combine storage with essential functionality.

Discover more bathroom storage ideas to maximise organisation in compact spaces.

Upgrade handles and tapware

New cabinet handles can instantly modernise any vanity. For a cohesive design, choose consistent finishes throughout the bathroom, such as brushed brass, matte black, or chrome. This is useful if you’re renovating your bathroom piecemeal or designing a modular bathroom.

Also think about replacing your tapware to complement your handle choice. Modern mixer taps with waterfall or swan-neck designs add luxury appeal without premium costs.

Paint the mirror frame

Transform existing mirrors with specialty paint designed for glass and metal surfaces. Metallic spray paints in gold, bronze, or black cost under $20 and create custom designer looks.

Mask the mirror surface carefully and apply multiple thin coats for professional results. This technique works particularly well with ornate or dated frames.

Lighting and finishing touches

Proper lighting and coordinated finishes create cohesion and enhance the functionality of your renovated space without breaking the bank.

Upgrade to LED lighting

LED downlights cost $15 to $40 each and reduce energy consumption by 75% compared to halogen alternatives. For comprehensive illumination, install them over vanities, in showers, and as general ceiling lighting. Backlit mirrors combine task lighting with storage.

Match finishes

Consistent finishes throughout the bathroom create a sophisticated, designer appearance. Choose one primary finish (chrome, brushed brass, or matte black) for all tapware, handles, and accessories.

This coordination principle extends to lighting fixtures, towel rails, and even tile trim. Mixing more than two finishes can create visual chaos in small spaces.

Add/replace towel rails and shower caddies

Heated towel rails add luxury while providing practical towel drying. Choose models that complement your finish scheme and provide adequate hanging space. Keep in mind that for a hardwired, polished look, you will need to budget for professional electrical installation, which can add several hundred dollars to the total cost.

Corner shower caddies maximise storage in compact shower areas. Stainless steel or powder-coated options resist rust and maintain appearance over time.

Place an indoor plant

Low-light plants like snake plants, ZZ plants, or pothos add natural elements that soften hard bathroom surfaces. Synthetic alternatives provide similar visual benefits without maintenance concerns.

Choose decorative pots that complement your colour and finish choices. Position plants away from direct water exposure while ensuring adequate light for living varieties.

Eco-friendly and sustainable budget bathroom renovation tips

Stylishly decorated bathroom countertop with neatly folded towels and a plant. - bathroom renovation ideas
A clean bathroom countertop. / Source: iStock

Sustainable choices in bathroom makeover ideas on a budget deliver environmental benefits while reducing long-term operating costs. These improvements often pay for themselves through reduced utility bills.

  • Low-flow showerheads and dual-flush toilet mechanisms reduce water consumption by a significant amount without sacrificing performance.
  • LED bulbs last 15–25 times longer than incandescent alternatives while using 75% less energy. The higher initial cost is offset by reduced replacement and electricity costs.
  • Bamboo vanities, recycled glass tiles, and reclaimed timber accents provide unique character while supporting environmental goals.
  • Energy-efficient exhaust fans prevent moisture problems while consuming less power. Proper ventilation extends the life of all bathroom materials.
  • Low-VOC paint products and finishes improve indoor air quality while often costing similar amounts to conventional alternatives. They’re particularly important in small, enclosed bathroom spaces.

Time for a bathroom makeover

Creating your dream bathroom on a budget requires strategic thinking rather than unlimited funds. The key lies in understanding where to invest for maximum impact and where smart savings won’t compromise quality or safety.

The most successful bathroom renovations on a budget balance DIY enthusiasm with professional expertise. While you can do some tasks yourself, professionals should handle the majority of the heavy lifting. Start planning your project with trusted bathroom renovation experts today.


FAQs on bathroom renovations

How much does a budget bathroom renovation cost in Australia?

Budget bathroom renovations typically cost $8,000 to $15,000 for basic updates, including painting, new fixtures, and cosmetic improvements. Mid-range renovations with some structural changes cost $15,000 to $25,000, while high-end renovations can exceed $30,000.

Can I renovate a bathroom myself in Australia?

You can handle cosmetic work like painting, installing accessories, and replacing non-plumbing fixtures yourself. However, licensed professionals must complete waterproofing, plumbing, and electrical work to meet Australian building standards and maintain insurance coverage.

Is it worth renovating a bathroom before selling?

Yes, bathroom renovations typically return a significant amount of their cost when the property is sold. Focus on neutral colours, modern fixtures, and quality finishes rather than highly personalised design choices.

Do I need building permits for bathroom renovations?

Minor cosmetic updates don’t require permits, but structural changes, plumbing alterations, or electrical work typically do. Check with your local council, as requirements vary by location and scope of work.

What mistakes should be avoided when renovating a bathroom?

Common mistakes include inadequate waterproofing, poor ventilation, choosing style over function, and attempting complex plumbing or electrical work without proper licensing. Always prioritise quality structural elements, even when working with tight budgets.

Which bathroom fixtures give the best value for money?

LED lighting, water-efficient showerheads, and quality tapware provide excellent value through energy savings and durability. Bathroom resurfacing of existing tiles and vanities often delivers better value than complete replacement.