Categories
Construction

Adding a house verandah: Boost your home’s value and comfort

Ever wondered how to make your Aussie home stand out? Enter the verandah–your home’s new best space. It’s not just a pretty face; adding a verandah to your house can transform your living space, boost your property’s value, and give you a perfect spot to enjoy our gorgeous weather. 

You could be sipping a cold one or hosting a barbie, and doing these on your verandah adds that extra oomph to your home. Let’s get into how attaching a verandah to your house can upgrade your place from ordinary to extraordinary.

How a verandah adds value to your home

a spacious garden verandah
Verandahs serve as an extra entertainment area for your family | Source: iStock

Well-done verandah designs become more than just an attractive addition to any home. They can significantly enhance your space’s overall value and appeal. 

Enhances the curb appeal of your home

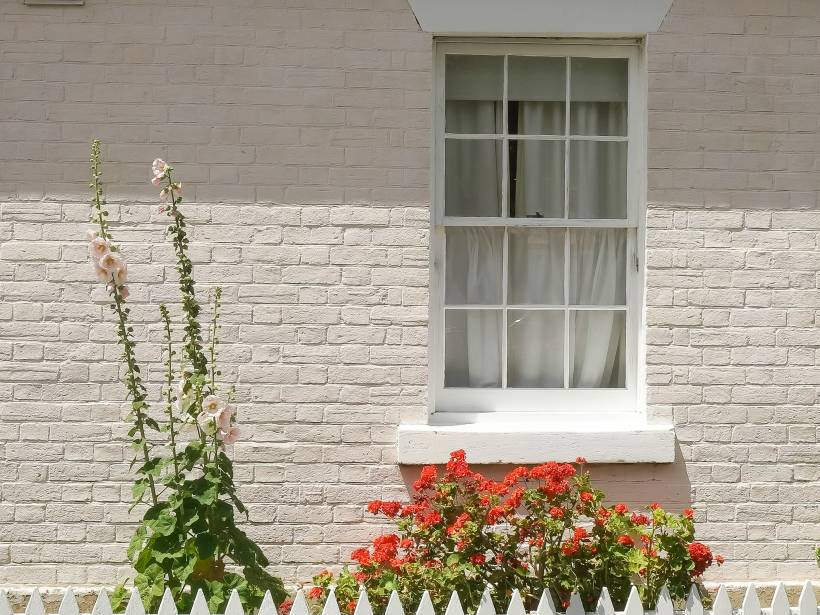
A verandah instantly boosts your home’s kerb appeal with its welcoming and visually appealing facade, increasing its desirability and market value. Decorated with lush greenery, elegant lighting, or stylish furniture, a verandah serves as an inviting entry point that leaves a lasting impression on visitors and potential buyers alike. 

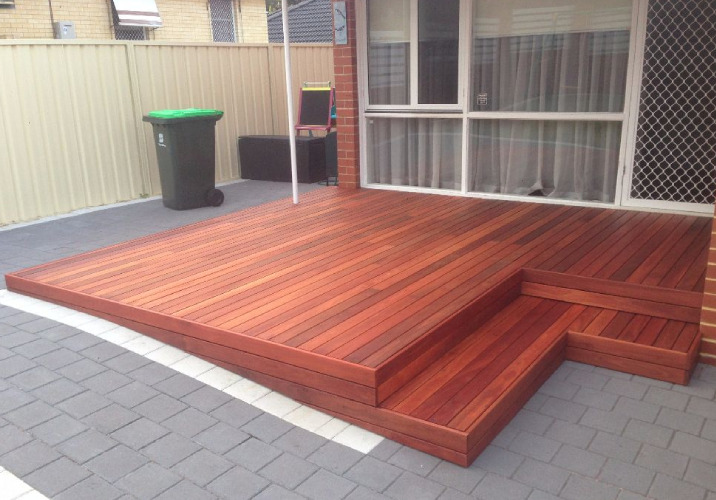
Additional living and social space

One of the more practical benefits of a verandah is the additional living space it provides. Backyard verandahs can be used for alfresco dining, a reading nook, or an area for entertaining guests, friends, and family. You can also have a front verandah to create a unique and memorable welcoming area for your guests. 

Creates a connection with nature

Verandahs let you experience the beauty of nature from the comfort of your home, seamlessly connecting your indoor and outdoor spaces. This integration with natural surroundings can improve your quality of life, providing a tranquil space to relax and unwind.

Additionally, a verandah provides an excellent opportunity to incorporate greenery into your home. By decorating it with potted plants, hanging baskets, or even small gardens, you can create a lush and vibrant space that enhances your connection with nature.

Gives protection from the weather

Given its structure, verandahs offer valuable protection from various weather conditions. It provides shade on hot, sunny days, and acts as a sheltered outdoor space during rainy weather. 

An energy-efficient choice

A verandah provides shade for your home, keeping it cooler in summer and reducing air conditioning costs. In cooler months, it provides a sheltered, warm space. This makes your home more comfortable all year while potentially lowering energy bills.

Verandah lighting and ambience 

a verandah with beautiful string lights
Outdoor lighting upgrades the style and beauty of your verandah | Source: iStock

Strategic outdoor lighting can significantly enhance the ambience of your verandah and turn it into a cosy and inviting space that can be enjoyed at any time of day or night. If you’re currently struggling with ideas to spruce up your verandah, try the following ideas below!

Layered lighting

Ambient lighting provides overall illumination. You can incorporate layered lighting by mixing ambient, task, and accent lighting together to create a balanced and adaptable environment for your verandah. 

String lights

String lights outline the verandah’s structure, adding definition and highlighting architectural focal points. The gentle illumination also fosters a relaxing and inviting environment, perfect for evening gatherings or quiet outdoor nights.

Decorative lighting fixtures

Selecting decorative lighting fixtures, like chandeliers, pendant lights, or stylish floor lamps, can add a unique character to your outdoor verandah, transforming it into a visually stunning space. 

Retractable awnings or canopies

Enclosing a verandah makes your outdoor space more protected against harsh weather. But for a more flexible verandah, you can consider installing retractable awnings or canopies which can be extended or retracted based on the weather. 

Transparent or semi-transparent roofing

Using materials like polycarbonate or glass for your verandah roof allows natural light to flood the space during the day while providing protection from the elements. These materials can be treated to reduce glare and UV rays for comfort.

Verandah roofing options

Modern australian home front at dusk
Select reliable roofing for your house verandah | Source: iStock

When designing or renovating your beautiful house with verandahs, the roofing choice and work play a crucial role in defining the overall look and functionality of the space. To help give you an idea of which style is best for you, consider the following:

Bullnose roof

A bullnose roof is a classic and elegant choice for verandahs, and is characterised by its curved roof edges that extend beyond the verandah’s perimeter. This style gives a touch of traditional charm to any home and is quite popular in heritage and colonial-style houses.

Flat roof

Flat roofs are highly functional, providing a straightforward and efficient way to cover the verandah. This design is noted by its clean lines and unadorned surface, creating a streamlined appearance that integrates seamlessly with modern architecture. 

The flat surface can be used for installing solar panels or creating a rooftop garden, adding further versatility to your outdoor space. 

Hipped roof

Hipped roofs have slopes on all four sides that converge at the top, creating a pyramid-like structure. This roofing is known for its stability and durability, making it an excellent choice for verandahs in areas prone to strong winds and storms.

The gentle slopes of a hipped roof provide effective water drainage and good sun protection, making the verandah a comfortable outdoor living space year-round. 

Gable roof

A gable roof features two sloping sides that meet at a central ridge, forming a triangular shape. This classic roof design is highly versatile and can complement various architectural styles, from traditional to contemporary.

The steep pitch of a gable roof allows for efficient water runoff, making it ideal for areas with heavy rainfall. The high, open ceiling created by a gable roof can also enhance the sense of space and airiness on your verandah.

Skillion roof

A skillion roof, shed roof, or mono-pitched roof has a single, sloping surface, and is a popular option for contemporary architecture. The simple slope of a skillion roof allows for easy water runoff, reducing the risk of leaks and water damage. This roof costs less and is relatively simple to construct, making it an attractive option for homeowners on a budget.

Hiring a professional builder 

When it comes to adding a verandah to your home, hiring a professional builder is a smart move. These pros know the local building codes and building regulations like the back of their hand so you can be sure they’ll comply and ask you to secure all the necessary permits before starting the project. 

Moreover, they’ll ensure your verandah matches your home’s style and meets all safety standards. While DIY might seem tempting, local construction and building businesses will save you headaches in the long run. Plus, they can often source quality materials at better prices. Remember to check for proper licencing and insurance before you sign on the dotted line.

Level up your property

In the end, adding a verandah to your home is a brilliant way to enhance your property and upgrade your lifestyle, as well as make better use of your outdoor space. It’s an investment in comfort, style, and property value. 

To make sure you get it right, don’t hesitate to call a professional verandah builder or renovator. They’ll help build a stand on your verandah where you can enjoy barbies and social nights comfortably. 


FAQs on adding a verandah

Does a verandah cool a house?

Yes, a verandah helps cool your home by providing shade and reducing direct sunlight. This can lower indoor temperatures and cut down on aircon costs, especially during our scorching Aussie summers.

What are the fancy trim things on an old house verandah?

Those decorative elements are called fretwork or lacework. They’re typically made of wood or cast iron and are a hallmark of traditional verandah architecture, especially in Victorian-era homes.

What is the use of front verandah in a house?

A front verandah serves multiple purposes: it creates a welcoming entrance, provides a spot to relax and watch the neighbourhood, offers shelter from sun and rain, and adds character to your home’s facade. 

Categories
Construction

Limewash colours for exterior painting

Traditional stone, brick and cement render exteriors are already stunning on their own, but for added dimension, try out a limewash paint exterior that can add depth and a sophisticated finish to your home’s outdoors. Exterior lime wash is a breathable material made of slaked and aged lime, water and natural pigments.

The matte finish of lime wash looks classy and elegant, and the natural soft, weathered patina over time and the hygienic properties make it a functional paint. 

If you want to decorate your new home’s exterior to transform your concrete panels or exterior walls, here are some ideas for limewash paint colours that can make your home — or your home’s new extension — a neighbourhood standout.

Limewash colours for your exterior walls

Earthy tones

an outdoor seating area agains a terracotta limewash exterior wall
Create a moody outdoor ambience | Source: Canva AI image generator

For a soft, weathered patina reminiscent of classic homes in regions throughout the Mediterranean, go for earth tones like brown. As the lime wash ages, it adds depth to your home’s exterior, giving it a unique and unmistakable vintage quality that adds character.

Stone grey

One of the most traditional lime wash colours is grey, a classic that leaves a cool and sleek vibe that feels chic in home exteriors. It might feel counterproductive to paint cement grey, but the finish of grey lime wash paint leaves an elegant and smooth surface that gradually washes into a soft and natural tone. Homes with darker themes can also benefit from grey as an accent.

Sand beige

a house exterior painted beige limewash
Keep your house theme neutral yet full of character | Source: Canva AI image generator

Another original lime wash colour, a sandy beige hue lends itself well to soft surroundings. Paint your exterior walls beige to introduce brightness to your home’s exteriors without having to bring in bolder colour variations.

Warm reds

Despite its striking quality, red is one of the most popular deeper colours for limewash exterior paint. As it ages, it creates a soft, weathered patina reminiscent of brick, and with the right shade, it can create a unique Mediterranean vibe that separates your home from the rest of your neighbours.

Sunny yellows

an outdoor terrace against yellow limewash exterior walls
Showcase your bring character | Source: Canva AI image generator

Whether you’re going for the ultra-bright tones or the more subdued and mustard hues, yellow will be a standout limewash paint colour. Painting cement walls yellow can turn the space from industrial to inspiring—a colour that can make your outdoor spaces feel cheerful.

Clean whites

Modern spaces deck out their unpainted masonry surfaces with white paint to create a clean feeling. The best thing about aged limewash paint in white is that its depth makes the usual white wall interesting. While white limewash paint on the exteriors is bright, the lime wash remains soft and pleasing to the eye, making it more sophisticated.

Natural greens

green limewash exterior walls with brush stroke texture on a two-toned house
Paint your exterior walls a calming colour | Source: Canva AI image generator

If you’ve got many plants in terracotta pots all around your outdoors, a green limewash paint can perfectly elevate your space. This exterior lime wash colour is one of the deeper colours that also creates elegance in your space, so use it for places like your grotto or your garden for a natural feel.

Bright blues

As one of the less traditional limewash colours for exterior painting, blue is fun and makes your outdoors feel vibrant and unique. Take note that while all limewash remains soft, blue, in particular, gradually washes off into a greyer hue, so be sure to either repaint often or be ready to live with a grey wall later on.

Use limewash paint to spruce up your house exterior

Who knew a mix of slaked and aged lime, water and pigments could make a paint that creates timeless walls with natural antibacterial qualities? From calm earth tones to vibrant reds and blues, use exterior lime wash paint for your next painting project to turn homes with the most absorbent building stones into curbside statements. The best part is that lime wash just gets better with age.

Consider using the unique lime-based coating for your next home renovation. However, this paint can be tricky to apply beautifully, whether on unglazed bricks or masonry blocks. You can try to paint it yourself or you can hire a professional painter that can apply the limewash properly and give the paint job a traditional and elegant vibe. 

You can also hire a colour consultant to help you achieve that perfect look for a distinctive home.


FAQs on lime wash painting

Can limewash paint be used outside?

Limewash paint has been used outdoors for centuries and is a great way to add texture and interest to your walls. Make sure you use the correct limewash paint for exterior brick and cement walls, as interno lime wash is only for indoor use and can deteriorate quickly.

How long does limewash last on exteriors?

The best thing about lime wash is that it can last decades. In the Mediterranean, where it’s popular, the weather makes it last about twenty to thirty years. However, it might be best to repaint every five years if you want to touch up the pigment on the walls.

Can I paint over an exterior limewash paint?

Painting over limewash is easy. A high-pressure washer can quickly remove the paint from the surface. If you’re reapplying limewash for a touch-up, you can remove any flaking limewash before putting the paint on the clean surface. If you’re unsure how to reapply over limewash, consider hiring a professional to do the job.

Categories
Construction

How to choose the best paint for exterior brick walls

Did you know?

Bricks must be completely dry before painting; allow at least three rain-free days in the summer and up to a week in the winter for proper drying.
Paint colour affects your home’s temperature—lighter shades reflect heat while darker colours absorb it, potentially reducing the need for air conditioning by up to 20%.
Quality masonry primer is non-negotiable; it’s the most common cause of paint failure on brick surfaces.

Brick walls give homes a timeless charm that many other surfaces can’t match. Their texture and character add warmth and depth to any house design. Over time, however, brick can appear worn or outdated as design trends shift, but the best paint for brick exterior can change all that.

According to independent studies, exterior painting projects increased property values by an average of 5%, making it one of the most cost-effective home improvements available to homeowners. In this guide, we’ll show you the best paint for an exterior brick house, helping you create a home that stands out with its beauty and character.

Why painting your exterior brick walls matters

A beautiful cottage home. | Source: iStock

Painting your brick walls gives your home an instant facelift while boosting its value, potentially increasing your property’s selling price. This is huge, especially if you’re trying to maximise its value before listing it on the market.

But paint does more than just make your home look good. It creates a protective shield against the worst weather and other external factors. Quality exterior coatings for painted brick homes stop moisture from seeping into your brickwork, block damaging UV rays, and prevent brick from cracking during freeze-thaw cycles (particularly in colder regions like Tasmania and parts of Victoria).

This protection helps your brick last longer while letting you put your personal stamp on your home. 

Understanding exterior brick and the types of paint that work best

A man painting the brick exterior of a house. | Source: iStock

Brick walls aren’t like other surfaces—they breathe and move with the weather. By nature, brick is porous, which means it has thousands of tiny holes that soak up water when it rains and release it when conditions dry out. This attribute means the brick expands in hot weather and shrinks when temperatures drop. 

Brick’s unique behaviour means you can’t just use any paint. Regular house paint can trap moisture inside your bricks, leading to bubbling, peeling, and even damage to the brick itself. The best breathable paint for exterior brick works with the brick’s natural properties rather than fighting against them.

Therefore, the paint you pick affects how your home looks today and how well it holds up over the next decade. Here are some common choices:

Elastodynamic paint

This high-performance coating actively adapts to brick movement and prevents cracking. Its thick, flexible layer bridges existing cracks and creates a watertight seal that stops water infiltration. Elastodynamic paint withstands extreme weather conditions and provides protection for up to 10 years due to its substantial thickness.

Best for: In Australia, the best paint for brick exterior is usually elastodynamic paint because it works well with homes subject to big temperature swings. Elastodynamic paint is also ideal for old homes.

Acrylic latex paint

This affordable option allows trapped moisture to evaporate quickly from porous brick, reducing damage from freeze-thaw cycles. You’ll typically need just one coat, making application faster and easier. While durable, acrylic latex tends to show dirt, grime, and mildew more readily than other finishes.

Best for: Many budget-conscious homeowners in milder climates consider acrylic latex the best paint for exterior brick walls, since dirt accumulation in these areas is less problematic.

Limewash paint

This centuries-old, eco-friendly formula combines crushed limestone, natural pigments, and water to create a distinctive weathered appearance. Limewash penetrates the brick rather than forming a film on top, allowing the surface to breathe naturally. A professional application delivers the best results for this specialised finish.

Best for: Heritage homes or properties where owners want an authentic, vintage aesthetic using environmentally sustainable materials.

Silicone masonry paint

Unlike standard masonry paints, silicone-enhanced formulations offer superior breathability while actively repelling water. The incorporated silicone resins keep brick surfaces completely dry without trapping moisture, contributing to exceptional durability with a potential lifespan that could last a decade or more.

Best for: Properties in high-rainfall or humid regions where moisture protection is non-negotiable but breathability must be maintained.

Enamel paint

This robust option delivers a glossy finish that resists chipping and peeling while blocking UV rays and moisture. Many manufacturers now offer high-temperature enamel formulations specifically designed for brick, ensuring they withstand extreme conditions without fading or deteriorating.

Best for: Ideal for painting a brick house, garden wall, patio, or other high-traffic exterior features where durability and a polished appearance are priorities.

Things to consider when choosing the best paint for exterior brick walls

House terrace with white brick walls. | Source: iStock

But wait—don’t go out yet and buy the next paint you find. Consider these key factors to get the best results for your brick home (and save yourself a trip):

  • Weather resistance: Australia throws everything at your home—baking sun, heavy rain, and wild temperature swings. Pick paints that can handle these conditions without peeling or fading.
  • Breathability: Brick needs to ‘breathe’ so moisture doesn’t get trapped. Choose paints that let water vapour escape, or you might end up with mould and damage to your walls.
  • Colour and finish: In general, lighter colours reflect heat better. For finish, satin works well for most homes; matte hides imperfections; gloss makes cleaning easier but shows flaws. For style inspiration, look at exterior paint colours for brick homes trending in your area.
  • Durability: Good exterior paint should last 7 to 10 years without major problems. Check the warranty; paints with longer guarantees usually perform better.
  • Brick condition: Take a good look at your walls first. Fix any cracks, chips or crumbling mortar before painting. Also check how porous your brick is by splashing some water on it. If it soaks in quickly, you’ll need a good primer and possibly more paint. For more complex repairs, consider hiring a builder.
  • Paint quality: Better quality paints cost more upfront but usually last longer and cover better. Check how many square metres a litre covers and read reviews from other homeowners.

When in doubt, ask at your local paint or hardware store. Describe your specific brick type and home conditions, and they can recommend products that have worked well for similar projects.

5 best paint colours for exterior brick walls colours for brick houses

The colour you choose when painting exterior brick can dramatically transform your home’s character. Here are five outstanding options that have proven themselves in Australian homes:

1. Timeless white

White brick wall with hanging plants. | Source: iStock

Nothing beats white for versatility and kerb appeal. Besides showcasing your home’s architectural features, it’s also a canvas that lets you express your style through colourful gardens, statement doors, or dramatic lighting. Each creates a different feeling for your home and community.

2. Warm terracotta

Cacti in pots against a brick wall. | Source: iStock

This rich, earthy hue celebrates brick’s natural heritage and delivers that sought-after Mediterranean villa feel. Choose terracotta if you want to showcase your landscape work; it makes everything from native grasses to timber accents look deliberately chosen.

3. Contemporary grey

A grey brick wall with window. | Source: iStock

Grey has firmly established itself as the modern classic for exteriors. From soft pewter to dramatic charcoal, these sophisticated neutrals create a striking backdrop for metal fixtures and landscaping. Since grey falls in the middle of the brightness scale, dust and dirt don’t contrast sharply with these shades, making them less noticeable.

4. Shades of blue

A bright blue brick wall with a window. | Source: iStock

Blue exterior bricks make a confident statement that could set your home apart in a big neighbourhood. Whether you fancy a breezy coastal blue or a dramatic navy, these tones create magnificent contrast against white trim.

5. Sage green

A calming sage green brick wall. | Source: iStock

Sage’s understated, nature-inspired colour delivers a peaceful presence in any street. It visually connects your home to the surrounding nature, absorbing light rather than reflecting it.

If you’re not sure what shade to select, read our guide on how to match paint colour to your existing exterior elements. In the end, the best exterior paint for brick homes comes down to your personality and style. 

Should I paint my own exterior brick walls or call a pro?

A red brick wall for a pop of colour. | Source: iStock

The paint-or-pay decision boils down to your skills, time, and budget. Here’s what to consider:

DIY Painting

Painting brick yourself cuts costs in half but demands serious commitment. The average home needs 3–5 full days of work for professionals, but DIYing it can take up to 4 weeks, even longer if you’re doing full-fledged home renovation. Success hinges on thorough prep: power washing, mortar repairs, and quality primer.

You also need to budget for extra paint for exterior bricks because brick drinks it up. Also, invest in good rollers, brushes, and safety equipment. 

Hiring a professional

Pros bring speed, expertise, and commercial equipment that transform results. They spot hidden issues like rising damp or structural cracks before they become major problems. A standard four-bedroom brick home costs $4,500 to $13,000 to paint professionally, but this includes warranties, insurance, and peace of mind.

For heritage properties, multi-story homes, or damaged brick, professional painting work becomes essential rather than optional.

For more extensive home renovation projects, hiring professionals makes sense. They bring specialised equipment and knowledge that you’d otherwise miss, and might even add precious years to your paint job’s life.

Painting your exterior wall, brick by brick

Painting your brick exterior does two important jobs at once: it protects your walls from the sun while making your home look chef’s-kiss-fantastic. Most people underestimate how much paint choice matters for this part of the house, as excellent paint selection lets your brick breathe while keeping rain and sun damage away.

When you’re ready to give your exterior brick walls a refresh, make sure to check Oneflare to hire qualified painters who understand the nuances of working with bricks for a lasting and beautiful finish. 


FAQs on exterior paint finishes

What paint do you need for brick walls?

Exterior brick should be painted with porous paint so that it can breathe. Use high-quality paint and apply a conditioner or primer first, followed by the breathable exterior paint for best results.

Do you need a primer to paint the exterior brick?

Whether you’re tackling older or newer brick, indoors or out, using a primer is a non-negotiable step for a job well done. The real trick is to ensure primer bonds with the brick, getting into all those nooks and crannies. The stronger that bond, the better your paint will stick, giving you a professional finish that lasts.

How do you prepare exterior brick for painting?

Clean the brick thoroughly with a pressure washer and allow it to dry completely (at least 24 hours). Repair any damaged mortar joints. Apply a quality masonry primer designed specifically for brick. Mask off areas you don’t want painted, including windows, doors and fixtures.

How much does it cost to paint exterior brick walls?

For DIY projects, expect to spend roughly up to $8,000 for a three-bedroom home. The costs could be much more (up to $20,000), depending on your home’s size and condition. For a detailed breakdown, see our cost guide for hiring painters.

What does ‘breathable’ paint mean?

Breathable paint allows water vapour to escape the brick while keeping liquid water out. This feature prevents moisture from becoming trapped inside the brick, which can cause damage through freezing, efflorescence (white salt deposits), or mould growth.

Where can I buy good quality exterior brick paint?

Quality masonry paints are available at hardware stores, paint specialty retailers, and home improvement centres. Look for stores with dedicated paint departments that offer expert advice on product selection for your specific brick type. Many locations also provide colour-matching services and can help you determine the right amount of paint for your project.

Categories
Construction

The 5 best exterior paint finishes for homes

Giving your home exterior a fresh coat of paint provides many long-lasting benefits. Various exterior paint finish types add durability and aesthetic value to your home. Moreover, they can protect your home from weather damage while giving it a glow or a noticeable shine. 

In addition, the best finish for exterior paint can protect siding and trim and ensure longevity. This article will guide you through the most popular exterior paint finishes for homes to help you make the best choice for your house painting project.

Understanding paint finishes

A paint’s finish refers to its appearance when it has dried on the surface. The kind of exterior paint finish you choose will impact the longevity of your siding, trim, and other exterior surfaces. In addition, the right sheen can instantly boost your kerb appeal.

When painting a wall, it’s more crucial to choose the right exterior paint finish than to select an interior finish. The paint finish must withstand day-to-day atmospheric conditions such as cold and hot weather. Moreover, outside dirt and debris can whittle away at inflexible paint over time. 

Considerations when choosing a paint finish

A painter painting the exterior wall / Source: iStock

Exterior paint finishes vary in the ratio of resins, binders, and pigment levels in the paint. When choosing a paint finish for your home exterior makeover, consider these three factors:

  • Luster: This affects how much light reflects on the painted surface. Finishes with low reflectiveness are suitable for hiding blemishes. Meanwhile, finishes with high lustre are best for illuminating places with little sunlight.
  • Appearance: The appearance of paint varies upon drying and the level of sheen a finish has. Matte paint reduces glare and blends with surroundings due to its low reflectiveness. Glossy paint can bring emphasis to outdoor architectural details.
  • Wear and tear: High-traffic areas such as front doors may require paint with higher durability and sheen. More flexible paint finishes, such as semi-gloss, are resistant to stains and are easily wipeable. Less durable finishes, like eggshells, are better for siding.

Does exterior paint come in different finishes?

Yes, There are five exterior paint sheens typically used in homes. Deciding on the best paint finish for exterior walls can be confusing at first. Here is a simple guide comparing the most popular exterior paint finishes used in today’s homes. Each finish has unique advantages and disadvantages, so take note of the following comparisons in your next home makeover.

Best exterior paint finish types

Flat or Matte 

A professional painter using a paint roller / Source: iStock

If you are looking for the perfect paint finish for retouching your paint exterior, look no further than flat or matte finishes. Its velvety and non-reflective appearance can hide imperfections on older walls. This finish performs best on homes in sunny areas. In addition, flat paint finishes are not advisable on homes in harsh summers and winters due to their low durability.

Best recommended for: Concealing flaws on older wooden siding and trim. 

Advantages:
Fast drying time
Smooth texture
Goes well with contemporary homes
Easy to retouch
Disadvantages:
Tough to clean
Not suitable for extreme weather conditions
Unappealing on homes with no sunlight

Eggshell 

Eggshell paint finishes are one of the most popular choices for exterior home makeovers, thanks to it being within the right balance of flatness and sheen. Eggshell paint gives your home a gentle and pleasant glow. 

In comparison to matte paint, it is more resistant to harsh weather conditions under sunlit exteriors. In addition, eggshell paint lends itself well to outdoor DIY paint applications. 

Best recommended for: Low reflective finishes while also concealing small imperfections.

Advantages:
Subtly enhances trim details
Beginner-friendly application
Creates an inviting appearance on the exterior than flat paints
Disadvantages:

Challenging to touch up
Not as durable compared to gloss finishes

Satin

Painting the walls of a house beige / Source: iStock

If you are looking for a durable finish for your exterior, a satin paint finish is a great choice. Its moisture-resistant and reflective formulation makes it a versatile option for exterior as well as interior painting. 

Satin paint is resistant to dirt, mildew, and peeling. It’s also easy to clean, making maintenance a breeze. For the best results, satin paint must be mixed thoroughly before application to keep the formulation consistent.

Best recommended for: Achieving a balanced, long-lasting sheen on your trim. 

Advantages:
Durable and stain-resistant
Moderate sheen
Works well in hot climates
Disadvantages:

Requires thorough mixing to achieve a professional-looking finish

Semi-gloss

Semi-gloss paint is the way to go if you want to give your home exterior a noticeable shine. This is a good choice for painting over surfaces that may experience significant wear and tear, like trim, shutters, and front doors. The tough and shiny finish that semi-gloss paint has makes it easier to clean than satin or eggshell paint. 

Take note that semi-gloss paints are often oil-based, which may emit harmful volatile organic compounds (VOCs). When using glossy paints, make sure that the surface is prepared well to prevent highlighting any dings or blemishes. 

Best recommended for: High-traffic areas such as garage doors, railings, and window frames.

Advantages:

High weather and moisture resistance
Great for high-traffic areas
Easy to clean
Disadvantages:
Challenging to apply
Makes imperfections more visible
Not suitable for large surfaces like siding
May contain environmentally harmful materials

High-gloss

Painting the garage door grey / Source: iStock

In terms of highlighting architectural details, nothing comes close to the sheen of high gloss paint. This type of sheen offers the greatest durability of all the finishes, making it a great option for emphasising intricate architectural details on your home exterior. 

However, high gloss paint can make a surface look plasticky when applied on a large exterior feature such as siding. Hence, it is typically used only for features such as trim and doors. Also note that richer paint, such as semi-gloss and high gloss paint, can chip away if not applied properly.

Best recommended for: Drawing attention to decorative features and accents.

Advantages:

Maximum durability
Rich colour on exterior details
Easy to maintain
Disadvantages:

Expensive
May highlight blemishes
Gives a plasticky appearance on large surfaces

Start planning for the perfect sheen

Colour is not the only consideration when choosing the perfect paint sheen for your home exterior. The right exterior paint finish can ensure your property is not only visually pleasing but also durable and gleaming just right.

Paint finishes are just as important in ensuring a home makeover that will last for years to come. Consult with a professional painter for your next house painting project for a successful painting job. 


FAQs on exterior paint finishes

Is low sheen or matte better for weatherboards?

Both finishes are good options for weatherboards. Low-sheen finishes such as eggshell paint can add a subtle shine to your weatherboards. This adds a layer of durability against the elements. Eggshell paint is also easier to clean than matte paint. On the other hand, matte paint is easier to apply. It requires fewer coats to paint and dries faster. 

What type of finish is best for exterior paint?

The best sheen for exterior painting depends on your personal preferences and project needs. 

If you live in a climate with harsh weather conditions, durable finishes such as satin or semi-gloss may be the better choice. Meanwhile, low-lustre paints like eggshell or matte are preferred for their ease of use. Semi-gloss or high-gloss finish are great choices if the surface you are painting tends to experience wear and tear. 

You can take your personal preferences and project requirements into account when considering the cost of professional painting.

Should exterior house paint be flat or satin?

Choosing flat or satin paint is a question of appearance and durability. Here’s a quick comparison between the two:

  • Flat paint helps your exterior achieve a more natural look. On the other hand, satin paint leaves an attractive glow on the surface. 
  • Flat paint is easier to apply, while satin paint has better cleanability. 
  • In mild weather conditions, flat paint can be a great option. However, satin paint is a better choice for homes in tougher weather conditions since it is more durable than the former.

Should exterior paint be gloss or satin?

While both are suitable choices for exterior painting, knowing the better choice will depend on the area being painted. High gloss finishes will look plasticky and unnatural on the siding, while satin paint is more understated and inviting. 

Moreover, using a high gloss paint is ideal for fences, doors, and other outdoor details. If you are looking for a more economical paint with a balanced sheen and durability, satin would be the better option. 

Categories
Construction

Moody house exterior paint colours

The exterior paint colours you choose for your home go beyond mere aesthetics; they shape the very mood and character of living spaces. Whether you opt for the allure of deep blues, the intensity of charcoal greys, or the warmth of earthy tones, your house exterior can make your property inviting and appealing. 

If you’re looking to paint your house yourself, then let us help you! In this guide, we will journey through different colour schemes for home exteriors. You can not only enhance your home’s aesthetics through paint but also breathe life into its unique charm.

9 Moody exterior house paint colour ideas

1. Midnight blue

Midnight blue house exterior / Source: iStock

Deep shades of blue can be reminiscent of nighttime, elegance, and a tinge of mystery. It’s best to pair this shade with lighter accent colours for a timeless and classic aesthetic. Opt for a colour palette of crisp whites or creams for your home’s different architectural features, such as the mouldings or posts, to better suit the midnight blue base colour.

2. Mystical grey

Mystical grey is a versatile colour between cool and warm undertones, creating an intriguing and ever-changing appearance. Painting your house exterior with grey paint is ideal for those looking to add a touch of mystery, modernity, and enigmatic charm to a home.

3. Forest green

Turn your home into something you and other people can find relaxing by painting your home exterior forest green. Not only do they make for great exterior house paint colours, but they also bring nature’s serenity and calm. Pair these colours with shades and hues you can easily find outdoors, like brown, yellow, or white. 

4. Charismatic charcoal

Modern house in white and charcoal colour palette / Source: iStock

The dark and brooding shades of charcoal black bring confidence and drama to your house. It’s not the usual shade homeowners go for, making it a bold choice for those who want to give a contemporary edge to their home’s exterior.

5. Bold maroon

If you want to make your home exterior a canvas for confidence and energy, try painting it a dark reddish purple like maroon. As a deep and sultry colour, maroon can effectively bring that luxurious yet at-ease feel to your house’s appearance. 

6. Rustic brown

If you’re going for a more vintage vibe, a dark, rustic brown or beige colour turns your home exterior into a warm, cosy property. It also provides a timeless design for your home that promotes an inviting and welcoming atmosphere when you pass it or stand by your front door. 

7. Muted sage

Big sage house with an entrance deck / Source: iStock

For a more subtle home that still captures visitors’ attention, muted sage can be your unique exterior paint colour scheme of choice. With its green base tones mixed with a bit of grey, this colour creates a calming sight and offers an understated exterior that blends well with the natural surroundings. 

8. Elegant aubergine

This rich, eggplant-inspired dark brownish-purple colour adds opulence and uniqueness to your home. It’s not a usual colour that homeowners request for their exterior, and that’s why it’s a bold choice that’s definitely eye-catching and leaves a lasting impression. This daring choice exudes luxury and creativity and elevates your home from ordinary to extraordinary.

9. Ocean teals

Teal, a light blue shade, makes the perfect house exterior paint colour if you’re after hues reflecting serenity and coastal charm. It’s a versatile colour that works well with different architectural styles and facades. Additionally, it is great to pair with neutral or pastel accents, such as in your window or front door trims. 

Tips for selecting a paint colour for your home’s exterior 

If you’re considering giving your home exterior a dark and moody makeover, you should keep a few things in mind.

Consider the surroundings

Before painting your home exterior, have a thoughtful look at your current neighbourhood and immediate surroundings. Your goal should be to ensure your home works with the environment, not clash with it.

Have complementary trim and accents

Choose complementary colours for trim, accents, and other exterior details to create contrast and enhance your property’s overall design. Lighter trim can provide balance and highlight architectural features.

Test different paint samples

Painting your home is a big decision. Before you commit to a specific colour, try out your desired colour on a small part of your exterior. Evaluate how it appears under different lighting conditions and weather patterns to ensure it maintains your desired effect.

Assess the climate in your area

Darker colours absorb more heat than lighter ones, which can affect the temperatures inside your home. Before fully committing to painting your house exterior, be prepared for the potential impact it can have on your home’s energy efficiency and subsequent costs of maintenance. 

Consult a professional 

If you’re still unsure about the best colour for your home exterior or the painting process, consider consulting a professional painter or a colour expert for guidance and cost inquiry. With their expertise in their craft, they can readily help walk you through the entire process so you can achieve the desired results.

Moody hues, endless possibilities 

Like light colours, deep and moody shades can create a sense of depth to any home exterior. Not only can they offer a cosy and unique atmosphere, but they help amplify its owners’ personality and character.

While the prospect of choosing and applying moody colours to your home’s exterior may seem daunting, the journey becomes infinitely easier with the help of professionals in the field. Their knowledge of colour selection, as well as precise execution, can turn your vision into a reality! 


FAQs on moody exterior paint colours

How do I choose exterior paint colour combinations?

Choosing exterior paint colour combinations involves considering your home’s architectural style, surroundings and the dominant colour for the main body of the house.

Select accent colours for trims and architectural details to provide contrast and ensure they complement the roof colour. Test paint samples in different lighting conditions and consider the climate’s impact on colour choices.

Should exterior paint be lighter or darker?

Exterior paint depends on various factors, including your personal preferences, architectural style, climate, and the effect you want to achieve.

Your personal style and aesthetic preferences play a significant role. Some people prefer the timeless, classic look of lighter shades, while others are drawn to the drama and depth offered by darker colours.

What is the best paint colour for a home exterior?

Versatile options include neutral tones, whites or creams, earthy colours, blues, greys, greens, reds, and even black or dark grey for accents. To make the right choice, consider your home’s features, surroundings, and climate, and test paint samples in different lighting conditions.

Categories
Construction

How to clean concrete

Concrete is everywhere, its good to know how to keep it clean and safe

Concrete is a versatile flooring material that is designed to withstand decades of wear. Proper care and maintenance are required to keep any type of concrete from becoming scarred or cracking. Whether you have a concrete driveway, patio pavers, or polished concrete in a home, how to clean concrete floors is key in keeping your concrete looking spectacular.

What are the types of concrete cleaners?

There are many different products that can be used to clean concrete. Its completely up to personal preference on how to clean concrete floor surfaces. These include:

  • Baking soda
  • Soda water
  • Bleach
  • Detergent
  • Lemon juice & vinegar
  • Commercial concrete cleaner
  • Degreaser

 The type of dirt that your floors are exposed to has a lot to do with how well products work. For example, simple dirt and grass stains can be removed with a solution of detergent and water. Tougher stains caused by petroleum-based products require a harsher chemical, such as degreaser.

Be sure to read the labels of commercial cleaning concrete cleaners before applying them to your concrete surface. Some cleaners contain muriatic acid and can require a new coat of sealant to avoid future stains.

Many people select to go with a natural method of cleaning concrete as opposed to heavier detergents that can cause damage to surrounding plants and animals. The natural method can work well if you are willing to follow a safer format of natural cleaners. 

Clean concrete pavers / Source: JRP Landscapes

What materials and tools are needed to clean concrete?

Possible materials and tools for undertaking a concrete cleaning project can include:

  • Broom
  • Dustpan
  • Mop
  • Bucket
  • Spray Bottle
  • Gloves
  • Safety glasses
  • Workboots
  • Pressure hose if necessary
  • Cleaning products
  • Scrub Brush (not metallic)
  • Cat litter
  • Power washer if necessary

Targeting specific areas may require certain materials and tools to make the job easier. For example, oil stains in a driveway can be removed quickly with a sprinkling of cat litter on the puddle of oil. A spray bottle can come in handy for treating individual spots that are soiling your concrete. A scrub brush can get into cracks to loosen dirt and oil.

How to clean concrete

 1.Sweep – Always start with a debris-free surface before treating with cleaner. Normal sweeping or blowing off loose dirt is usually enough to prepare your concrete.

2. Rinse – Using a garden hose, spray down the surface to loosen any dirt that can be caught in the porous parts of the concrete.

3. Clean – Depending on your method of choice, prepare your cleaner. Pretreat any spots that are darker than the normal dirt buildup. A power washer is the easiest way to clean outdoor concrete. 

4. Seal – sealing is an additional option for added stain protection. some concrete surfacess may not be suitable for sealant

Concrete used for verandah / Source: Home Concrete Solutions

How do you remove different types of stains?

  • Mould, mildew, or moss – You can search for a concrete cleaner that is made for eliminating mould, or a solution of bleach and water will do the trick. A certain amount of scrubbing is required to get down into the pores of the concrete. Let the mixture sit for a few minutes for good penetration. Rinse down and repeat if necessary.

Because mold is an organic source of dirt, an organic type of cleaner can remove its presence. Vinegar is an excellent source of destroying mold but should be treated with a low-solids solvent-based sealer to allow for better breathability. 

  • Grease or oil stains – Any type of soft drink will loosen and remove grease stains. The three ingredients of carbonic acid, phosphoric acid, and citric acid found in soda work together to break down the grease. Scrubbing with a metal brush may be needed.

How to clean concrete garage floor can be quite different from how to clean polished concrete that may be located inside. Just as how to clean concrete pavers may differ from how to clean concrete driveway finished. Finding the right materials and products depend on the nature of the concrete. 

  • Removing rust stains – Old rust stains may seem impossible to remove from concrete, but the right chemical reaction will tackle them nicely. A combination of white vinegar and lemon juice, undiluted, will attack old and new rust spots with a little elbow grease. 

Contact local high pressure cleaners

 How to hire a high-pressure cleaner

An experienced high-pressure concrete cleaner will be able to recommend the best product and method to use on your concrete surface. There is no licensing required for a company to clean concrete, but the following should be present:

 – Qualifications – Past experience and a portfolio of completed jobs are a good way to note whether or not a company can handle the job. 

 – Knowledgeable – Having knowledge of finished and unfinished concrete will put your mind at ease about how the end result will look.

 – Guarantees work – A company that guarantees their work will assure you that no additional costs will be added later.

 – Suggestions – A qualified concrete cleaner will be able to offer suggestions on how to care for your concrete moving forward. They may even be able to offer sealing for an additional fee to help protect it.

Always try using natural products to clean your concrete, especially indoors. Fumes from harsh chemicals can be overwhelming in an enclosed space and not necessary. If you have tried different products on your floor without any luck, it is best to call a professional. For a few hundred dollars, you can get a professional-looking job. Clean your concrete weekly by dry mopping and wet mop with a pH-balanced cleaner as needed. Reseal every two to three years to protect the surface.

Concrete resurfacing

Another cost-effective method to restore the appearance of concrete surfaces is concrete resurfacing. This involves the application of a polymer or sparse cement overlay on a current concrete exterior. This is done to create that new look and to conceal the older soiled existing concrete surface.

Concrete resurfacing is applicable to all types of concrete, including both exterior and interior concrete surfaces and has an extensive range of designs, textures and colours. Because of this variety, it is possible to create many different types of finishes and resurfacing designs from retro to rustic to the contemporary look. Some of these great looks include finishes such as stamped concrete, sandstone, granite and brick, as well as paved finishes. You could also mix various finishes with designs and create borders.

Part of the concrete resurfacing procedure includes sealing, so as to preserve the colours. Sealing also assists in protecting the top coat from wear and tear. One other great benefit is that you could use an anti-slip coating to prevent slipping when the exterior is wet. This is a wonderful safety feature.

Categories
Construction

What’s the best timber for decking?

A deck is a great addition to any home. They are perfect for entertaining company, soaking up the sun, and eating al fresco when the weather is nice. But before you call your contractor, you may want to consider the kind of materials that you will be using in your renovation project. Why be wasteful and use new timber when you can reuse and repurpose recycled timber for your project. There are many benefits to using recycled timber for building your deck. Read on for more information on using recycled timber for your project.

Timber grading

For centuries, builders and suppliers have used grading systems to assess the quality of construction-grade timber. Today, timber grading has evolved into a complex system that’s virtually impossible for the layman to comprehend. Unless you’re an industry professional, chances are you won’t be able to identify an F14 piece of hardwood or explain how select grade is better than standard grade.

If you’ve ever wondered how timber is graded, here are a few of the basics.

Not all timber is created equal, there are different grades available / Source: Bridgebuilt Pty Ltd

Grading tests

Timber that’s destined for structural use is submitted to these two stress tests:

• Visual: This type of test gauges the timber’s natural strength in relation to its species, and can determine the overall quality of an entire timber load by appraising the apparent defects in different lengths of wood. Timber that is unseasoned is graded from S1 to S7, and timber that is seasoned is graded from SD1 to SD8. The lowest number indicates the greatest strength.

• Mechanical: This type of stress test gauges the overall strength and flexibility or rigidity of the timber. A high number indicates a stronger timber. With the mechanical system, timber is graded from a weak strength of F1 to a high strength of F34. For example, a less-dense timber, such as radiata pine, typically grades from F5 to F14.

Grading for aesthetic timber

Timber that is used for aesthetic or decorative purposes, such as hardwood flooring, is also graded before it can be marketed. Aesthetic timber is classified into three grades:

• Character grade: Aesthetically, this is the lowest grade, and this grade of timber will be full of knots and streaks, presenting a rustic appearance.

• Standard grade: This is a medium-grade timber, which will have some sap streaks, knots and burls; it is commonly used because of its distinctive wood grain appearance.

• Select grade: This grade of timber has few visible knots, burls or sap streaks, and is generally smooth and even, with a uniform, straight grain.

Aesthetic timber grading doesn’t take strength or durability into account; just appearance. For more formal areas, you’ll want to choose a select grade with a smooth wood grain. For a rustic cabin or primitive-style room, you might want to consider using a character grade.

When purchasing a parcel of timber, be aware that not every piece has been graded or appraised. It’s a good idea to take the time to inspect as many pieces as you can for serious defects. By paying attention to the grading and making your own inspection, you’ll find the right quality timber for your construction project.

Contact local decking experts

Using recycled timber for decking

There is plenty of recycled timber to choose from in a variety of different species, so there is a broad window of opportunity to use your favorite type of timber for your project. Here is a look at just some of the timber that may be available to you:

  • Ironbark
  • Tallowwood
  • Blackbutt
  • Jarrah
  • Spotted Gum

Recycled timber is available in a variety of sizes ranging from 19mm-30mm in depth and between 60mm-260mm in width. There are also different and unique deck edging available to give your deck a unique look.

What to consider when choosing recycled timber for decking

If you going to go forward with recycled timber for your deck you will need to consider a few factors. These factors include:

  • Availability: Not all timber types will be available due to season, demand, and local variety. Also, keep in mind that suppliers may not have enough of a particular timber depending on the size of your project.
  • Strength and durability: You need to select a wood that can withstand the pressure of a group of people of varying sizes, as well as furniture and weather, as well. Recycled timbers that are designated for building decks are classified. Make sure you choose timber that has a 15-year guarantee.
  • Cost: A big factor that is sure to alter your decision is cost. Not all timber costs the same. Find a timber that will meet your needs and stay within your budget.
Categories
Construction Outdoor living

Top ways to improve your driveway

Driveways are one of the first things people see when they arrive on a property. Usually, they go unnoticed. However, they are usually are precursor of what’s to come or what to expect from the house. The saying, first impressions last longest, can very much apply to your driveways introduction to your home. Setting the standard high is very important to onlookers perception and setting the right tone.

So, with this in mind, we are going to give you a few tips and ideas on how to improve the overall look of your driveway.

Tip #1: Fixing general cracks

General surface cracks are really common in driveways over four to five years old. While small cracks aren’t going to ruin your driveway, if not addressed, can lead to a much bigger problem.

The type of cracks a driveway has is do with the materials. For example, if your driveway is made of concrete it will be prone to hairline cracks, for example asphalt. Hairline cracks, are pretty easily sealed over, usually with sealant. Fortunately, this repair job is super cheap and will only take about 20 minutes.

The cracks that you want to be aware of are called, alligator cracks. They get the name alligator cracks because they end up looking like the scales of an alligator. Visually, these look terrible and practically, they can expand and grow over time making your problems ten times worse. Fortunately, they only occur where the asphalt or concrete is weak on your driveway. This means fixing the cracks is really no big deal.

The solution

All you really have to do with these types of cracks are cut out and remove the affected area and re-seal it. Make sure the reseal is the same colour as the surface and that it’s levelled to prevent the replacement looking out of place.

Source: Bullfrog Constructions

Tip #2: Staining your driveway

Staining your driveway is one of the easiest ways to give your driveway a nice new look. This tip is for concrete driveways only. Applying a staining solution pretty much the same as staining a piece of wood.

All you need are the following four things:

  • Broom
  • Paint Roller & Paint Tray
  • Driveway Stain
  • Some Good Weather

We recommend using water-based stains over acid stains because means the better range of colours you can get. Concrete stain is a bit different to paint, as instead of just sitting on the driveway’s surface, the stain permeates into the concrete. This causes the stain to fuse with the concrete rather than just sit on top.

The solution

All you really have to do is sweep off your driveway and make sure there is no rubble, and as little dust as possible. Then, pour your concrete stain into your paint tray and apply the stain to a roller.

Make sure you work backwards from the bottom up to ensure that you are not walking over the work you have already done. Usually, the stain will dry within one day. However, make sure you read the instructions on your stain as all types are different.

Tip #3: Bring in the plant life

Simply putting in some plant life along the sides of your driveway can make a world of difference.

What we have found to make a big difference is placing fresh grass seed along the edges of a driveway. Once this fills in, it should come right up to the edges replacing an area that is typical pretty barren.

For some, the lack of grass on the surrounding edges of your driveway might not even be an issue. But for those that it is, and who are wondering why this is, here is the answer:

If you driveway does not have appropriate drainage channels, water will tend to run off to edges and onto the soil. This water will pool and, over time, erode the surrounding grass. While filling in the grass is not a long-term solution, it can act as a temporary fix.

If you intend to do a bit more heavy-duty garden work, such as planting some trees or thick bushes, be mindful of the root growth. As time goes on, tree and bush roots will burrow underneath your driveway. These can lead to general cracking in the future and eventually undermine the entire driveway.

Contact local landscapers

Tip #4: Lighting

Line the sides of your driveway with some LED lights.

Typically, this is something you want to do while your driveway is being constructed. That way, you can embed them into the concrete or asphalt. This will make the lights and the driveway look one and the same.

But have no fear! If your driveway is already built you can still add some awesome lighting features.

You can pick up some pretty cheap outdoor LED lights from amazon and best of all; they can run on solar power. All you need to do is place them in semi-concealed spot so as to ensure that they still get some sunlight and illuminate your driveway.

Source: S.F.D Caringbah

Tip #5: Pressure wash

This has got to be the cheapest and easiest of all our tips. Simply pressure washing your driveway can take as little as 15 minutes and can make a world of difference.

Over time, your driveway will come into contact with oils and all other manners of stains and dirt. If you don’t already own a pressure washer, head down to your local hardware store and rent one for the day. Washing your driveway will take little to no time at all. A high-quality pressure washer will be able to wash all manner of stains off the surface.

Categories
Construction

How to build stairs

If you are planning a DIY deck project, one of the most important parts is building the stairs. Maybe you need to add a short set of steps to reach your back door or a shed. These are projects that you can accomplish yourself, but most of the time, stairs on the inside of the home must be constructed by a licenced contractor. If you are thinking about building a small set of steps for your landscape or outdoor project, this article will help you understand the process.

How easy is it to build steps for a deck?

The answer to how easy is it to build steps for a deck is that it is a manageable process, but some parts of the process require time to get right. Outdoor timber steps are a relatively easy project as far as materials and carpentry skills are concerned. You can always purchase ready-made outdoor steps and attach them to your deck with minimal skills. The most challenging part of how to build steps for a deck is getting the steps level and the proper height. You want to make sure that they are easy to get up and down and do not slant and cause a tripping hazard.

Stairs leading a second level / Source: Mitroteam Projects

What is the standard rise and run of stairs

Before beginning the process, make sure to check your local building codes, because even for a short set of outdoor deck stairs, some areas have strict regulations. The first thing that you need to know about how to build external timber stairs is the standard stair step height that is required. 

The first thing you must do is calculate the proper rise and run for the stairs. This is the most crucial part because it will affect the staircase’s stability and overall usability. The rise is the total height of the stairs from the ground. The run is how far out the stairs will need to go to create stairs that are not too steep and difficult to navigate. The height of each stair is a function of this calculation.

Materials and tools

Here are some of the basic materials and tools you will need to complete your staircase construction. Keep in mind that DIY stairs will require some basic carpentry tools, and purchasing the proper safety equipment is always a must. Make sure that you have all of the required tools and materials on hand before you begin your project.

  • Tape measure and carpenter’s pencil
  • Carpenter’s square
  • Spirit Level
  • Cordless drill and decking screws
  • Circular saw or hand saw
  • Clamps 
  • Lumber for the stringer, treads, and risers
  • Bracket designed to attach the stairs to the deck, house, and flooring 
  • Paint and approved outdoor sealant 

How to build deck stairs

Now that you have your materials, it is time to begin constructing the stairs. 

  1. Calculate the stair rise and run: The first thing you need to do is calculate the stair rise and run. You need to determine how many steps you will need to make the stringers carry the treads and risers. First, measure the total height that the stairs will need to cover. This will be measured from the ground or flooring to the deck’s top board. The standard step height is between 16.5 and 20.3 cm. The best step size for stairs is 17.7 cm on average. Divide the height of the rise by this number. This will tell you how many steps you need. The tread’s width needs to be no less than 22.8 cm so that your entire foot can fit on them. Multiply the number of stairs by the tread width, and this will give you the run of the stairs. This is the length the stairs will extend from the deck or home. 
  2. Measure and cut stringers: Once you have these measurements, it will allow you to cut the stringers accordingly. You will need to accommodate for at least 22.8 cm horizontally, and the stairs’ height. This template will look like a sawtooth pattern. It will have a place for you to attach the treads and risers securely. It is important to make sure that your cuts and measurements are accurate. Otherwise, your stairs could have a slant, which could cause a tripping hazard. This is the most critical part of the building process.
  3. Install stringers: The first thing that you need to do is to securely attach the stringers to the house or deck and the flooring or ground. If you are attaching to the ground, you will need to get brackets that hold H3 CCA posts. Special brackets will also be needed for attaching to wood or concrete surfaces. 
  4. Install risers: Next, use decking screws to attach the risers to the stringers securely. When installing the risers, make sure that everything is flush and secure. Countersink all of your screws to make sure that none of the heads stick out and can snag on clothing or shoes.
  5. Install treads: Installing the tread is a step that requires special attention. They should be securely attached with decking screws and countersunk, just as with the risers. Even if you accurately cut the stringers, it is still a good idea to double-check each tread as you install it with a spirit level to make sure that it is flat. Make sure you know how to level stairs before beginning this step. 
  6. Attach trim boards: Now, you can attach the trim boards and give your project a finished, professional look. 
  7. Varnish and seal: The final step is to varnish and seal the decking. Make sure to use a product designed for exterior decking. You should also choose one that will not cause slipping or become slippery when wet. Installing grips to the treads can help prevent a tripping hazard. Now, your deck stairs are ready to use. 

Contact local decking experts

How to build interior stairs

Building interior stairs uses a similar process as building outdoor stairs for decks. In some houses, the rooms’ size and way out may make the calculations trickier than for outdoor deck stairs where you have plenty of space. The process is similar, but building codes and stair dimensions are different for the house’s interior than for the outside. Most inside stairs require a licenced contractor for the job. 

A simpler project / Source: Quality Timber Decking

How to hire a builder

As you can see, building a set of stairs looks like an easy process, but it is quite complicated. Suppose you get the calculations wrong or miscut one of the stringers. In that case, you can end up with a set of stairs that is a hazard, look unattractive, and that could land you fine if the inspector happens to see them. Safety is the most important consideration when building a set of stairs, so if you do not have the experience or knowledge to do it right, this is one job that is better left to the professionals. 

Licencing and qualifications

Your contractor must have a carpenter’s license and a general contractor’s licence to complete the job. Some locations have special requirements that must be met. It is up to you to make sure that you hire a contractor who is licenced and qualified to complete the job properly so that your stairs will be safe for you and your family.

Categories
Construction

How to build a shed

Benefits of building a DIY shed

Australians have many reasons to consider building a shed on their property. It can provide practical solutions for storage and serve many useful purposes. On the outside, it seems like building DIY outdoor storage sheds would be a simple task, but it can be challenging, especially if it is your first time. This guide provides you with a basic overview of the steps. 

What type of shed should I build?

The first thing that you need to decide is what type of backyard shed you need. You can build a woodshed, garden shed, or a more sophisticated shed with electricity and specialized storage areas for tools. A shed can serve as a workshop, a separate office, or as an artist’s studio. A shed can also be the perfect playhouse for children, given that it is not also used as a storage space for tools.

You can build a shed from many different types of materials, including wood, block, or brick. If you’re looking for a space to store gardening tools, you have many choices in garden shed designs. You will need to decide what type of roofing you want and what kind of flooring, too. For roofing, you can choose options such as standing-seam metal roofing or traditional roofing shingles. You will also need to determine if you need amenities such as electricity and plumbing. Your shed can be as simple or complicated as you choose to make it. You can design it entirely from scratch, or you can choose many of the DIY shed kits that are available online. 

A shed connected to the house / Source: DT Home Improvement Services

What to do before building a shed

Whether you decide to design a shed yourself, purchase pre-made plans, get a DIY kit, or work with a carpentry business, the preparation steps are the same. Here is what you need to do before you begin your DIY outdoor storage shed project.

  1. Choose an appropriate site. The first thing that you need to do is to choose a suitable location. Before you do this, it is a good idea to call your local Council to find out if there are any requirements. Many areas have ordinances that dictate how far away it can be from the main building, how far away it must be from property lines, and other requirements. Planning your site might have to centre around local conditions. 
  2. Take measurements and make a plan. The next step is to take measurements and make some drawings. It is a good idea to mark the area where the shed will go with marking paint. 
  3. Seek council approval. Local councils have different requirements for what you have to do to seek permission for shed construction. You will have to follow their procedures and get their approval before beginning the building process. Some of them might require inspections after the building is completed. You might have to follow special requirements if you live in an area that is prone to severe storms, fire, or floods. 
  4. Level the ground. Regardless of the method you choose for building your shed, the first step is to prepare the site and make sure the ground is level. Depending on the size, you may be able to do this by hand, or it may require renting excavating equipment. 

Materials and tools

Once you have approval and have your site prepared, you can now start gathering the tools and materials that you will need for the project. If you do not have all of them, it may be possible to rent them from a local tool rental store or home improvement centre. You might not need all the tools on this list, depending on the type of shed that you decide to build. Whether you are starting from cutting your own boards or you have purchased a DIY kit will also change the tools that you need or do not need. The following list is only a few suggestions for those of you who are choosing to do everything yourself.

Tools 

  • Jigsaw
  • Mitre saw
  • Hand saw
  • Circular saw
  • Drill
  • Impact driver
  • Pencil
  • T-square or carpenter’s square
  • Spirit level
  • Staple gun

Materials

Here are some of the materials that you might need, depending on what type of shed. Keep in mind that you will need different lumber for the piers, flooring, walls, and roofs. The amounts and types will depend on your building plans and local requirements.

  • Construction timber
  • LogLap cladding or other cladding 
  • OSB board 
  • Corner fence posts
  • Cement
  • Sand 
  • Waterproof sheeting 
  • Roofing felt
  • Shingles or metal for roof
  • Door hinges
  • A variety of screws
  • Windows (optional)

Contact local builders

How to build a shed from scratch

Here are the basic steps for building your shed. 

  1. Building the shed’s foundation. The foundation is the most crucial part of constructing the shed. The first step is to set the deck piers and beams. Next, you will attach the floor joists, and finally, install the flooring material. Sometimes, garden shed flooring can be dirt or other drainage material. The most important factor is that a wood floor will not be in contact with the wet or damp ground and that it allows for airflow underneath.
  2. Build & attach the wall framework. Next, you will begin framing the walls and constructing the doors and windows. It is essential to make sure that everything is square and flush when assembling the components. You can install the doors and windows at this time, too. 
  3. Build the roof rafters. Once the walls are up, you can begin constructing the roof rafters and attaching them to the walls. Most council regulations mandate the materials, spacing, and method of attachment. 
  4. Cover the wall. Now, it is time to attach the outer wall cladding. You can also do any outside trim work around the windows and doors. 
  5. Attach the roof. The last step is placing the OSB board on the roof rafters, installing the roof sheeting, and installing the shingles. 
A small shed for storage / Source: Zane Hand Painting

Once you have constructed your shed frame, it’s time to consider lining the interior walls. While you want a clean and polished look, it’s also important to stay within budget. Here are some things to consider when lining your shed interior:

How to line a shed:

  • Drywall or plasterboard is a common and simple option to use. It is a cost-effective and straightforward installation method that provides a smooth finish.
  • Plywood is another budget-friendly and straightforward option. It can be painted or stained to match your exterior or existing décor.
  • V-Joint cladding provides a finished look for the interior shed walls using thin strips of timber.
  • Tongue and groove timber panels offer a classic look with interlocking edges. They provide extra insulation to your shed and are easy to install with screw fixings.

Cheapest way to line a shed:

  • One of the most cost-effective ways to line a shed is by using oriented strand board (OSB) or particleboard.
  • Another cheap option is the plain metal or fiberboard that you may have used for the exterior shed walls.

Shed footings size:

The footings for your shed should be able to support the weight of your structure. It’s important to check local building codes before calculating your footing size. The general rule is to create footings that are about 4 inches thick and 4 inches wider than the shed base.

Sub board for shed:

A sub-board provides additional insulation between the framing and finish materials. Most commonly, 1/2-inch OSB or plywood is used as sub-board. It’s important to ensure the sub-board is installed flat and secure so that the finish material has a secure surface.

Overall, deciding how to line your shed walls depends on your preferences and budget. Ensure the footings are sized correctly and the sub-board is installed properly to make the most of your shed interior.

How to waterproof your shed

Whether you are building a garden shed or other type of structure, your DIY shed will need to be waterproof. There are several factors involved in waterproofing the shed. The first is the flooring. Some people choose to place a waterproof barrier between the floor and the ground to protect the boards underneath. 

The walls, windows, and doors typically involve caulking and sealing any holes or cracks. It is important to install the roofing according to the manufacturer’s instructions, paying attention to proper overlap, and all necessary steps. Creating a waterproof shed can be the most challenging part of the entire project, but it is also the most important. 

How to hire a builder or handyman

As you can see, there are many steps involved in building your shed. If you do not have all of the necessary skills, it can be a long and frustrating process. That is why many people choose to find a qualified professional to do it for them. Here are a few considerations for hiring someone to build your shed.

Licencing and qualifications

In many cases, one person or a team can build the shed without involving any outside contractors. If you want electricity or plumbing installed, there might be other specialty trades involved. The most important thing is to make sure that all of your professionals meet state and local requirements. It is vital that make sure they have reviews from many happy customers, too. Taking the time to plan and choose the right professional is the most important part of the process to ensure a shed that you will be happy with for many years to come.