Whether you’re planning a new home build, conducting a renovation or looking to make some minor updates, there are plenty of ways to ensure your kitchen is sustainable.
Eco-friendly kitchen renovations
The first step in refreshing your kitchen is don’t discard – recycle. Before you touch anything, take a few snapshots of your kitchen and spread the word around that you’re looking to renovate. What seems like trash to you might be someone else’s treasure. Someone else nearby might want to take all of those unwanted kitchen fixtures off your hand, which might save you a lot of time and trouble, and possibly earn you some extra budget.
There are many factors to consider when creating a more eco-friendly kitchen design / Source: SG2 design
After that, decide on the scale of your renovation. Should you go all-out and change everything, or are you just looking for a few cosmetic touches? You might want to keep using some of your cabinets. There’s no need to toss them if you’re just putting in a bigger pantry or different kitchen island. Additionally, there is always the option of refacing the kitchen instead of replacing everything. Just try a new set of drawers or door fronts or a new coat of paint on everything. Those little changes might be all that you need for a new look.
Green kitchen appliances
All the different heat-using appliances in the kitchen – the oven, microwave, toaster, fridge – make that room one of the most energy-inefficient places in the entire house. The first thing to do to save energy is to look for the right appliances. Check out the Energy Rating labels. Choose a fridge that isn’t too big for what you’re going to use it for. Use gas for your oven instead of electric energy. Install “smart” appliances that know how to operate at peak energy efficiency.
Eco-friendly appliances benefit both the owner and the planet. Manufacturers must comply with strict environmental standards to earn the Energy Star rating displayed on every product. Because of the legal requirements and increasing awareness and sophistication of consumers, manufacturers now compete not only on performance and cost, but also on the energy efficiency of the appliance.
Buying eco-friendly appliances
By law, Energy Star labels and the rating system for appliances must be in clear language and easy to understand. Each star represents an increment of energy efficiency. The higher the number of stars, the higher the appliance rated in the efficiency tests. When an appliance uses both electricity and water, the label must rate for both. Dual use appliances, such as heater/air-conditioner units, must have separate ratings for each function.
However, a lot of work and research goes into those simple labels. Each appliance is submitted to a series of rigorous tests before it receives its star rating. Depending on the appliance, the difference between the star ratings represents a dramatic difference in the item’s energy usage. For example, the difference of a single star on an appliance may mean it is 25 percent more efficient than the lower rated competitor. As a result, a three-star refrigerator may be more expensive than a two-star model, it will be run up to 25 percent more efficiently. The difference in electricity costs will pay for the unit over time.
Contact local kitchen renovators
One exception to the Energy Star is ovens and stovetops. They are typically not labeled. As a consumer, you must decide which is better for you. Generally, gas units are considered more efficient and cheaper to operate. If you prefer an electric range, consider an induction system. It is more expensive initially, but cheaper and safer to operate.
Other eco-friendly and green alternatives include compact fluorescent lights and LED lights. Consider adding solar panels to your home and converting to solar hot water heating. The true benefit of eco-friendly appliances and other products is that over the life of the unit you save energy, you save money, and you help save the environment.
Materials
The materials you use to construct your kitchen also make an environmental impact. Try using recycled timber, recycled glass or engineered stone when constructing your floor or benchtop – it will look just as good and will do wonders for the earth.
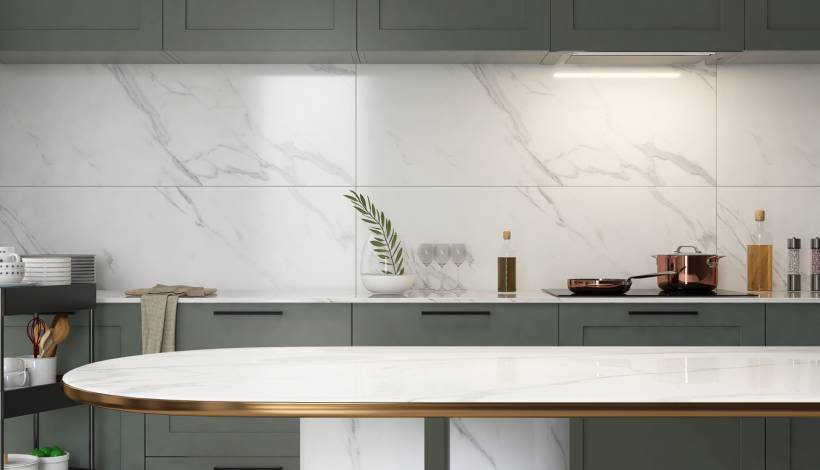
A kitchen is the centre of a home. It’s where you prepare your family meals and often socialise. Since you spend so much time in the kitchen, it makes sense to decorate it beautifully. One way you can do that is by choosing kitchen tiles that will add a fresh, new look to your kitchen. There is a wide range of kitchen tiles available on the market, which can make choosing tiles feel overwhelming. Here, we’ll help you narrow down your choices, and choose the tiles that will work best in your kitchen.
How to pick the perfect kitchen tiles
What part of your kitchen do you want to tile?
Before you choose your kitchen tiles, you need to consider what area you will be tiling. If you want to install new tiles on your floor, you should choose floor tiles that can stand up to the traffic. They should be non-porous, strong, and scratch and stain resistant.If you intend to tile your kitchen walls or the splash back, choose tiles that are sealed to prevent food and grease stains and that can be cleaned easily.
What tile colours should you choose?
The beauty of designing your own kitchen is that you get to choose the colours you like best. However, you should consider how the colour will affect the overall design of your kitchen. Bright, cheerful colours may look nice in your kitchen, but they generally require more frequent cleaning because stains tend to show on them. The same goes with black and white. If you want to minimise the amount of cleaning you have to do, choose neutral colours that will hide grease, food and other stains. Shades of light brown tend to work well with all kitchen decors and are good at hiding dirt. Another thing to consider withtiles is to avoid trendy colours that will quickly go out of style.
What size tiles work best?
Tiles are available in a wide range of sizes, from large format tiles to small mosaic tiles. Large tiles will make your kitchen look bigger and work particularly well on floors. Small mosaic tiles can be used to create a pattern that adds a visually interesting appeal to your kitchen, and work well on walls, splashbacks and counter-tops. One thing to consider is the smaller the tiles you use, the more grout you will need. If you choose small tiles, use an antibacterial grout to inhibit mould and mildew growth, to minimise how much cleaning you have to do.
Consider your budget
Tiles can get pretty expensive, especially if you start looking at marble and granite tiles. If expensive tiling is over your budget, don’t worry about it. There are plenty of more economical choices available, such as porcelain and travertine tiles. In addition, you can save money by looking for sales and discounts. One way to find large discounts is to buy discontinued tiles; however, make sure you buy enough to finish your project, since you won’t be able to buy more later.
Different types of kitchen tiles
Mosaic glass
Mosaic glass tiles are still popular this year. Glittered mosaics with gold hues and metallic, shiny tiles are selling better than the mosaics with colour. More subtle coloured kitchen tiles are also still hot. Large mosaic glass tiles are selling better and are expected to gain popularity in the coming seasons.
Subway or rectangular tiles
Known as ”subway tiles” in the United States, the big, rectangular shaped tiles are now becoming popular in Australia, and are favoured by city apartment dwellers. They are double in size, but make the kitchen appear larger. Order them in semi-gloss and pastel colours to soften their bold, imposing look. These tiles can be arranged in a ”checkerboard” style with black and white or black and red, to really make a plain wall pop. They are easily cleaned and hold up well against grease and splashes.
Tiles can be a great way to inject colour and personality into your kitchen / Source: Bryce Parker Homes
Graphic style
The most popular graphic styled kitchen tiles are digital in appearance and feature subtle changes in colours to make them appear less busy and distracting. Use these as splashbacks around countertops and smaller areas to showcase them properly. You can also use them as accents, so that they do not get buried in the background of the kitchen. Graphic style kitchen tiles come in many styles ranging from cartoonish images to animals and can be chosen to fit your kitchen’s existing motif.
Large format floor tiles
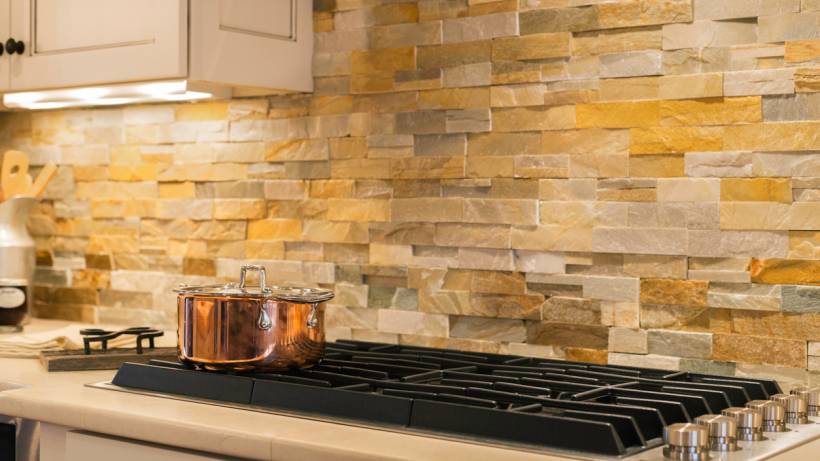
Large format floor tiles are the opposite of the smaller mosaic tiles. They look ideal on kitchen walls, especially as splashbacks behind the stove. They’re easy to clean since they don’t have a lot of grout lines in between. These tiles work best in kitchens with large walls, although the tiles can be scaled down for smaller walls.
Printed glass kitchen tiles
New varieties of printed glass kitchen tiles feature raised patterns of leaves with delicate veins running through them. This gives your walls a 3D look and plenty of lustrous colour.
Stained Glass Kitchen Tiles
A trend that seems to be continuing is the use of stained glass tiles to create stunning accents in the kitchen. The rich, jewel-like colours and dramatic effect they create make a drab kitchen come to life. Stained glass kitchen tiles are a colourful way to bring richness and light to dark corners.
Contact local tilers
Choosing tiles for a splashback
It’s time to pay attention to the splashback tiles in the kitchen – they’re one of the most important areas, design-wise, out there. Getting some stylish splashback tiles can make the difference between having a dull or impressive kitchen. There are four main types of splashback tiles – mosaic, glass, ceramic and porcelain, and natural stone.
Mosaic tiles are usually constructed with attractive, neutral tones to complement modern kitchen styles, although innovative metallic and glass mosaic tiles are also available. Glass tiles are cheaper now than ever before and make for very flexible and versatile additions to the kitchen. Ceramic and porcelain tiles are more expensive, but they can add plenty of flair to the kitchen with their attractive designs. As for natural stone, the current trend is to have it as kitchen wall tiling – giving the entire kitchen an attractive elegance. Try pairing up pale beige stones against darker benchtops and cabinets.
Installing a dishwasher for the first time can be intimidating. However, the process is possible for a DIYer if the right steps are followed.
How to remove a dishwasher
If you are faced with removing a dishwasher, the following steps should be followed to ensure an easy DIY dishwasher install.
Prepare the area
Your dishwasher should be located close to the kitchen sink. Clear out the area beneath the kitchen sink, the countertop immediately above the dishwasher and at least 5′ floor space in front of the dishwasher. Line the floor area with a drop sheet or other material to prevent scratching the immediate area when the dishwasher is pulled out.
Disconnect water & power
Open the cabinet located under the kitchen sink. You will notice three lines coming from the direction of the dishwasher. One of these will be an electrical cord that is plugged into an outlet. This is the first and most important part of how to disconnect a dishwasher.
Drain hoses under the sink
The second line will be a water line. Follow this line to a shut-off valve and turn to stop the water flow. The last line will be the drain line. Follow it to clamps that are holding it in place. Remove any clamps or other hardware that is keeping the line secure.
Remove dishwasher from its place
There should be a removable plate below the front door of the dishwasher. Remove this panel and look for any bolts and screws that may need to be removed. Notice a water line attached inside the panel. Disconnect the coupling on this line with a small wrench. You can then slide the dishwasher out from its place.
Replacing an existing dishwasher is possible to do yourself / Source: Shakeadog Photography
How to replace an existing dishwasher
Once the old existing dishwasher has been removed, the new one needs to be hooked up and made operable.
Unpack new dishwasher and adjust feet: Remove your new dishwasher from the packaging and adjust the feet for a proper balance. A dishwasher plumbing installation follows the same rules as the above steps, but in reverse.
Connect water, waste, and power lines: Line up the dishwasher with the space under the cabinet. Leave enough room to reach into the opening and locate the three lines that will be attached to the new unit. Maneuver the cables through the space under the sink. Allow enough slack to prevent the lines to become tangled behind the cabinets. First, connect the water line by sliding the hose into the valve. Hand tighten clockwise until snug. The next step can either be plugging in the power cord or adding the drain hose. The drain hose installation can be tricky if you are connecting the dishwasher drain hose for the first time. A U-bend should have been packed with the new unit. This is used to carry the drain hose as high as possible to avoid a siphon effect. Once in place, tighten down the hose with a clamp.
Slide new dishwasher in place & secure with screws: Make sure the feet are level against the floor, and there is no rocking. You may have to pull the unit out to adjust the feet. When comfortable with the placement, secure to the countertop with screws.
Turn on power and water: Plug the power cord in and open the water valve. Run an entire cycle and watch for any leaks or problems under the sink with the lines.
How to install a dishwasher where there was none prior
Installing a dishwasher in existing cabinets may sound like an easy job, but there has to be plumbing, electrical and carpentry work to consider.
Contact local plumbers
Required tools & materials
You will need a lot more tools and equipment to install a dishwasher where there was none. Some of these include:
A drop sheet
Drill
Crowbar
New tap and drain connections
power cabling for a power outlet
Remove cabinets to create space for the dishwasher
This step can be done by the DIYer without much difficulty. There only needs to be enough space for threading hoses into the under sink cabinet.
Install drainage, water and power cables in the adjacent cabinet
If you have little knowledge of installing a plug in with the required voltage for a dishwasher, it is time to seek help from an electrician. The same applies to tapping into water lines and drains, as you will need a plumber to help you do this.
Install a new dishwasher using the steps above
Once the lines have been created to attach to the new unit hoses and lines, the same steps as replacing a dishwasher will complete the installation.
Custom dishwashers are hard to replace without a professional’s help / Source: Mastercraft Kitchens
How to hire a plumber
Researching problems that can occur when adding a dishwasher may change your mind on hiring a plumber. How to connect a dishwasher is simple for a licensed plumber.
Licensing and qualifications
Each state has specific licensing and registration requirements to be able to operate as a plumber. Many times a plumber has worked under the supervision of practical training or received an AQF (Australian Qualifications Framework)certificate III or IV. Contact the plumbing authority in your state for a list of documentation to ask for:
Reputation and experience
Earning a reputation for giving excellent service and being well-educated often comes with a full calendar. However, it is usually worth the wait. Holding a positive presence in the community is also a winning signal that you have found a good plumber.
A written quote
A plumber can charge between $50 to $250 an hour. Depending on the amount of work that needs to be done to install your dishwasher, the price could run several hundred dollars. Replacing a dishwasher is an easy task for someone with handyman skills. However, when starting from scratch or wanting to locate the unit further away from a sink, a new set of problems could arise. It is a good idea to balance your skills against a plumber when experience is needed.
Key Takeaways: • Kitchen splashbacks are essential for protecting walls from moisture, grease, and food splatters while enhancing kitchen aesthetics and potentially contributing to property value. • From ceramic tiles and glass panels to stone slabs and timber options, each material offers distinct benefits for various kitchen styles and maintenance requirements.
A study showed that kitchen renovations were Australian homeowners’ number one home improvement project. Yet, many overlook one of the most crucial design decisions that can make or break the entire space: kitchen splashbacks. Splashbacks don’t just protect walls from cooking chaos; they can also transform a bland kitchen into a stunning centrepiece or, if chosen poorly, undermine even the most expensive makeover.
There are different types of kitchen splashbacks for every need and homeowner personality. This guide explores the most sought-after splashback materials among Australian homeowners, their unique properties, and the care routines that will maintain their beauty and performance for decades.
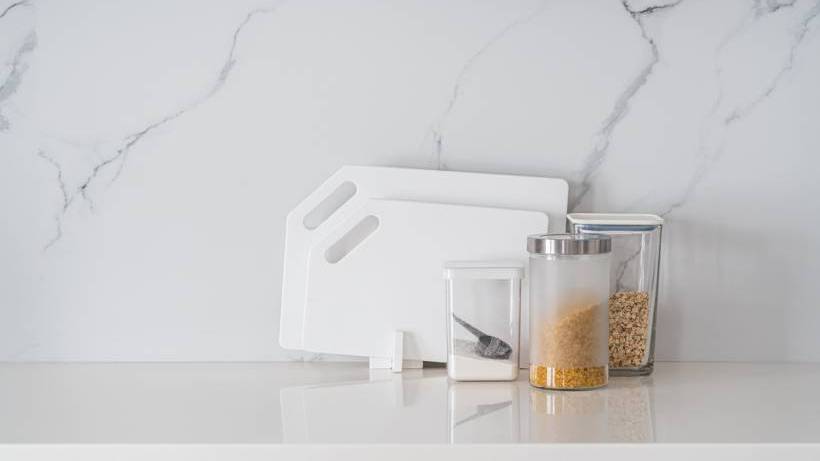
Understanding kitchen splashbacks and their benefits
A modern kitchen with marble-effect splashback tiles. | Source: iStock
A kitchen splashback is a protective surface that goes behind cooking and prep areas and sinks, where walls face regular exposure to moisture, heat, and food particles. Beyond their primary protective function, different types of splashbacks for kitchens deliver various advantages:
Hygiene
Splashbacks provide surfaces that are easier to sanitise than painted walls, reducing bacterial growth and maintaining kitchen cleanliness standards. Their non-porous nature prevents the absorption of cooking odours and contaminants.
Aesthetics
You can choose from various splashback designs to give your kitchen visual depth. Recent trends favour earthy tones and natural textures, with materials such as stone and timber finishes bringing warmth and character to kitchen environments.
Property value
With the right and fitting splashback for your home, it can enhance your home’s market appeal and contribute significantly to returns from kitchen renovations. Quality installations show attention to detail and long-term thinking that appeals to prospective buyers.
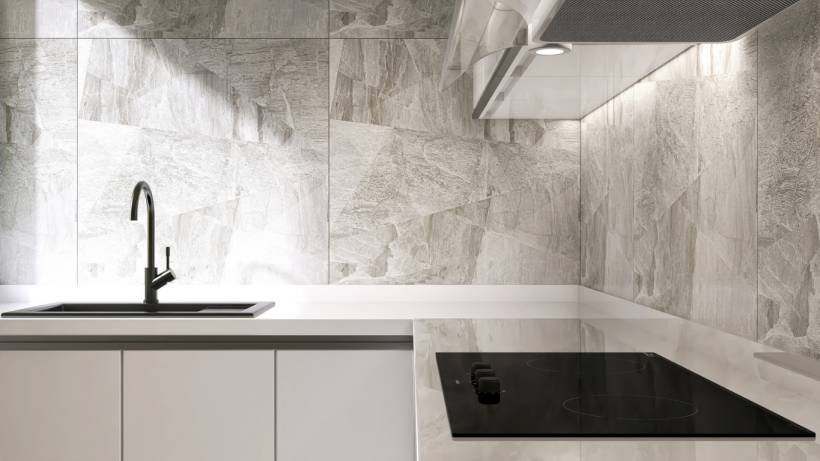
What are the different kitchen splashback materials in Australia?
A sleek kitchen featuring a stone-look backsplash and countertop. | Source: iStock
Australian kitchens showcase several types of kitchen splashbacks based on material. Each type offers distinct characteristics suited to different cooking styles, maintenance preferences, and design themes.
Ceramic and porcelain tiles
Ceramic and porcelain kitchen tiles remain popular among Australian homeowners due to their versatility and practical benefits. These tiles offer affordability, straightforward installation, and a range of classic, appealing options. Of these two, porcelain has higher water resistance, which makes it even better for particularly humid kitchens.
Features: Both materials are highly durable, but porcelain offers superior resistance to water absorption and thermal shock. The wide variety of colours, patterns, and sizes means you can achieve any design, from understated neutrals to bold, dramatic pieces. Large-format tiles are also effective for creating clean, elegant lines with less grout.
Finishes/Options: Ceramic and porcelain splashbacks come in high-gloss, matte, textured, or stone-look surfaces. Glossy tiles reflect light and brighten a space, while matte and textured finishes offer a softer, more tactile feel. Meanwhile, stone-look porcelain brings a luxe and natural appeal while still being durable. There are also mosaic options in various finishes and sizes that give a sleek, low-maintenance look.
Best for: Homeowners seeking cost-effective solutions with extensive design flexibility. Tiles look great for both traditional kitchen designs, like a Hampton-style kitchen and contemporary designs.
Pros: • Cost-effective–ceramic tiles range from $20–30/m², while porcelain tiles are around $70/m² • Easy to replace individual tiles if damaged • Good heat resistance • Simple to clean using standard household cleaners
Cons: • Grout lines can stain and need periodic retouching • Requires more upkeep than seamless surfaces (e.g. glass, stone) • Complex patterns or irregular layouts increase installation difficulty
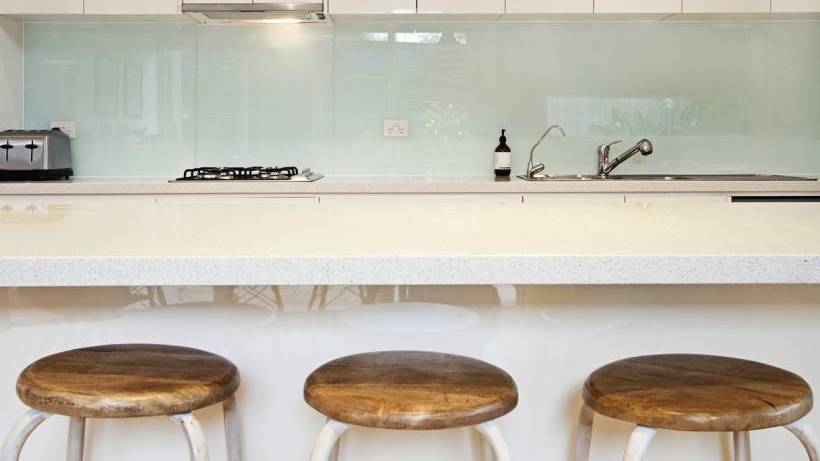
Glass splashbacks
The sleek and minimalist design of a glass splashback. | Source: iStock
Glass is one of the most common types of splashbacks for kitchens in Australia, especially those using tempered glass for improved safety and durability. They deliver sleek, reflective surfaces that suit modern kitchens and are easy to maintain.
Features: Tempered glass is three to five times stronger than regular glass, providing excellent durability and heat resistance. Their non-porous surface prevents water absorption, eliminating concerns about cracking, swelling, or staining.
Finishes/Options: Available in numerous colours, including bold blues, vibrant greens, and sophisticated neutrals, with options for clear, bronze, or smoked finishes. Custom colour matching allows coordination with existing design elements.
Best for: Contemporary kitchens that prioritise minimal maintenance over pattern variety. It’s also suitable for smaller kitchens where light reflection creates spacious illusions.
Pros: • Quick wipe-downs remove grease, splatters, and fingerprints with ease • Superior durability with minimal maintenance • Excellent light reflection that can make small kitchens appear larger
Cons: • Higher initial costs from $30 to $120 per square metre (excluding installation) • Extended installation timeframes and professional installation requirements for measurement, fabrication, and fitting • Highly polished finishes may also create glare issues in bright spaces
Stainless steel splashbacks
Stainless steel applications in residential kitchens create looks that feel both innovative and classic, ranging from standalone installations to comprehensive coverage across entire spaces. This material brings commercial kitchen durability to a residential setting.
Features: Outstanding heat resistance and hygienic properties make stainless steel ideal for active cooking areas. The material resists corrosion, staining, and bacterial growth while providing contemporary industrial aesthetics.
Finishes/Options: Available in brushed, polished, and textured finishes. Standard gauges provide adequate protection while heavier options offer enhanced durability for high-use situations.
Best for: Contemporary kitchen designs where functionality takes precedence over decorative elements. It’s particularly suitable for serious cooking enthusiasts who value commercial-grade performance.
Pros: • High durability, easy cleaning, and recyclability • Superior heat resistance compared to alternatives, making it ideal for gas cooktop applications • Generally costs less than premium glass or stone
Cons: • Prone to scratches, fingerprints, and watermarks, requiring careful cleaning techniques • Industrial appearance may not suit all design preferences and architecture
Acrylic splashbacks
Close-up view of a minimalist kitchen design. | Source: iStock
Acrylic splashbacks provide a glass-like appearance at reduced costs with simplified installation processes. For example, lustrolite is a popular high-gloss acrylic option that mimics glass while offering lightweight installation and superior stain resistance.
Features: Lightweight construction facilitates easier installation compared to glass while maintaining a similar visual appeal. Non-porous surfaces resist staining and moisture absorption effectively.
Finishes/Options: Available in extensive colour ranges with gloss and semi-gloss finishes. Custom colour matching accommodates specific design requirements.
Best for: Cost-conscious renovators seeking glass aesthetics without premium pricing. It’s suitable for DIY installations where professional glass fitting exceeds budget limitations.
Pros: • Significantly lower costs than glass with easier installation requirements • Less likely to break than glass due to its higher impact resistance • Can be suitable for DIY installation in some cases.
Cons • Susceptible to scratching, requiring careful cleaning with soft cloths and mild cleaners • Limited heat resistance compared to glass or stone alternatives—maintain appropriate distance from heat sources
Timber and plywood splashbacks
Wood-like materials add rustic appeal and tremendous warmth to kitchen spaces, with modern moisture-resistant tiles providing natural beauty on top of the durability you demand. Professional carpenters, however, advise that if you want to use natural timber, moisture resistance should be a top priority.
Features: Timber applications offer a minimal, warm look when applied across kitchen spaces, including cabinetry and flooring. Modern treatments enhance moisture resistance while preserving natural characteristics.
Finishes/Options: Natural timber offers various species with distinct grain patterns and colours. Engineered options provide enhanced stability and moisture resistance while maintaining authentic appearances.
Best for: Country-style and modern-country kitchen styles that emphasise natural materials and high-quality craftsmanship. This makes it suitable for homeowners prioritising warmth and organic textures.
Pros: • Unique natural beauty with potential for customisation through staining or finishing • Creates an inviting, warm atmosphere that complements various design styles • Resists moisture better than untreated timber while maintaining the same aesthetic
Cons: • Requires careful sealing and regular maintenance to prevent moisture damage • Limited heat resistance; appropriate distance from cooking surfaces is necessary
Stone splashbacks
An elegant kitchen with a textured stone backsplash. | Source: iStock
Stone splashback materials represent premium choices for sophisticated kitchen designs and work particularly well in luxury kitchen renovations.
Features: Matching splashback and benchtop material combinations using stone create sophisticated, cohesive flows throughout kitchen spaces. Natural stone provides unique patterns while engineered options offer consistent appearances and enhanced durability.
Finishes/Options: Stone splashbacks, particularly granite, marble, and quartz, offer durability and luxurious appearances when matched with coordinating benchtops. Natural stones showcase individual characteristics with polished, honed, or textured finishes.
Best for: Luxury kitchen installations where premium materials justify higher investments. Consult our benchtops cost guide for more detailed cost advice.
Pros: • Superior durability and easy maintenance with low porosity, preventing liquid and bacteria absorption • Exceptional heat and scratch resistance with long-term aesthetic preservation • Generally costs less than premium glass or stone
Cons: • Higher costs than most alternatives; professional installation for natural stone is significantly more expensive • Marble splashbacks are also soft and porous, making them susceptible to marking and staining.
How do you maintain and clean your kitchen splashback?
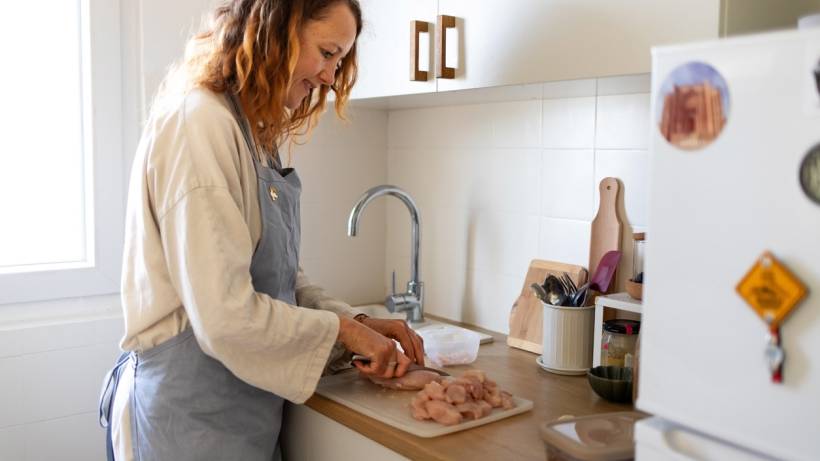
Preparing food in the kitchen. | Source: iStock
What type of splashback is best for the kitchen? The answer is the one that you can maintain. Like most things around a typical home, a splashback for the kitchen needs regular maintenance to extend its lifespan while preserving its appearance. While different materials require specific approaches, most principles apply across all installations.
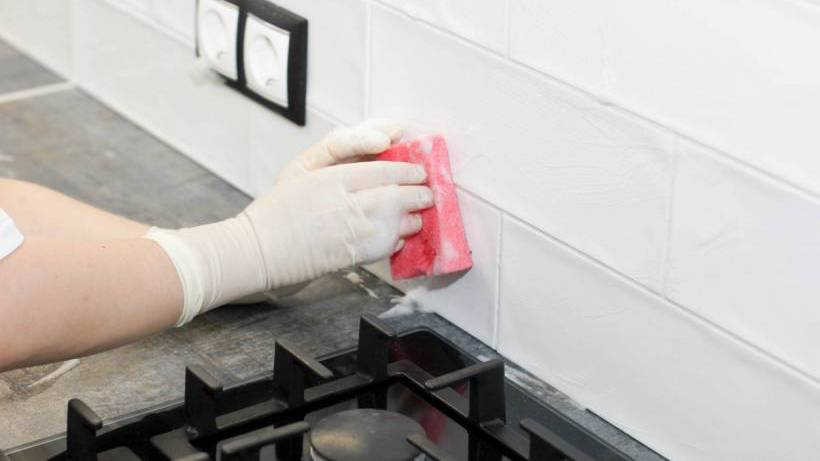
Wipe spills right away
Removing spills and food splashes right away prevents permanent staining to splashbacks or grout. Developing a habit of cleaning spills as they occur maintains a splashback appearance with minimal effort.
Use appropriate cleaning materials
Your splashback material determines appropriate cleaning products, ranging from simple glass cleaners to specialised stainless steel solutions.When uncertain, water-diluted gentle dishwashing detergent provides safe cleaning for most materials. Regardless of your splashback type, avoid harsh or abrasive chemicals that can cause permanent damage.
Choose the correct cleaning tools
Using appropriate cleaning cloths maintains the splashback’s finish. Avoid abrasive options like metal or plastic scourers, which can damage or scratch surfaces. Instead, opt for lint-free cloths or paper towels to clean marks and spills. Then, after cleaning, it’s best to wipe over surfaces with a dry, clean cloth.
Clean according to cooking frequency
Heavy cooking requires daily splashback cleaning to prevent grease buildup, while weekly thorough cleaning suits moderate cooking patterns. Adjust cleaning frequency based on your cooking habits and splashback exposure.
Apply proper cleaning techniques
Use circular motions when cleaning glass surfaces to avoid streaking, rather than wiping up and down or left to right. Remember to let the cleaning solutions sit for several minutes before wiping to soften stubborn residues.
Maintain sealing and water protection
Sealing splashbacks protects them from water damage regardless of material type. Stone splashbacks require resealing every few years, while tile splashbacks need grout resealing periodically. Make sure to check the integrity of silicone borders that help maintain water impermeability, as these may need replacement over time.
Most modern kitchen splashbacks encounter issues during their lifetime. Fortunately, they can be resolved with proper knowledge and a little elbow grease.
Grout discolouration or mould growth
For light discolouration: Mix equal parts water and white vinegar in a spray bottle. Spray affected areas, let sit for several minutes, then scrub gently with an old toothbrush. Rinse well.
For stubborn stains: Create a paste using baking soda, dish soap, and water. Apply to discoloured areas, allow adequate contact time, then scrub gently with a soft brush.
For mould growth: Use appropriate mould cleaning products following the manufacturer’s instructions and ensure good ventilation. However, consider a professional assessment if mould persists, as this may indicate moisture penetration issues.
Surface scratches
Glass splashbacks: Minor scratches sometimes improve with appropriate polishing compounds applied with soft cloths in circular motions. On the other hand, deep scratches may need professional assessment to determine if repair is more cost-effective than replacement.
Acrylic surfaces: Light scratches may respond to gentle polishing with appropriate products designed for acrylic surfaces.
Stainless steel: Buff minor scratches following the grain direction using appropriate stainless steel care products and microfibre cloths. Unlike glass, avoid circular motions when polishing stainless steel surfaces, which can worsen the appearance.
Surface stains
Oil and grease stains: Apply baking soda paste to stained areas, allow adequate contact time, then remove gently with a soft cloth.
Hard water marks: Mix equal parts white vinegar and water, apply to marks, wait several minutes, then wipe clean. For persistent marks, lemon juice provides natural acidity.
Food stains: Address them right away with a dish soap solution. For set stains, check the manufacturer’s recommendations for appropriate cleaning methods.
Chips/cracks
Ceramic/porcelain tiles: Small chips can often be concealed with colour-matched repair compounds available from tile suppliers. Clean the area, apply according to manufacturer’s instructions, and allow adequate curing time before cleaning.
Glass splashbacks: Any crack compromises structural integrity. Stop using the area right away and contact professionals for assessment. Temporary measures may prevent the issue from worsening until a professional can inspect the problem.
Stone surfaces: Minor chips may be repairable with suitable products, though professional assessment often provides the best guidance for matching patterns and achieving proper finishes.
Choose the right kitchen splashback for your home
Strike a balance between your preferences, commitment to maintenance, and budget. In addition, how often you cook matters, as premium materials like natural stone offer beauty and durability but demand higher maintenance and a greater upfront investment.
Connect with trusted kitchen renovation experts who can guide you through material selection, design planning, and professional installation to create the kitchen of your dreams. For comprehensive pricing information, explore our detailed kitchen renovation costs guide to help budget your project effectively.
FAQs on kitchen splashbacks
Can I put a new splashback over old tiles?
Installing splashbacks over existing tiles is possible in many situations, provided the current surface remains firmly attached and level. The additional thickness may require adjustments to electrical outlets and trim pieces. A professional assessment will help ensure proper adhesion and long-term stability.
When planning installation, consider what’s included in quotes, warranty coverage, and whether building inspection compliance documentation is required. For electrical modifications, work with qualified electricians to ensure safe compliance with Australian standards.
How high should a kitchen splashback be in Australia?
Standard Australian practice installs splashbacks at 600mm above benchtop surfaces for electric and induction cooktops, thoughnewer rangehood manuals often recommend 650mm regardless of cooktop type.
Note that areas behind gas cooktops requirespecific clearance considerations due to safety regulations outlined in Australian Standard AS/NZS 5601.1. For gas cooktop installations or modifications, consult a licensed plumber who understands these compliance requirements.
What is the most durable splashback material for a busy kitchen?
Quartz and porcelain offer exceptional durability with heat, stain, and scratch resistance, making them ideal for active cooking environments. Both materials provide easy maintenance while withstanding heavy daily use without compromising appearance. For comprehensive durability comparisons, explore our kitchen benchtop materials guide.
What’s the difference between ceramic and porcelain splashback tiles?
Porcelain tiles absorb less water than ceramic alternatives, making them more suitable for high-moisture kitchen environments. Porcelain also demonstrates superior durability and stain resistance, though ceramic tiles offer broader design variety at lower costs.
Do stone splashbacks need to be sealed in Australia?
Natural stone splashbacks require periodic sealing every two to three years to maintain protection against moisture damage and staining. Engineered stone alternatives often require less frequent sealing due to their dense structure and consistent composition.
Kitchen cabinets don’t just provide storage; theyre also a primary focal point for any kitchen. Switching up your kitchen cabinets is an easy way to add a decorative touch to any type of kitchen space, no matter what the size. Vinyl wrap are durable enough to stand up to everyday wear and tear, and they also look fabulous. Made from medium-density fiberboard (MDF) thats been cut, shaped and coated with glue, and then covered with pressed vinyl that goes completely around the door so that there are no visible joints.
Vinyl wrap doors are incredibly versatile, as MDF panels can be cut and shaped in a huge range of styles, from simple, flat designs to ornate surfaces that resemble carved wood. The vinyl wrap is available in a wide array of colours, textures and finishes, including simulated wood veneers and glosses.
Vinyl wrap doors are extremely popular with homeowners on a budget because they can replicate the look of wood so well. They cost significantly less than natural wood cabinets, but you have to look closely to see the difference. In addition to smooth wood grains, vinyl wrap can also simulate the look of different varieties of textured wood. This means that if you already have wood features in your kitchen, you’ll be able to select vinyl door coverings that will tone in beautifully.
Caring for vinyl wrap doors
Vinyl wrap doors are ideal for kitchen cabinetry because theyre incredibly durable. The MDF material is scratch resistant, so you dont have to worry about chips and marks. It is also engineered to seal out water and moisture, so your cabinets wont be in danger of warping. In addition, vinyl wrap doors require very little maintenance. You’ll never need to sand, paint or revarnish your vinyl wrapped doors, and they’ll never need furniture oil. To clean them, all you need to do is wipe them with a soft cloth or sponge and warm soapy water, and then allow them to air dry. Avoid using chemical cleaners, as these may damage the vinyl. For stubborn stains, you can apply a bit of methylated spirits, and then rinse clean. Otherwise, the only other maintenance you’ll need to do is oil the hinges occasionally.
2. New benchtops
What is the first thing to wear out in the kitchen? Often it is the benchtop. From all the spilling, chopping, and general wear and tear that benchtops take, upgrading to a new laminate, granite, or even marble top can make a vast improvement to the overall modernised look of your kitchen.
There are several different factors that need to go into your benchtop selection. First, think about how big you’ll need to make your benchtop; as a general rule, they should be between 600-900mm deep. Remember, if they’re too wide, you won’t be able to reach all the items you’ll need – but don’t make it too small as to detract from the food preparation! Figure our how many people are going to be preparing food, and get a benchtop that has room enough for all of them to do the work.
After that, you’ll have to figure out what your benchtop will actually look like. This is important, since the benchtop is such an important, dominating part of the kitchen.
Benchtop materials
You want to pick out a tiled benchtop that both fits into the existing decor and is practical enough to fit into your lifestyle. More serious cooks might want to go for heat and scratch-resistant materials, while casual cooks might want to go for laminates. Additionally, figure out how much of a renovation you’d like to do. Just replacing the benchtops might be more complicated than it seems – you might have to figure out how structurally sound your kitchen is before you do any work.
Granite is durable and resistant but needs to be sealed on a regular basis. The blended material Corian is seamless, stain- and heat-resistant and available in a range of options. The marble looks great but requires plenty of sealants. Quartz is low-maintenance and very durable. Concrete is very popular nowadays and can be cast right on-site, but has to be sealed often. Laminate is economical and versatile. Tiled kitchen benchtops offer plenty of designs, and are available in several different materials. Hardwood is sturdy and perfect for the home cook who wants to get serious.
Contact local kitchen renovators
From bargain to expensive, kitchen benchtops are available at a variety of prices. However, even if you are on a strict budget, do not skip the laminate benchtops. They are highly cost effective and will last for many years with little maintenance. Also, they are available in a variety of colours, effects and patterns. There are finishes that resemble stone or timber, so you can have that look without the cost. Additionally, laminates are available in designer options to provide stylistic flare to your kitchen. Use laminate benchtops in conjunction with laminated splash backs, doors and drawer fronts.
5. Splashbacks
Consider filling the gap between your new counters and cabinet doors. Connect your cupboards and benchtop elements by installing new splashbacks. Options for this feature include acrylic splashbacks, glass splashbacks, and even LED splashback which can install straight over your existing one.
One of the quickest and least expensive ways of giving your kitchen the makeover it deserves is to add some personal touches. Let’s take a look at how we can do this on a budget:
Grow flowers on your windowsill: Find a colourful flower or useful herb to grow indoors on a windowsill.
Update your small appliances: You do not have to run out and buy a new stove or refrigerator unless you really want and need to. Instead, you can just update some of the smaller, frequently used appliances in your kitchen. Think about adding an element of colour while you’re out shopping for these; it will bring a new element to your kitchen countertops.
Also, think about swapping out those old handles and hinges for some new, interesting ones. There is a lot of freedom in this upgrade, as home decor suppliers have a huge range of options for you to choose from.
5. A fresh coat of paint
One of the easiest and most effective ways to hit refresh on a tired space is a fresh coat of paint. Depending on the layout of your kitchen, this could be a great option.
Another option to revamp your kitchen is a door respray or finish. You could paint over suede paint with a more durable and easier-to-clean 2-pack paint, or opt for a Japan black finish for a sleek and modern look. However, if you’re not confident in your DIY skills, it’s best to leave it to the professionals to avoid a potential floor disaster.
In addition, if you have a display cabinet that does not seem to be getting the most attention, think about painting its back wall with a bright vibrant colour that can breathe a new life into it.
With a Hamptons style kitchen, you get the perfect combination of a room that is perfect for both family meals and entertaining. Inspired by the region of the same name, the style uses natural colours such as tan and blue that work with the coastal theme along with a tonne of natural light. This style gives you all the space that you need and creates a functional space for cooking and eating.
Benefits of a Hamptons kitchen
Functionality
As you look at Hampton kitchen designs, you’ll find that these rooms are highly functional. Not only do you have separate spaces for cooking and prep work, but you get space for entertaining and organising your foods and ingredients too.
Aesthetically pleasing
The most significant benefit of choosing this type of kitchen is that it is aesthetically pleasing to both your family and guests. While the natural light makes the room look larger, the bright colours turn the kitchen into the focal point or central hub of your home.
If you’re tired of redoing your home every few years as trends change, you’ll love that the Hamptons style is timeless. The colours and features that it adds never go out of style.
What makes up the Hamptons style?
Colour pallet
One thing to keep an eye on while looking at Hampton’s kitchen ideas is the colour combos used. White is very popular because it has a clean and refreshing look. If you worry that you can’t keep white clean, go with a deep navy blue and add some white accents. You might opt for lighter shades of blue and tan that work with the theme too. These colours are reminiscent of relaxing at the beach.
Materials
Wood is the most popular material that designers use for a Hamptons kitchen, both in natural brown colours and white. Marble and natural stone are also commonly used. Wicker also looks excellent in this type of kitchen. You can use wicker baskets for storage or opt for wicker furniture. Wire and metal accent pieces work well too.
Nautical and coastal themes
Nautical and coastal themes transform the kitchen into something special. You don’t need to go overboard with tons of decorations though as just a few pieces work to emphasise the style.
Specific features
Architecture
Now is the time to make the most of the architectural features in your home. If you have tall ceilings, consider adding wood beams. When you choose the right stain, those beams will work in the space without overwhelming your senses. Large and open spaces are common in this type of kitchen, but you don’t need to tear down a wall. You can try removing the doors on your cabinets or installing open shelving. New shelves and cabinets open up the room and make it feel larger and more inviting.
Benchtops
Benchtops usually come in marble or wood in a Hamptons style kitchen. Use a darker colour to make the benchtops the focal point of the room, or use a lighter shade to blend in with the surrounding space.
Flooring
In a modern Hamptons style kitchen, the flooring can make a big impression. Wood flooring is easily the most popular choice. A darker shade of wood hides stains but can make a small kitchen feel even smaller. When you select a lighter shade of wood, you get the beach feel every time you walk in the room. Not everyone likes using wood floors in kitchens though because the wood can develop scratches and scuffs. Consider going with tile in a soft and natural colour.
Contact local interior designers
Lighting
Hanging lights are a standard option for a kitchen in the Hamptons style. Also called pendant lights, they usually have a cord or bar that hangs from the ceiling and supports the lighting fixture. Many of the top Hamptons lights use shades of white and black, but some prefer the look of entirely white pendant lights. You can use lights that incorporate gold or silver too as these colours work with the theme.
Centre island
Adding a centre island is the easiest way to create a gathering space for your family. They’ll love pulling up a stool and taking a seat to share a quick breakfast and relaxing as you cook. The island also creates a place where you can read the newspaper or flip through a cookbook while your kids do their homework. It also comes in handy for entertaining and gives you extra storage space. Look for centre islands that have open shelving or cabinets for storing extra cookware and things that you need every day.
Kitchen stools
Don’t forget to look for Hampton’s style kitchen stools to go along with your centre island. Look for comfortable seats that people will want to sit on when they eat a meal, help you cook or stop by during your next party. Chrome stools have a shiny finish and usually feature a leather seat. If you think that those stools are too modern, go with wood stools. You can choose stools with a fabric covering that matches the Hamptons theme and is easy to clean. Just make sure that the seats are tall enough that people can pull them up to the counter or island.
Hamptons style kitchens use a lot of wood and marble / Source: Aspect Cabinetmakers
Splashback
A splashback prevents damage to the wall and catches the splatters and splashes that come off pots and pans as you cook. A Hampton’s style kitchen splashback can be simple or elaborate. A simple idea involves tile in shades of white and grey that blends with the rest of the room. Using tiles in unusual shapes can make the splashback more interesting. You can incorporate other colours too, such as pale blue and light brown.
When bringing home the Hamptons look for your kitchen, choose contractors you can trust who get the job done quickly. They can install Hampton cabinets, put down new flooring, install a centre island and hang new lights. Those accents help you create the perfect kitchen.
Every home has a designated kitchen space to prepare, store and consume food but as we replenish the fridge and restock the pantry, our kitchen space can quickly get cluttered, bursting at the seams with stored ingredients, condiments and utensils. Rediscover the luxury of extra space and declutter your pantry and cabinets with our simple kitchen storage solutions that will refresh your existing space without a costly reno. To give you the best head start on organising your kitchen, we share our top kitchen storage solutions.
Make your kitchen drawers more functional
Most people attempt to organise their kitchen drawers so that everything has a place to go and is easy to find, but usually, there isn’t enough room and everything ends up piled in the drawer haphazardly. Try these kitchen drawer storage tips to de-clutter your drawers:
More space for silverware
Install two shallow drawers in place of one. Place plastic cutlery inserts in both drawers and now you have twice the storage space for silverware as you did before.
Organise your junk drawer
Throwing all your odds and ends in one drawer really isn’t functional. Digging through a drawer desperately trying to find something is the exact opposite of organised. Solve this problem by placing dividers in your drawers to separate off sections. This way, you can categorise your items in the junk drawer and make them easier to find.
Using drawers for pots, pans and dishes
If you have plenty of drawers, why not use some of them to store your pots, pans and dishes? It’s much easier to separate and access these items when they are in drawers instead of cabinets.
Make your kitchen shelves more functional
Kitchen cabinets have the same problem that kitchen drawers have. If they aren’t organised, it’s hard to find anything in them. Make the most of your kitchen cabinet space by following these tips.
Increase storage by installing shelves over island benches / Source: In Design International
Slide-out shelves
Hire a contractor to install slide-out shelves in your kitchen cabinets. Slide-out shelves significantly increase the usable space in your kitchen cabinets and allow you to organise better.
Wire racks
Place wire racks in your cabinets to increase your storage space. Wire racks work nearly as well as slide-out shelves and are a whole lot cheaper.
Hooks
Screw hooks into the inside of your cabinet drawers to hang commonly used small items, such as bottle openers and can openers.
Drawers for corner cabinets
It takes a lot of effort to reach all areas of a cabinet. This is okay for most people, perhaps; but those with limited mobility will have a hard time reaching out for several items. However, you can easily overcome this drawback by installing corner drawers. The sizes or depths of the drawers can be customised depending on the sizes of stuff you’re going to store in them. You can store small appliances and utensils, or bigger stuff such as pans and pots. Additionally, corner drawers should be designed to have inwardly folding fronts for ergonomic reasons.
Install additional cabinets
One way to take advantage of overhead cupboard height in your kitchen is to place additional shelving or cabinets that extend all the way up to the ceiling. This provides extra storage for items used less frequently or bulky, like large serving platters or seasonal items like holiday decor.
Lazy Susan
It can be really tiring to keep reaching and fumbling blindly for the thing you need. Not to mention, it can be a total waste of time as well. To avoid this from happening again, you can ask for a rotating, circular tray most popularly known as the Lazy Susan to be installed. They are mostly seen on round tables but can also be installed in cabinets for easy accessibility. All you need to do is to put your kitchen necessities on the tray and by the next time you need them, all you do is to turn the Lazy Susan until the item you need is within your reach. How easy is that?
Contact local kitchen experts
Pull-out storage space
Pull-out storage allows you to use existing space, no matter how small or confined it might be. You can install pull-out storage features in corners, cabinets, under the sink and in other places where you can access them quickly and easily without having to bend or reach.
Pull-out storage generally consists of drawers, trays or shelves that can be deep enough to hold large pots and pans or shallow enough to hold cutlery and linens. Pull-out shelves are especially helpful if its hard for you to reach all the way to the back of your cabinets.
Pull-out storage doesn’t have to be constructed into your kitchen walls, shelves and cabinets. It can also be added on by using pre-built, inexpensive units. For example, you can easily install pull-out crockery racks or spice racks in your pantry. Likewise, pull-out wire baskets are an excellent choice for storing fruits and vegetables or for storing cleaning supplies in your pantry or underneath your sink.
Swing-out bins
If you are still looking for a few options for space under the sink, consider using a swing-out bin. When you open the door to the cabinet, the swing-out bin comes out with it, making it very convenient for you to access. It also allows you to hide your bin from view in the kitchen. You may want to find a way to store all of your plastic grocery bags. An option for this is to install a holder on the door that is designed specifically for these bags. This is a great way to keep them within reach without actually having to have a mess on your hands.
Adding a pantry
Having a functional and versatile pantry storage system is a great way to de-clutter a kitchen for a more organised feel. If you have always wanted a pantry of your dreams, here are some of the options you should consider for your kitchen.
Placing appliances in the pantry frees up bench space in the kitchen / Source: Kitchen Perfection
Drawers and baskets
An easy way to add quick and attractive storage to small spaces in both apartments and homes is by installing drawers and baskets. Similar items can be grouped together for a streamlined system, and they are also easier to locate. Flours, spices and pasta are suddenly within reach and in the same spot for an added convenience. Plus, baskets and drawers are temporary options. They’re easy to install and remove, so even renters can use them. They’re also versatile, so no matter the size or shape of the pantry, there are baskets and drawers that will suit it. One thing to remember with drawers is that you need to account for the full opening range and weight of the objects within to maintain complete functionality and to keep the area safe.
Two kinds of pantry shelves
Sometimes, tight spaces or limited mobility make it hard to reach the back of the shelves. In these cases, it’s best to install either pull out or swing out pantry shelves.
Swing-out shelves swing out to the left and right like a door. This opens up the entire pantry for the clearest view of all your goods, but it does use a greater amount of space in your kitchen.
All the accessories
If organisation is your ultimate goal, there are dozens of helpful pantry accessories that can make your life simpler. Modular storage is a great example and makes short work of neat stacking and frees up the greatest possible space in packed pantries.
Every room in one’s home is important. However, if you’re someone who spends a lot of time in the kitchen and loves to cook, it’s essential that you get your kitchen design completely right. You may have heard it before, but, in the end, it’s the way we perceive and organize the kitchen (and every other room, for that matter) that will affect the way we feel about it. Therefore, if your goal is to make healthier meals and enjoy the process and the environment at the same time, you should be very careful not to make the following kitchen design and remodeling mistakes.
The question of open shelving
Open shelving is beautiful and it can make your kitchen come to life. This is especially true if you have some unique items that you want to show off. On the other hand, not every kitchen item you own should be on display. Some things are best kept in closed kitchen cabinets. Therefore, possible mistakes are having either too much or not enough open shelving. Try to create the perfect balance for your kitchen space.
Lighting solutions
In order to achieve the best possible look in one’s home, expert designers advise three types of lighting for almost every room. This is especially important for the kitchen. Of course, you need a ceiling light as your main source of brightness. However, that’s not enough for a warm and comfortable space. As you’ll be cooking and preparing meals there, you also need task lighting. These can be LED strips at certain spots. Moreover, if you’re going for a specific style for your kitchen redesign, accent lighting is another type of lighting that you’d probably want to consider. If you neglect the last two solutions, your kitchen won’t be properly lit and can lose its cozy feel.
Of course, we all enjoy stainless steel kitchen elements. You should definitely invest in a stainless steel oven and a fridge since these will be more durable and easier to clean. Also, a stainless steel dishwasher is the perfect choice for a modern kitchen. However, no matter how much you value the modern look, you shouldn’t go overboard will stainless steel. Apart from the mentioned appliances, using stainless steel for every single surface and appliance in your kitchen can create a room that’s too cold and uncomfortable to spend time in.
Cabinet installation & organisation
In general, the kitchen requires plenty of room for storage. However, it’s very important that you pay attention to the way the cabinets open and the place you want them to be. One of the biggest design mistakes involves the unfortunate cabinet placement where the cabinets next to each other cannot be open at the same time. This is something that you want to keep in mind if you wish for your meal prep to proceed smoothly.
As you’re already aware, the kitchen is the place that probably has the biggest number of electrical appliances in the entire home. In that respect, you should think about the appropriate number of electrical outlets as well. Unfortunately, this can easily slip your mind during the remodeling process. Therefore, it would be best to have some kind of a reminder so that you can address this issue as soon as possible. You don’t want to finish the whole remodeling process only to find yourself stuck with just one or two available outlets.
Contact local kitchen renovators
It’s never a good idea to rush into the remodeling process if you don’t have everything worked and planned out. Therefore, make sure to decide on a specific look so that you can effectively discuss the best options with your contractors and finish the project as quickly and efficiently as possible.
When buying an oven, you need to consider a few things. Should you go with an electric or gas oven? Should you pick one that looks great and stays in one place? There are lots of features to consider and designs to choose from, so hopefully this guide will help you work out what type of oven is best for you.
Electric vs gas ovens
Historically, people have gone for gas ovens because of their heat control. However, electric ovens can heat up and cool down quickly now as well, meaning that there is little difference between the two. Often, people choose electric ovens due to their versatility and multifunctional uses.
Gas ovens, however, are more energy efficient and better for the environment, which is becoming increasingly important to many people. They also help remove moisture from food better, making them more popular amongst chefs.
Beyond the appearance of an oven, there are a number of features that you need to consider. Safety features include:
Having a door that holds itself open, rather than one that can only be open or closed all the way
Safety stops to prevent shelves sliding out
Shelves that don’t drop down and sag when taken out this can make cooking heavier dishes more difficult
Grill trays shouldn’t sag either, but must extend out enough so that foods at the back can be turned and worked on
The grill’s heating element should be safe, eliminating the possibility of having your hands touch the heat source by accident.
Other features include:
Having a number of racks
Having many rack positioning options at least three
Having a smokeless grill tray
Having a grill tray with at least two positions
Additional features to look for
After these main features have been considered, other optional features can be looked at, such as:
Fan assisted ovens with at least one fan. These are more expensive, but distribute heat better.
Quick preheating
Defrost functions are also handy for cooking frozen foods.
Self-cleaning ovens Catalytic liners will absorb fat, whilst pyrolitic cleaners burn off fat and convert then to ash by heating the oven to extreme heats.
Electronic controls make the cooking process more simple, but are an unnecessary and costly extra. Automatic timers, however, are handy options for both cooking and safety.
Types of ovens: Built-in or freestanding?
Freestanding ovens
As you might have guessed from the name, a freestanding oven is installed straight onto the floor. Generally, freestanding ovens combine the oven part with the cooktop to create one all-encompassing unit. They’re very easy to install since they can fit into most spaces. All you’ll need to do is hire an electrician to set the wiring.
As far as style goes, freestanding ovens fit better with traditional designs, but will certainly look fine in just about any kitchen. You can also easily move them out of the way for repairs if something breaks. The only downside to freestanding ovens is that they make the area around them quite hard to clean – the gaps between the benchtop and the oven can be narrow, and will attract plenty of dirt and grime. Also, freestanding ovens might be hard on your back – since you’ll be constantly bending over to check on food and move it out of the way. Take that into consideration before you install one.
Freestanding ovens come in a variety of options and can be easier to repair / Source: Unitek Constructions
Built-in ovens
Built-in ovens are installed right into your kitchen cabinetry; this design allows for much greater flexibility. You don’t necessarily need to have the oven and the range in one unit. Instead, you can move them to wherever is better in your kitchen. Since the layout is so flexible, you can install the unit higher up – meaning you’ll save a lot of time and pain from constantly bending over. You can have the units installed higher up in the kitchen. They’re designed to flow and fit into whatever different layout you have.
There are some drawbacks to built-in ovens, though. Since the two different parts of the oven are separate, the oven might take up more space. Also, since they’re built straight into the cabinetry, it can be a very arduous process if you ever want to upgrade the oven. Built-in ovens are also much harder to clean and require a professional to install.
When to replace your oven
In many cases, ovens can last for many years. Nevertheless, from time to time, it will become necessary to replace the old oven with a new one. Knowing when you will need to do this can take some time, though. You will want to make the right decision so you are not wasting time or money on the process. Consider the following factors when it comes to replacing your oven:
Is repairing an option?
Talk to a professional about the options available to you for replacing your current oven or if you can repair the existing one. If it is possible to cost effectively repair your old oven, doing so may be a good idea. However, if you will need to make regular repairs to keep it running, this may no longer be the right option for you.
Are you renovating?
In some cases, you can hold off a bit if you are planning to do some renovating in your kitchen in the coming months. You may want to hold off so that you can be sure that you are investing in an appliance that will fit well into your overall new layout. It is a good idea to choose a new oven that will last for many more years when the time comes.
Is it working okay?
In some cases, there is no need to replace your current oven if it is serving your needs just fine. However, if it is not heating properly or inconsistently, it could be costing you money on wasted food. In some cases, it may not be large enough or it may not have the features you need.
Contact local home appliance experts
When it’s time to replace
There are some circumstances in which you will need to replace your oven no matter what. If your oven has any of the following, replace it now rather than waiting.
Does it need frequent repairs?
Are your energy bills very high as a result of the oven?
Do you plan to renovate your kitchen right now?
Is there a concern when it comes to safety?
If it is time to make these changes, putting it off will not make the process any easier to do.
With a variety of benchtop styles and materials available for your kitchen design, choosing between a marble, stone or timber benchtop can be overwhelming. The benchtop you invest in can influence the ambience and style of your entire kitchen space.
Timber benchtops
Timber is the old reliable and the old standby. It’s been one of the favourites of people around the country for years and years. It offers a huge array of hardwood trees to craft into the benchtop. Tasmanian Oak (or Tassie Oak) boasts a light-brown to pale-blonde colour. Jarrah is dense, dark and red, going perfectly with areas that have plenty of natural light. Blackbutt can come in plenty of different shades or colours, and it’s cheaper than Tasmanian Oak. Red Gum has a naturally rich, red colour.
A timber benchtop can prove to be a truly beautiful addition to any kitchen – it’s got a classic, natural feel that is impossible to find among the many, many other material options you have out there. You can either choose from a solid slab of timber or one that is made from several joined-together boards. There are dozens of varieties of timber to choose from, which means you’ll likely be able to find a style and colour of wood that perfectly suits the look you’re after.
Timber benchtops are also incredibly durable. When you’re ready to change up your look – you can either sand it back and refinish, or recycle it. Timber fits especially well with certain types of kitchens – for example those in a ”rustic” style – where the cracks and nicks of age actually make everything look better. Timber is also low-maintenance and, if you’re going to use recycled timber, it’s actually very cost-effective.
Here are other things you should know about timber benchtops.
Sealing Timber Benchtops:
As with any natural product, timber is susceptible to daily wear and tear. To protect the timber and increase its lifespan, it’s essential to seal it regularly. Sealing timber benchtops creates an extra protective barrier, preventing it from absorbing liquids and allowing it to be more resistant to scratches and staining. It’s recommended to seal the timber benchtop with a food-safe sealant designed for this purpose.
Rubber Wood Benchtops:
Rubberwood, also known as parawood, is a popular choice for timber benchtops. It’s lightweight and durable, making it ideal for use in the kitchen. However, it’s worth noting that the colour of rubber wood tends to be lighter than other varieties, so take this into consideration when choosing the colour palette for your kitchen.
Acacia Solid Oiled Hardwood Project Panel:
Acacia is a hardwood that is well-suited to use as a kitchen benchtop. It is a durable and long-lasting timber, with a natural, warm, and appealing aesthetic. Acacia solid oiled hardwood project panel is an easy-to-install pre-cut panel that can be cut to size to fit any kitchen benchtop. The oiled finish provides a non-toxic food-safe sealant that helps the timber last longer and is a popular choice for those looking for an all-natural benchtop option.
Beech Laminated Panel:
Beech laminated panel is a practical choice for a timber benchtop. It is a stable wood, almost white in color, and is less expensive than some of the other timber options available. It offers good durability, with the rigidness and ease of use found in manufactured wood like MDF or plywood. This makes Beech laminated panel ideal for those looking for a more affordable timber benchtop option.
However, timber might not be as strong as other materials you can pick for your benchtop, and is not heat-resistant. That means that your benchtop is likely to get scratched, stained and nicked over time. You can protect the timber benchtop with finishes, but even then, they’ll likely get damaged over time. Timber benchtops can be very vulnerable – susceptible to water damage – so you’ll have to be very, very careful around them. Timber might also not fit into the different style of your home. The wood can clash against a more modern, streamlined approach, for example. Think carefully about the style before you decide on timber.
Marble benchtops
A marble benchtop gives a striking, elegant and timeless edge to your kitchen space. The option between honed or polished finishes, as well as the colourful range of patterns and tones offers an extensive range of marble options that add a unique touch to your kitchen space.
As a durable option, marble is an economical investment for your kitchen, lasting longer with everyday use without replacement or repair. While staining may have been a problem with marble benchtops in the past, contemporary marble benchtops are treated with sealants that prevent liquids from penetrating and staining the stone. With regular sealing and cleaning, marble can be a long-lasting option but it is not scratch or stain resistant.
Marble is a durable and fashionable option for your kitchen benchtop / Source: Henry and Co Interiors
Marble is also incredibly versatile, enhancing different types of flooring or wall treatments, and working well with different design schemes. Whether you have a rustic country pine kitchen or a contemporary kitchen gleaming with glass and chrome, marble will make everything look even better, increasing the overall style of your kitchen space.
Granite benchtops
Granite is a fairly low maintenance option, its non-porous surface allows the surface to retain a fresh, new look for years. Granite is available in a range of shades and colours to ensure it adapts to your decor. Unlike the natural finish of marble, granite benchtops create a uniform and solid look.
Similarly to marble, granite also requires frequent sealing to ensure it remains looking new and should be cleaned regularly to prolong the life of its surface.
Granite is considered to be more durable than marble with a surface that is highly resistant to scratches and spills, but can be on the expensive side. As a heat resistant and scratch resistant stone, Granite requires less maintenance than marble and is mostly resistant to acidic spills, offering a popular alternative for your kitchen space.
Bamboo benchtops are both beautiful and functional, making them a great, unique choice for your kitchen. Bamboo is similar to timber but has its own distinct grain and colour that looks good in any kitchen. Bamboo is durable, stable, easy to clean and not affected by heat or cold, making it perfect for any type of cooking setting.
Bamboo benchtops are, in most cases, scratch-resistant and easy to sand down and re-varnish. Since these benchtops are not affected by water or moisture, they will not misshape or warp, and being moisture-resistant means that they will also not decay or support the growth of mould. Another great benefit is the fact that they do not expand or contract with the weather as timber benchtops do.
Bamboo benchtops are also an environmentally friendly option because they are made from an entirely renewable resource. Not only is it renewable, but it is also plentiful, and it grows back quickly so using it is not depleting the world bamboo supply.
Onyx benchtops
For a pure, elegant and visually striking choice, you can try the natural stone onyx. Onyx is a type of marble rock; its amazing and natural translucency, along with the striking, contrasting bands of colour that run through the stone, combine to make it arrestingly beautiful. It has plenty of colour choices – from honey golds or minty greens, to rich browns and reds – and you can either polish it to a high gloss or give it a cool-looking matte-like finish by honing it.
Just like every other feature of the kitchen or the house, though, you’re going to have to care for onyx benchtops to make sure they look good and last for a long time. Use a powerful and reliable sealer on the onyx benchtop when it is first installed to make sure it’s protected against spills and accidents. You will also need to reapply the sealer on a regular basis. Additionally, make sure not to use acids or acid-based cleaning agents when wiping down the onyx benchtop; these can harm the delicate finish. Just do a little bit of simple maintenance, and you should have this beautiful kitchen benchtop for a long time.
Glass benchtops
There are a number of options for customisation when it comes to glass benchtops in the kitchen:
Patterned stumped glass
Painted glass
Plain glass
Tinted glass
It can be freestanding or laid on top of another material like stone or timber. They aren’t available in standardized sizes so must be cut once to a specific measurement. You can however opt for a recycled glass – making it an environmentally friendly option.
Glass benchtops are a hygienic kitchen benchtop option since there are no crevices or joints for which bacteria can build. They are extremely easy to clean and won’t stain – it’s as simple as wiping them down with a cleaning solution or wipes. They are heat resistant so hot pans on the counter are not a worry.
Laminate benchtops
The cheapest type of kitchen benchtop is the laminate benchtop. It’s also one of the more customisable, available in a huge range of high-end styles, colours and patterns. However, for as cheap and as customisable as benchtops are, there is a downside. Laminate benchtops are thinner than other styles and won’t last as long as timber, solid surfaces or stainless steel.
Stainless steel benchtops
Stainless steel is also popular these days, offering a sophisticated look when paired with neutrals or black and white. Gourmet chefs love stainless steel, as it fits in well with whatever type of kitchen you have. It’s very expensive, but it’s also durable. All the maintenance stainless steel needs is a regular wash and polish, plus benchtops made of stainless steel are heat and water-resistant. Scratches to the surface can be easily buffed out.