Categories
Building & renovations

How to paint kitchen cabinets

It might seem small, but well-painted kitchen cabinets can liven up your space and make your kitchen more enjoyable. Not only does it add colour and life to your home, but it’s also a budget-friendly DIY project. A kitchen cabinet painting project can also be fun for your family!

If you don’t know how to paint kitchen cabinets, don’t fret. It’s a simple project with a satisfying result that will invigorate your kitchen in no time.

Tools and materials you’ll need

Claiming you know how to paint laminate kitchen cupboards takes more than just a brush and some paint. Doing it properly takes a few tools to ensure your paint job is neat and beautiful.

  • Bucket
  • Primer
  • Paint for kitchen cupboards like oil-based paint, latex paint or acrylic enamel paint
  • Paint brushes and rollers
  • Screwdrivers and drills
  • Masking tape
  • Scrubbing materials like brushes and sandpaper
  • Wood filler
  • Putty knife
  • Soap
  • Protective gear like gloves and masks

While the methods aren’t necessarily difficult, the time it takes to complete this project depends on the number of kitchen cabinets you’re working with. Following our step-by-step guide can take you an entire weekend for a modestly-sized kitchen or a whole week if you have a massive kitchen to transform. If you can’t commit much time, consider hiring a professional.

The essential steps to painting your kitchen cupboards

Step 1: Prepare and clean the kitchen space

Before you start painting cabinets, you have to prep the space around them. If you plan to paint in the kitchen, this is especially important as you don’t want paint to bleed onto any other surface. Even if you’re painting outside, you still need to clean the surroundings to make sure you can manoeuvre the furniture in and out effortlessly.

Clear out the room and make sure there are no utensils and appliances in the way before you start your kitchen painting project.

Step 2: Remove the cupboard hardware

removing kitchen cabinet hardware
Remove the cabinet knobs and hinges before painting | Source: iStock

Use your screwdriver or a drill to detach the cabinet doors from where they’re attached. Find the hinges and make sure you take them out without damaging the surrounding area. This part is somewhat time-consuming, especially because you’ll need to disassemble the different cabinets as well.

Make sure you detach all the removable hardware, like knobs and hinges. You’ll also want to find screws holding drawers together and try to break them down into all their separate pieces to ensure full coverage when you paint your kitchen cabinets.

Step 3: Clean the cupboards

A crucial but severely overlooked step in this project is cleaning the cabinets to guarantee a smooth paint job. First, you must run through the hardware with a damp rag to get rid of any blemishes on the cabinets, whether from food or other dirt that can accumulate in your kitchen. You can also use dish soap to get rid of any stubborn stains and blemishes on the wood.

This step also prepares your wooden drawers for sanding, as any grease or dirt can be further pushed in when pressure is applied. While at it, you should also prepare the area you’ll use for painting. Lay down some brown builder’s paper on the floor to prevent mess.

Step 4: Repair scuffs with wood filler, then sand

Sanding the wood makes paint adhere better | Source: iStock

On older cabinet units, you’ll have small nicks, scratches and dings that can be hard to deal with when you start painting them. The best way to fix bigger blemishes is by using wood filler, a special material that can be applied with a putty knife to smoothen your cabinet’s surfaces.

Next, you’ll have to sand the cabinets. This prepares the surface and lets you apply the paint to achieve a smooth finish. Lightly sand all around the cabinet, especially in exposed areas like the cabinet door. This can be an arm workout, but it’s the only way to get an even cabinet surface after painting.

Step 5: Start priming

Painting without a primer is a big mistake. Primer improves paint adhesion and ensures a durable finish when you finish painting. Determine the kind of cabinet boxes you have, whether laminated or wood, before running to your paint store to get the right primer for your cabinet frames. Protect your cabinets using tape to protect the parts you want to stay paint-free.

Use long and even strokes when putting on the primer with a paintbrush or a paint roller. Apply it on every surface that will be painted, even the sides and the back. Every primer is different, so read the manufacturer’s instructions to know how long to dry the primer before moving on. 

A pro tip: If brush marks are evident after applying primer, use sandpaper to smooth it before painting.

Step 6: Paint your first coat

Repainting kitchen cabinets gives it a new look | Source: iStock

The best way to apply new paint evenly is by doing multiple layers of thin coats rather than one thick layer. This gives you a more even application and leads to a paint job that doesn’t easily chip.

To start with your first coat, you should apply it across the surface in even, parallel brush strokes to prevent drips and rough surfaces. Let the coat of wet paint dry, then sand it again and wipe with a tack cloth to remove any sanding dust before moving on to your next coat.

Step 7: Apply more coats

The second coat of your paint will make your drawer fronts pop. After your first one dries and is cleaned of any dust that could have settled, go in with another fresh coat that’s just as clean and even as the first one you did. Afterwards, repeat the drying and sanding process to prep for any further coats.

Usually, two coats are enough for a perfectly adequate paint job, but a third coat can make your cabinets’ colours more vivid and prolong the life of your freshly painted cabinets. Just note that it’s very time-consuming to keep on applying layers. Once you’re happy with the colour, let the cabinets dry fully, which can take overnight.

Step 8: Paint all the pieces properly

Cover all bases for a seamless finish | Source: iStock

Make sure your paint is applied well, and coat your cabinets completely. While the drawer fronts and cabinet doors are the most important parts as they are the ones people see first, it’s also good to paint the sides and the back of your kitchen cabinets as they get seen when in use. Put a thin paint coating on them and watch your paint finish feel slightly more elevated.

Step 9: Dry and put the drawers back

Once you’ve finished painting your kitchen cabinets, you need to let them dry completely. Afterwards, remove all the tape from your cabinet doors and drawers and remove dust from all the surfaces. Reattach all the different hardware pieces, like the hinges and the knobs.

Carefully put back each drawer and cabinet door. Even if your paint is fully dry, fresh paint still gets chipped easily, so you need a delicate hand to avoid bumping the pieces on any kitchen counters.

What to use: a paint roller or a paintbrush?

As you paint kitchen cabinets, you might be wondering if you should be using a paint roller or a paintbrush. Both tools have their advantages and disadvantages, and in fact, you might need to use a combination of the two for your newly painted kitchen cabinets to look their best.

Paint rollers cover a big area with each stroke. The most common type of roller is a manual roller, and it’s the one that’s available in all hardware stores. Use this tool to cover the cabinet doors’ flat sides. It leaves clean and even coats very quickly, so having a roller in your toolbox can make your project much quicker. You might also need unique rollers for special kinds of paint, like latex paint.

Paintbrushes help you apply paint on more embellished kitchen cabinet doors. If your cabinets and drawers have intricate details and non-detachable knobs, you will need to paint around these places with a precise paintbrush. Brushes also work best with oil-based paint, a common paint for kitchen cabinets.

There’s a third option that’s less common but highly effective: paint sprayer. You get the coverage of a paint roller while also being able to paint precisely like a brush. However, kitchen cupboard spray paint and paint sprayers are expensive and require practice to use, so if it’s your first time doing a big painting kitchen renovation project, you might want to hold back on spray painting kitchen cabinets and leave it to the pros. 

Make painting kitchen cabinets much easier

Kitchen cabinets take up much of the visual space of your kitchen, so painting them is a great way to brighten up and add colour to a vital part of your home! With a tack cloth, a paintbrush and paint of your choice, you can create beautiful cupboards with minimum effort all in one weekend. Whether you choose to paint or spray kitchen cabinets, just make sure you’re tidy and apply the paint in clean and even coats to guarantee your success.

If you’re pressed for time and can’t commit a weekend or a whole week for this kitchen beautification project, or if you just don’t have confidence in your painting skills, then it might be time to ask help from a professional house painter. Equipped with everything they need to turn any kitchen into a beautiful space, interior house painters can bring new life to your kitchen cabinets!


FAQs on painting kitchen cupboards

Can I just paint over my kitchen cabinets?

It’s more complicated than simply buying paint. There are a few things to consider before painting over your old fixtures. If it was sealed with any wax, as some painted cabinets are, you must remove it before painting. If your cabinets were painted with oil-based paint, then water-based paint won’t adhere to it, and vice versa. Also, if the finish of the paint isn’t intact anymore, you’ll need to sand your cabinets before applying paint over them.

Do I have to sand the cabinets before painting?

If you’re repainting your cabinetry, you should sand before starting the process. Over time, the cabinets can get small nicks that can be annoying to deal with while painting. Sanding can smooth the surface for a better paint application.

Is it better to brush paint or spray paint kitchen cabinets?

Brushing paint and spraying paint aren’t too different in terms of results, but they differ when you’re applying the pain. Brushing takes a lot of time, but it’s also a more precise and easy way to get paint onto your cabinet doors. Spray paint takes a deft hand and more skill, so it’s not recommended for paint novices. 

Categories
Building & renovations

How to remove paint from concrete surfaces

Whether as flooring or for indoor or outdoor walls, on your garage floor or in the living room, there is sure to be a concrete surface in most homes. One special characteristic of concrete is how porous it is, which is why getting paint on it is easy, and removing the paint can get a little tricky.

Say you accidentally left paint splatters on the concrete floor while painting a wall. You’ll need to go through the proper steps to remove the paint on concrete surfaces. Learn how to remove paint from concrete floors and other surfaces using this step-by-step guide to ensure you have clean and attractive surfaces at home!

Understanding the types of paint and concrete

Yellow paint splatters on concrete ground | Source: iStock

Different types of paints, like epoxy and oil-based, are used on concrete surfaces. However, the paint removal difficulty depends on the paint type. Latex paint, for instance, peels easily, allowing simple scraping before using paint thinner. 

The affected surfaces can also influence your choice of paint removal method. For example, open driveways make using lots of chemicals and a pressure washer easy, as they are wide open spaces. However, you might need to use lighter chemicals and more elbow grease to get the paint off safely from a concrete wall indoors.

Choosing the right paint removal method

Before getting started, you’ll need to determine your paint removal method.

Scraping 

If the paint is already chipping away from the concrete and peels off easily, a paint scraper or a wire brush and some patience could do the trick. This method is easy but time-consuming and will probably need to be combined with chemical strippers.

Chemical strippers 

The most common method is using paint strippers like paint thinners or acetone. There are different kinds of paint strippers; some are better for water-based latex paint, and the most common is used for oil-based paints. This is a fairly easy method, but it takes a bit of time and can be hard for those sensitive to strong odours.

Power washing 

By using a pressure washer that shoots powerful jets of water, you can physically separate the paint from the concrete. This works on nearly every paint and is a quick way to do the job. However, you’ll need to rent the equipment or even hire a professional to do it, as using the machine improperly can gouge your concrete surface.

Sand or soda blasting 

This method is the costliest, as it requires you to buy or rent industrial tools; however, they are also very effective. Sandblasting shoots out silica, while soda blasting uses specialised sodium bicarbonate, also known as baking soda. Both are highly effective when used to remove paint from concrete.

Tools you’ll need

For a typical at-home paint removal process, you’ll need these items:

  • Protective gear like gloves and goggles
  • Bucket
  • Sponge
  • Wire brush or steel wool
  • Pressure washer
  • Paint thinner
  • Plastic sheeting

You’ll need at least two hours to remove big paint spills on concrete, but whole painted walls should take half a working day. It will also be a lot of active work, so commit yourself to the process.

Safety precautions

Removing paint might seem easy, but all the methods require strong chemicals or heavy equipment. Stay safe by having all the safety equipment on you, like heavy-duty gloves and safety goggles. When using strong chemicals, ensure you’re not in an enclosed area and open windows and doors where possible.

A guide on how to remove paint from concrete floors and other surfaces

Step 1: Scrape away loose or peeling paint

Scraping paint off a concrete wall | Source: iStock

The first thing to do when you remove paint stains from concrete is to peel and scrape off any old paint. This removes a lot of the paint without the need to use chemicals like a paint stripper for concrete. 

You can do this step by hand at first for any old paint stains that can be peeled off, but you’ll have to pivot to using a scraping tool to get under the tougher stains.

Step 2: Clean the surface

After scraping as much paint as possible, you need to clean off all the dirt and grime that can act as a barrier between the paint stripper and the concrete. This is an important step, as concrete is porous and hard to clean thoroughly. Mix a cleaning solution with warm water, then scrub with your wire brush.

This is also where you can use a pressure washer. Ensure your washer is in an appropriate setting so you don’t gouge the concrete surface and cause damage. Use the pressurised water to clean the area with the paint stain.

Step 3: Apply a paint stripper and let it set

A gallon of paint thinner ready for use | Source: iStock

Once you have a cleaned concrete surface, you can start using your paint stripper to remove paint deep in your concrete. 

Wear protective gloves, glasses and a mask. If you’re working outdoors, use plastic sheeting to cover up any plants around, even if you’re using environmentally-friendly paint thinner to be safe.

Apply the paint stripper generously over all the paint spots you want to remove. Not every paint thinner is the same, so it’s best to read the instructions to know how long it needs to soak. As a general rule, let the paint remover stay for 20 minutes to break down the paint stain.

Step 4: Get scraping (again) or scrubbing 

The paint thinner should lift the paint off and create a mass easy to scrape off with a putty knife. Some patches might be tougher to remove than others, so scrape and scrub until you can’t take them off anymore. 

You can also return to using your pressure washer to remove all the paint, which should be much easier now that the paint remover has chemically lifted the paint.

Step 5: Rinse and repeat 

Tough paint stains or splatters usually need more than one cycle of paint removal, so just go back to applying the paint stripper and scrubbing. If the paint stain is proving too tough, you can pivot to a different kind of paint thinner or use a different paint removal method.

Restore the beauty of your concrete surfaces

Removing old paint from a wall | Source: iStock

Removing paint from concrete takes time and a lot of effort. It’s a helpful skill to learn to do by yourself for small paint stains. However, it might be best to call up a professional for big projects big project, like revamping a fully painted garage floor.

Expert paint removers are equipped with all the tools for clean and thorough paint removal. From floor grinders to pressure washers, you’ll be sure to get rid of any paint stains on concrete. Experienced professional painters can finish the tough job and put on fresh paint for your home.


FAQs on removing paint from concrete

Does acetone remove paint from concrete? 

There are many different kinds of paint thinners out there. Acetone is a great example that you probably have at home, and it will work as a paint stripper substitute for small stains in a pinch. 

What is the best way to remove paint from a concrete floor?

It depends on the paint type and the concrete surface. For example, latex paints are easy to scrape off, but you cannot say the same about oil-based paint. It’s best to use the appropriate paint-removing technique in the situation you find yourself in.

How do you remove spray paint from concrete?

If you plan to remove acrylic spray paint on concrete walls, this is best removed using an ammonia solution. Alternatively, you can use acetone for smaller areas. 

Categories
Building & renovations

How to identify asbestos

What is asbestos?

Not all minerals are good. Asbestos is one example of how naturally occurring minerals can have an adverse effect on humans. Mined to bring stability to concrete-like products, it was discovered that the fine fibres of these minerals were causing cancer in humans. By the time asbestos showed its true markings, one in three homes in Australia had used products with this deadly mixture.

Why is asbestos dangerous, and how much asbestos exposure is harmful?

No amount of asbestos exposure is considered safe. While daily mining and manufacturing of asbestos are certainly the most high-risk, minimum exposure can show up later in life. Because filaments and dust particles associated with asbestos are not visible to the naked eye, special asbestos testing can only determine the amount of asbestos that each structure has. 

Asbestosis is the result of inhaling asbestis fibers. It is a chronic lung disease that causes lung tissue to scar. This disease can take 10 to 40 years to form and can be mild to severe. Signs of asbestosis include:

  • Feeling short of breath
  • Dry, persistent cough
  • Weight loss, no appetite
  • Tightness in chest

Mesothelioma is a tumour formed from asbestos exposure. Unlike asbestosis, the life expectancy is ten years. There is no cure. Chemotherapy and radiation may improve prognosis, but the end result is usually fatal. 

Employees that worked with insulation, bricks, and concrete in the 50s and 60s have suffered the most with the regular exposure to asbestos dust. Breathing in the dust irritates the lungs and causes a place for cancer to grow. 

Source: Shutterstock

Materials and tools

Removing asbestos is no feat for the untrained. There are special equipment, supplies, and specific knowledge that professional asbestos removal companies possess. A few of these specialty items include:

  • Restraint from falling
  • Trash bags-black asbestos labelled
  • Gloves bags-Grayling
  • Air scrubbers
  • Mastic removers
  • HEPA vacs

How to identify asbestos

There are no outward signs of asbestos in products. Only by being tested by the National Association of Testing Authorities, Australia (NATA) can the presence of asbestos be verified. However, since the number of products that used asbestos is so broad, care in every situation is given. Some of these products include:

  • linoleum
  • roofing
  • cement floors
  • internal and exterior walls
  • insulation

Asbestos symptoms are often realized from the age and construction of the materials in question. If unsure, they can be sent off for testing. A licensed surveyor can also take samples of materials and submit them for test results. The average cost of their services is $520.00.

Contact local asbestos experts

Other asbestos-containing materials

Asbestos-containing materials can be found in products manufactured before the 1980s, including asbestos plasterboard, underlay, and fake brick cladding asbestos. 

  • Asbestos plasterboard: A drywall panel made from a gypsum plaster core and reinforced with asbestos fibers. It was commonly used in walls and ceilings for its fireproof and insulating properties.
  • Asbestos underlay: A type of insulation material made out of asbestos fibers that were commonly used to insulate floors in homes and buildings constructed prior to the 1990s.
  • Fake brick cladding asbestos: A thin layer of bricks applied to the exterior or interior of buildings to give the appearance of real bricks without the added weight and cost. Some fake brick cladding products were made with asbestos-containing materials, which were added to the cement or adhesive used to bond the bricks, and have since been identified as hazardous.

Villaboard and asbestos: Does Villaboard contain asbestos?

Villaboard is a popular lining product that is commonly used in both residential and commercial construction projects. It’s a type of cement-based sheet that is used as an interior lining for walls and ceilings. It is a highly versatile product suitable for high-moisture areas, making it ideal for wet areas such as bathrooms, laundries and kitchens.

Does Villaboard contain asbestos?

Most building materials manufactured before the 1980s contain some level of asbestos. This includes products like fibro sheeting, cladding and roofing, insulation, and older versions of Villaboards manufactured prior to the 1990s. 

It is difficult to identify the presence of asbestos in Villaboard without conducting laboratory testing. It’s best to assume that any construction materials used prior to the 1990s could contain asbestos. If you suspect the presence of asbestos in Hardies Villaboard or other lining materials, have it professionally tested and removed. 

Why you should always leave asbestos removal to a professional

Asbestos removal cost is not cheap. Depending on your location in Australia and how many square meters are involved, it can run several thousands of dollars. 

Asbestos awareness should be left up to asbestos removalists experienced in what to look for and where. Asbestos removal should only be undertaken by a licensed and qualified professional in accordance with strict regulations and guidelines.

It is required for asbestos removalists to be licensed. There are two types of Asbestos Removal Licences: Class A and Class B. Class A removalists are trained to remove all signs of asbestos, while Class B can only handle solid asbestos material. An asbestos inspection can be performed and materials tested for asbestos. 

Source: Shutterstock

How to hire an asbestos removalist

Hiring an asbestos removalist is more about the experience than the cost. There are several steps required in securing the property, planning on demolition, proper discarding, and making sure that all laws and regulations are being followed. Look for a seasoned company and prepared for any mishaps that could occur. Notifications need to be sent to surrounding properties, and the air quality is routinely tested. 

Verify credentials, including license, certifications, and work experiences. It is imperative that they strictly comply with the national and state-wide Work Health and Safety Regulations to help validate their knowledge and expertise.

Licensing requirements vary across Australia. In some states like NSW, asbestos removal specialists and businesses are required to obtain a license when removing asbestos or asbestos-containing materials.

Categories
Building & renovations

What is a cabinet maker?

When you require assistance with a repair or need new construction of timber-related products, you should turn to a cabinet maker professional. Although many cabinet makers only specialise in one expertise, others can complete any requested job.

Cabinet makers mostly receive on-the-job training during their apprenticeship as opposed to formal training. Also, many are woodworking hobbyist who decide to enter the trade. In any situation, they have a specific skill set that matches their interests. The services they can provide include:

  1. Customised furniture design
  2. Restoring furniture
  3. In-home constructions
  4. Outfitting offices

Some cabinet makers work solo, some have a team of apprentices and others may be part of a joinery company.

In most locations, there are numerous cabinet makers to select from. However, what do you need to know about your local cabinet makers? How do you know who is best for the job?

Cabinet makers can create custom builds to suit your interiors – like custom TV cabinets / Source: Maif Kitchen & Shop Fittings

What’s the difference between a cabinet maker and a carpenter?

While both carpenters and cabinet makers are tradespeople that work with wood, there are some key differences between the two. Carpenters will usually work on-site, constructing, shaping and installing the structure of a building.

Cabinet makers on the other hand, will specialise in smaller scale projects – such as furniture or other quality woodwork.

Selecting a cabinet maker

When searching for a reliable cabinet maker there are several considerations, including:

  • Request a portfolio from the tradesperson and ask for references from satisfied customers.
  • If the cabinet maker has a showroom visit it and look at the displays.
  • Try to take a look at their workshop. You can see small hints about their skill through their organisation, equipment, tools and how well their current projects are being constructed.

Once you have selected the right person for the job, ask for a written quote prior to signing anything. Also, if the cabinet maker will be installing fixtures in your home, ensure they have their own insurance. If they do not have this and an accident occurs, you are liable for injuries and damages.

Categories
Building & renovations

DIY: How to paint a ceiling

Painting your ceilings is a terrific way to elevate your home’s aesthetic appeal. After all, the ceiling can be considered your fifth wall. Even without repainting all your walls or revamping your furniture, you can dramatically change a space by touching up the ceiling. 

In this guide, we’ll take you through how to paint a ceiling and share a few tricks to make the most of your painting project. It takes a few steps and a few hours on a stepladder, but the results will be worth it.

Tools you’ll need for painting ceilings

Painting an empty kitchen white | Source: iStock

Unsure about what paint roller to use for ceilings and what kind of paint to use? Here are the tools you’ll need to get started with your DIY project:

  • Stepladder
  • Drop sheets, plastic sheeting and painter’s tape
  • Protective gear (e.g., goggles, a dust mask, overalls)
  • Ceiling brush or broom
  • Interior putty
  • Putty knife
  • Sanding pole
  • 22-cm (9-inch) paint roller frames
  • Paint roller covers 
  • Paint roller tray and roller extension pole
  • 5 to 7-cm (2 to 3-inch) angled brushes
  • Stain-blocking primer
  • Your choice of paint

You’ll also need to allot around a day to paint a regular-sized (40 sqm.) ceiling. This includes a couple of hours for prep work, around 30–60 minutes to prime, 30–60 minutes to apply the first coat, and 2–4 hours to wait for this first coat to dry. You can do touch-ups or a second coat as needed. Lastly, you’ll need time to let it set and clean up.

A step-by-step guide to painting your ceilings

Once you have all your tools ready, it’s time to prep and paint! Here’s a beginner-friendly guide on how to paint a ceiling.

Step 1: Preparation

First off, put on your safety goggles, dust mask, and overalls. Get started in removing all the furniture and items in the room, or cover them with drop cloths and plastic sheets. Secure these in place with painter’s tape. If you’re painting an empty room and are doing the walls later on, you can skip this extensive masking.

If you have ceiling fixtures such as lights and ceiling fans, turn the power off, then uninstall or cover all electricals.

Next, sweep or brush the ceiling to clear the dust and cobwebs. You could also use a mop and mild detergent to clean it thoroughly.

Spot any cracks or holes? Apply some interior putty to fill them. Afterwards, sand the whole ceiling down for an even surface.

Step 2: Priming

Prepping the surface before painting | Source: iStock

The best way to paint a ceiling involves priming.

If your ceiling is pretty much stain-free, use any stain-blocking primer. But if there are already splotches, you’ll want to get an oil-based primer for water stains or a shellac-based primer to address other stains.

Use the angled brush to cut into the ceiling. “Cutting into” means outlining the edges and corners of the ceiling. Make 4 to 6 cm-wide strips of primer all around the ceiling. Then, apply primer to the rest of the ceiling. 

Step 3: Cutting into the edges

Check if the primer is dry. Once it’s all good, get another angled brush, your chosen ceiling paint, then cut into the edges, just like you did with the primer. Use a brush to fill the corner with paint, then make a straight line along the edge of the ceiling. You should end up with a nice 4 to 6-cm wide border to fill in at the next step.

Step 4: Painting the rest of your ceiling

Painting the ceiling grey using a paintbrush | Source: iStock

While the edges of your ceiling are still wet, start on the middle portion.

Imagine your ceiling is a grid with many little sections. Pick a section near one corner to start with a wet edge. This helps avoid streakiness and brush marks.

But before you go trigger-happy with your paint, here’s how to properly paint a ceiling with a roller:

  • First, load the paint onto the paint tray. Dip the roller into the deep portion, then run it across the tray several times to spread the paint evenly.
  • Lay the roller on the unpainted portion of the ceiling, then run it towards the wet edge with light pressure. Roll slowly, overlapping each stroke. You’ll also want to change the direction of your rolling–go in rows, columns, and zigzags for an even coat.
  • Once you’re done with one section, move on to the next part, ensuring you roll towards the last wet edge.

Try to finish painting the ceiling in one session to ensure uniform drying and minimise streaks.

Afterwards, wait two to four hours or until the paint is completely dry. Keeping the windows open can help speed up the drying process.

Step 5: Additional coats and touch-ups

This step is optional. But if you’re using a bright colour or flat white, going for another coat can help improve coverage.

The key here is to roll in a direction perpendicular to the first coat to even the paint out.

Once your ceiling is dry and ready for inspection, check the whole area for missed spots. Carefully brush paint onto these spots, then blend them out with a roller. For streaky areas, use the sander to sand these down before reapplying paint.

How to paint the cornices on a ceiling

Carefully painting the cornices | Source: iStock

If the room has cornices or coving, you should use a brush since this will give a more even wash of colour versus a roller.

Begin by cutting in at the edges with a brush and some primer, just as you would with a regular flat ceiling or wall. Apply primer to the rest of the cornice after cutting in. 

Let the primer coat dry completely, then apply the paint. Flat or matte paints are popular, especially since glossy paints can highlight imperfections in the cornice’s designs later on. If needed, use smaller paintbrushes to get into the cornice’s nooks and crannies.

The dos and don’ts of painting ceilings

Now you know the basic steps. But that’s not all there is! These rules for painting ceilings will make the process easier save time and money, and could even help you avoid accidents.

DO’s

  • DO paint the room from the top down, starting with the ceiling and ending with the walls.
  • DO get help when working with electricals on your ceiling, such as when removing or reinstalling your ceiling fan.
  • DO use painter’s tape to mask around the edges for straight lines when you “cut.”
  • DO have rags on hand for drips and splatters.
  • DO choose your ceiling colour wisely. Dark colours look dramatic and make the room feel cosier, but they may make rooms feel smaller. Light colours give the illusion of more space. They’ll also reflect more light.
  • DO choose a flat or matte colour to help hide defects in your ceiling.
  • DO “box” your paint for uniformity. If you’re using multiple cans of the same colour, you should pour them all into one large can or bucket to even out any minor colour differences. 
  • DO maintain a wet edge while painting to hide roller or brush strokes.

DON’Ts

  • Don’t just use any roller cover. Use thin or “low nap” roller covers for smooth ceilings and thicker ones for textured ceilings.
  • DON’T forget safety equipment and precautions. Wear a dust mask and goggles to avoid paint or dust getting into your eyes or inhaling paint fumes. Also, keep the room as ventilated as possible.
  • DON’T attempt to deal with mould in the ceiling by yourself. Ask an expert instead about how to remove mould from the ceiling before painting it.
  • DON’T use too much or too little paint. Excess paint can cause splatters; too little can result in patches and streaks.
  • Don’t attempt to paint a high ceiling by yourself. For your safety, hire a pro instead.

Hiring a professional painter to do the work

Considering hiring a local painter to do your ceilings? This could be a good choice if you’re in a time crunch or simply don’t feel comfortable working so high up for hours.

Make sure your contractor is licensed and qualified. Ideally, they should be insured, too, so you can safeguard against any accidental damage to your property while they’re on the job. You can ask to see the painter’s license, qualifications, and insurance papers before you hire them.

As for painting quotations, you can request a written quote and timetable in advance. This avoids miscommunication and puts you both on the same page. If you’re still canvassing, avoid getting the offer with the lowest quote since this could mean low-quality products and less experience in the industry.

Don’t forget to ask the painter for references or reviews. You can call up these references, read online reviews, and even ask these former customers about the prospective painter’s performance.

Now that you know how to paint a ceiling, get ready to roll!

Painting a ceiling can be an exciting and fulfilling DIY project. Follow this handy guide, and you should be ready to redecorate your home.

But if you think it’ll be a challenge, hiring a pro painter is worth the cost, as they can get the outcome you like. You’ll get the revamped ceiling you’re looking for, plus a perfectly smooth paint job!


FAQs on painting ceilings

How many coats of paint do you need for a ceiling?

Most ceilings only require one coat of paint. But if you’re covering a darker ceiling with a brighter-coloured paint, you may need two to three coats of paint to get the best coverage.

Painting your walls in the same colour as your ceiling? You’ll need a lot more paint since walls typically need two coats, minimum.

How long should you wait to apply the second coat of paint?

You can safely apply a second coat after four hours. Most paint takes two to four hours to dry, but this can change depending on the weather, how well-ventilated your room is, and even the type of paint used.

How do I paint popcorn ceilings with a roller?

When dealing with popcorn ceilings and other textured ceilings, it’s best to use a thick paint roller cover. This holds more paint and distributes it better in the nooks and crannies.

A word of warning when dealing with popcorn ceilings: these may contain asbestos, a dangerous chemical. You may want to hire a professional who can test for asbestos before proceeding with your painting project. 

Categories
Building & renovations

Your essential guide to café design and fit-outs

Everyone in the hospitality industry knows; the café business is cut throat. Every year hundreds of Australians take the plunge and open their own cafe or coffee shop, often realising a lifelong dream.  Unfortunately, many will fail long before they have made their owners any money.

The café fit out is usually the biggest expense a new café owner will face. Get it wrong and the business is destined to fail, but get it right and you will have a thriving business on your hands.

So before you start, we’d like to offer some common sense advice on how to plan a successful fit-out and start your café business off on the right foot.

Know your budget

To lay the foundations for success, every new café owner should have a tight business plan. Managing ongoing costs will be key to the long-term success of your café, but initially, set up costs (including the cost of your fit out) will be your biggest expense, and the biggest risk you take.

There are several factors to consider when completing a cafe fit-out / Source: Blank Creatives

According to the Australian Bureau of Statistics, more than 60 percent of small businesses cease operating in the first 3 years. A major reason for this is a lack of capital. If you spend too much on your fit-out you won’t have sufficient cash to run your business and will be destined for failure.

It will be very tempting to break the bank creating the café of your dreams but always remember, the more you spend on your fit out, the more you will need to turn over to break even or service any debt you incurred starting the business.

Whether fitting out a hole-in-the-wall coffee shop or a sprawling garden café, you need a realistic budget that you can stick to, and that all starts with a solid business plan.

Know your audience

First and foremost, your fit out must meet the needs of your customers. During planning, you should have spent plenty of time considering who your customers will be, and how your café will meet their needs. New café owners often try to be all things to all people. Most would be better off focussing on the needs of their core customers first.

For example, if your target audience is busy office workers collecting takeaway coffee and food, your fit out design will need to focus on customer flow and use of space. You will need clearly defined areas for ordering, waiting and collecting. Large signage that can be seen from anywhere in the cafe will speed up your line. Furniture and barriers can be used to gently guide customers where you want them to go.

If you want your clientele to sit down, relax and stay a while, your fit out needs to be spacious, comfortable and welcoming, it’s all about knowing your customer and designing for their needs.

Know Your Space

With good planning and design, a café can work in almost any space. Good design is making the best of what you have rather than trying to fit the right café into the wrong space.

The size and shape of your premises will dictate the kind of fit out that will work. Even if your dream café has luxurious soft booths or banquette seating, if it doesn’t fit, or reduces your seating capacity you will have to compromise if you want to stay in business.

Don’t neglect outdoor areas. If you are lucky enough to have a garden or courtyard area, consider a fit out design that makes the most of your extra space.

Take a good look at the bones of your building. You may discover some lovely old features you can use as a design element in your fit out. Exposed brickwork, hardwood floors and structural beams all add character to space and tie your business to the history of the building it is in.

To theme or not to theme

Kids and families love themed cafes! If that’s your target market, a big, bold, novelty theme is a great marketing strategy to get large profitable family groups through the door.

As with any design ideas, there are thousands of good, bad and downright ridiculous examples. A theme that is charming to one customer is tacky to another. When considering a theme, you should keep your customers front of mind in your designs. Try to resist indulging your own quirks too much. Remember your café is a business first,  if the customers don’t like your shelves of Star Wars memorabilia, they’ll have to go.

Instead of a specific theme, consider including a common design thread or colour that runs through the name, menu and fit-out design of the café.

Coffee is king

The espresso machine is the single most important decision you will make when fitting out your cafe. When picking a coffee machine for your café you need to consider:

Size & position: Your coffee machine (and barista) need to fit in your café. It will also need to be near a power supply, water supply and waste drainage.

Group heads: As a part of your business plan you should have estimated how many customers you will be serving at your busiest time.  Most cafes have a 2 or 3 group machine but you will need to factor in how many baristas you have working and how much coffee you will be serving per week when making your decision.

Boiler: Commercial espresso machines usually have 1 boiler, 2 boilers or a heat exchanger. Talk to your barista, they may have a preference or consider your clientele, the main drawback of a single boiler is you cannot draw coffee and froth milk at the same time, which can limit capacity.

Automatic or semi-automatic: Automatic machines take the pressure of your barista to control water flow, freeing them up to perform other tasks. However, some baristas prefer to be in control of the extraction process so will prefer a semi-automatic machine.

Price: Espresso machines vary greatly in price. Consider a reputable brand, that has the right mix of features and capabilities of your business. Your coffee machine is a big expense, but as the heart of your business, it should be seen as an investment. Some makers offer to lease and rent-to-own options. Servicing and maintenance may be an additional expense or built into your lease agreement.

An espresso machine is one of the biggest investments in a new cafe / Source: ADSWORK

Use your ears

If you are installing a sound system as part of your fit out, consider what your customer will be doing in your cafe. Whether business people in for a meeting or friends catching up, most customers won’t want their conversations overheard but won’t want to have to shout to be heard.

The acoustics of your space will affect how sound behaves in your café.  Hard flat surfaces will bounce sound around and will sound ‘noisy’, while soft surfaces at a lot of different angles will soak up the sound, letting customers hear the music, or each other more clearly.

The system you settle on will influence the ‘vibe’ of your café and is another cue you are giving potential customers about the experience they can expect at your café.

Give your compliments to the chef

Your kitchen fit-out will be one of the biggest expenses you face. If you have the budget, it is best to get professional advice about the equipment and installation you will need. At the very least, talk to the people who will be using the kitchen to produce your menu, they may have specific ideas about the layout or equipment that they prefer.

Lighting is key

The key to good café lighting is flexibility. Your café will probably be mostly open during the day and if you have nice big windows you may be able to make do with natural light. Customers need to be able to see their coffee, food and your menu but apart from that, the lighting should reflect the mood you think suits your customers best.

Contact local interior designers

Pick the right people

As you can see, a lot goes into a successful café fit out. A lot of new business owners get themselves into trouble by not preparing for the expense and complexity of a successful café fit out. If you haven’t started a café before, it may be a good idea to enlist some professional help from either a designer or a hospitality industry consultant. You may save money in the long run by avoiding common mistakes new business owners often make when starting their café.

Categories
Building & renovations

4 ways to create a self-sufficient home

There is a lot of talk about sustainability these days, especially when it comes to home design. Finding a sustainable home design is important not only for your budget’s sake, but also from an eco-conscious view point as well. Australia now has stringent requirements for builders of new structures to create buildings that are sustainable and energy efficient.

Designing a sustainable home

Designing a sustainable home is about choosing materials that are not necessarily cost-effective now, but will last the longest and provide the most wear. It is important when designing a home that you ensure that the design will work for some time to come with energy efficient aspects such as a north facing living room, energy efficient windows, open floor plan, and more.

Source: S.F.D Caringbah

What is sustainability?

Sustainability is the ability to endure through change and requirement. A sustainable home design is not only appealing and attractive but energy efficient, spacious, and provides effective use of square footage. Other aspects of sustainability include good insulation, sealed windows, energy efficient heating system and minimal use of natural resources.

Sustainable home design principles

Sustainable home design principles include:

  • Prime location, orientation and landscaping to maximize exposure to natural sunlight and breezes.
  • Solar energy elements
  • Water recycling and efficiency
  • Alternate energy sources such as solar or wind power
  • Low energy consumption
  • Recycled materials

Ways to create a self sufficient home

1. Save water

Unless you have a well somewhere on your property, going completely off the grid when it comes to the water supply is nearly impossible; still, it doesn’t mean that there’s nothing you can do to save water and minimise its consumption. You can collect rainwater from your own rooftop and use it for the toilet, washing clothes, and watering plants. What is more, if you properly maintain your rainwater tank and follow the Department of Health’s guidelines, you can use it for cooking too. Having a rainwater tank can save you a lot of money. You can also save water you used for washing your hands and use it to flush your toilet, for example.

2. Waste management

We all make a lot of waste every day, but if you start sorting it, recycling, and making compost, you will be able to minimize the impact you have on the environment. Compost is easy to make, all you need are organic materials you can layer: scraps of vegetables from your kitchen, grass clippings after mowing your lawn, dry leaves and twigs in autumn, as well as shredded paper. You will also need a bit of soil in order to create a concoction which becomes humus which you will be able to use to fertilize your garden naturally. Keep in mind that dairy and meat products shouldn’t be thrown in compost bins, as these attract the ‘wrong’ kind of insects.

3. The sun is your friend

It’s possible to produce your own electricity and not pay for it by installing solar panels on the roof of your home or pick free-standing ones and leave them in an open area. Solar panels use the sun’s rays and warmth and convert them into electrical energy which you can use to power your home in any way: for cooking, electrical appliances, charging your phone… You name it! Even though they used to be rather expensive and difficult to get, solar panels are more affordable today than ever. They will allow you to save a lot of money too: a 5kw solar system will save you up to $1800 a year. As the electricity prices rise every day, solar panels are a common sight everywhere.

Solar is a renewable source of energy and can help save you money on bills / Source: Hot Water Heroes Pty Ltd

4. Natural heating & cooling

Your heating and cooling systems are taking up a lot of energy and money, so by switching to solar panels, your monthly bills will be significantly lower. Your reliance on these can also be reduced, however, if you make small changes in your household: if you opt for increased ceiling and wall insulation as well as double glazed windows, you won’t have to rely on artificial heating and cooling. The best thing is that both of these things can be added as building sustainability upgrades for your modular home. Also, you’ll want to close off areas of your home which you aren’t using all the time: living room during the night and bedrooms during the day.

Wrap up

Turning to alternative sources to provide your own heating, cooling, and water, as well as to manage your own waste is a great way to do something for our planet. You might think that it’s not much, but you’d be surprised to discover how much those ‘little things’ matter when you consider the bigger picture. Attaining self-sufficiency is challenging, but definitely worth it, and if you’re willing to put in more effort, you’ll manage to get your own self-sufficient home and do something for the environment.

Categories
Building & renovations

Top features of an eco-friendly home design

Right now, people are trying to design their homes as eco-friendly as possible. Not only does it help reduce your impact on the planet, but it also can help save your household money in the long run. So, if you’re moving into a new home or you’ve decided to renovate, it’s the perfect time to consider going green. Here, we’ll take you through the main features you can add to make your home eco friendly.

Why build an eco-friendly, sustainable home?

It’s more cost effective and easier to build an eco-friendly home costs a than renovating an existing one. However, there are still many changes and updates you can do to make an existing home more sustainable. Benefits of an eco-friendly home include:

  • Lower utility bills.
  • Your lifestyle actually contributes to make the environment better, helping to minimise the production of greenhouse gasses and carbon dioxide in your home.
  • Better flow of air around your home
  • Low maintenance home

Features of an eco-friendly home

Bamboo flooring

Wood is one of the most popular flooring materials in modern homes. However, the problem with wood, at least as far as flooring goes, is that it isn’t a particularly renewable material. It takes years and years for new forests to grow, and deforestation is a key issue facing our planet today. On the other hand, bamboo grows pretty quickly and makes a great flooring material as well. Therefore, instead of going for traditional wood flooring, going for bamboo is a great move if you want to design your home in an eco-friendly fashion. You can also consider using bamboo for your cabinets and countertops.

Use recycled or sustainable materials

Most of us buy furniture in retail stores. However, companies that make that furniture usually don’t care too much about the effect their work has on the environment. Take a look at it this way – almost all readymade furniture is made of particle board which is one of the least durable board products out there. On the other hand, if you decide to turn to experts who make custom furniture, you can ask them to provide you with furniture made out of sustainable materials. On top of that, if you turn to local experts, you’ll also be reducing transportation waste. This option can be expensive, so as an alternative aim to look for local suppliers who sustainably source their material.

Where possible, use locally sourced and sustainabe furniture and materials / Source: Ryan Linnegar Photography

This methodology of sourcing sustainable or recycled products should be applied across your entire home – especially when it comes to building materials.

Plant life

No matter if you’re renovating or designing your new home, you’ll always be looking for ways to decorate it. While paintings and beautiful lampshades are something you can always go for, you might also want to think decorating with plants. Plants can filter air in your home, getting rid of any harmful chemicals from it. Moreover, these can help you reduce noise and stress. Of course, there are plenty of amazing potted plants that are guaranteed to add some style to your home.

For bonus sustainability points, consider planting a veggie or herb garden so you can grow your own food.

Led lights

Chances are you’ve already heard that LED lights are an absolute must when going eco-friendly. LED bulbs make a great option since they both last longer and use less energy than traditional bulbs. In fact, according to recent reports, by switching to LED lights, you could actually end up saving about 20% on your energy bill. Of course, with everyone going for LED lights, you can now find these in almost any shape or colour. This makes LEDs a perfect option for spaces like pool areas and kids’ rooms.

Use sunlight

Where possible, install solar panels to make use of the sun’s energy for your heating, cooling and lighting. Solar is a sustainable energy source, and will also save you money in the long run.

Another great way to make your home green is to let in as much sunlight as possible. This will both reduce your energy bill and reduce your carbon footprint. Also, if there are any small rooms in your home, sunlight is always going to help you make them look larger. One of the best ways to let sunlight in is to install a few extra double-glazed windows. If you opt for these, you’ll use your cooling and heating equipment less and thus reduce your energy bill even more.

Harness sunlight in your home as a sustainable source of energy, heat & light / Source: Source Architects Pty Ltd

Making your kitchen eco-friendly

There are plenty of ways to make their kitchens green. Firstly, as we’ve already mentioned, you can use materials such as bamboo for your kitchen cabinets and countertops. Here are a few other ideas for making your kitchen eco-friendly:

  • Start a compost to reduce your biodegradable kitchen waste and improve the sustainability of your home and zero-waste living
  • Install a rainwater tank
  • Use recycled glass for your splash-back – as opposed to the standard glass or quartz

Making your bathroom eco-friendly

The bathroom can be one of the most non-environmentally friendly rooms in a house because of high water use, chemical cleaners and other issues. Your bathroom, however, doesn’t have to be harmful to the environment with these environmentally friendly ideas.

Ditch the chemicals

Many bathroom cleaners contain bleach and other chemicals that are bad for the environment and your health. Opt for natural, organic cleaners instead. Even many regular supermarkets now have “green” cleaners that use orange oil, tea tree, lavender and baking soda to clean, disinfect and freshen your bathroom. You should also steer clear of pesticides by purchasing organic towels, wash cloths and bath robes.

Hire a green plumber

Hire a green plumber to make your bathroom use less water. A green plumber can inspect your plumbing and fix any leaks that are wasting water. In addition, a green plumber can install a grey water system that uses your sink, shower and laundry water to flush the toilet.

Water efficient fixtures

Your toilet, sink faucets and shower heads release a lot of water. You can reduce your water usage by installing low-flow toilets, sink faucets and shower heads. These low flow fixtures work just as good as their water wasting counterparts, they’re just kinder on your pocket book (because your water bill will be cheaper) and more friendly to the environment. You can probably instal the sink faucets and shower heads yourself if you’re handy, but you might want to hire a plumber to instal the toilet.

Solar water heating

Solar powered water heaters are a great way to reduce your energy consumption. If you live in an area that doesn’t get a lot of sun, you can instal a battery backup or gas powered backup to heat your water on overcast days.

Categories
Building & renovations

The advantages of gas appliances

While energy costs rise each year and scientists grow more concerned over the effects of greenhouse gases, Australians continue to search for sources of alternative energy. One source that has been here all along is gas. Liquid propane and natural gas are both clean-burning and relatively inexpensive. These fuels are efficient and can power several different appliances in the home.

Gas appliance types

Type-A appliances are gas appliances that have an approval badge from the Australia Gas Association, meaning they are safe to use in the home. Australians use several different kinds around the house including:

  • Gas cooktops 
  • Gas refrigerators 
  • Gas ovens 
  • Gas water systems 
  • Gas air conditioners 
  • Gas heaters

Gas cook-tops

These are the most widely utilised gas appliances in Australia and have been used for many years. They are a favourite due to the ability to raise or lower surface heat quickly and adjust the flame with complete control.

A silver oven and and stove top
A gas cook-top / Source: The Gas Smith

Gas refrigerators

These work by using ammonia as a coolant and heat from the gas to power the cycle. Previously used in caravans, this system is becoming more popular with Australian homeowners due to the efficiency of the process.

Gas ovens

Gas ovens were commonly used years ago. They’re cheaper to use compared to electric ovens, especially if you’ll be baking for a long while. This is because gas is more affordable compared to electricity. It also does not require so much energy to start up and run. Aside from that, you’ll get exact temperatures with gas ovens. This allows you to have full control when you are cooking or baking. Adjusting the temperature is also easy with gas ovens. It can be quick and ensures that the dish is properly cooked depending on your preference. They are also easy to clean and maintain. You just have to wipe the grills after using them.

There are two types of gas ovens: the fan-assisted and one without a fan. Gas ovens that are fan-assisted can cook food faster. However, there are times when the fire gets concentrated on the top. Youll need to rotate the food every now and then in order to cook it evenly and well. Those without fans, on the other hand, are great for roasting, baking cakes, and cooking casseroles. They do not dry out the food so much.

Gas water systems

A gas-powered water heating system is designed to heat water only when it’s needed. It operates by channelling cold water through a specially-designed heat exchanger that turns on the gas burner, which in turn heats the water. These systems are available in three sizes that are determined by the flow rate, which is the amount of water that filters through the system every minute. Typically, a two-bathroom house will use approximately 24 litres per minute, while a larger family will use more.

Contact local gas experts

Advantages

Because this type of hot water system works on demand, you’ll always have hot water in an instant, whenever you need it, and you won’t need a storage tank for unused water. Another advantage is that this type of system is extremely compact and can be mounted on a wall or placed inside a cupboard.

A gas-powered water heating system is less expensive to run than an electric system, mostly due to its ergonomic design. Youll be able to save money on your utility bills every month and best of all, you’ll only be paying for heated water that you use.

Safety 

A gas-powered water heating system is extremely safe for family use. Because there’s no storage tank involved, you never have to worry about leaks or hot water overflowing. In addition, you don’t have to be concerned about children or pets getting their fingers burned on a tank’s boiling hot exterior.

Another advantage is that you can set the water temperature yourself by merely using the taps. For instance, you can use the hot taps in the laundry room when you want extra hot water, and you can likewise use the tap to make water temperatures cooler in the bathroom. By having this level of control, you’ll be better able to prevent accidental burns and scaldings from happening.

A gas pump outside on the exterior wall of a home
A home’s gas pump / Source: Bs Bplumbing

How do gas how water systems conserve energy?

There are several ways that gas hot water systems prove more energy efficient.

  • They recover heat faster, requiring less energy.
  • They use a smaller storage tank, making them more efficient to run.
  • They produce fewer emissions and greenhouse gases.

Gas appliances cons to consider

Although gas appliances are more energy-efficient, they can also be dangerous if installed incorrectly. Licenses are required for contractors who install them. They tend to cost more to run than electric appliances, but they also last considerably longer. Gas is also not always available directly from the street in most areas in Australia like electricity is.

Categories
Building & renovations

What is after builders cleaning?

You’ve just built your dream home, but the dust and debris left behind is a nightmare. After the hammers stop swinging, a deep clean is essential to make your new abode truly livable. This article explores the vital service of after builders cleaning, equipping you with the knowledge to start fresh in your newly minted property.

Defining after builders cleaning

An after builders cleaning is an extensive deep clean performed after construction or renovation work. This differs from a regular home cleaning, which is a lighter clean involving dusting, vacuuming, and routine chores.

An after builders clean shares some similarities with an end-of-lease clean in terms of the thorough, deep cleaning required, but differs in that it focuses specifically on post-construction messes rather than preparing a rental property for new tenants.

Who needs an after builders cleaner?

A room under construction with lots of building tools on the ground
The amount of rubbish left behind by builders can affect the cleaning price / Source: Hungs Tiling & Bathroom Renovations

In general, you need deep cleaning after renovation and remodelling, especially for new home construction to clean up after the debris and construction waste left behind. Most exposed surfaces like floors and countertops also need to be cleaned and disinfected.

What does after builders cleaning involve?

After a construction project, the last thing you want to deal with after a building inspection is a messy and dusty space. That’s where end-of-construction cleaning comes in. Here’s what you can expect: 

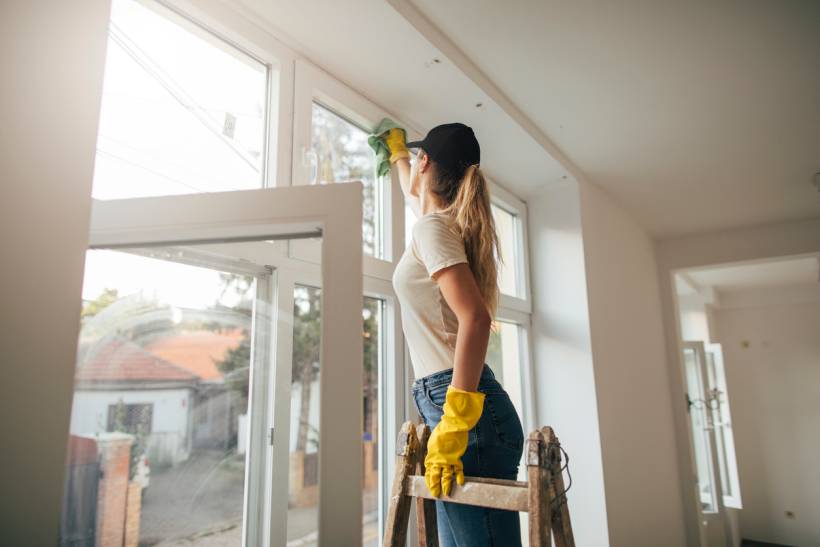
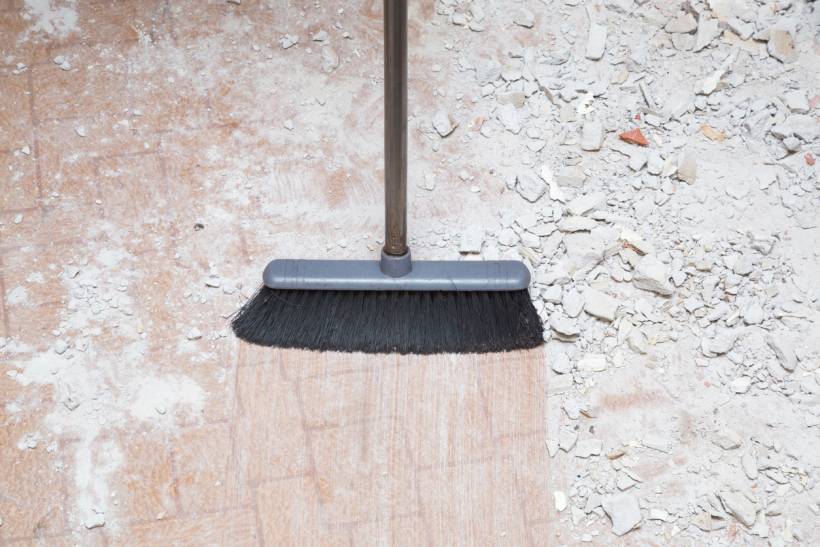
  • End-of-construction cleaning professionals will remove dust, plaster and debris left over from construction.
  • They will also remove trash, clean countertops, flooring and other surfaces once fixtures have been installed.
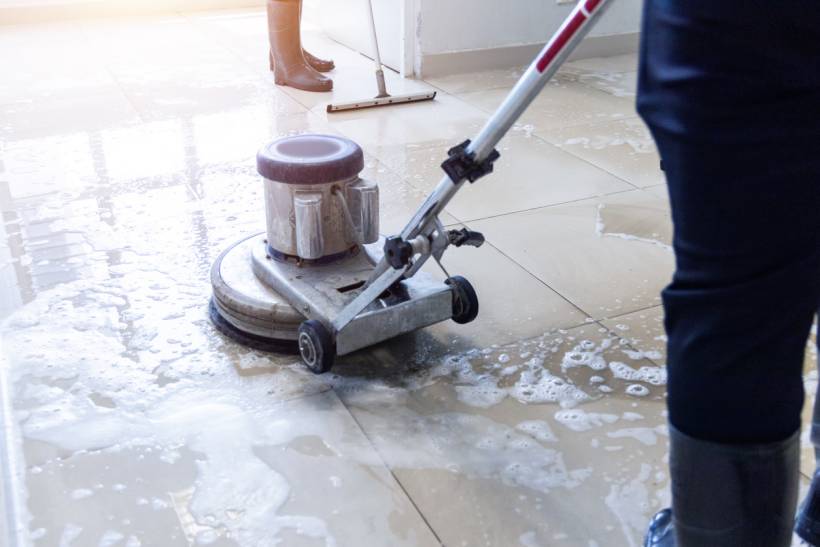
  • For commercial buildings, building cleaners may use specialised equipment like industrial sweepers and floor polishers instead of standard vacuum cleaners.

After builders cleaning process

An end-of-build clean typically goes through two cleaning phases.

Two women vacuuming debris on a carpet
After builders cleaning is necessary for commercial properties as well as residential / Sion Cleaning Services

Initial clean

The initial cleaning is the first phase, usually midway through the building’s construction. For instance, cleaners might clear the walking spaces in new construction of dust and debris before workers can install new flooring. The initial phase also involves removing all trash from the property at the end of the construction project.

Most of the time, workers themselves load and haul off their own trash, but some contractors may hire a post-construction cleanup service to do the job.

Final detail clean

This is a more thorough cleaning process that involves removing minor construction defects. For instance, final detail cleaning workers will remove paint splatter from windows and also straighten crooked grout lines. They may also remove grout haze from tiles and floors.

In addition to fixing slight workmanship defects, cleaners will clean and scrub bathrooms and kitchens, including all furnishings and appliances (if any). They will also sweep, vacuum and mop floors according to their surface type.

This stage often takes longer than the initial phase just due to the volume of cleaning work, depending on the size of the building and its architectural style. For instance, a property with intricate, detailed design may involve more work.

Contact local cleaners

Things to consider when getting an after builders cleaning service

a man sweeping the dust and debris on the floor after construction
Get professional help to clean your new property | Source: iStock

When hiring professionals for an after builders clean, consider these four important aspects for a satisfactory job:

  • Services included: Verify what specific services are included in the construction cleaning service package. This may cover dusting, mopping, cleaning windows/mirrors, sanitising bathrooms, and more.
  • Cost: Get quotes from multiple providers and understand after builders cleaning prices—per hour, per square metre, flat rate, etc. Bigger projects may qualify for discounts.
  • Timeframe: Inquire about their typical turnaround time for jobs of your size. Generally, the time required for post-construction cleaning depends on the size of the space. A smaller one requires a few days to clean, while larger buildings may take a few weeks to complete.
  • Qualifications and insurance: In Australia, the qualifications and training for after builders cleaners can vary by state. In addition, your cleaners should have the following insurance coverage:
  • Public liability insurance – To cover third-party injury or property damage.
  • Professional indemnity insurance – To cover errors and omissions in their work.
  • Workers compensation insurance – If the business has employees.

Services included

The services offered by cleaning companies may vary slightly. However, most builders’ cleaning companies provide the following services:

  • Clean doors and door frames
  • Polish surfaces and woodwork
  • Deep clean all hard flooring
  • Clean all tubs, toilets, fixtures, and showers
  • Remove grout from all bathroom fixtures
  • Clean paint spatter from all surfaces
  • Clean all windows
  • Remove debris from drywall
  • Clean and polish mirrors
  • Remove all the garbage left behind from material packaging
  • Wipe down all stairs and handrails
  • Clean all kitchen appliances, which includes refrigerators, stoves, dishwashers, and microwaves
  • Clean cupboards, closets, and wardrobes
  • Other cleaning services that an owner might need, such as fireplace or chimney cleaning

Cost

The cost of after builders cleaning varies depending on the job type and building size.

Larger buildings with more debris typically cost more than smaller projects. Many businesses charge by the square metre, ranging from $5 to $10 or higher per sqm. The cost can be higher or lower based on the project’s scope or how the company structures its pricing.

It’s also important to factor in the cost of after-builders cleaning when setting your overall renovation budget. Obtain quotes from multiple businesses to compare builders’ cleaning prices.

Timeframe

The timeframe for after builders cleaning varies, mostly on the size of the property and the number of cleaners. As mentioned above, the interior design and architectural style of the structure may also factor into the timeframe; notable examples include Victorian and Colonial styles, which require more maintenance and care.

In addition, if the construction crew tended to be careless or wasteful, leaving a lot of trash or debris behind, the cleaning could take much longer and be more expensive.

Qualifications and licencing

There are no national-level licensing requirements specifically for post-construction cleaners or cleaning services in Australia. However, local regulations can vary and certain certifications can enhance a cleaner’s credibility and business prospects.

For instance, the CPP30321 Certificate III in Cleaning Operations is a nationally recognised qualification that equips individuals with essential skills in cleaning and sanitising various environments, including commercial and residential spaces. 

However, some states and territories in Australia may require specific qualifications.

For instance, New South Wales cleaners performing residential building work valued over $5,000, including labour and materials, must hold a licence or qualified supervisor certificate from NSW Fair Trading.

Even in states and territories where a licence is not required, training courses might be. Such training teaches potential workers which recycling measures must be taken. Workers also learn how to manage waste material and government compliance regulations in regard to the environment and public safety.

From dusty to dazzling with after builders cleaning

From top to bottom, a professional after builders clean restores order from the chaos of construction. With expertise in debris removal, deep cleaning, and meticulous attention to detail, these services ensure your newly minted abode shines. And you don’t have to do it yourself—entrust it to seasoned after builders cleaning pros who can bring out the best, most pristine form of your dwelling that it deserves to be.


FAQs on after builders cleaning

How can I prepare for new home cleaning?

Clear away any remaining tools, materials, and large debris before the cleaners arrive. Protect valuables, remove fragile items, and communicate any specific areas of concern.

Is after builders cleaning different for new constructions vs. renovations?

While the core cleaning process is similar, post-renovation cleaning often involves more contained messes like drywall dust, while new constructions have site-wide debris. Specific services may vary.

What are some common areas that require extra attention during an after builders clean?

Areas like ductwork, appliances, cabinets, and windows often need extra attention to remove embedded construction grime and dust. Specialty after build cleaning may be required for fireplaces or intricate surfaces.