Categories
Design & decor

How to achieve a French provincial bedroom look

French provincial style originated from, as the name suggests, various provinces in France during the 1700’s. People in Bordeaux, Brittany, Normandy and Provence began to incorporate the opulence of chateaux and estates into their own homes, with the style now being known for its warmth and elegance.

Key components of the French provincial style include marble, wrought iron, carved or rustic timber, stone and lightly distressed materials, mirroring the materials found in French villages. French provincial style can be considered feminine, favouring muted, soft colours and textured fabrics. However, the style avoids gaudiness, opting for sophistication instead.

Source: Lindy De Waal Interiors

Linen

Soft, high-quality linen and textiles are a hallmark of the French provincial style. If you can, opt for authentic French linen, as it’s guaranteed to be a worthwhile investment. French provincial textiles will often give off a “romantic” feeling, but try to avoid excessive frills and ruffles.

Muted colours

French provincial style is synonymous with muted colours like ivory, taupe, sage and other natural tones, with black even being incorporated into many French provincial homes. This colour palette will instantly create a warm and soft environment that embodies the atmosphere of the French countryside.

Statement furniture

Although French provincial style places an emphasis on subtlety, the furniture pieces are always prominent and commanding. Perhaps one of the best areas of the home to express the French provincial style is the bedroom. After all, no other area of the home is better suited to luxury, opulence and comfort than the bedroom. For this, invest in a French provincial bed as the statement piece in the room.

Eye for detail

Although showcase furniture items are key in the French provincial style, nuanced ornate moulding is also considered highly. This means fireplaces, walls, skirting boards or cornices with decorative details are preferred over bold prints and artworks. Furniture and cabinetry also tend to feature striking elements, which help to create an authentic vintage look.

Attention to detail is also important beyond just the furniture, with the French believing that everything in the home should be beautiful. Expect to find fresh flowers and thoughtful touches added to side tables throughout the home.

Wallpaper

Wallpaper is something you can choose to skip if you like how your walls look currently, but can be used to great effect when added to a French provincial style home. A faded fleur-de-lis or damask pattern, stripes or even country scenes can all add a creative touch to your home, but remember that subtlety is key.

A fleur-de-lis wallpaper design can add interest and colour to your muted palette / Source: In Design International Pty Ltd

Soft shapes

Like the colour scheme, shapes and lines are also soft in French provincial style. A distinctive feature of French provincial furniture are the curved legs, which provide a sense of elegance and femininity. French provincial chairs with curved, carved legs are particularly popular pieces.

Tasteful lighting

Lighting is an element that is sometimes overlooked when decorating a space. Wrought iron scones, brass lamps and those capped with glass or fabric lampshades will all bring a touch of the French countryside to your home. The most complementary of all lighting options, however, has to be the classic chandelier. Opt for a statement chandelier that will be the dazzling centre of your room when lit up. Also make sure to dot candles around the home for a constant sense of warmth.

Continuity

If adopting the French provincial style, ensure that each of your rooms tie together cohesively. Having just one room decorated in the style will look jarring and unsophisticated. Mix old and new items throughout the home to seamlessly blend the vintage style into the modern world.

Contact local interior designers

A touch of the rustic

Of course, the French provincial style is not all about pomp and circumstance. Integrating rustic elements allows you to honour the rural origin of the style while allowing for a more natural look. Try incorporating stone, metal (particularly wrought-iron), timber and distressed painted furnishings to add interest while complementing the overall style.

Be eclectic, not matchy-matchy

Your home should not look like it’s been taken out of a furniture catalogue. Naturally curate items over time, as opposed to buying all the items from a vintage replica furniture store at once. Mismatched yet complementary items add the sense authenticity and merry happen chance evoked by the French provincial style.

Categories
Building & renovations

How to soundproof a room

As the world seems to be getting noisier and noisier, most of us are becoming even more determined to keep as much noise as possible out of our living spaces. With increased traffic outside, as well as high-tech stereos and entertainment centres in our homes – not to mention the smaller yards separating houses, it seems as if were more vulnerable than ever to the noises of our neighbours as well as the sounds produced by the rest of the outside world.

Soundproofing with plasterboard

There are three types of plasterboard that are commonly used for soundproofing:

  • Barrierboard: This Australian-made plasterboard comes from a composite material that reduces outside noise levels by as much as 75 percent. Barrierboard is comprised of two sheets, with a layer of insulation in between. This rigid, 32mm board wont sag or bend, and can be applied directly onto standard walls without having to make construction changes to areas such as doorways.
  • Boral SoundSTOP: Especially engineered for areas with acoustic walls and ceilings installations. Its used in conjunction with the Quiet Living, CinemaZone and PartiWALL systems produced by Boral. One advantage of the Quiet Living system is that is uses the same width as a standard interior wall, so its compatible with standard window frames, door jambs and other features. Likewise, Borals CinemaZone system is specially designed to protect your home theatre room from outside noises while enhancing and controlling the noise levels from the theatre speakers. Note: Boral SoundSTOP is so effective that loud outside voices can only be heard as a quiet murmur indoors. If more sound blocking is needed, you can add another layer to the wall.
  • Gyprock Soundchek: This 10mm plasterboard is made with a thick, sound-reflective gypsum core thats layered with heavy-strength liner boards. It comes in two levels: STC 45, which can make conversations inaudible, and STC 50, which reduces sounds produced by music.

Enhancing your soundproofing

To enhance your plasterboard soundproofing, you can combine it with either wall or roof insulation to add another layer of protection. You can also apply it to solid doors that have been surrounded with protective door seals. If you have an entertainment centre or home theatre, you’ll want to also install soft carpeting and furnishings that are quiet and don’t creak. Additionally, take steps to ensure that light switches and power points aren’t placed back to back, as sound can leak through the gaps that were created for these installations.

Along with plasterboard, ensuring your home is properly insulated will help reduce noise / Source: Active Vac and Insulation

Soundproof doors

A soundproof door is heavily insulated to block out noise and vibrations from the outside. This reduction in noise is achieved with strong acoustic seals and quality insulation. Acoustic doors are made in accordance with standards of sound resistance and should be certified after testing. They are available in a wide range of materials like laminated steel, galvanised steel and also sheet metals.

Different types

Once you have considered your soundproof requirements, you can choose doors in different sizes and types.

The main doors available include the following:

  • Double or single sliding doors
  • Swinging doors, single or double.
  • Smoke or fire doors.
  • Magnamatic or electronic automatic doors.
  • Lightweight or heavy doors.

Soundproof windows

Noise from the street can get in easily through single glazed windows. The glass is thin, but there are also small holes and gaps around the window frame and joints that allow sound to transmit into your home. The sound can also travel through vibration as the noise hits the glass and vibrates through your house. Ensuring that your windows are well-sealed is one step to take, but getting them double glazed provides extra soundproofing.

Double glazed windows

Double glazed windows are completely sealed and do not allow the air to vibrate sound into your home. There are two layers of glass with a small gap between them, which helps to kill the vibration. Additionally, the extra pane of glass means that any outside noise has two panes to travel through before it can break into the peacefulness of your home. Double glazed windows can prevent the transmission of noise by up to 70 percent. New home builds will likely have double glazed windows, however older homes will need to retrofit these.

Contact local glaziers

Other soundproofing tips

In addition to plasterboard, soundproof doors and windows, here’s some other tips to minimise noise where it’s needed; for example a home theatre.

  • Ensuring adequate insulation throughout the ceiling and walls
  • Plush furnishing and carpet, as well as heavy window coverings that can absorb sound
Categories
Gardening & landscaping

Lawn guide: Should you repair or replace?

Whether you have natural grass, sod or artificial turf, there may come a time when you need to do some maintenance to whip your lawn into shape again. For example, if your lawn has brown spots or is looking worn, it’s probably time to take action. Here we’ll explore whether you should be replacing or repairing your lawn in order to bring it back to it’s full glory.

The best time to work on your lawn

The best time to repair or replace your lawn is between late autumn and spring. During this season, your lawn is starting to hibernate in preparation for the peak growing season.

If you need to repair your lawn, the best time is between late autumn and spring / Source: Old School Landscaping

Signs your lawn needs to be repaired

Signs that your lawn needs to be repaired include:

  • Bare spots in your lawn
  • Large areas of lawn that don’t look healthy
  • Areas of lawn that are burned
  • There are a lot of weeds in your lawn
  • Areas of the lawn look old or worn
  • Pieces of turf are missing or damaged

The best ways to repair your lawn

There are different maintenance techniques that you can use to revive your lawn. Here are some useful lawn maintenance techniques:

1. Aeration

Weeds thrive in arid, dense soil and plants starve from deprived oxygen and nutrients. Aerating your soil is the best way to achieve rapid repair. It breaks through thatched layers, enables roots to breathe and increases water and nutrient penetration.Aeration makes the soil more able to absorb water, and being doing this regularly you’ll likely reduce the amount of water needed to keep your lawn looking healthy all year round.

To aerate your lawn, use an aerating tool to loosen compacted soil during autumn or early winter. After aerating put fertiliser, sand or compost over the grass to give added nutrients to the soil. Be sure to trim your lawn down before aerating in order to get as deep in the soil and root system as possible.

2. Dethatching

Dethatching is a process where you remove a layer of grass stems, roots, clippings and other debris that have accumulated in your lawn. Although having thatch is important, a build-up of debris can suffocate your lawn, causing it to look worn and dull. Too much of thatch can also prevent water and essential nutrients from seeping into the roots of the grass. An easy way to dethatch your lawn is to go over it thoroughly with a rake to remove the debris.

3. Seeding

Spread new grass seeds over your lawn if you have a lot of brown or burned spots. Spread more seeds than you need to make your lawn look thick and lush.  

Signs your lawn needs to be replaced

If your lawn is in really bad condition, maintenance techniques won’t be enough to save it. Signs you need to completely replace your lawn include:

  • The entire lawn is dead
  • Large areas of the lawn are dead and have not responded to maintenance attempts
  • The turf is damaged or worn
Sometimes a lawn will need to be completely replaced / Source: All Lawns and Garden

How to replace your lawn

To replace your lawn, you first need to remove your existing lawn. Use a hoe to uproot the entire lawn, including the roots, and rake away all the debris. Then spread rich topsoil as a base for your new lawn. After you have done these steps, you can spread new grass seeds or lay new sod. Be sure to give your lawn plenty of water.

If you are planning to lay artificial turf, you should still remove the old lawn and debris, but you don’t need to lay a rich topsoil, since artificial turf is not alive.

Tips for maintaining your lawn

Feed your lawn

Nourishment is the key to maintaining a lawn that looks good. For a healthy looking lawn, ensure that it has adequate fertiliser. Fertilisers should be added in spring to promote good growth in the summer. Fertilisers can be bought at gardening stores, or in the gardening section of hardware department stores. When buying fertiliser, make sure you buy one specifically made for lawns. Lawn fertilisers may be organic, synthetic or a combination of the two.

Prior to applying fertiliser, make sure that your lawn is free of weeds and is well aerated. To simplify your job, there are a number of fertilisers that come with added weedkillers. Apply fertiliser in even coats. Doubling up the fertiliser may burn the grass. Once you have added the fertiliser, remember to water it in.

Remove weeds

Removing weeds is essential to promoting healthy lawn growth. Weeds grow very quickly and easily and can hamper the growth of your lawn if given the chance to grow. Weeds should be pulled out as soon as they come in. There are special tools that you can use to weed while standing.

Contact local gardeners

Ensure adequate water supply

Lawns need to be watered regularly for healthy growth. Lawns are best watered in the morning before the sun comes out. Make it a practice to water your lawn at the roots. This will promote growth at the deeper root level as well.

Learn how to mow

Make sure you mow your lawn the correct way. Never mow it shorter than 7.5 centimetres. Any shorter, and portions of your lawn may actually die off.

Keep your lawn slightly acidic

Plan to periodically — annually is best — test your lawn’s pH with a soil testing kit. You want it be slightly acidic at about 6 or 6.5. Any higher, and your lawn is too alkaline, lower and it’s too acidic. You can fix acidic lawns by spreading dolomite or garden lime. An alkaline lawn can be repaired by spreading sulphate of ammonia over the lawn. With any of these products, make sure to carefully follow the instructions and water them into the lawn well.

Categories
Real estate & moving

Which trendy Sydney suburb is the best to live in

Do you want to be in the hustle and bustle of the inner city or chill out by the beach? Are parks for your pooch important or is proximity to lively nightspots your priority?

Sydney is chock-a-block with varied and hip neighbourhoods. We’ve helped to hone your new home search down by picking five popular Sydney hotspots.

If you’re considering a change of address, these read on to determine which trendy Sydney suburb could be your next port of call.

Surry Hills

When you live in Surry Hills you can leave your car at home, with cycleways streaking through the leafy suburb, it’s not only eco-friendly but quick and easy to get from A to B. You’ll be happy to be cycling from place to place to work off all the extra calories you’ll be ingesting, with foodie delights waiting around every corner. Residents revel in craft beer, being home to ‘Sydney’s best breakfasts’, their coffee culture, wine bars and fashionable restaurants. The nightlife, galleries and posh boutique shops are not half bad either.

Surry Hills is filled with cycle-friendly leafy streets / Source: Shuttestock

Manly

Every day feels like a relaxing beach holiday when you call Manly home. Frolic in the shallows or grab a board and head for the surf break for exhilarating fun in the sun. For a chilled night out check out one of Manly’s plethora of pubs, bars, restaurants or the open-air food market. Manly has a beachy, sleepy and friendly small town feel, but if you do miss the big smoke remember it’s only a picturesque 30-minute ferry ride away.

Newtown

A lively and hip paradise, Newtown has everything a modern-day hipster could ever want and need. With no shortage of affordable vegetarian and vegan restaurants, vintage clothing stores, tattoo parlours, pubs, clubs and live music, Newtown is the place to be. The stellar expansive street art is also worthy of an afternoon walking tour. The neighbouring up-and-coming suburb of Camperdown is worth a look too.

Bondi Beach

Home to Sydney’s most famous stretch of coastline, Bondi Beach is the place to be for beach lovers. With a glamorous Venice Beach LA vibe, do as the locals do and dine al fresco street side, browse stores along Campbell Parade, pick up some organic produce at Bondi’s Farmers Market and take a sunset stroll along the spectacular Bondi to Bronte Coastal Walk.

Source: Beaches Conveyancing

Paddington

The super stylish Paddington aka ‘Paddo’ is home to Sydney’s fashionistas and ‘it girls’. Oxford Street is lined with high-end eateries as well as every designer boutique a shopaholic could wish for. Check out some local design talent at the Paddington market every Saturday which showcases locally made clothing, accessories and homewares. Stretch your fashionable legs by having a wander around neighbouring Centennial Park, the perfect spot for a lazy Sunday picnic, an evening jog or even horse riding. Best of all this is all only 3km from the CBD!

For more information on the best places to live in Sydney check out Sydney’s most walkable suburbs and Sydney’s safest suburbs.

Categories
Cleaning

The best way to clean windows

Windows can get dirty so easily. Cleaning them is simple enough, but there are a few tips and tricks you can learn to make them dazzling. Here’s what you need to know to do it yourself.

How to clean your windows

1. Wash the outside

For the exterior windows, start with the flyscreen if you have one. Doing this prevents your window from rapidly getting dirty again, since dirt and dust can build up from inside. Get rid of the cobwebs first by using a brush or a broom, then set aside. Then, wash your window down using a hose, soap and water or window cleaning agents.

After this is out of the way, it’s time to clean the windows themselves. There is a selection of glass cleaning agents and solutions you can pick from, or make your own from soap or vinegar and water. After cleaning one window, ensure that you dry it quickly with a cloth (make sure it’s lint free!) Once your windows look clean and dry from the outside, put the fly screens back on.

Windows need to be cleaned from both the inside and the outside / Source: S.F.D Caringbah

2. Wash from the inside

This is a simple but arduous task. It can take a bit of time, so be patient. The best way to start is with the frames, which you should sweep with a duster or indoor brush. Follow this up with soap and water to make sure all dust and cobwebs are gone. Once the frames are clean, move to the glass. Like the outside windows, you can use soap and water, a specialised window cleaning agent or vinegar and water. All of these work pretty well.

Once you have wiped down the glass, dry it quickly with a cloth to prevent streaks, wet spots and marks that will mean you have to start the wiping process from scratch. Dont forget to dry the frames!

Cleaning your windows with vinegar

White vinegar can also be used as a great tool for cleaning, but can cause streaking if you’re using it on a window that has been cleaned with a commercial cleaning solution before. To prevent streaks, mix a solution of water, white vinegar and a touch of liquid detergen to wipe your windows down with. After this, use a mix of water and white vinegar solution on your windows to get them sparkling. You can dry them with a lint free cloth, but paper towels and newspapers also work well. After doing this, your windows can be cleaned with the vinegar and water solution regularly.

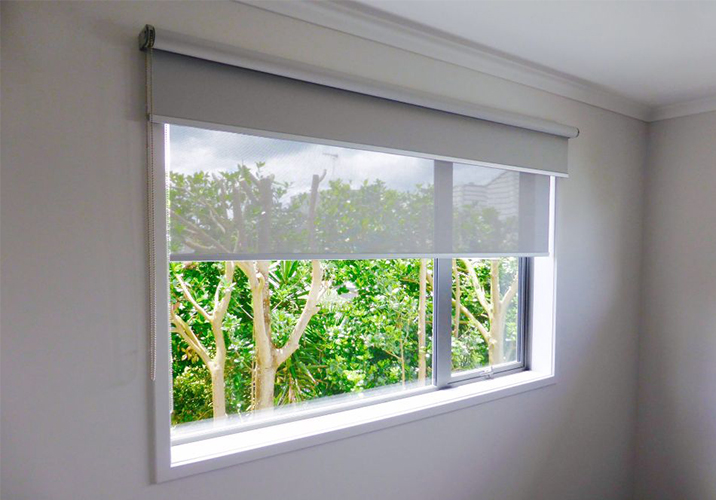
Cleaning roller blinds

If you have roller blinds in your home, you know that they are practical, easy to use, and elegant, but they do get dirty over time. They are not always the easiest thing to clean either. It is possible to clean them if you know how, or if you can turn to a professional for help with your specific needs.

Determine the material

Before you can get started with cleaning roller blinds, you need to determine the specific type of material it’s made of. Depending on the material, you may need to spot clean them. In other cases, you will be able to wash them. If you are not sure what the material is, it is best to ask a professional before getting started.

Source: Australia’s Cheapest Blinds

Washing your roller blinds

In many cases, it is possible to wash your roller blinds, including those made with fabric. In this case, you will need to start by vacuuming to remove as much debris as possible from the surface. Then remove the blind from the roller, lay the blind down and use a brush attachment for your vacuum to help further clean up the dust and dirt from the surface. If necessary, you can then place the blind into a large water container, such as in a bathtub, and allow the water and some mild detergent to gently work over it. Meanwhile, allow the blind to soak in a mixture of warm water and mild detergent. This will loosen any dust or dirt and will allow you to use a cloth to wipe it clean. For stains, use use a toothbrush.

Once the blind is clean, you can drain the water and then fill it again with clean, fresh water. This will allow all of the soap to come out of the blind. Once you have completely washed it, lay it on a flat surface to dry and allow to fully dry before reattaching to the roller.

Contact local window cleaners

Tips for spot cleaning

Sometimes you may not be able to wash a roller blind. In this case, you can spot clean it to remove visible dirt.This is the safest and easiest way to clean non-washable blinds.Vacuum the blind first, then create a solution of laundry detergent and warm water to use to wipe off debris. You will want to use a sponge or toothbrush to tackle problem areas. You do not want to wet the entire blind, but work on just those areas necessary. Remember to spot test before you tackle the whole blind in case the cleaning solution discolours it.

Categories
Bathroom & laundry

Your guide to low flow taps & toilets

If you’re looking for ways to reduce your water bill, low taps are are in ideal solution.

What are low flow taps?

Low flow taps are deceiving by name. You may think that because they’re called low flow taps, you won’t have high-pressure water coming out, but this is the contrary. Regular taps use more water and therefore produce more water pressure which results in increased water flow. However, low flow taps also produce a high power water flow, but it does this by mixing air into the water, which gives the appearance of a higher flow; although the pressure feels just about the same.

Source: Mintconstruct Pty Ltd

A normal tap lets out up to 18 L of water per minute whereas the low flow taps only use about 2 L of water per minute, which really saves you a tremendous amount on your water bill. When looking for low flow tap, you may run into the Acronym WELS. WELS is a water efficiency labeling scheme. WELS rates items according to efficiency and it allows you to see how much you’re saving and how efficient the product is before purchasing it. WELS has a six star rating system with the higher stars being more efficient and the lower stars being less efficient. Any water producing item that you purchase is rated by WELS.

Advantages of using low flow taps

Low flow taps help to stop water wastage and also provides you with a better source of water. In addition, they decrease your water cost and are more energy-efficient. This might be an ideal solution in a household that has high water usage or higher water bills. Besides simply saving you money on your water, there are two other benefits to using low flow taps. These benefits include saving money on electricity and reducing water wastage.

Low flow toilets

As one of the most essential fixtures in your home, the toilet is also the most consuming of water. By installing low flow toilets, you will lose significantly less water (and see a lower water bill), without noticing a change in the toilet’s effectiveness. In addition to improving water efficiency, low flow toilets will ensure your home is up to code.

What are low flow toilets?

Other than outdoor irrigation, the standard toilet is the largest water consumer in your home. By installing a low flow toilet, you can reduce water usage while still performing the same function of removing bodily waste. To effectively remove waste, gravity assists during the flushing process allowing low flow toilets to only use six litres of water per flush. These toilets are available in the most basic models and also top-of-the-line units.

Source: Hammer on Constructions

The dual flush option

The most common type of low-flow toilet on the market is the dual flush model which has two buttons. The first button, known as the half flush, uses only three litres of water to eliminate liquid waste. The second button, referred to as the full flush, uses up to six litres of water to dispose of solid waste. Therefore, you are only using as much water as necessary for each visit.

Buying a low flow toilet

If you are in the market for a low flow toilet, there are a few considerations. First, ensure the toilet has been certified as water efficient. The amount of water used in the half and full flushes should be readily available. Second, ensure there is enough space in your bathroom to fit the new toilet. Third, there is a wide variety of designs including:

  1. Colour
  2. Height
  3. Modifications (heated seats, bidet, etc.)
  4. Shape (round or elongated)
  5. Noisiness

Water saving tips

In addition to installing low flow taps, there are many other ways that you can reduce your energy costs and save wastage. Some of these tips include:

  • Installing low flow tabs on all sinks, tubs and basins in your home
  • Minimizing the temperature on your heater
  • Closing taps when you’re not using them and frequently checking any pipes for leakages

Remember a small leak can add up, so it’s best to have that leak under control before it causes more problems. Low flow taps can be a tremendous help, but if they aren’t maintained or used properly they can contribute to water wastage.

Categories
Bathroom & laundry

Renovating your bathroom? Here’s where to start

A beautiful bathroom is your private sanctuary, a place for long, relaxing baths and pampering.  It may be one of the smallest rooms in the house but it’s one with a lot of components and should be one of the most considered spaces when renovating.  If you’ve decided to update your bathroom, some careful planning can go a long way to ensuring your end result is what you’ve been dreaming of.

Here are some things to consider when planning your bathroom renovation.

What do you want to achieve?

Are you looking to create a luxurious space that feels like an exclusive spa, or do you need a practical bathroom that will meet the needs of a family of 5? It’s important to start your planning process with your goals in mind to ensure you and your family’s wants and needs are met. Who will be using this bathroom and will their needs be met? Think about what are absolute must haves and what you’re prepared to compromise on. Write a list of what you don’t like about your current bathroom so that you can rectify these problems in the next.

Start your bathroom renovation planning with the end goal clearly in mind / Source: Ryan Linnegar Photography

Budget

Knowing how much you have to spend is critical when planning a renovation. Can you afford a total remodel or do you just want to change the vanity and fixtures? Having a budget will make it much easier to determine your parameters and will ensure you get maximum bang for your buck. The size of the space, the materials you choose and whether you’re going to be doing any of the work yourself will affect the cost of a renovation.

Get inspired

Look for design inspiration in magazines, online or in showrooms. Keep your goals in mind, along with the rest of your home – the bathroom should ideally continue the flow of the décor. You don’t want your bathroom to quickly date so be wary of trends. Do your homework and find classic, timeless designs you’ll love for a long time to come. Collate a collection of inspiring images, get samples and actually see the products where possible instead of just looking online. Utilise visual rendering technology where possible to give you a better idea of what your finished bathroom will look like.

Design & layout

In a space as small as a bathroom, design and layout is critical to ensure functionality and usability. You don’t want to end up with your knees hitting the edge of the bath every time you use the toilet or a tiny shower that you’re disappointed with.  Get familiar with the space you have to work with and once you have a preliminary design, ensure it’s to scale.

There are lots of space saving ideas for a bathroom. Things like corner vanity units can really open up your space or having a sliding door instead of a traditional hinged door can work wonders.

Determine the focal point of the bathroom when you enter the room and be sure to plan for quality materials and fixtures in this area. The primary fixtures are the toilet, sink, bathtub and/or shower stall. Think about clearances, such as the shower door hitting the main door. If you are laying in the tub, do you want to be staring at the toilet? Also, where are the utilities such as water, sewer and electricity located? The less you have to move existing utilities or run new ones, the more economical the bathroom will be. 

Some things other questions to consider:

  • Is there adequate ventilation?
  • Do I want a wet room or a shower screen?
  • Is the shower large enough?
  • Are there enough windows and do they need to be moved?
  • Is there enough storage space?
  • Is the bath large enough?
  • Is there enough natural light?
  • Are there enough power outlets?
  • Is there enough benchtop space?
  • What will the height of the sink be if it’s a bowl sink?
  • Is there enough room for the door to open?
Your bathroom design should be both beautiful and practical / Source: Lifestyle Extensions & Renovations

Lighting

Lighting choice is critical in a bathroom. You need to have different lighting for different functions – a bright light for applying make-up and soft, muted lighting for a luxuriously long soak in the bath. Be sure to include layers of decorative, task, accent and ambient lighting to achieve a beautiful yet practical design that will meet all of your needs.

Timing

If you are project managing, plan your trades and services in the correct order to avoid costly mistakes. If you’re doing a lot of the work yourself, make sure you’ve done your research. The more mistakes, the longer it takes, and the longer you’ll be without a bathroom and using the gym showers.

Have everything you need

Before you take to your old bathroom with a sledgehammer, make sure you have everything you need on hand. It can be a long wait for those porcelain tiles from Morocco to arrive when you don’t have a usable bathroom. Check that all of your materials have arrived undamaged so you don’t hold up progress having to get replacement materials at the last minute.

Spend money wisely

Assess what can be saved from your existing bathroom. If you can work with some of the things you’ve already got you’re going to save a considerable amount of money. Tiles can be re-grouted, baths can be resurfaced and walls can be painted, there are lots of things you can do to refresh your space without doing a total demolition job. Just changing the vanity unit or the fixtures and fittings can really transform a bathroom.

Don’t be tempted to buy the cheapest options available for everything. Buy quality where you can and splurge on a few key pieces that will really set the tone of the space and add to its luxury.

Think about whether you absolutely need to move the location of the shower, toilet, bath and vanity units – doing so may mean you need to need to move the plumbing which can be costly. Sometimes it’s absolutely worth doing but you need to weigh up.  Perhaps you could upgrade the toilet instead of moving it, or change the old shower screen to a sliding screen. There are plenty of ways to improve your space without spending a fortune. Be smart with your budget and it will stretch a whole lot further.

Contact local bathroom renovators

Storage

Clutter isn’t appealing in a bathroom and can quickly ruin your carefully planned aesthetic. Those tacky plastic hangers for shampoo and conditioner can be avoided if you plan to have a recessed area built in to your shower. Choose your vanity unit wisely and in accordance with your storage needs. Whilst pedestal basins may look fantastic, they aren’t exactly practical if you’re short on storage space.

Think about what you keep in your bathroom now and plan for plenty of space, especially if the bathroom is being used by multiple people. Consider options such as recessed cabinetry, vanities, medicine cabinets, over the toilet storage, and eye level shelving to keep your bathroom looking organised and provide a place for everything.

Do you need to have plans drawn up or council approval?

Depending on the extent of your renovation, you may need to have plans drawn up or gain local council approval. Most councils allow for minor changes that don’t alter the structure or services such as plumbing, drainage and electrical, however it is always best to check what your local government’s policies are.

Categories
Building & renovations

Home renovating tips: What to avoid

Whether you’re a seasoned DIY veteran or just starting out, understanding the potential pitfalls involved with a renovation project is a good way to ensure that you don’t end up with your home in a state of disaster. We’ve compiled a list of the five most common DIY mistakes and a guide on how to avoid them.

Diving in the deep end

The cause of many DIY disasters is from being a little too enthusiastic about starting a project before it’s properly planned out. With numerous DIY shows making it look simple, it’s easy to underestimate the actual size of a job and start something that is above your skill level.

How to avoid: Take a step back from the project and assess if you are up to the challenge. Are you willing to take the time and effort to learn new skills if you need to? Do you have enough of a buffer in your finances if something goes wrong? Start small, if you can, and always have a plan to find help.

How to solve: If you do find yourself in over your head the best thing to do is to take a step back and evaluate. If things have progressed to a point where you have no choice but to continue consider hiring a professional.

Source: Jnaid & Sons

Incorrectly budgeting

This mistake is closely linked to the first. Improperly budgeting can be the undoing of a lot more than just your project. Most building projects have a lot of hidden or incidental costs that may come as a nasty surprise if you start without creating a watertight budget. It’s worthwhile doing lots of research

How to avoid: Before you begin, go over the whole project on paper first. Note down every material you will need, the associated costs, whether or not you have the right tools, etc. Then once you have that final figure add 10% as a buffer in case of any accidents.

How to solve: If you’re stuck in a position where you are running out of money to continue the project, stop working on it. You can end up spending good money after bad if you don’t re assess. That assessment should be about prioritising what need fixing so that you can continue living in your home. That way you will have time to rebuild your funds and finish the project when you are better prepared to do so.

Making mistakes with the measurements

The difference of a few centimetres can cost a lot of time and money. Ordering materials in the wrong size or worse, cutting something to the wrong length can bring a project to a standstill.

How to avoid: Measure twice and cut once. Always make sure that you take down the measurements as accurately as possible. This means not only making sure that your measuring equipment is exact but also that you record the measurement correctly. Don’t be worried if you spend a bit of time ensuring that your measurements are correct. It will save you a lot of time and problems in the long run.

How to solve: If you have cut to the wrong measurements, unfortunately, you have very little option than to either reair the section that has been damaged or buy more materials. However, always keep the remaining materials. They may end up being useful later on in the project or give you extra coverage in a future project should the same issue arise.

Using the wrong tools

Certain materials need to be handled using specific tools. Trying to complete a job using the wrong tools is a dangerous endeavour. You can end up using more force than necessary and end up damaging your home or yourself.

How to avoid: Always use the right tool for the job. If you don’t have the tools at hand, or cannot afford to buy them, see whether there are rental options available to you or whether your friends or family can lend you one.

It’s also important to remember that even if you have the right tool, make sure it is in good working order before you use it. A broken or worn tool can be just as dangerous as the wrong tool.

Take safety seriously

DIY can feel like a hobby. Working on the project whenever you have the time to chip away at a smaller task. However, not having proper ventilation in a room while painting, operation power tools, or demolishing a room can all lead to potentially life-threatening injuries.

How to avoid: Always wear the appropriate safety equipment. Gloves, ear protection, safety glasses, respirators even a dust mask can make all the difference in saving yourself from serious damage. If you’re ever in doubt or don’t have the right tools and equipment to complete a job safely, consult a professional.

Contact local builders

Common kitchen renovation mistakes to avoid

Overspending

One of the biggest concerns is staying within your budget. You need to be realistic, and you need to make sure you are not spending money that you simply don’t have on a renovation. A good guide to use when doing a renovation is not to spend more than seven percent of the cost of the home to do the renovation. Be flexible with your options, and do not go overboard on a costly project.

Accuracy

You need to make sure you measure properly when renovating a kitchen. If you have the wrong dimensions, it can cause a lot of havoc. There are cabinets, appliances, benchtops, and flooring that are all hinging on your ability to know how much space you have and how to put everything together.

Source: F&F ConstructionsPty Ltd

Beware of the current trends

Do not fall head over heels for what is hot right now. There is a reason they are called trends; they will not last very long. You do not want to have to renovate every couple of years because you are bored with the design or because what you did is now considered hideous. If you want to use the latest idea, make sure it is something that can be changed out easily to stay current.

Get the right pros

Make sure you hire professionals you know you can trust. See what else they have done, and make sure they are able to do all of the work you want within the budget you have. You want them to stay on time and do the job right.

Remember the small details

Yes, we all want the kitchen to look great, but where are you going to plug everything in? Make sure you have power points laid out, as well as the proper lighting and proper appliance location. See how well everything will fit in the newly renovated room.

Proper storage

No matter how nice the kitchen looks when you walk in, it won’t matter if you do not have someplace to put everything. Proper and adequate storage will make you feel better about the area, and it will help you keep your renovated room clean and organised.

Think about the finished product from the start

The kitchen is a place where everyone spends time. You need to make sure that it will look good and function well for you as well. It’s about making it look more modern and eye-catching, while still being comfortable to cook in.

Categories
Walls & flooring

Should you hire a painter, or do it yourself?

To give your home a lift or seasonal refresh, the best option is usually a fresh coat of paint. However, should you fork out money for a professional painter to get the job done, or have a go at doing it yourself? Here, we explore the advantages of hiring an expert.

Advantages of hiring a professional painter

1. Experience

Professional painters have years of experience in the trade meaning that they know everything from how many tins of paint it will take to paint a room depending on its size, how many coats of paint are needed, and if any special measures are needed to prepare a surface for painting.

2. The right equipment

Chances are you won’t have an array of paint brushes, rollers and drop sheets at home. Through hiring a professional home painter you won’t need to waste money and storage space on painting equipment you’ll seldom use.

A fresh coat of paint can increase the value of your property / Source: MKG Interior Design

3. Health & safety

Don’t neglect the idea of safety when painting, especially if your painting job involves heights, ceilings and hard to reach areas. Professional painters have the right type of ladders and harness equipment to paint difficult to reach walls in the home. Painting also involves using chemicals such as solvents to clean up any spillages or paint runs, which can be very dangerous if they make contact with skin or are inhaled.

4. Perfect finish

You may think that the do-it-yourself approach to painting is worth the cost savings of hiring a professional. However commercial painters and home painters are trained perfectionists who will ensure that the job is completed to the highest of standards. It’s certainly worth spending the extra money to achieve a quality finish for your home or business. Professional decorators also know which are the best paint brands and finishes for each type of job, whether you want a matt, gloss, satin or eggshell finish your painter will be able to source the best quality product to achieve the desired look.

Q&A with a professional painter

We spoke to professional painter Hass from DHY Painting And Decorating, based in Mill Park Victoria, to find out more about Australian home painting trends, the most requested painting jobs, popular paint colours and what the best thing is about being a professional painter.

How long have you been painting and decorating for?

Painting is a family trade, my father is a painter, and my great uncle was a painter. I was exposed to painting from a very young age. Every school holiday during high school, I was out with my father and uncle acting as their apprentice.

What are your most requested painting jobs?

My most requested work would be repainting for landlords refreshing their property to release. But we don’t stop there, DHY Painting complete paint jobs for many new homes, repainting for family homes, office repaints, and many other special projects.

What is the most popular colour Australian home owners are painting their walls?

It would definitely be “White on White”.

What sort of paint is best to use for painting exterior walls and fences?

My go-to paint for exterior walls and fences would have to be Taubmans Endure Exterior, or Taubmans All Weather.

For exterior painting Hass recommends Taubmans Endure Exterior or All Weather / Source: Jnaid & Sons

What’s the largest paint job you’ve completed?

The largest commercial paint job I’ve ever completed was painting part of the Chadstone Shopping Centre extension, Australia’s largest major shopping centres. The largest domestic paint job I’ve completed was a 100 square metre home in Eden Park, Melbourne.

What colours do you recommend using when painting your home to be sold?

White! A blank canvas is the most appealing to home buyers.

How many days does it usually take you to complete a paint job?

It usually takes me around 2 days to repaint a 2 bedroom unit. A 3 bedroom home can take 3-5 days to repaint.

What is your favourite part of your job?

My favourite part of the job of being a professional painter would definitely have to be handover time. It is such a good feeling, seeing the excitement on my clients face when we transform their property and give it a new lease of life!

Categories
Walls & flooring

What are the different types of carpet?

Choosing between carpets can be tricky and with the range of colours and textures on the market, it can get overwhelming. The texture and colour you choose for your carpet will primarily depend on the way your space is used. In areas of high activity, durable fabrics will work best but in rooms that cater to children, a darker carpet will be preferable. Discover how to choose a carpet for your space based on the different styles and fibres available.

Different types of carpet available

Cut or loop

Carpets are either a cut pile or loop pile construction and both styles offer something different. The differences lie in the style, level and length of the yarn, but the material you choose will depend on the durability and ease of the maintenance you prefer.

In a loop carpet, the yarn is looped and doesn’t show external marks created by walking or vacuuming, making it ideal for areas with high foot traffic. On the other hand, the exposed yarn is cut and looped in a cut and loop yarn carpet. These carpets are more suitable for bedrooms, where foot traffic is quite low.

  • Twist carpets: also known as ‘frieze’ carpets, are comprised of yarn twisted in different directions that create the appearance of depth and texture. As a cut pile style, twist carpets provide a comfortable and soft surface but are also long lasting and durable, making it the ideal option for households with pets. The textured look is currently trending and can complement modern home designs.

twist carpets

  • Plush carpets: are level-cut piles that are luxurious options for the home, ensuring comfort and style. With consistent fibre lengths and a high-sheen surface, cut pile plush carpets are more prone to display temporary shades from vacuums and footprints. Textured plush carpets, however, have fibres twisted in different angles and effectively conceal vacuum or footprints making it an ideal option for high activity areas and people with busy lifestyles.

plush carpets

  • Loop carpets: Loops of yarn can create a range of modern carpet finishes. Loop carpets referred to as Berber, are created with yarns that are looped back into the carpet and are generally made from nylon or olefin fibres. Level or multi-level loops are constructed with rows of looped yarns of the same or variant heights, depending on your preference and style.

loop carpets

Wool or nylon

In Australian homes, the most popular carpet selections are made of blends from nylon, wool or olefin (polypropylene). Choosing a carpet won’t depend on the fibre selection alone, but determining which fibres are best suited to your environment will help you make the right carpet choice.

Wool carpets can be a great addition to a space, feeling soft and luxurious. Wool is a natural and sustainable fibre, which is bound to keep you warm in winter and cool in the summer. As a resilient and easily dyed fibre, wool is also available in a range of styles to adapt to the look of your home. Textured or twist carpets can often trap dirt between fibres and will quickly absorb any liquid stains so the required maintenance should be considered prior to investing in a wool rug or carpet. The elasticity and resilience of wool also makes it a suitable option for high traffic spaces, while its durability and soft surface makes it a great choice for cooler climates.

Close up of a wool carpet / Source: Supplied

Ingrid Powell from Choices Flooring, estimates that around 90% of all residential carpets are made from nylon, a durable and stain resistant fibre.

“Wool is the ultimate natural fibre when it comes to carpet whereas nylons and polypropylenes are manmade and have more manufactured properties included in their makeup,” she said.

Nylon fibres are either woven or made from sunken loops, creating a simple and compact texture. Nylon is cost effective for its durability and versatile range of colours and styles, and is highly resistant to abrasion. It is a synthetic fibre however so it is prone to emit off-gas.

Nylon is a durable and versatile synthetic option / Source: Supplied

Olefin fibres have a low absorbency rate. As a positive, this means olefin carpets are stain resistant but on the flip side, olefin is not easily dyed, providing limited style choices. Olefin carpets can be most useful for outdoor areas or spaces prone to spillage or liquid damage. Olefin is non-resilient and it will not regain its shape easily when exposed to weight or high activity areas.

Contact local carpet experts

Colour options

Take a moment to consider the space you intend to carpet as this will influence the style and fabric you choose. With pets or children about, carpets with lower maintenance are preferable and a dark charcoal or coffee coloured carpet will show less of the stains, but in small spaces, dark carpet colours can make the space appear smaller. When paired with white walls, lighter coloured carpets will draw your eyes outwards, giving the appearance of extra space, but can be a lot more difficult to clean or maintain.

Start by considering what mood or effect you wish to create with your carpet. For example, if you wish to add a homely touch to an empty space, you may consider opting for a neutral or warm tones carpet such as greys or soft pinks, to add an inviting allure to a space. A neutral colour carpet will also shift the focus away from the flooring and complement your furnishings. Alternatively, if you wish to open up a small and stuffy space, you might choose a carpet with whites or cool tones such as blues and greens, to make a room feel cooler and brighter.