Categories
Outdoor living

Outdoor lighting ideas

Outdoor lights serve a practical purpose, illuminating dark spaces, lighting a pathway and securing your home during the night. Along with its functional benefits, outdoor lighting decor can replace a gloomy and uninviting space with an ambient glow in your backyard. Create an idyllic zone in the comfort of your own garden with our stunning ideas to decorate an outdoor space with lights.

The benefits of outdoor lighting

You can use outdoor lighting for functional tasks, or you can use it as a decorative accent. Task lighting should be placed in areas where there is high traffic and activity, such as above the barbecue grill or on pathways. Likewise, accent lighting can be placed anywhere to showcase the porch or an attractive item in the garden, such as a special tree or a beautiful statue. Accent lighting can also divert the viewer’s attention from items you may not want to put on display, such as a weather-worn doghouse or a sagging clothesline in the backyard.

A steep driveway with lights in the wall on both sides
Lighting in walkways and driveways provide safety / Source: Goodwin Electrical Contractors

Choosing outdoor lighting

Before you start shopping for outdoor lighting, decide what you want the lights for. Will they be decorative and subtle, or should they be bright enough for high activity areas outside? Do you just want to showcase water features and garden attractions, or will you be lighting up pathways so that you and your visitors can see at night? 

Garden uplights

LED uplights are mounted at ground level to focus light upwards and illuminate surrounding plants, showcase the architectural features of your home and create a modern edge to your garden and landscaping. Uplights can update a dull garden wall or add character to a mundane space and are inconspicuous during the day.

Uplights are designed to withstand fluctuating weather conditions and temperature changes and installing a durable copper ground light will further extend the life of your ground light. When adding an uplight, angling the light creates harsh shadows but positioning the light close to the base of a plant, will let the light beam travel upwards.

String lights

For a cafe-inspired vintage look, hang rows of string lights overhead or across a gazebo. String lights can cover a wide range of space and function as a versatile decorating option for a unique outdoor space.

Take precaution and avoid any loose power leads or exposed hooks as you install your outdoor string lights. Secure outdoor leads and chords with electrical tape or clips rather than utilising screws or hooks which are prone to corrosion. String lights are available in a range of colours and styles, but low wattage incandescent lights are popular for its tinge of yellow. Before purchasing a string light, confirm it is fitted with LED bulbs for a longer-lasting alternative in your outdoor space.

Nylon lanterns

Nylon lanterns are finished with a soft lustre and a bright finish and are an eye-catching addition to your garden. Unlike than the traditional paper lantern, nylon lanterns are also wind and water-resistant making it more acclimatised to the outdoors.

Solar lanterns are an energy-efficient alternative, with most solar lanterns equipped with dual LED bulbs, rechargeable batteries and built-in sensors that allow the lanterns to switch on automatically and glow for up to eight hours.

Contact local electricians

Deck lights

Power choices in deck lights

You will need a power source for your deck lights. There are three main types you can choose from. You can opt for hard-wired lights that you can control from dimmers or switches, lights that simply plug into your regular electrical outlets or solar-powered lights. With these options, even a beginner can change the atmosphere of their deck using deck lights.

Pod lights

These lights are very versatile and can be mounted virtually anywhere on your deck. Pod lights offer bright lighting and low profiles that can be used to create dramatic lighting effects. You can also place pod lights in areas with plants to diffuse the light, creating a softer effect. For this type of lighting hard-wiring is usually required since they are halogen or LED-based.

Deck post lights

Deck post lights are the easiest to install and can often be found in solar-powered models. They are designed to simply fit over the top of a deck post and usually only require a set-screw to hold them in place. While solar-powered deck post lights are the easiest to instal and require no outside power source, they may not offer a great amount of reliable light.

Inset lighting

Although inset lighting is the most difficult to install, it can also be the most beautiful type of deck lighting. As the name suggests, inset lighting must have holes drilled in the decking for the lights to be set into, and these lights usually require hard-wiring. If you are not well-versed in electrical work, this may be best left to the professionals.

Inset lighting can be used on deck steps to light them up for safety precautions and used to create a lit walkway up to the main deck area. You can opt for accent lighting with the lights placed strategically around the deck or you can create a more dramatic flair with lights running around the perimeter of your deck. 

Two lights either side of a closed door
Lights illuminating the entrance to a property / Source: Super Home Services

Lighting options for your pergola

You may be surprised by just how many options there are for lighting your pergola. Take your time exploring them to find the lighting that best suits you and your home. Some of the common lighting methods are:

  • Outdoor fireplaces
  • Solar lights
  • Fire pits
  • Sensor lights
  • Torches
  • String lights
  • Chimineas
  • Candles
  • Solar lights
  • Spot/floodlights
  • Lanterns

Budgeting and lighting

While the costs of the lights themselves are always a consideration when planning your budget, don’t forget the cost of running the lights. Electrical lights are becoming increasingly expensive as the cost of electricity rises, even more so if they are not energy efficient. You might also consider the cost of replacing lights that become damaged by weather or by accident.

Categories
Gardening & landscaping

Grow your own vegetable garden

More and more people are growing their own vegetables at home as an alternative to buying from the supermarket. There are many reasons for this, not least the fact that it can be quite a considerable saving from your weekly grocery bill. In addition to this, if you grow your own, you’ll know for sure that they haven’t been chemically treated and can harvest them at the peak of their freshness for that extra special taste. You don’t even need a large garden or plots of soil, as there is a large number of vegetables which can be grown in pots.

Choosing which vegetables to grow

Of course, the first consideration when growing your own vegetables is your personal taste, so you’ll want to pick some of your favourite greens. Another thing to consider is the requirements of each plant; most need different amounts of sunlight and water, plus their own pot, but some veg can be grown together, like tomatoes and cucumber.

Potting your vegetables

Any type of pot is usually adequate for growing vegetables, even old buckets or cans, but you’ll generally want to use a clay pot with holes in the bottom so surplus water can drain out. These pots can be sealed to prevent too much water escaping. The colour of the pot is important too; for vegetables that need a lot of heat, you should use a dark pot and for those that need less heat, a lighter coloured pot is preferable. The size of the pot you use will obviously depend on the size of the veg you are growing, with larger greens such as tomatoes and squash needing large pots. The final thing to consider before planting your seeds is the type of soil that the plant will need in order to grow. Usually, this will be indicated on the seed packet, but most pots should be filled with a sterile, pH adjusted soil with fertiliser and water retention granules.

Pots with vegetables and herbs on a balcony
Vegetables and herbs growing in pots / Source: Shutterstock

Growing your vegetables

Once you’ve selected and planted your vegetables, it’s time to let them grow. They obviously need sunlight and water, but care and attention are the most vital ingredients. Regularly watering your plants will keep them from becoming dehydrated and give them the best chance to flourish. 

How to grow cucumbers

Cucumbers are classified as fruits as they take well to warm weather and come in a wide variety of types. Nonetheless, cucumbers can be a staple food item and are a great plant to grow in your first vegetable garden with numerous health benefits: 

Plant in early spring

Plant cucumbers early in September as a seedling or newly planted seeds.

Pick a spot with lots of nutrients and organic matter

Cucumbers need lots of water while growing so plant seeds in moist, loose soil that’s well-drained.

Give them space

Distance your cucumbers half – a metre apart to give them space to grow.

How to grow potatoes

Potatoes are a versatile vegetable with a wide range of uses. While potatoes can grow from an existing potato, planting seeds from a local garden centre will give you a better yield of crops.

Timing is key

Plant potatoes between late Feb- September and you should see growth within a week to ten days. Potatoes will mature in four to five months. Potatoes should be planted at least 10cm deep and at least 50cm apart from each other.

Additions will help

Loosen up your garden’s soil with additives like manure that provides the needed phosphorus for potatoes.

Keep your crops covered

During the early growth phase, keep potatoes covered with soil and mulch because sunlight can render potatoes inedible. Keep potatoes moderately watered but overwatering can cause rotting.

Harvest when vines die

The ideal time to harvest your plants should be when the lower half of the plan begins wilting, approximately a month after the flowering has begun. Store your harvested potatoes away from the full sun and ensure they’re completely dried before storing them away.

Contact local gardeners

How to grow garlic

Garlic is easy to grow all year round and while it’s a tiny addition to your recipes, a small clove makes a big difference in flavour and seasoning.

Plant in full sun

Choose an area of your garden that receives full sun all day. Garlic doesn’t use seeds and a clove can be planted in a pot or a patch as it won’t harm plants nearby.

Garlic blooms in March

The middle of March when the days are shorter and nights are cooler, make it an ideal time to plant garlic. Plant a garlic clove two to three centimetres under the soil with the narrow end upward facing. Separate your cloves about a fist distance apart in rows that are about 35cms wide. Water garlic generously about twice a week.

Harvest garlic cloves when the leaves die

Simply grab the stalk of the plant and pull the bulb from the soil. Simply brush the dirt off rather than washing a garlic clove.

A person pruning seedlings with scissors
Pruning herbs and vegetables can encourage their growth / Source: Shutterstock

Growing herbs

Many herbs are seasonal and will only survive until the growing season is over. Basil is a fast-growing herb, and its growth is encouraged by pruning. Try putting this in a window during the summer months. Remove flowers from cooler-climate herbs like coriander and dill, and they’ll last much, much longer. The pruning helps to keep them compact and will help keep the herb yields higher. 

A more inexperienced gardener might want to go for herbs like rosemary, sage and thyme. The less attention paid to them, the stronger they’ll be. One thing to watch out for when you start to plant – lookout for pests. They can quickly become a problem. In order to combat insects, be sure to use natural products or solutions to get rid of them once and for all.

Categories
Lighting & electrical

Kitchen lighting ideas

Our kitchens are communal spaces for creativity and nourishment. Here are our top kitchen lighting ideas that combine style with energy-saving technology to enhance the culinary experience and create an ambient space the entire family can enjoy.

Three different kinds of kitchen lights 

There are three major types of kitchen lights to mention:

General lighting

General lighting illuminates the entire room. Mostly, this will be overhead lighting, which can be either recessed lighting or a hanging light.

Task lighting

Task lighting is that which is designed for specific purposes. It is an essential feature in every kitchen, making it easier to perform tasks in some of the most common areas of the kitchen such as the bench, sink and stove. Don’t be restrained to one central light source but consider the unique way your family uses the kitchen and add a mixture of light sources that will adjust to your specific tasks.

Mood and accent lighting

Mood and accent lighting is key to creating an inviting atmosphere in a kitchen. Without it, any expensive and luxurious features might go under the radar and be missed.

Mood lighting creates an inviting atmosphere / Source: Caliber Kitchens

Light switches

General lighting should have switches at all entry and exit points. Rather than simply using a single switch for all task lighting fixtures, have separate ones for different areas. In U-shaped kitchens, for example, include separate lights and switches on both sides of the U. If there is an island in the middle of the room, it is a good idea to instal a specific light to illuminate it, with a separate switch to the main general overhead lighting in the room. Dimmer switches are important for accent lights to allow you to create different moods when you want.

Space savers

Lampshades and lanterns take up precious floor or bench space in small kitchens but opting for ceiling or wall lighting fixtures can help illuminate the space in a functional and trendy way.

In tight corners, dark pantries or small spaces, illuminate with stylish light alternatives. Rope lights or strip lights are practical, space-saving solutions in those tight, tricky kitchen spots. Adding a row of LED lights to your pantry, cabinets or narrow shelves is a stylish and practical way to brighten dark corners.

Contact local kitchen experts

LED strip lights 

LED strip lights are small lights installed on a strip and spaced so that they provide even light. Strips can be used separately or joined together, depending on the length of the area you want to light.

Because of their qualities, LED strip lights are great choices for kitchen lighting. They are functional, modern and good for the environment because they use little energy to run and they do not emit heat. Add in the fact that they resist moisture and are very sturdy, and you have a perfect lighting choice for your kitchen.

They are also extremely cost-effective because the bulbs last so long some last longer than 40,000 hours! No more standing on ladders and changing bulbs LED strip lighting might last longer than your kitchen.

Pendant lights

Pendant lights use space efficiently and accentuate a focal point in your kitchen by positioning pendants over central areas of the kitchen to organise a small space. Avoid oversized pendants in a small kitchen space but opt for pendants with petite shades or sleek edges, rather than a wide cylindrical shape to complement your space. Pendants generally require higher ceilings so consider the height of your ceiling.

A kitchen and dining room with three decorative pendant lights
Pendant lights can make a statement in a kitchen / Source: Bryce Parker Homes

Sunlight

Sunlight is an ideal source of ambient light that is entirely free. Save space and utilise natural light in your home by removing upper cabinets in exchange for extra window space. Upper cabinets impede incoming light and without the obstruction, natural light will bathe your kitchen space with bright and ambient light during the day. 

An electrician can help you pick out the perfect lighting fixtures to help you create the ideal kitchen. In fact, you can even find a lighting consultant to help you pick them out as well. Whatever you choose to do, never overlook the importance of lighting when doing kitchen renovations. They really can make the difference between a boring, ordinary kitchen, and a truly spellbinding one.

Categories
Gardening & landscaping

The benefits of mulch

Mulching is beneficial for new and established gardens alike. If you want to make your garden look healthy and beautiful, you should definitely consider applying a layer of mulch. Mulching is the application of a top layer of organic or inorganic material over your garden’s soil and can provide so many benefits to your garden. 

Mulch benefits

  • It conserves water in the soil
  • Organic mulches add nutrients to the soil
  • It helps prevent soil erosion
  • It keeps your plants from getting too hot or too cold
  • It helps prevent weeds from growing

Types of mulch

There are a number of different mulches that fall into two broad categories, organic and inorganic.

Organic mulches

Organic mulches are made from biodegradable plant-based materials, and they fertilise the soil as they break down over time. Common types of organic mulches are:

Bark and wood chip mulches are attractive, stay in place well and don’t blow away in the wind.

Sawdust mulch is inexpensive and it acidifies the soil, so it’s a good type of mulch to use around plants that require acidic growing conditions. However, it’s light and tends to blow away during windy weather, absorbs nitrogen from the soil, so you may have to fertilise more often and does very little to stop weeds from growing.

Straw mulch is even less expensive than sawdust, and it does a great job of keeping weeds from growing.

A house with a front yard covered in mulch
Mulch will help newly planted plants to grow / Source: Nature Build

Inorganic mulches

Inorganic mulches are made from a variety of non-biodegradable materials. They last longer than organic mulches, but they don’t break down over time and don’t fertilise the soil. On the other hand, they don’t remove nutrients from the soil either. Some common types of inorganic mulches include:

Gravel and crushed stone mulches are available in a variety of colours, which allows you to add a bit of colour to your garden beds. To prevent the small stones from mixing into your soil, place a layer of landscape fabric underneath.

Plastic mulch does a good job of keeping weeds from growing, and it helps prevent moisture loss from the soil. Plastic also prevents the soil from absorbing water, so a watering system needs to be installed underneath it. One big disadvantage to plastic mulch is that it isn’t environmentally friendly and can potentially leach toxins into the soil or underground water supply. In addition, pets and wildlife may eat it, which could cause intestinal blockages.

Fabric mulch comes in large sheets of tightly-woven fabric. Fabric mulch is excellent at preventing weeds from growing. Because fabric mulch isn’t very attractive, it’s usually topped with another type of mulch.

Applying mulch

Firstly, when you apply a layer of organic mulch around your plants remember that the best time to spread mulch which is in late winter/early spring. Secondly, remember to never mulch when the ground is frozen. Thirdly, remember to feed the plants before mulching and finally remember that too much mulch will stifle bulbs.

Contact local gardeners

Depth of mulch

If you’re using chunks of cedar, put them about 5-inches below the surface. They’re bigger and need additional time to breakdown. Same holds for other large organic materials like eggshells, banana peels or things that have gone to rot in your refrigerator’s crisper section. Grass clippings should be used only an inch-or-so down. You don’t want to use toxic materials where you’d like to grow good things.

Separate from the plant

Keep the mulch separated from the plant. Putting your plants too close to decomposing materials can breed diseases that could infect the existing growth.

Separate from your house

The wood that’s used to build your house can be severely damaged by termites. Mulch harbours wetness and these wood-eaters love moisture.

A front yard with small enclosed gardens containing mulch and plants
Ensure mulch is separate from your home / Source: The Landscaped View

Other considerations

We recommend taking an inventory of the soil and the plants and soil where you’d like to mulch. Consider how the drainage is and what type of covering might enhance the growth of the plants. Also, think about whether these plants grow well in acidy soil. Fortunately, most available mulch is pretty neutral and can be applied just about anywhere. If you already have a cover of mulch, rake it to break it up. Avoid mulch that smells sour. Also, be aware that some products can be dangerous to pets. Read the warnings carefully or ask the salesperson if the mulch is animal-friendly. Creating a compost bin will let you make your own mulch. Add wood chips, leaves, bark and wood to the area you’ve set aside. Let it sit for a month, then turn it over. Give it a little more time. Repeat the mixing process and shovel as much as you need into a wheelbarrow. Presto! DIY mulch.

Categories
Real estate & moving

Which trendy Sydney suburb is the best to live in

Do you want to be in the hustle and bustle of the inner city or chill out by the beach? Are parks for your pooch important or is proximity to lively nightspots your priority?

Sydney is chock-a-block with varied and hip neighbourhoods. We’ve helped to hone your new home search down by picking five popular Sydney hotspots.

If you’re considering a change of address, these read on to determine which trendy Sydney suburb could be your next port of call.

Surry Hills

When you live in Surry Hills you can leave your car at home, with cycleways streaking through the leafy suburb, it’s not only eco-friendly but quick and easy to get from A to B. You’ll be happy to be cycling from place to place to work off all the extra calories you’ll be ingesting, with foodie delights waiting around every corner. Residents revel in craft beer, being home to ‘Sydney’s best breakfasts’, their coffee culture, wine bars and fashionable restaurants. The nightlife, galleries and posh boutique shops are not half bad either.

Surry Hills is filled with cycle-friendly leafy streets / Source: Shuttestock

Manly

Every day feels like a relaxing beach holiday when you call Manly home. Frolic in the shallows or grab a board and head for the surf break for exhilarating fun in the sun. For a chilled night out check out one of Manly’s plethora of pubs, bars, restaurants or the open-air food market. Manly has a beachy, sleepy and friendly small town feel, but if you do miss the big smoke remember it’s only a picturesque 30-minute ferry ride away.

Newtown

A lively and hip paradise, Newtown has everything a modern-day hipster could ever want and need. With no shortage of affordable vegetarian and vegan restaurants, vintage clothing stores, tattoo parlours, pubs, clubs and live music, Newtown is the place to be. The stellar expansive street art is also worthy of an afternoon walking tour. The neighbouring up-and-coming suburb of Camperdown is worth a look too.

Bondi Beach

Home to Sydney’s most famous stretch of coastline, Bondi Beach is the place to be for beach lovers. With a glamorous Venice Beach LA vibe, do as the locals do and dine al fresco street side, browse stores along Campbell Parade, pick up some organic produce at Bondi’s Farmers Market and take a sunset stroll along the spectacular Bondi to Bronte Coastal Walk.

Source: Beaches Conveyancing

Paddington

The super stylish Paddington aka ‘Paddo’ is home to Sydney’s fashionistas and ‘it girls’. Oxford Street is lined with high-end eateries as well as every designer boutique a shopaholic could wish for. Check out some local design talent at the Paddington market every Saturday which showcases locally made clothing, accessories and homewares. Stretch your fashionable legs by having a wander around neighbouring Centennial Park, the perfect spot for a lazy Sunday picnic, an evening jog or even horse riding. Best of all this is all only 3km from the CBD!

For more information on the best places to live in Sydney check out Sydney’s most walkable suburbs and Sydney’s safest suburbs.

Categories
Cleaning

The best way to clean windows

Windows can get dirty so easily. Cleaning them is simple enough, but there are a few tips and tricks you can learn to make them dazzling. Here’s what you need to know to do it yourself.

How to clean your windows

1. Wash the outside

For the exterior windows, start with the flyscreen if you have one. Doing this prevents your window from rapidly getting dirty again, since dirt and dust can build up from inside. Get rid of the cobwebs first by using a brush or a broom, then set aside. Then, wash your window down using a hose, soap and water or window cleaning agents.

After this is out of the way, it’s time to clean the windows themselves. There is a selection of glass cleaning agents and solutions you can pick from, or make your own from soap or vinegar and water. After cleaning one window, ensure that you dry it quickly with a cloth (make sure it’s lint free!) Once your windows look clean and dry from the outside, put the fly screens back on.

Windows need to be cleaned from both the inside and the outside / Source: S.F.D Caringbah

2. Wash from the inside

This is a simple but arduous task. It can take a bit of time, so be patient. The best way to start is with the frames, which you should sweep with a duster or indoor brush. Follow this up with soap and water to make sure all dust and cobwebs are gone. Once the frames are clean, move to the glass. Like the outside windows, you can use soap and water, a specialised window cleaning agent or vinegar and water. All of these work pretty well.

Once you have wiped down the glass, dry it quickly with a cloth to prevent streaks, wet spots and marks that will mean you have to start the wiping process from scratch. Dont forget to dry the frames!

Cleaning your windows with vinegar

White vinegar can also be used as a great tool for cleaning, but can cause streaking if you’re using it on a window that has been cleaned with a commercial cleaning solution before. To prevent streaks, mix a solution of water, white vinegar and a touch of liquid detergen to wipe your windows down with. After this, use a mix of water and white vinegar solution on your windows to get them sparkling. You can dry them with a lint free cloth, but paper towels and newspapers also work well. After doing this, your windows can be cleaned with the vinegar and water solution regularly.

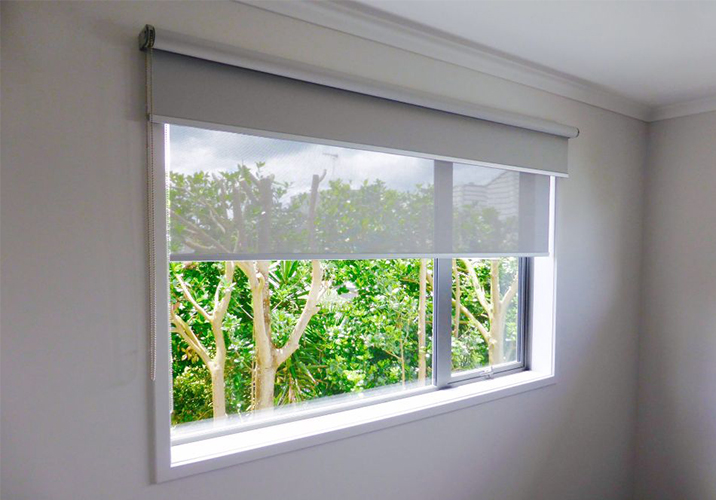
Cleaning roller blinds

If you have roller blinds in your home, you know that they are practical, easy to use, and elegant, but they do get dirty over time. They are not always the easiest thing to clean either. It is possible to clean them if you know how, or if you can turn to a professional for help with your specific needs.

Determine the material

Before you can get started with cleaning roller blinds, you need to determine the specific type of material it’s made of. Depending on the material, you may need to spot clean them. In other cases, you will be able to wash them. If you are not sure what the material is, it is best to ask a professional before getting started.

Source: Australia’s Cheapest Blinds

Washing your roller blinds

In many cases, it is possible to wash your roller blinds, including those made with fabric. In this case, you will need to start by vacuuming to remove as much debris as possible from the surface. Then remove the blind from the roller, lay the blind down and use a brush attachment for your vacuum to help further clean up the dust and dirt from the surface. If necessary, you can then place the blind into a large water container, such as in a bathtub, and allow the water and some mild detergent to gently work over it. Meanwhile, allow the blind to soak in a mixture of warm water and mild detergent. This will loosen any dust or dirt and will allow you to use a cloth to wipe it clean. For stains, use use a toothbrush.

Once the blind is clean, you can drain the water and then fill it again with clean, fresh water. This will allow all of the soap to come out of the blind. Once you have completely washed it, lay it on a flat surface to dry and allow to fully dry before reattaching to the roller.

Contact local window cleaners

Tips for spot cleaning

Sometimes you may not be able to wash a roller blind. In this case, you can spot clean it to remove visible dirt.This is the safest and easiest way to clean non-washable blinds.Vacuum the blind first, then create a solution of laundry detergent and warm water to use to wipe off debris. You will want to use a sponge or toothbrush to tackle problem areas. You do not want to wet the entire blind, but work on just those areas necessary. Remember to spot test before you tackle the whole blind in case the cleaning solution discolours it.

Categories
Bathroom & laundry

Your guide to low flow taps & toilets

If you’re looking for ways to reduce your water bill, low taps are are in ideal solution.

What are low flow taps?

Low flow taps are deceiving by name. You may think that because they’re called low flow taps, you won’t have high-pressure water coming out, but this is the contrary. Regular taps use more water and therefore produce more water pressure which results in increased water flow. However, low flow taps also produce a high power water flow, but it does this by mixing air into the water, which gives the appearance of a higher flow; although the pressure feels just about the same.

Source: Mintconstruct Pty Ltd

A normal tap lets out up to 18 L of water per minute whereas the low flow taps only use about 2 L of water per minute, which really saves you a tremendous amount on your water bill. When looking for low flow tap, you may run into the Acronym WELS. WELS is a water efficiency labeling scheme. WELS rates items according to efficiency and it allows you to see how much you’re saving and how efficient the product is before purchasing it. WELS has a six star rating system with the higher stars being more efficient and the lower stars being less efficient. Any water producing item that you purchase is rated by WELS.

Advantages of using low flow taps

Low flow taps help to stop water wastage and also provides you with a better source of water. In addition, they decrease your water cost and are more energy-efficient. This might be an ideal solution in a household that has high water usage or higher water bills. Besides simply saving you money on your water, there are two other benefits to using low flow taps. These benefits include saving money on electricity and reducing water wastage.

Low flow toilets

As one of the most essential fixtures in your home, the toilet is also the most consuming of water. By installing low flow toilets, you will lose significantly less water (and see a lower water bill), without noticing a change in the toilet’s effectiveness. In addition to improving water efficiency, low flow toilets will ensure your home is up to code.

What are low flow toilets?

Other than outdoor irrigation, the standard toilet is the largest water consumer in your home. By installing a low flow toilet, you can reduce water usage while still performing the same function of removing bodily waste. To effectively remove waste, gravity assists during the flushing process allowing low flow toilets to only use six litres of water per flush. These toilets are available in the most basic models and also top-of-the-line units.

Source: Hammer on Constructions

The dual flush option

The most common type of low-flow toilet on the market is the dual flush model which has two buttons. The first button, known as the half flush, uses only three litres of water to eliminate liquid waste. The second button, referred to as the full flush, uses up to six litres of water to dispose of solid waste. Therefore, you are only using as much water as necessary for each visit.

Buying a low flow toilet

If you are in the market for a low flow toilet, there are a few considerations. First, ensure the toilet has been certified as water efficient. The amount of water used in the half and full flushes should be readily available. Second, ensure there is enough space in your bathroom to fit the new toilet. Third, there is a wide variety of designs including:

  1. Colour
  2. Height
  3. Modifications (heated seats, bidet, etc.)
  4. Shape (round or elongated)
  5. Noisiness

Water saving tips

In addition to installing low flow taps, there are many other ways that you can reduce your energy costs and save wastage. Some of these tips include:

  • Installing low flow tabs on all sinks, tubs and basins in your home
  • Minimizing the temperature on your heater
  • Closing taps when you’re not using them and frequently checking any pipes for leakages

Remember a small leak can add up, so it’s best to have that leak under control before it causes more problems. Low flow taps can be a tremendous help, but if they aren’t maintained or used properly they can contribute to water wastage.